FAQ Overview
SmartVPSs
Go to categoryHow often is my site backed up? I accidentally deleted a file that I need from my site. Can I get a back up copy?
We're backup fanatics and have saved many a web designer's *ahem* ass by retreiving files that they assumed were long gone. And keep in mind that unlike most web hosts we keep backups for you for free. Also, be sure to check out our snapshot feature for our SmartVPS!
Your site's files and databases, VPSs, and email are all backed up every night to servers inside our datacenter and then a copy of those backups is sent to another datacenter for off-site storage.
We retain backups incrementally every night for 7 days, then again on the 1st of each month for three months.
So if you need a version of a file from your web site from, say, four days ago or two months ago, just ask and we'll grab it for you!
That said, backups can become corrupt, backup servers can die, and things can just go wrong, so we highly recommend that you backup your data as well!
How do I show hidden files?
Configuring your FTP client to show hidden files is a process that differs significantly for each FTP client. Instructions for doing so using many popular FTP clients can be found below:
In Dreamweaver
Dreamweaver won't display hidden files in Site View. You can either use another FTP program or you can use your filemanager.
In Filemanager
- Go to www.yoursite.com/fileman/fileman.cgi?
- Select the web folder
- Select Preferences from the Tools menu.
- Check the File Display - Do you want to show hidden files? checkbox (NB: The directory will refresh showing the hidden files.)
- You can then delete / copy / move the file using the Commands menu.
In CuteFTP
- Go to Sitemanager.
- Choose the connection and click edit.
- Make sure filters is checked.
- Press the filter button towards the bottom.
- Check [Enable remote filters (Server applied filter)]
- In the box below, add -al
- Hit apply. Now log in with that connection.
In WSFTP
- Right click on the connection before logging on.
- Select properties, then select the startup tab. On this screen you will see a box that says Remote file mask. In this box place "-al", then log in.
In Fetch
- Open Preferences.
- Click on the Misc tab.
- Click on the Obscure Options popup menu.
- Check the Send LIST -al to UNIX servers
In BBEdit
Click the checkbox that says Show Files Starting with ".
In Transmit
- Open Preferences.
- Click on Files in the Toolbar.
- Check the box that says Show all Hidden Files.
In FTP Voyager
- Select a profile in the FTP Site Profile Manager.
- Click on the Advanced button.
- Select the category Connection.
- Enter "-la" in the Extra LIST Parameter.
In SecureFX
- Right click on the connection before logging on.
- Select properties.
- Select Category > Options > FTP.
- On this screen you will see a box that says Directory Listing Options. Select the option All entries, then log in.
In LeechFTP
- Run Leech FTP
- Select File > Options.
- Select the Transfers tab.
- In the List Command box enter "LIST-a" (no quotes).
- Click Accept.
- Log in and view directory; all is well.
How do I use an .htaccess file?
Create a new text file on your computer and save it as ".htaccess" (with the leading dot and without the quotes)
Whatever directives you are entering into the .htaccess files you'll want to add them now.
Some instructions for adding these directives are here:
- How do I create a custom Not Found page?
- How do I password protect one of my web site directories?
- How do I turn off PHP "magic quotes"?
Once you've completed the instructions for any of the above, continue on...
.htaccess files are case sensitive, so be sure to check the case before you upload.
When you are done creating your .htaccess file it into the docs directory on the server. Make sure it's uploaded in ASCII format (not binary).
If you upload your .htaccess are you get a 500 server error or something similar when you load your site most likely you've uploaded the file in Binary format as opposed to ASCII or the syntax of the contents of the .htaccess is not correct. Download your error log files and look at the end of them to see what went wrong (log files are located in the /logs directory when you FTP in to your site).
How do I administer my SmartVPS?
Brownrice SmartVPSs are powerful machines that can be fully administered via the Brownrice Dashboard at https://dashboard.brownrice.com
How to add new web site or subdomain to be hosted on your Managed VPS
When a site is added to your VPS via our dashboard its ready for hosting. The site's logs are rotated, permissions are set up perfectly, its directory structure follows the Brownrice schema, and AWStats are automatically run for it each evening.
Setup a site:
- Log in to your Dashboard
- Navigate to VPS HOSTING
- Select your VPS: yourvpsname.com
-> Click Manage (green button)
- Go to the Web Sites

- Click Add New Website or Subdomain to this VPS (green button)

Done!
Create new SSH/SFTP user account:
- Log in to your Dashboard
- Navigate to VPS HOSTING
- Select your VPS: yourvpsname.com
-> Click Manage (green button) - Go to FTP/SSH Users or SSH Users (depending on the Generation of your VPS)

or
- Click Add User (green button)

or
- Select a username and password
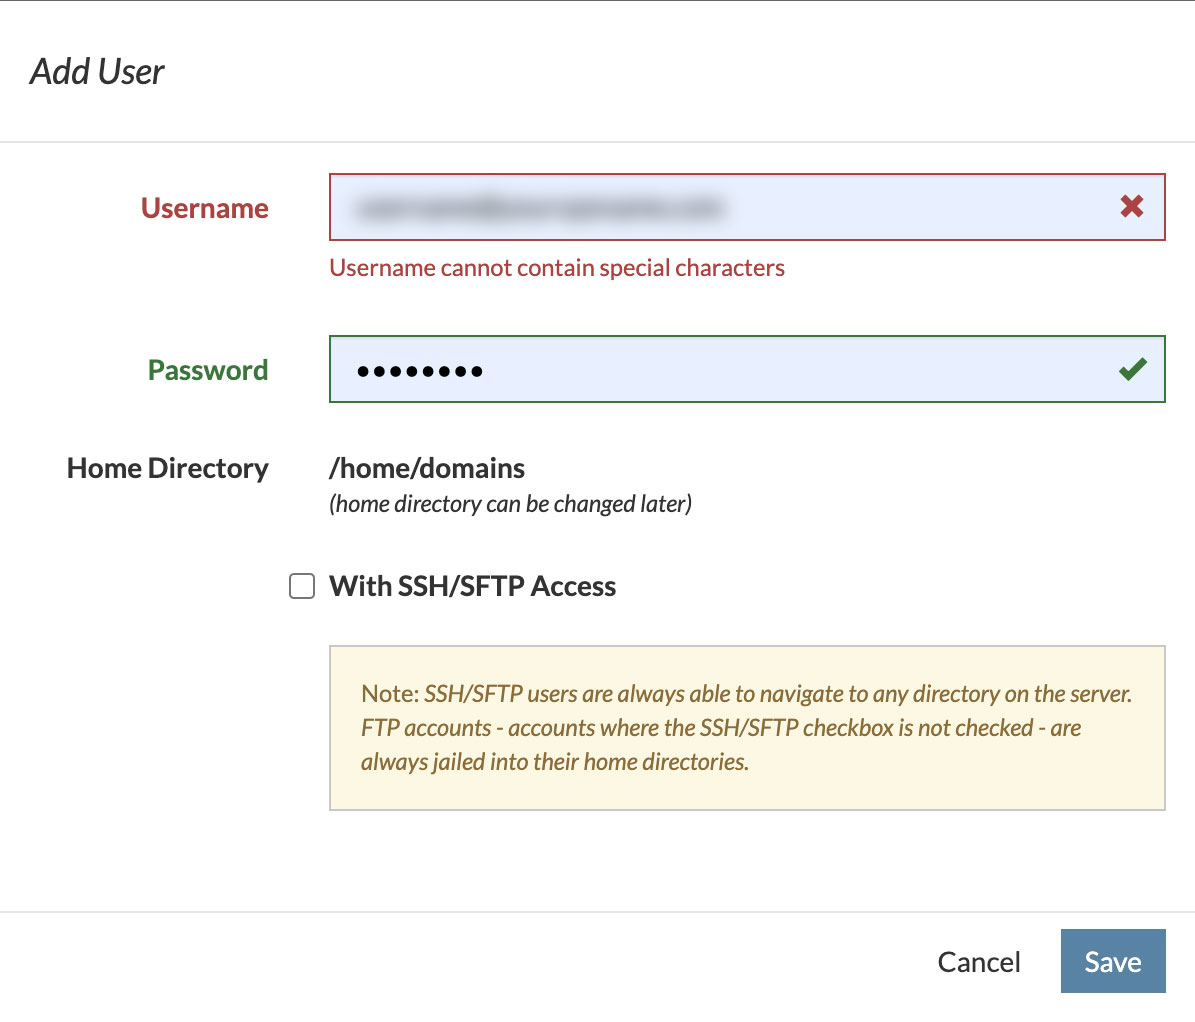
- Save
Done!
Get MySQL root password and link to phpMyAdmin:
- Log in to your Dashboard
- Navigate to VPS HOSTING
- Select your VPS: yourvpsname.com
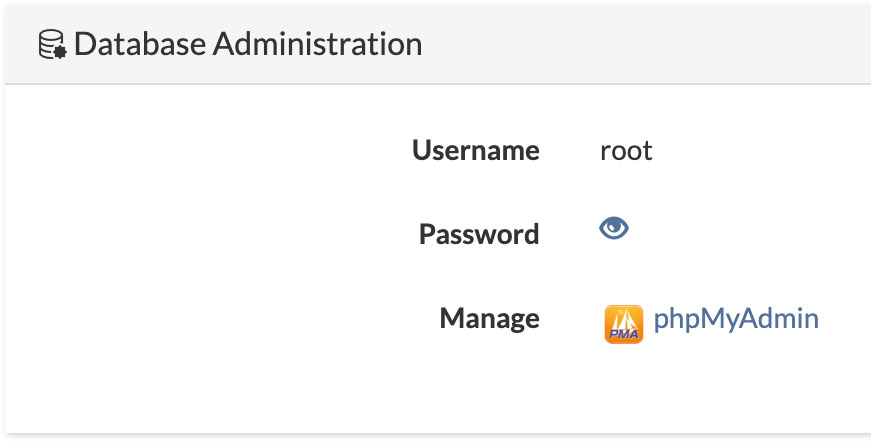
-> Click Manage (green button) - Go to Databases

- Click the "eyeball" next to the Password filed to view the MySQL root password
- Click the phpMyAdmin link and login with user name root and the password you just viewed.
Done!
SSH to the Machine
From your Mac Terminal or Terminal program (such as Putty) on a Windows Machine, type:ssh username@yourwebsiteaddress.com
Never SSH'd into a server before? Follow these detailed intructions »
Create a Cron Entry
SSH into your server using the SSH account that you set up via your dashboard. Once logged into the command line type "crontab -e" and create your cron entry. Or you can use our Dashboard to create the cron job. Follow these detailed instructions for setting up a cron job on a Brownrice VPS.
Document Root (all sites live in the /home/domains/ directory)/home/domains/domainname.com/public
phpMyAdmin (root MySQL access can be found in the Dashboard)
http://www.domainname.com/MySQL
Do the brownrice servers support mod_gzip?
In Apache2 - which is the web server Brownrice uses - mod_deflate has replaced Apache 1.3's mod_gzip.
mod_deflate is loaded and enabled on all of our servers.
See http://www.howtoforge.com/apache2_mod_deflate for usage.
Add this line to your docs/.htaccess file to enable:
AddOutputFilterByType DEFLATE text/text text/html text/plain text/xml text/css application/x-javascript application/javascript
The directives and be set via .htaccess, but if you need anything changed in a vhost please email.
I'm getting a "permission denied" or "forbidden" error when I try and edit a file. How can I change permissions?
Occasionally web site software or a user on your server will change your file permissions which can prevent your other users from being able to write to your web site files. Or, conversely your FTP or SSH user account might upload a file without the correct permissions for your software (Wordpress, etc) to run correctly. When this happens you'll likely see the "Permission Denied" or "Forbidden" error message.
How to fix a "Permission Denied" or "Forbidden" error
For SmartVPS accounts:
- Log in to your Dashboard
- Navigate to VPS HOSTING
- Select your VPS: yourvpsname.com
-> Click Manage (green button) - Go to Web Sites
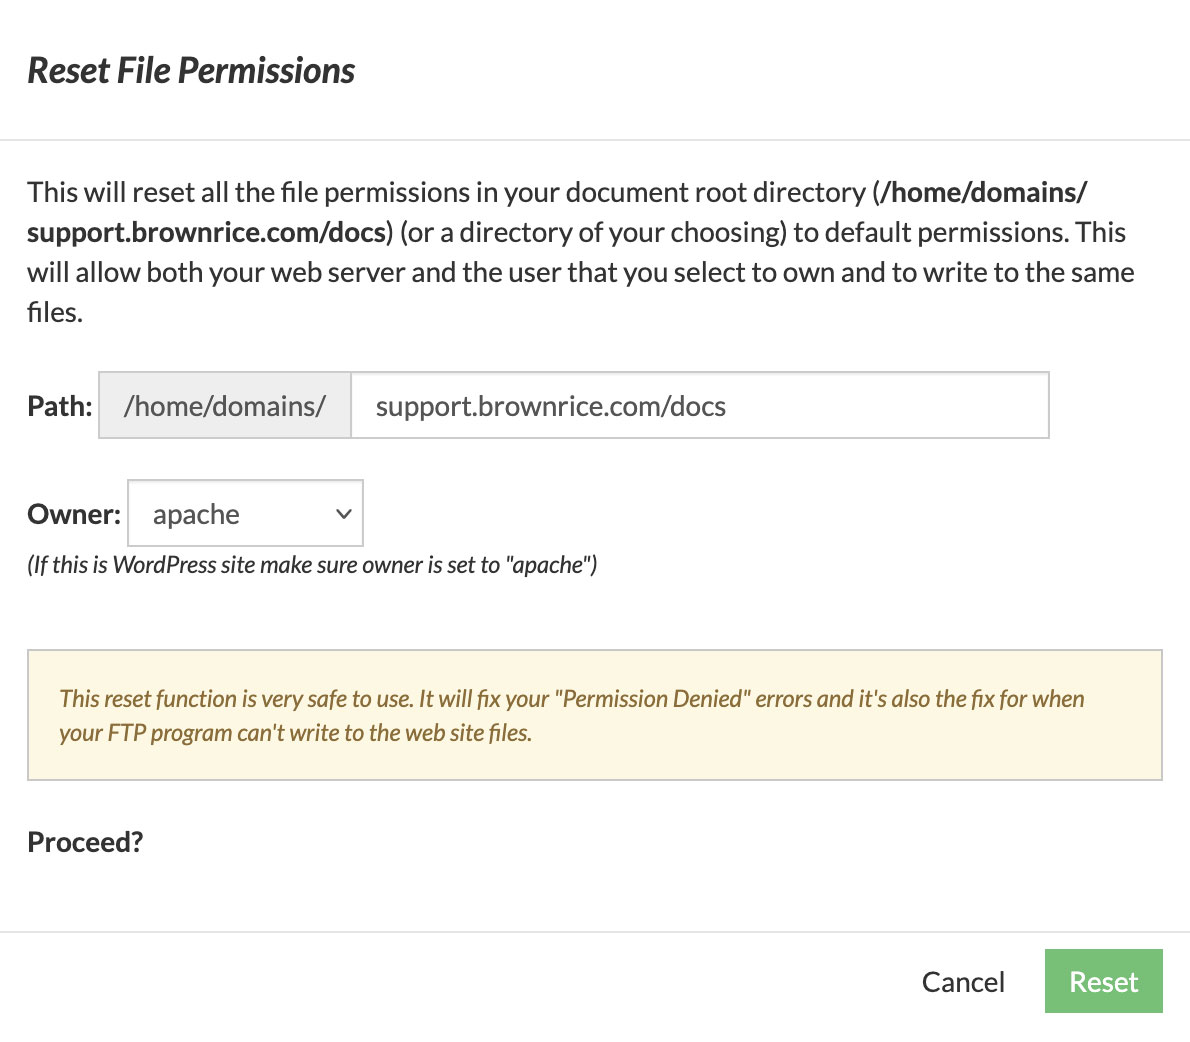
- When viewing your list of web site details (document root, php version, etc) click the File Permissions Reset link.

- Select the user account that you'd like your file to be owned by. If your website is running a CMS like Wordpress then make sure that user is set to apache
- Select Reset button and you should be all set!
Done!
Note: This permission reset function makes all files in the document root group writeable, ensures that the web server and all users are in the same group, and changes all file ownership to the user that you selected.
How does one properly migrate a web site to Brownrice?
First, please know that Brownrice will migrate one customer site per service free of charge for new customers. We're very good at this and happy to do it.
However, if you are migrating multiple sites on your own into a VPS or dedicated server, these are the instructions that we use:
Pre-migration check list:
- Ensure that you have access to your old host's DNS control panel.
- Ensure that you have FTP or SSH and database (phpMyAdmin) access to your old host (SSH access is really useful).
- Look up your database username, password, and database names on your old host server and save them somewhere so you can refer to them in the steps below. This information is often located in your old host's cpanel or within your web site's code, often in a file called "config.php" or something similar. It may take some digging to find this.
- If you are also planning on migrating your domain registration to Brownrice, you will need access to your current registrar account.
- Brownrice automatically assigns brownrice.com subdomains for each new service that is set up on our server. i.e. If your web site is mygreatsite.com then we'll automatically set up mygreatsite.brownrice.com which will point to your web site on our servers. Ensure that this is working and pointing to your new, Brownrice server as its important for testing. If its not please let us know and we'll set it up for you.
- Check your current PHP version on your old host. Then check it on your new Brownrice server. If they don't match let us know and we can downgrade or upgrade your PHP version on your new Brownrice server to match. You can also do this yourself through the Dashboard following instructions found here.
Migration!
- Login to your old host's DNS control panel and change the TTL for your domain to a small number, like 30. This will ensure a quick transition to your new Brownrice server.
- Using an FTP program download all of your web site files from your old host to your computer. Then upload them to your new Brownrice server's document root. Advanced users with command line access to both your old server and new Brownrice server can use
scporrsyncto directly copy files from server to server. Saves a lot of time! Examples below are run from your old host server. Be very careful with these commands as entering the wrong paths can delete and overwrite real data!scp -r /var/www/mywebsite.com/public_html username@mygreatwebsite.brownrice.com:/home/domains/mygreatwebsite.com/docs rsync -avz /var/www/mywebsite.com/public_html username@mygreatwebsite.brownrice.com:/home/domains/mygreatwebsite.com/docs/
- On your Brownrice server set up the same database users, password, and users-to-database permssions that were on your old host via our Dashboard: https://dashboard.brownrice.com
- Using phpMyAdmin or mysqldump (mysqldump is used from the command line), export a copy of all of your database files to your computer or web site. Then using phpMyAdmin (or mysql from the command line) on your Brownrice server (can be accessed via the Brownrice control panel at https://dashboard.brownrice.com) import all of your database files.
- At this point there is a small chance that everything will work! But its not likely and you'll need to check a few things by navigating to your Brownrice subdomain to see how things look. i.e. Now go to http://mygreatsite.brownrice.com and see if your web site works! Its often database connection issues that will need to be addressed by editing the database connection scripts (remember the config.php type file above) and user permissions, which can be changed via FTP or SSH access. Feel free to contact us if an error is stumping you and we'll be happy to help you through it.
- Once all errors are gone from http://mygreatsite.brownrice.com and you are ready to make the switch you'll want to login to your old host's DNS server control panel and change the A record for your web site to point to your new Brownrice IP address. Your IP address can be found in our control panel.
- If you changed the TTL for your domain in step one you should start to see traffic on your new Brownrice server nearly immediately. If you did not change the TTL it may take a few hours before things start to happen.
- Wait at least 48 hours, then pull the plug on your old hosting service. Done with your site migration!
Next steps to think about: Migrating DNS, email, and domain registrations to Brownrice...
How do I add a subdomain to my hosting account?
Add a subdomain to your hosting account
For SmartVPS accounts:
- Log in to your Dashboard
- Navigate to VPS HOSTING
- Select your VPS: yourvpsname.com
-> Click Manage (green button) - Go to Web Sites
- Click Add New Website or Subdomain to this VPS (green button)
-
Follow instructions.
Now add the DNS entry for your subdomain
- Log in to your Dashboard
- Navigate to DNS
- Select your VPS/Domain: yourvpsname.com
-> Click Manage DNS (green button)
- Click -> Edit DNS Records -> Add DNS Record

- Add your subdomain in the Hostname Field. i.e. If you are setting up "dev.yourvpsname.com" you'd enter "dev" in the Hostname field
- Change the Type a CNAME
- Enter your domain name in the Address field. i.e. If you are setting up "dev.yourvpsname.com" you'd enter "yourvpsname.com" in the Address field
- Save
Done!
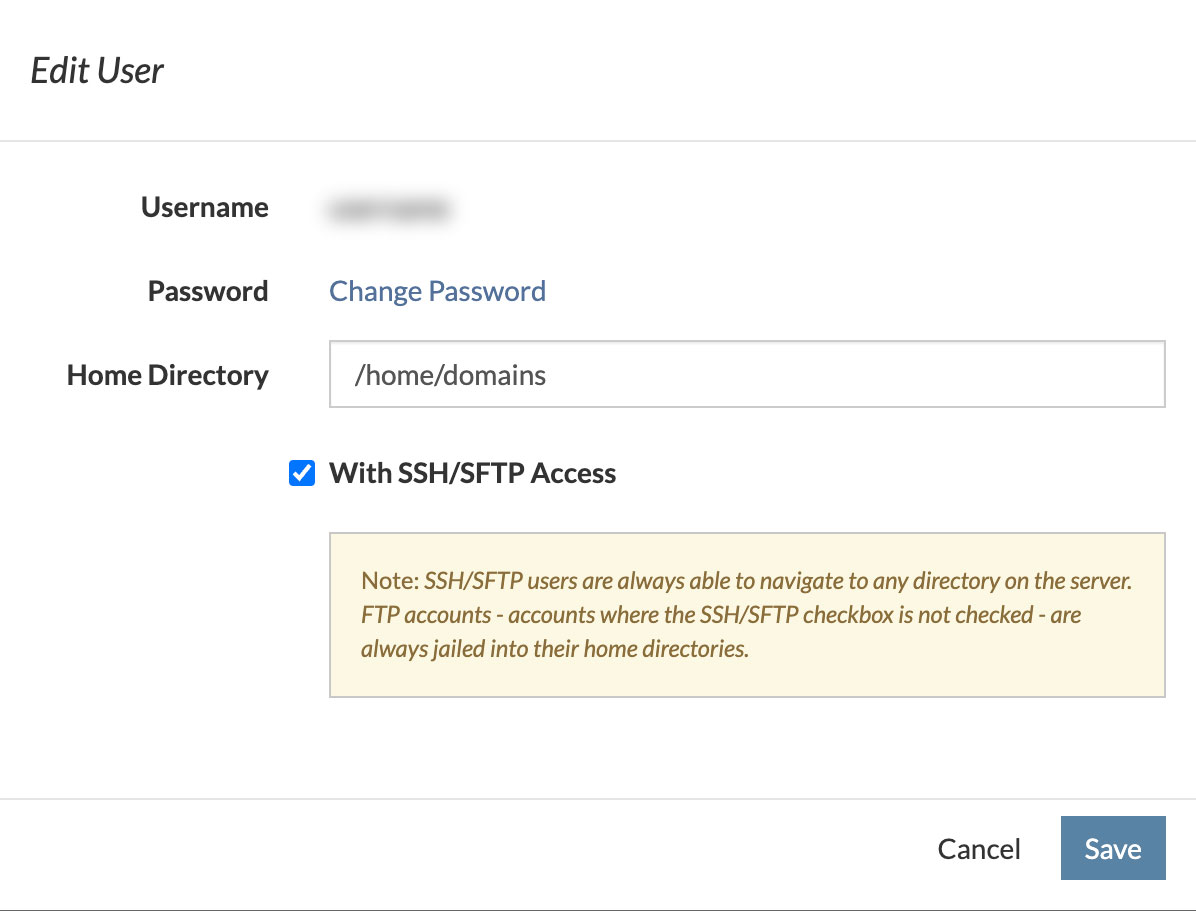
How do I change my FTP/SSH User password?
How to change an FTP/SSH User password
For SmartVPS accounts:
- Log in to your Dashboard
- Navigate to VPS HOSTING
- Select your VPS: yourvpsname.com
-> Click Manage (green button) - Go to FTP/SSH Users or SSH Users (depending on the Generation of your VPS)
or - When viewing your list of FTP/SSH accounts click the small pencil icon to change the password.

or
- Update the password and Save
Done!
How do I modify DNS records?
How to modify DNS records
- Log in to your Dashboard
- Navigate to DNS
- Select your VPS/Domain: yourvpsname.com
-> Click Manage DNS - Click -> Edit DNS Records -> Add DNS Record
- Make your changes.
Done!
Notes: Changes made here are immediately reflected in our DNS servers (ns1.brownrice.com and ns2.brownrice.com.) However, propagation may be slowed by DNS record TTL times, which are listed in seconds. TTL is the last field in each record above.
How do I SSH into my VPS?
Using SSH allows you to do some advanced (or simple) systems administration on your VPS. You can SSH to your VPS using Windows, Macs, or Linux computers.
In order to SSH into your VPS you'll first need to login to our Dashboard and create an SSH user account.
Create an SSH user account
- Log in to your Dashboard
- Navigate to VPS HOSTING
- Select your VPS: yourvpsname.com
-> Click Manage (green button) - Go to FTP/SSH Users or SSH Users (depending on the Generation of your VPS)
or - Click Add User (green button)
or - Select a username and password and be sure to click the "With SSH/SFTP Access" checkbox!
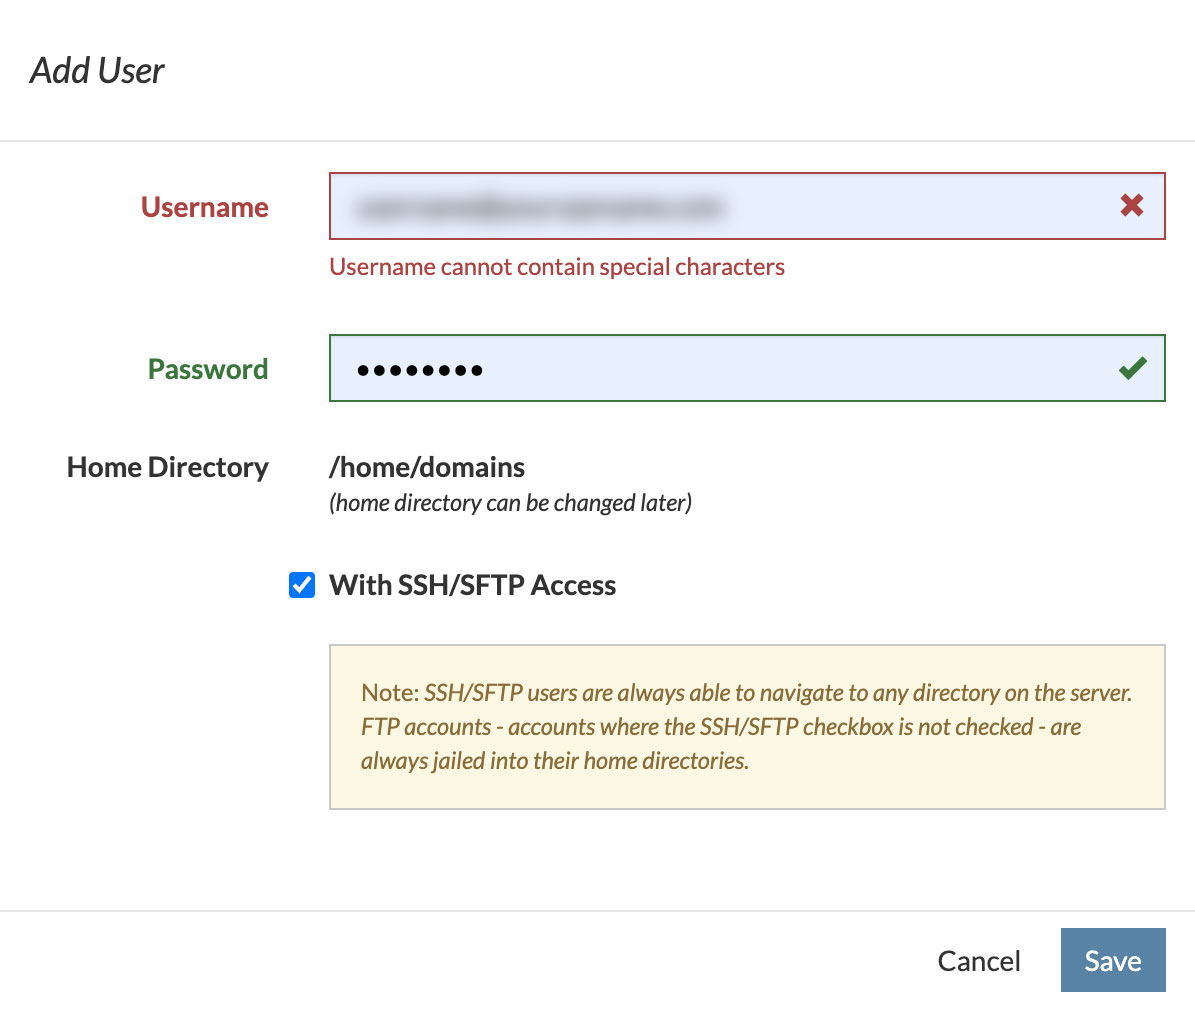
- Click Save
You now have a working SSH account. Remember your username and password and follow these Windows or Mac instructions:
How to SSH using Windows (Mac instructions are below)
- Download PuTTY to your Windows computer by right-clicking here http://the.earth.li/~sgtatham/putty/latest/x86/putty.exe and selecting "Save Link As"
- Double-click the putty file that you just downloaded and click the Run.
- In the Host Name (or IP Address) enter your web site address.
- Click the Open button at the bottom of the PuTTY screen.
- At the PuTTY security alert screen press the Yes button.
- Enter your SSH username when prompted by the login as: prompt.
- Enter your password.
If you enter your password correctly you'll now be on the command line. And you are done! Congratulations! You can now change permissions, use rsync, set up cron jobs, and all sorts of other great stuff!
How to SSH using a Mac
- On your Mac, using Finder, Navigate to Applications -> Utilities.
- Double-click the Terminal Icon.
- The Terminal program is now open.
- Now type into Terminal - replacing "username" with the username you created when you set up the SSH account - replacing "mywebsite.com" with your web site address:
ssh username@mywebsite.com - Then press enter.
- If has gone well to this point you'll now be looking at warning about the authenticity of this host. Type "yes" on a Mac or click the "Yes" button on the PC when faced with a "Are you sure you want to continue connecting (yes/no)?" question.
- You will be prompted for your password. Enter the password for the SSH user account that you created and press enter.
- If you enter your password correctly you'll now be on the command line! Congratulations! You can now change permissions, use rsync, set up cron jobs, and all sorts of other great stuff!
How do I create a cron job?
How to create a Cron Job
For Shared or Basic Hosting accounts:
- Log in to your Dashboard
- Navigate to EMAIL HOSTING
- Select your VPS: yourvpsname.com
-> Click Manage Web Site (green button)
- Go to the Cron Jobs

- Follow instructions! And that's it.
If you have any issues, questions, or would like us to do this for you just contact us and we'll be happy to take care of you.
For SmartVPS Hosting accounts:
- Log in to your Dashboard
- Navigate to VPS HOSTING
- Select your VPS: yourvpsname.com
-> Click Manage (green button) - Go to Cron Jobs
- Follow instructions! And that's it.
If you have any issues, questions, or would like us to do this for you just contact us and we'll be happy to take care of you.
If your account is a VPS account and you prefer to work via the command line:
SSH to your VPS (Don't know how? Follow these instructions first.)
Once logged into your VPS via the command line (any user account can do this, not just root) type: crontab -e
This will open a blank file where you will enter your cron commands. Type the letter "A" on your keyboard to enter edit mode so that you can enter your command.
The example comand below would open a web page every minute of every day.
* * * * * curl http://mywebpage.com/script.php
Here's an explanation:

This example would run a php script from the command line at 5:15pm every day (17:15):
15 17 * * * php /home/domains/mywebpage.com/docs/script.php
This will run a script every fifteen minutes. You can place multiple commands in a cronjob, just separate them with a semicolon. Here, we cd (change directory) to the location of the php script THEN execute it. If you're having problems getting a cron job to work, try doing it this way.
0,15,30,45 * * * * cd /home/domains/mywebpage.com/docs/; php script.php
This will run a script every fifteen seconds! - It is actually 4 separate jobs that start running at the same time (once a minute, every minute), but each one sleeps progressively longer than the last before executing the next command in the job.
* * * * * cd /home/domains/mywebpage.com/docs/; php script.php
* * * * * sleep 15; cd /home/domains/mywebpage.com/docs/; php script.php
* * * * * sleep 30; cd /home/domains/mywebpage.com/docs/; php script.php
* * * * * sleep 45; cd /home/domains/mywebpage.com/docs/; php script.php
Need to periodically download a file from another site? Just use wget! No need to script it in PHP.
* * * * * cd /home/domains/mywebpage.com/docs/downloads; wget http://example.com/somefile.zip
And if you want to have an email sent to you each time your cron runs enter this command:
MAILTO=username@youremailaddress.com
Note: Here is a nice tutorial with the full syntax of cron commands: http://code.tutsplus.com/tutorials/scheduling-tasks-with-cron-jobs--net-8800 And here is another one: http://tecadmin.net/crontab-in-linux-with-20-examples-of-cron-schedule/
When you are done editing the file you'll need to leave "edit" mode by pressing your ESC key, then you'll type ":wq" to save the file and quit the cron editor.
That's it! Your cron command(s) will run as often as you asked them to from this point forward.
A few notes on Cron Jobs:
- You can enter as many cron commands as you like within one file. Just keep each command on a seperate line.
- If you ever need to modify your cron command just follow this tuturial again and you'll see the commands in place (as long as you login as the same user)
- We recommand that you test your cron commands from the command line before entering them into the cron file to make sure they work. i.e. SSH into the machine, then type the command at the command line like this example "php /home/domains/mywebpage.com/docs/script.php" then press enter. If no errors then enter into your cron job! If there are errors then fix'em and try it again.
Where is your control panel?
Our mobile-friendly control panel is located here:
https://dashboard.brownrice.com
You can login with any email address that is associated with a Brownrice billing account. Click the Password Reset link to get yourself a password.
How do I install Wordpress
How to install Wordpress
- Log in to your Dashboard
- Navigate to VPS HOSTING
- Select your VPS: yourvpsname.com
-> Click Manage (green button) - Go to Web Sites
- If you have not already, setup your new website by clicking Add New Website or Subdomain to this VPS (green button)
- Scroll down to your website and click Install Wordpress (click Wordpress icon)
Note: The website must not have any existing site in place or the site install will fail. - Select the site url you would like to install wordpress to, along with your preferred email address and username you'll use to login.

Note: If you see any errors below your site name as shown above, you should first setup your domain's DNS A record to point to your VPS's IP address, which can be found on the VPS management page. Otherwise you can use the brownrice subdomain option and your site will work there as well. - Then click Install! Once WordPress is installed, the login info displayed ought to be saved in your records for future use.
How do I set up a second site or domain name to point to my main web site?
Set up second domain name as an alias for your primary domain:
Let's call your primary site yourdomain.com, and the alias site othersite.com. The site yourdomain.com is probably the name of your VPS if you only have a couple of websites.
- Log in to your Dashboard
- Navigate to VPS HOSTING
- Select your VPS/Domain: yourdomain.com
-> Click Manage (green button) - Go to Web Sites
- Click Add New Website or Subdomain to this VPS (green button)
- Add a new website, called "othersite.com" or whatever your alias will be.
The alias site will now appear in your list of websites, and you'll see an option to edit the document root. Change the document root of your alias website so it matches the document of your primary website, i.e. /home/domains/yourdomain.com/public
That's it! Your domain is now aliased, and it'll even get free SSL certificates automatically installed. That takes a bit of time, usually about half an hour, so just be patient.
If your alias is a newly purchased domain, or if you're just now pointing it to our servers, you'll probably need to set up DNS: https://support.brownrice.com/content/2/276/en/how-do-i-setup-dns.html
If that sounds scary or you're just not sure, just email support@brownrice.com and we can tell you very quickly.
How do I change the document root of my website?
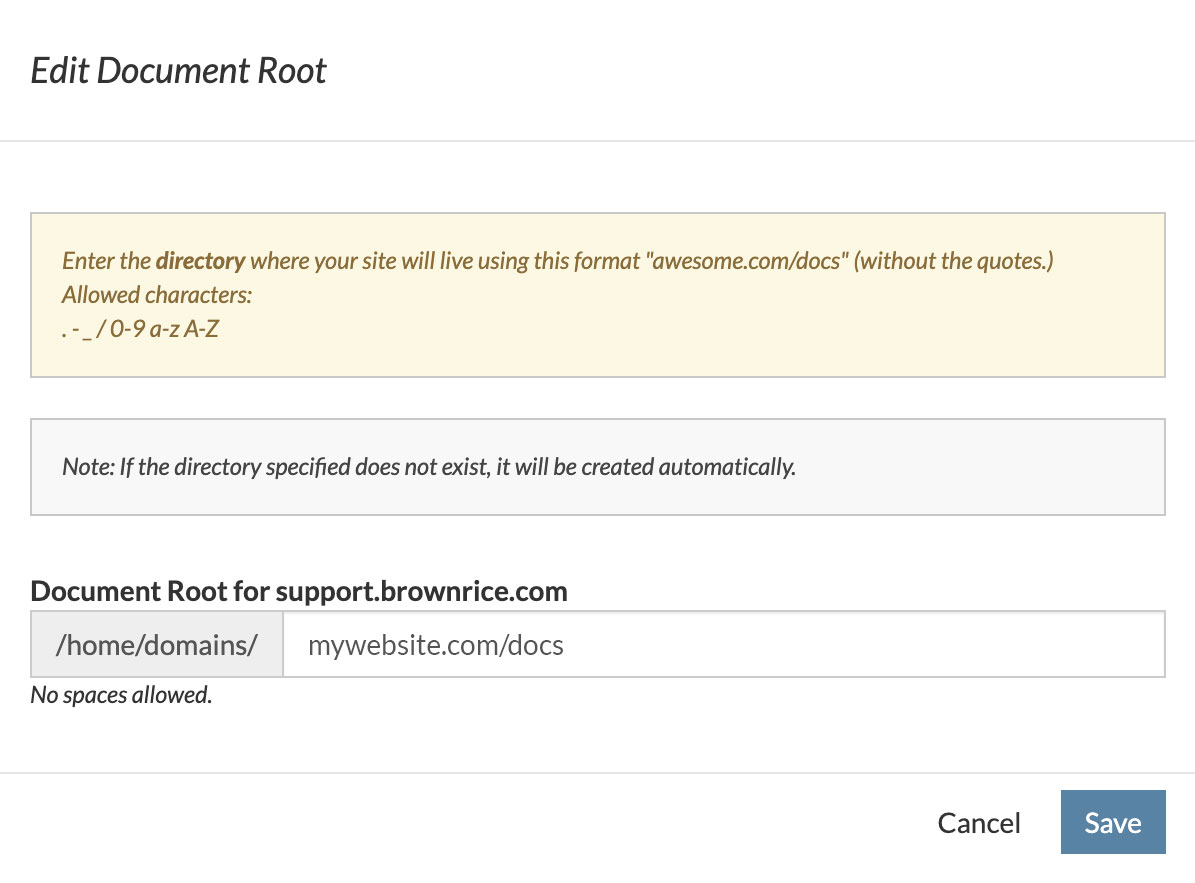
What is the Document-Root?
This is the directory where your site lives, and where you should put your index.php or index.html file, or install your software. Its also where Wordpress is typically installed.
The default settings are as follows:
For the main site (mywebsite.com in this example) this is where your document root usually lives:
/home/domains/mywebsite.com/public
for any subdomians of that site (mysubdomain.mywebsite.com in this example):
/home/domains/mywebsite.com/public.mysubdomain
For older, Gen6 SmartVPS customers, the document root is typically here:
/home/domains/mywebsite.com/docs
How can I change my website's document-root?
- Log in to your Dashboard
- Navigate to VPS HOSTING
- Select your VPS/Domain: mywebsite.com
-> Click Manage (green button) - Go to Web Sites
- Scroll to your website, and click (edit) next to the Document Root.

- Type in a directory name and click Save. Note: If the directory doesn't exist, clicking 'Save' will also create the directory automatically.
- Important: You will also need to change the document-root for the two SSL versions of your site (www and without www.)
That's it, you're done!
How do I review my VPS's performance graphs and statistics?
Brownrice VPS Performance Graphs/Statistics
Brownrice continuously collects over 30 data points (CPU, Sendmail, Apache, MySQL, RAM, etc.) from your VPS and uses this data to keep your VPS automatically tuned so that it is performing as fast as possible at all times. However, there can be instances where no matter how finely tuned your VPS is your web application still runs slowly. This can be the result of poorly written code or it can be caused by a legitimate increase in traffic. In these situations it can be extremely helpful for a web developer to view the raw peformance data that we collect.
- Log in to your Dashboard
- Navigate to VPS HOSTING
- Select your VPS: yourvpsname.com
-> Click Manage (green button) - Go to Performance Graphs or Statistics (depending on the Generation of your VPS.)

or
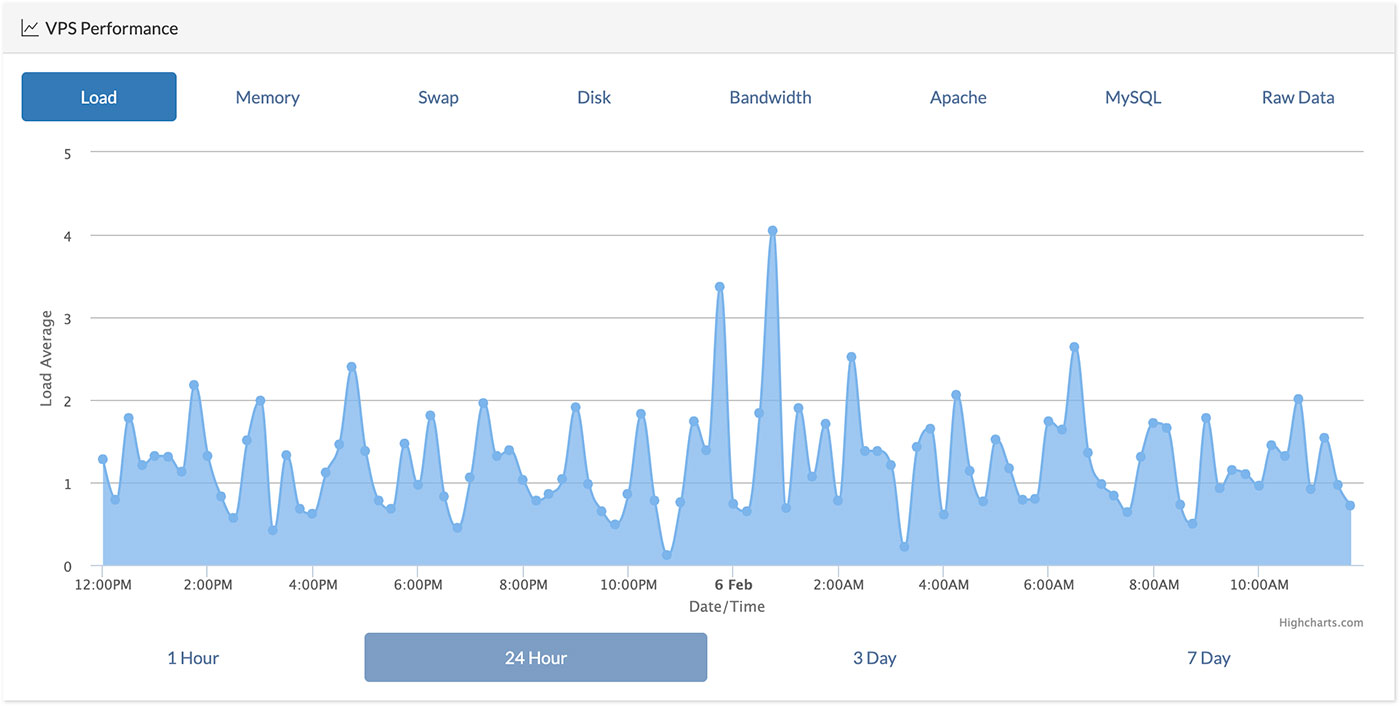
Your Performance Graphs/Statistics display data from the last hour, 24 hours, 7 days, or 30 days.
You can view Load Averages, Memory Usage (by type), Swap, Disk, Bandwidth, Apache, and MySQL graphs. Keys explaining each graph can be seen below each graph.
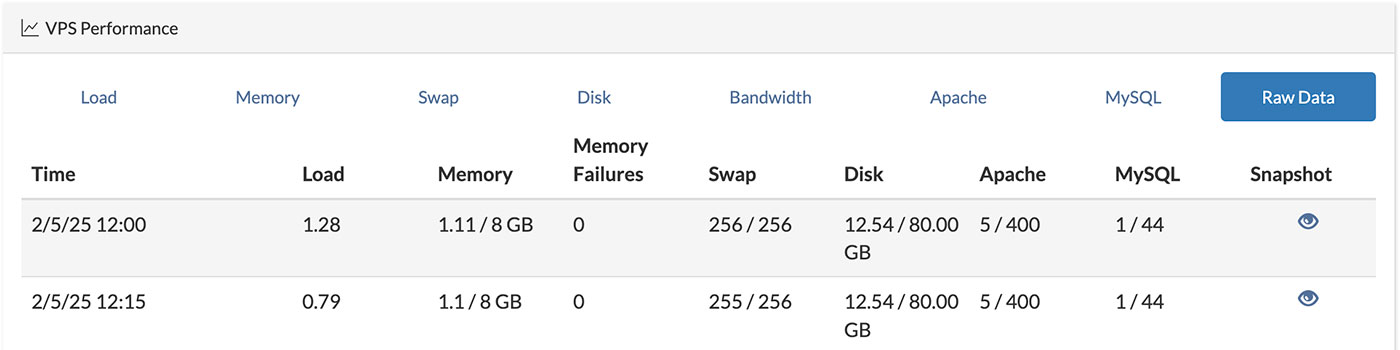
- To view Raw VPS data click on the Raw Data tab, which will display the actual values for the most important data points.
- To view a VPS Snapshot click the small "eye" icon within any Raw Data column to see what was happening with the web server, database server, load (via top), and sendmail were doing at any time.
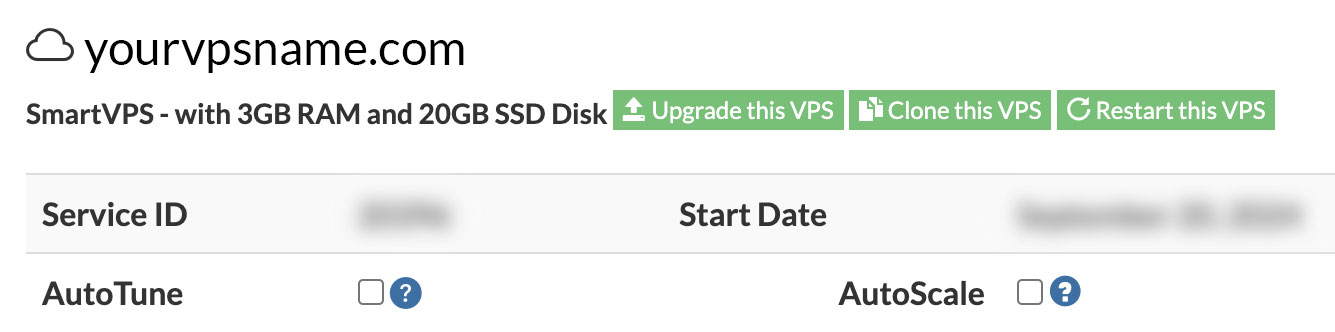
What is SmartVPS AutoTune?
Brownrice’s SmartVPS AutoTune service continually collects over 30 VPS performance metrics and automatically re-tunes your web and database server settings whenever anything gets out of tune so that your site's are always screaming fast.
No down-time, no slow-time, ever.
How much does this service cost?
Zero dollars. VPS Auto-Tune is free with every Brownrice Managed VPS.
How do I turn this on?
It's enabled by default for all of VPS customers.
How do I turn this off?
- Log in to your Dashboard
- Navigate to VPS HOSTING
- Select your VPS: yourvpsname.com
-> Click Manage (green button) - Turn the AutoTune checkbox from On to Off
How do I know this thing is on?
Your SmartVPS will email you whenever your server is re-tuned or having any issues that you need to know about.
Is there anything I need do know or do to take advantage of this?
Nope. We do it all, in the background, without you having to do anything. You just work on your site and we make it go fast, always.
How do I get my Free SSL certificates?
Our free SSL certificates are available for all web site's hosted on a Brownrice SmartVPS. If your site is on a SmartVPS you likely already have the certificate in place as our systems are fully automated. However, if your certificate is not in place these are things you can check:
Make sure your site is on a VPS Hosting account
If your site is on a shared or basic hosting account you will NOT receive a free SSL certificate but you can upgrade to take advantage of this great feature. Follow the steps below to check it out.
To check if your site is on a Shared or Basic Hosting account:
- Log in to your Dashboard
- Navigate to EMAIL HOSTING
- Look for your site: yourvpsname.com
-> If the site is listed under EMAIL HOSTING you will NOT get a free certificate. - If you'd like to upgrade from a basic hosting account to a SmartVPS the cost is just an additional $1 per month. Send us an email to support@brownrice.com and we'll upgrade you ASAP.
To check if your site is on a VPS Hosting account:
- Log in to your Dashboard
- Navigate to VPS HOSTING
- Look for your site: yourvpsname.com
-> If the site is listed under VPS HOSTING you will get a free certificate!
Make sure your site is LIVE and pointing to your VPS IP.
Once your site is live and DNS is pointed to our servers our automated SSL install scripts will attempt to issue your certificate within 20 minutes.
My site is live, on a SmartVPS but I still don't have an SSL certificate? What do I do now?
Wait an hour. If you still don't see the certificate check to ensure your VPS operating system is at least CentOS 6.
You can check this by logging into https://dashboard.brownrice.com and clicking VPS HOSTING. Scroll down to your VPS and note the OS Version.
If yours is CentOS 5 send us an email at support@brownrice.com and we can quickly upgrade your operating system for you at no charge.
How many free certificates do I get? And will they work with subdomains?
There are no limits to the number of free certicates you can have. And yes, they work with subdomains.
How do I create SSH keys on my VPS?
First, create an SSH user and login to your VPS by following these instructions.
Once you've logged into the VPS type this command:
ssh-keygen
Follow the prompts.
Done.
Your SSH keys will live in your ~username/.ssh/id_rsa directory
If you'd like to set up passwordless authentication you'll next want to
- Create an authorized_keys file in your ~username/.ssh/id_rsa directory.
- Paste your public ssh key (from your computer) into the ~username/.ssh/authorized_keys file that you just created
- Lock down the permissions so that only your account can read the contents of your authorized_key file by running: chmod 700 ~username/.ssh/authorized_keys
Done.
You should now be able to SSH into your server without a password from your own computer by running this command: ssh username@yourvpsaddress.com
How do I set up a database on my SmartVPS?
How to setup a Database on a SmartVPS
To set up a database on your Smart VPS, you will need to use phpMyAdmin. The procedure is very simple. First, you need to know your root password for MySQL.
Get your root password for MySQL:
- Log in to your Dashboard
- Navigate to VPS HOSTING
- Select your VPS: yourvpsname.com
-> Click Manage (green button) - Go to Databases
- Click the "eyeball" next to the Password field to view the MySQL root password
- Click the phpMyAdmin link and login with user name root and the password you just viewed.
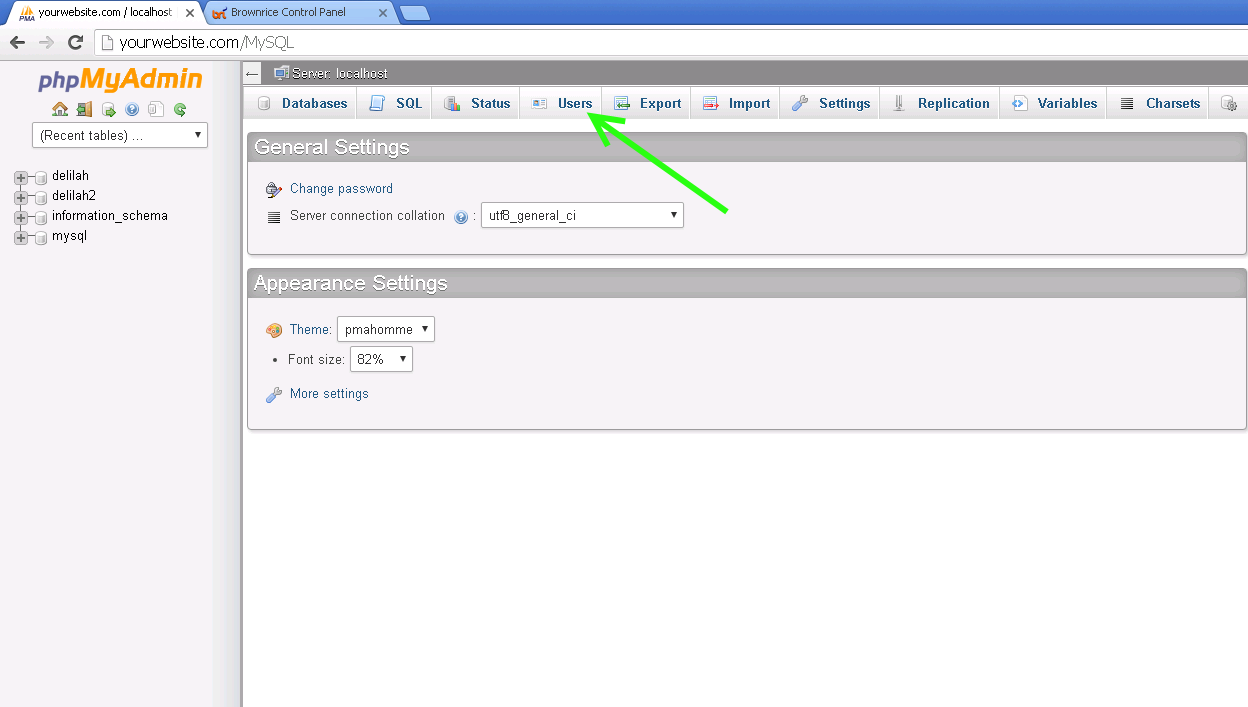
Continue setting up a new Database in MySQL:
Now that you have phpMyAdmin open, the easiest way to get your database set up is to create a new user and database at the same time:
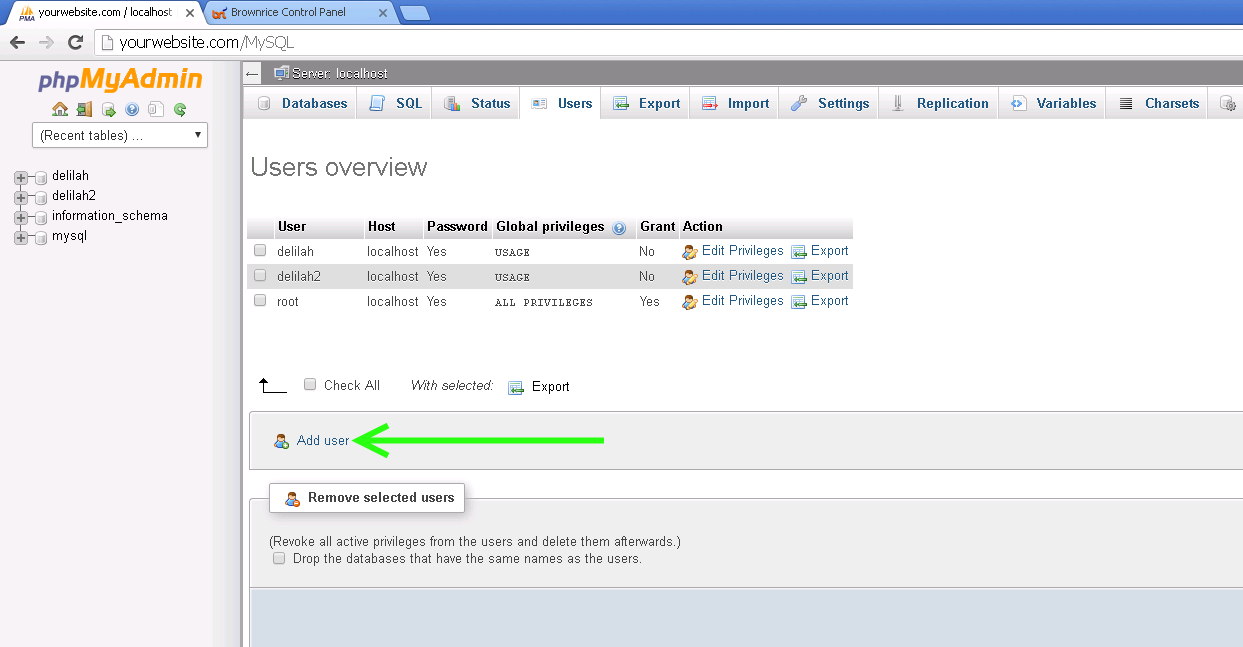
- Click Users in the main menu
- Click Add user
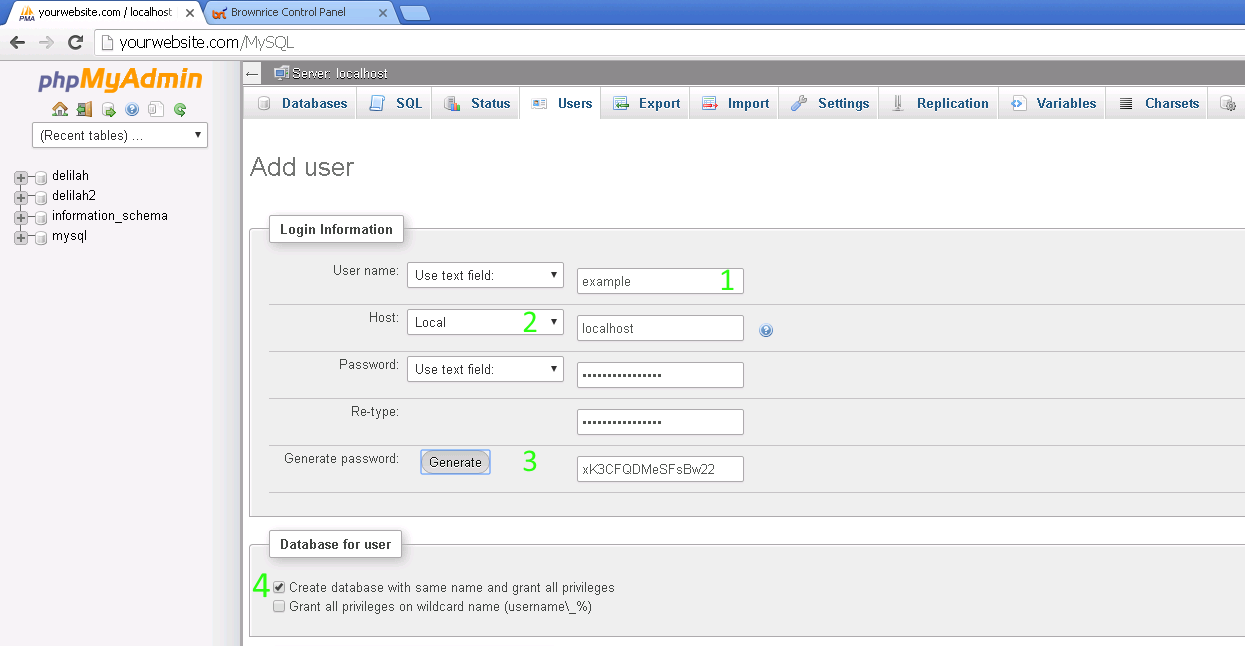
Now you just need to fill out some basic fields. Here's what to do:
- Enter a username. Can be anything you want, but should be all lowercase, and must not have any spaces or special characters.
- Select "Local" from the drop-down menu for "Host". The word "localhost" will automatically appear in the text box.
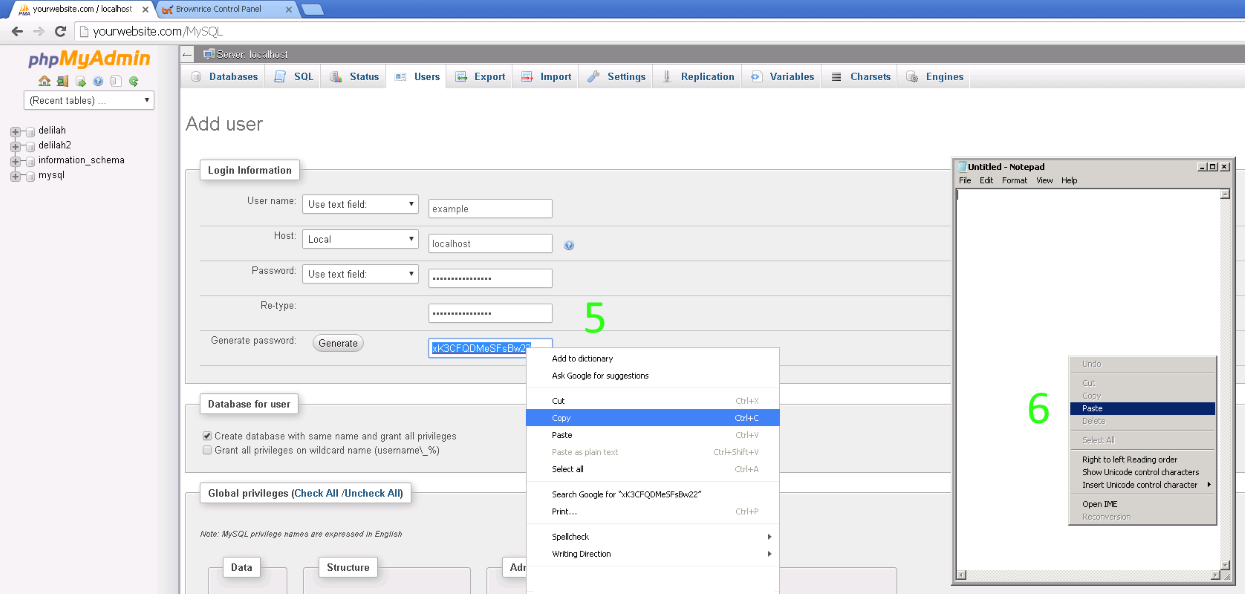
- Click the Generate Password button. It will randomly create a strong password. You will likely use this password only once or twice, so it should be strong, not memorable. If your MySQL password were cracked it would be bad news for your website. Use a strong password.
- Check the box labeled "Create database with same name and grant all privileges"
- With your mouse, highlight the password shown in the text box, right click it, and pick "Copy" from the context menu.
- Right click in an empty notepad, MS Word document, etc and pick "Paste". You'll want to paste this password into your application's setup page. (Joomla, Wordpress, etc.)
Now scroll to the bottom, and click the "GO"button in the bottom right corner.
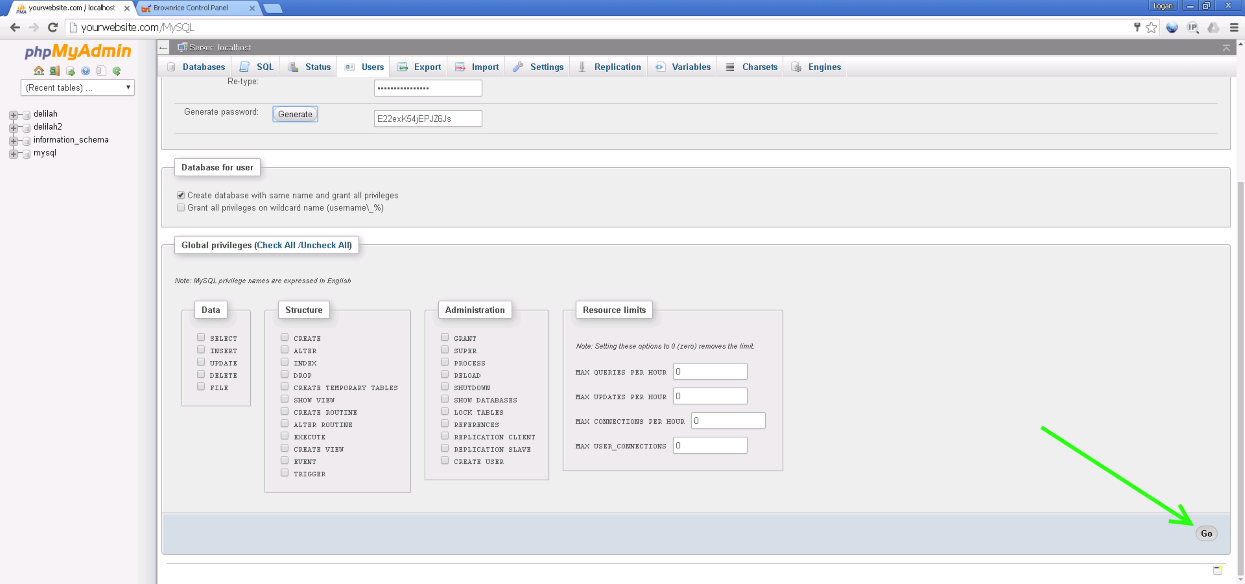
Your database name, and username will now be exactly the same, and you're good to go!
How do I upgrade or downgrade my SmartVPS?
How to Upgrade or Downgrade your VPS
- Log in to your Dashboard
- Navigate to VPS HOSTING
- Select your VPS: yourvpsname.com
-> Click Manage (green button) - Click Upgrade this VPS (green button)

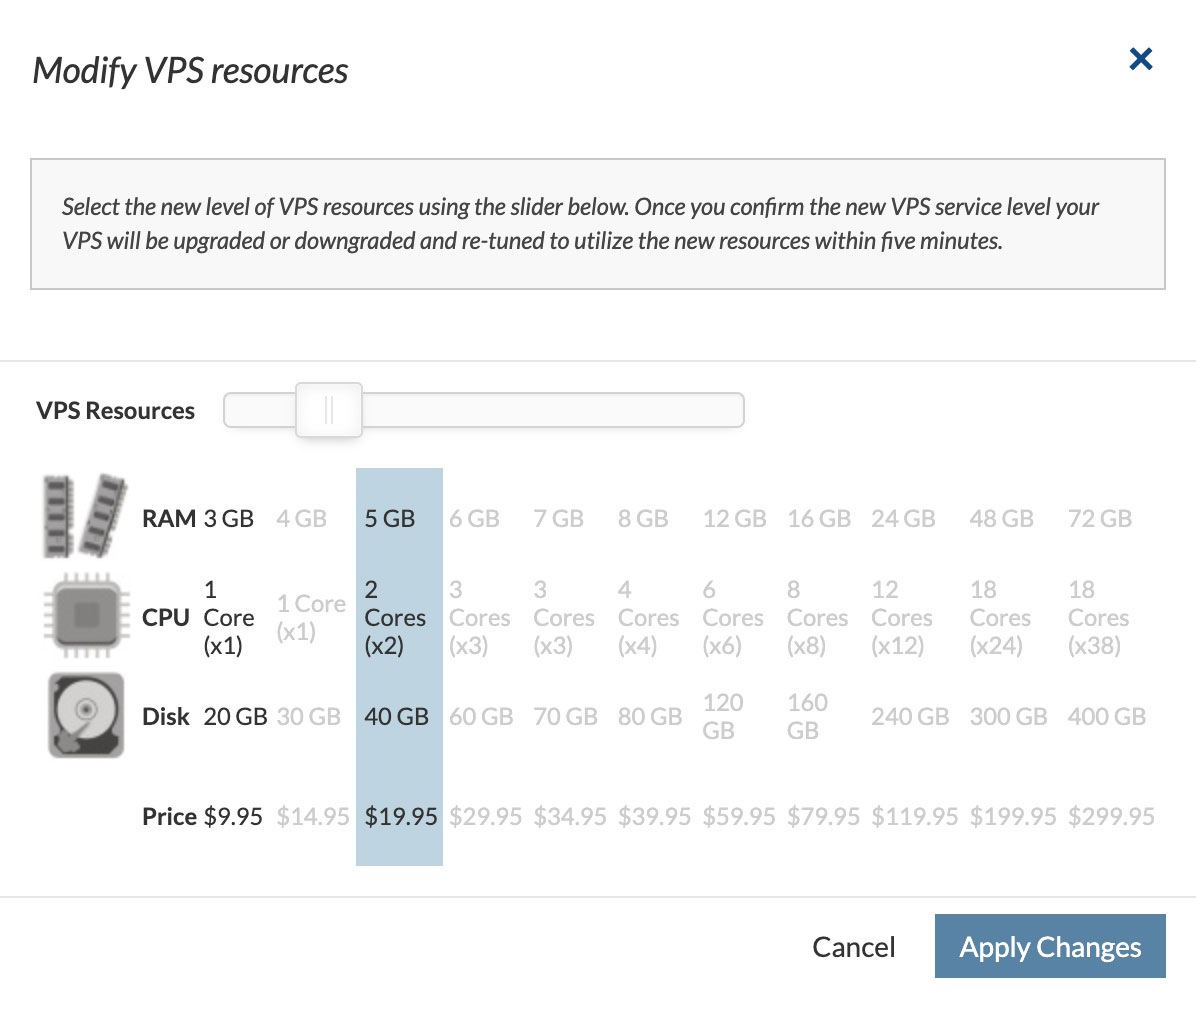
- Use the slider to change resources either up or down
Done!
Within 5 minutes you'll receive an email from our systems saying that your SmartVPS has been upgraded and re-turned for added performance. Once that's received then you'll know that the upgrade has been completed.
Billing Notes
If you upgrade and then downgrade again before 4AM then there will be no charges. 4AM is when our billing system looks for changes and then prorates the service charges through the quarter. So same-day upgrades and downgrades are free.
If you upgrade for longer than a day, then downgrade a few days later, it won't cost much either, since the charges will be appropriately prorated in both directions.
My Wordpress site has been hacked! How do I clean it up?
How to clean up a Wordpress hack
The only way to ensure that a hacked Wordpress site is fully rid of a hackers code is to follow these instructions:
- Using FTP or SSH download the wp-content/uploads directory to your computer, virus scan all files and ensure that its hack free.
- Using FTP or SSH download the wp-config.php file and write down the database name, username, and password.
- Login to Wordpress (if you are able) and write down the exact names of all of your active plugins.
- Using FTP or SSH delete all code from server (leave database in place).
- Re-install a fresh Wordpress install by FTP'ing NEW Wordpress install files back to server. (do not use *any* old Wordpress files and do not use our dashboard installer to reinstall Wordpress.)
- Configure new Wordpress wp-config.php file to connect to old database using the database info you collected in step 2.
- Reinstall all plugins that you noted in step 3 via the new Wordpress. (Do NOT re-upload existing plugins as they are a likely source of hack.)
- Change all Wordpress username and passwords and delete any Wordpress users that you are not familiar with. (may require reviewing Wordpress users database table directly.)
- Re-upload your *cleaned* wp-content/uploads directory to the server.
What should I do about these AutoTune Alerts?
AutoTune notices are just informing you of site "slow-downs," not outages. And these occasional Load Average spikes, or Web Server Connections being maxed out, are not something to be overly concerned about. The important things to know are that your web sites are is still up, running, and serving web pages to your customers, though the pages may be slowed as the server recovers and/or protects itself from crashes. The key is to pay attention to the frequency and duration of the alerts.
Why is this happening?
These issues can be caused by hack attempts, bots that are quickly spidering your site, or a legitimate traffic spike, all of which are very common on the Internet.
To determine the exact cause:
- Log in to your Dashboard
- Navigate to VPS HOSTING
- Select your VPS: yourvpsname.com
-> Click Manage (green button) - Go to Performance Graphs or Statistics (depending on the Generation of your VPS.)
or - Your developer can do this if you are not technical. View Full Instructions » Pay particular attention to the Raw Data -> Snapshot information. These detailed VPS snapshots taken every 5 minutes from your VPS and stored for 30 days.
When should I do something about these alerts?
Pay attention to the frequency that you receive the alerts. If you only receive these alerts once per week, its likely safe to ignore them. If the notices increase to say, once per day, have your developer review your "Raw Data" snapshots in your dashboard to identify whether its legitimate traffic or not, whether the sites code can be optimized, and if a VPS upgrade is appropriate.
How do I upgrade my VPS?
VPS upgrades are easy, affordable, nearly immediate and costs are prorated. So you could upgrade your VPS for a few days and see if things go away, then downgrade again, which would likely just cost a few dollars. Upgrade your VPS with these instructions.
How do I cancel my Brownrice account?
Just send an email to support@brownrice.com from an email address listed on the account and we'll shut it down for you.
Keep in mind that all data will be removed when we do so be sure to have a back up of any site files, databases, and email that you want to keep before requesting that your account be closed.
Any unused, pre-paid hosting payments will be prorated the following day and credited to your account. Refunds will not be issued but credits can be applied to future Brownrice services.
How do I migrate my website from shared-hosting to an existing VPS?
First, please know that Brownrice will migrate one customer site per service free of charge for new customers. We're very good at this and happy to do it.
However, if you are migrating multiple sites on your own, say, into a VPS or dedicated server, these are the instructions that we use:
Migrating Multiple Sites
Database Migration:
- Connect to current site via FTP and look at the wp-config.php file to see your database credentials: database name, username, password. Write these down/paste them into notepad.
- Log into the phpMyAdmin for the old site via the Brownrice Dashboard, and take an export of the database, using these instructions: How do I export or backup a database?
- Log into the phpMyadmin for the new VPS,
- Click 'Users' from the menu bar, then click 'Add user'
- Enter the exact same username and password, and select Localhost for Host
- Check 'Create database with same name and grant all priveleges' under 'Database for User'.
- Click 'Go' on the bottom-right.
- Click the name of your new database on the left.
- Click 'Import' from the menu-bar.
- Choose File, and upload the .sql file you downloaded in step 2.
- Click Go
File Migration - Setup a new site:
- Download all your site files (everything inside /home/domains/yourwebsitename.com/docs/) via FTP.
- Log in to your Dashboard
- Navigate to VPS HOSTING
- Select your VPS: yourvpsname.com
-> Click Manage (green button) - Go to the Web Sites
- Click Add New Website or Subdomain to this VPS (green button)
- Enter the full website name: yourwebsitename.com, and click Add Site.
File Migration - Create a new FTP/SSH User:
- o to FTP/SSH Users or SSH Users (depending on the Generation of your VPS)
or - Click Add User (green button)
or - Select a username and password
- Save
File Migration - Use FTP/SSH User to upload files to the new server:
- Connect via FTP to the VPS (use the IP address, shown next to 'Assigned IPs' in the VPS details, as the hostname).
- Upload all your site files to /home/domains/yourwebsitename.com/public/
- Log in to your Dashboard
- Navigate to VPS HOSTING
- Select your VPS: yourvpsname.com
-> Click Manage (green button) - Go to the Web Sites
- Click the Reset link to reset file-permissions
- After that everything should be in place. You can take a look at the site on the VPS by adding the following lines to your /etc/hosts file on your local machine (google for instructions for your local machine OS):
{IP address of the VPS} yourwebsitename.com {IP address of the VPS} www.yourwebsitename.com - Once you've verified the site looks good, you can update the DNS A record to point to thenew IP address, and the site will be live on the VPS!
Contact us to have us remove the shared-hosting account.
My computer is not syncing with OwnCloud, help!
If your computer is not pushing files or document updates to owncloud, most of the time this is going to be caused by an issue with the OwnCloud Client on your Mac or PC.
Make sure that the OwnCloud client is running, it will look like a Cloud icon in your system tray.
SysTray on Windows is in the lower right hand corner, it is in the upper right hand corner on a Mac.
- If it IS running and files are not syncing right click and choose quit OwnCloud.
- Then launch the client from your applications folder, or desktop icon and make sure it shows up in SysTray
- If it is NOT running, start the client and that will resolve your issues with syncing as it has to be running for syncing to work correctly.
My Wordpress site is now live on Brownrice. How do I change the temporary URL to my URL?
If you've been using a temporary brownrice.com URL to build your site on our servers prior to it going live (e.g. yourwebsite.brownrice.websites) you'll want to change that temporary address "yourwebsite.brownrice.websites" to just be "yourwebsite.com."
How to make your temporary url live and move to the live url
Via your Dashboard (easiest option):
- Log in to your Dashboard
- Navigate to VPS HOSTING
- Select your VPS: yourvpsname.com
-> Click Manage (green button) - Go to the Web Sites
- Click the small pencil icon to the right of Wordpress URL.

- Enter the live URL of the website (https://yourwebsite.com) and click the Set button
- Check your Wordpress site and ensure that its working correctly.
Done!
Via Wordpress Directly (harder but better if you don't have dashboard access):
- Login to Wordpress: http://yourwebsite.com/wp-login.php
- Click -> Settings -> General.
- Change both the Wordpress address and Site Address to read: https://yourwebsite.com.
- Click Save Changes.
- Click Permalinks.
- Click Save Changes (yes, you don't actually change anything on the Permalinks page, you only click Save Changes.)
Done!
How do I redirect an alias domain to an internal folder, another address, or my SSL domain?
Add any of the code below to an .htaccess file in the "docs" folder within your web site. i.e.
docs/.htaccess
Redirect to a subdirectory:
RewriteEngine on
Options +FollowSymlinks

RewriteCond %{HTTP_HOST} ^(www\.)?example\.com
RewriteCond %{REQUEST_URI} !/test/
RewriteRule (.*) /test/$1 [L]
Redirect one domain to another domain, optionally adding a subdirectory (i.e. wordpress/)
This is useful if they want to redirect all domain traffic to some other location, but still want to access the server by IP address, or another hostname such as *.brownrice.com subdomain. The simpler methods below don't care what the current hostname is, they will redirect all traffic.
RewriteCond %{HTTP_HOST} ^www.example.com$ [NC]
RewriteRule ^(.*)$ http://www.someotherplace.com/optional-path/$1 [R=302,L]
The "$1" in the rewrite rule will be replaces by whatever parameters were in the URL after example.com/, so that data will get passed to the destination. The "^" indicates we don't give a hoot whether http or https is being used initially. 302 indicates a temporary redirect. Don't use permanent (301) unless this really is likely to be permanent. Has to do with search engine ranking.
Redirect ALL traffic temporarily to another URL:
Redirect 302 / http://www.example.com
Redirect ALL traffic to SSL version of your site:
RewriteEngine On
RewriteCond %{SERVER_PORT} 80
RewriteRule ^(.*)$ https://www.example.com/$1 [R=301,L]
Redirect ALL traffic EXCEPT particular subdomain(s) to another URL:
RewriteEngine On
# Redirect anything except foo.example.com, bar.example.com
RewriteCond %{HTTP_HOST} !^(foo|bar).example.com$ [NC]
# Redirect to www.example.com, preserving the URI
RewriteRule ^(.*)$ http://www.example.com/$1 [R=302,L]
For redirecting ALL traffic permanently to another URL:
Redirect 301 / http://www.example.com/
Redirecting a specific file to another location
Redirect /index.html http://example.com/newdirectory/
How do I get a free SSL certificate for a domain alias?
The short answer is that we don't support SSL certificates for aliases. However, you can still totally get this done.
How to get a free SSL certificate for a domain alias
If you already set up your alias domain in another web site, remove it.
Create a new web site using the domain that you were going to set up as an alias:
- Log in to your Dashboard
- Navigate to VPS HOSTING
- Select your VPS/Domain: yourdomain.com
-> Click Manage (green button) - Go to Web Sites
- Click Add New Website or Subdomain to this VPS (green button)
- Add a new website, called "othersite.com" or whatever your alias will be.
The alias site will now appear in your list of websites, and you'll see an option to edit the document root. Change the document root of your alias website so it matches the document of your primary website, i.e. /home/domains/yourdomain.com/public
That's it! Your domain is now aliased, and it'll even get free SSL certificates automatically installed. That takes a bit of time, usually about half an hour, so just be patient.
Edit the document root:
Edit the document root of the new web site so that it points back to the orginal web site.
Done!
Wait about 10 minutes and your alias domain will receive an SSL certificate but will show the content of your original web site.
How do I setup DNS?
How to add your domain to the Brownrice DNS servers
Find the hosting service that is setup and note the IP address that we've assigned to it:
- Log in to your Dashboard
- Navigate to VPS HOSTING
- Select your VPS: yourvpsname.com
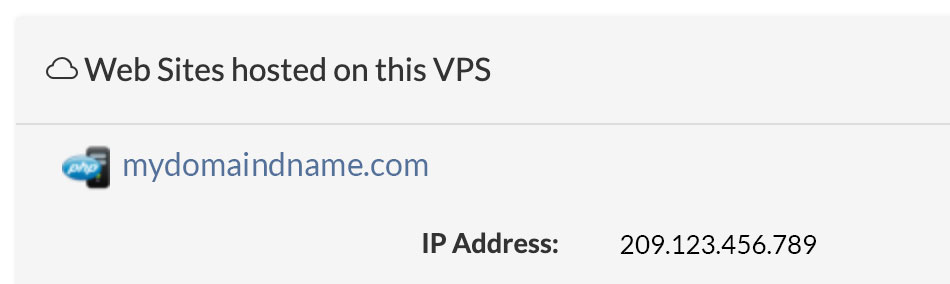
-> Click Manage (green button) - Go to the Web Sites
- Find and note the IP Address for mydomainname.com
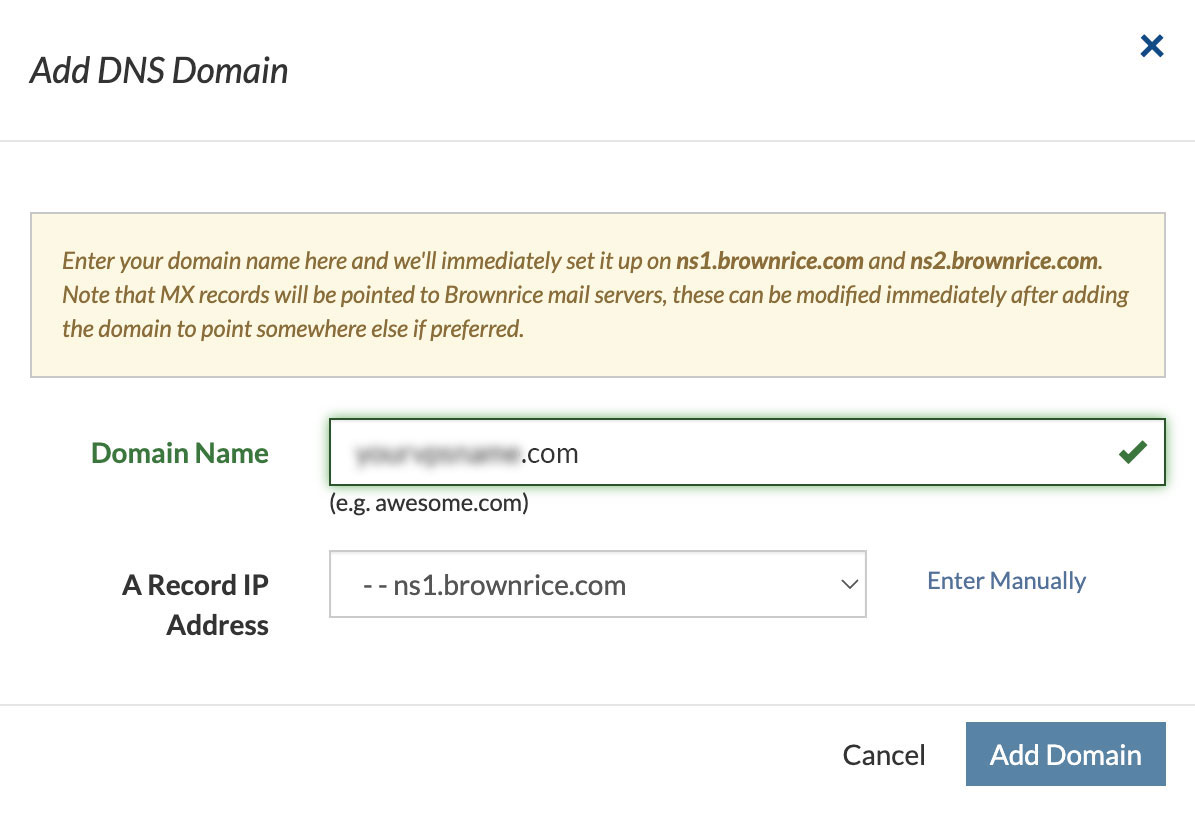
Add a DNS Domain:
- Navigate to DNS
- Click the Add DNS Domain button (green button on right side of page)
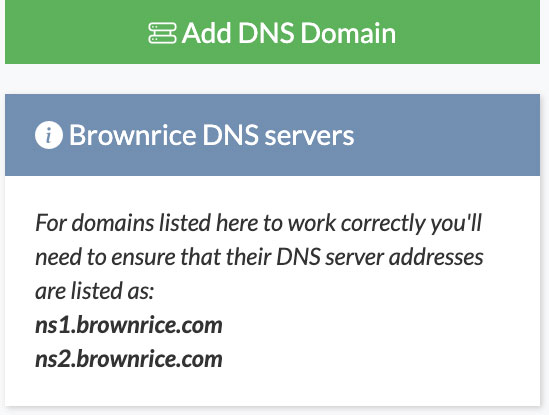
- Enter your domain name (e.g. "mydomainname.com") and either select the correct IP address from the drop down list or click Enter Manually and manually enter it.

or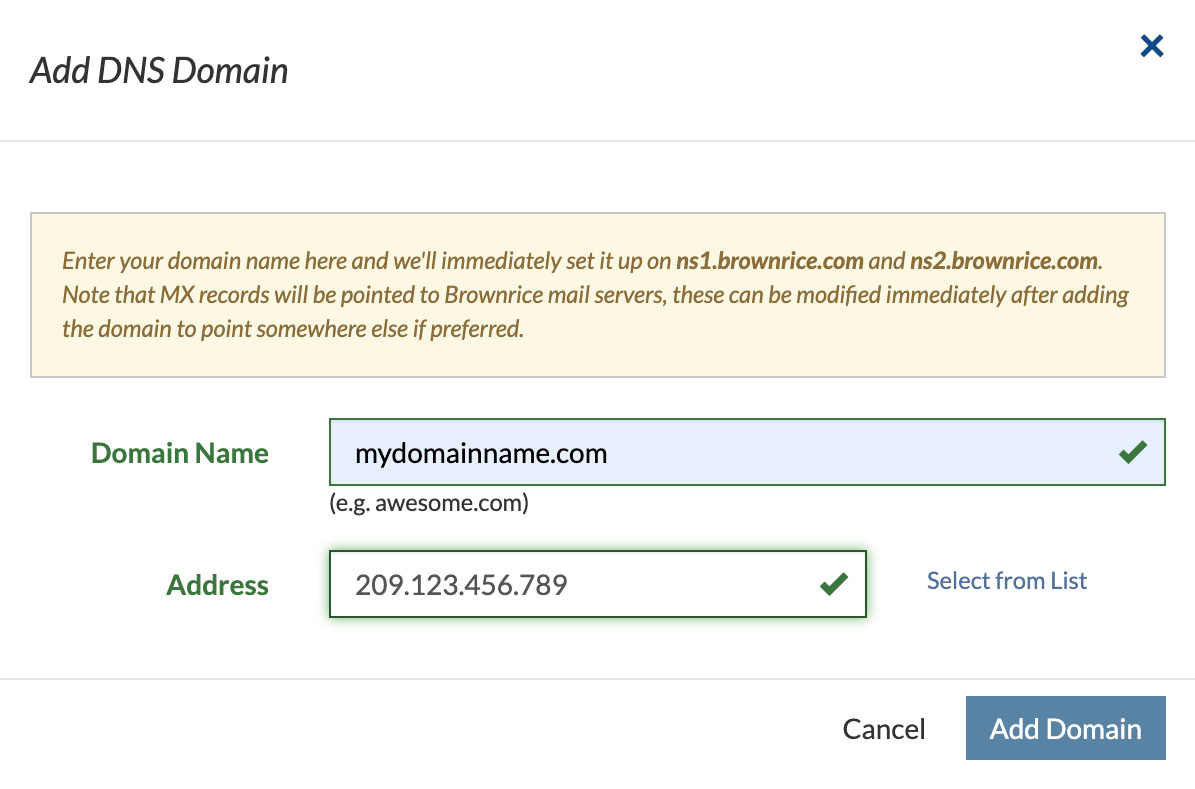
- Click Add Domain
Done!
Important: This will only work if the DNS server address associated with your domain name are pointed to: ns1.brownrice.com and ns2.brownrice.com
If Brownrice is your registrar you can set this in the Domains tab of the http://dashboard.brownrice.com by following these instructions.
How do I set up a new web site on my SmartVPS?
How to setup hosting for a new web site or subdomain to be hosted on your SmartVPS
You can add as many web site hosting accounts to your SmartVPS as you like. There are no additional charges for this.
Setup a site:
- Log in to your Dashboard
- Navigate to VPS HOSTING
- Select your VPS: yourvpsname.com
-> Click Manage (green button) - Go to the Web Sites
- Click Add New Website or Subdomain to this VPS (green button)
- Find and note the IP Address for mydomainname.com
Done!
Now your SmartVPS is configured. Next you'll most likely need to add your new web site address to the Brownrice DNS servers so the internet knows where your new site lives. You'll need to ensure that the web site that you just set up for hosting has its DNS server addresses pointed to Brownrice's.
If your domain name is registered with Brownrice:
- Navigate to DOMAINS
- Select your Domain: mydomainname.com
-> Click Manage (green button)
- Go to DNS Servers

- Click Edit DNS Servers and ensure they are set to:
Name Server 1: ns1.brownrice.com
Name Server 2: ns2.brownrice.com
Otherwise, if your domain name is registered with another registrar you'll need to login to that registrar and change the DNS server addresses to read:
- ns1.brownrice.com
- ns2.brownrice.com
Done!
Note: I can take up to 24 hours for registrar changes to make their way around the internet, so be patient. If you suspect something isn't right, or need help, please feel free to contact us and we'll get you squared away!
How do I upgrade my PHP and MySQL versions?
How to upgrade PHP/MySQL versions
For Software Generation 7 SmartVPS accounts:
- Log in to your Dashboard
- Navigate to VPS HOSTING
- Select your VPS: yourvpsname.com
-> Click Manage (green button) - Go to the Web Sites
- Find the site or subdomain that you want to switch the PHP version for and then click the PHP Version: X.X (change) link.
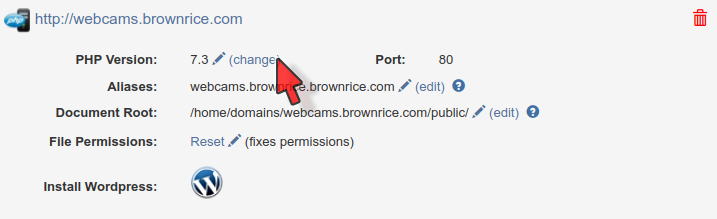
- Select your required version of PHP
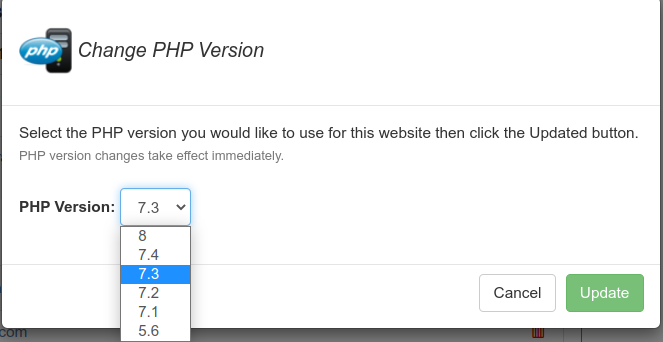
- Click Update
Done! Version changes are reflected immediately.
For all other Software versions we can upgrade or downgrade your SmartVPS to nearly any version of PHP and MySQL that you like. Just send us an email to support@brownrice.com and we'll get it done ASAP.
How do I allot more RAM, CPU and disk space to one of my VPSs on my dedicated server?
Allot more resources to one of your SmartVPSs on your Dedicated PrivateVZ server
- Log in to your Dashboard
- Navigate to DEDICATED

- Select your Private Server Name: yourvpsname.com
-> Click Manage (green button)
- Go to VPS Resources

- Select your Container/VPS: yourvpsname.com
-> Click Manage (green button)
-> Click Modify Resources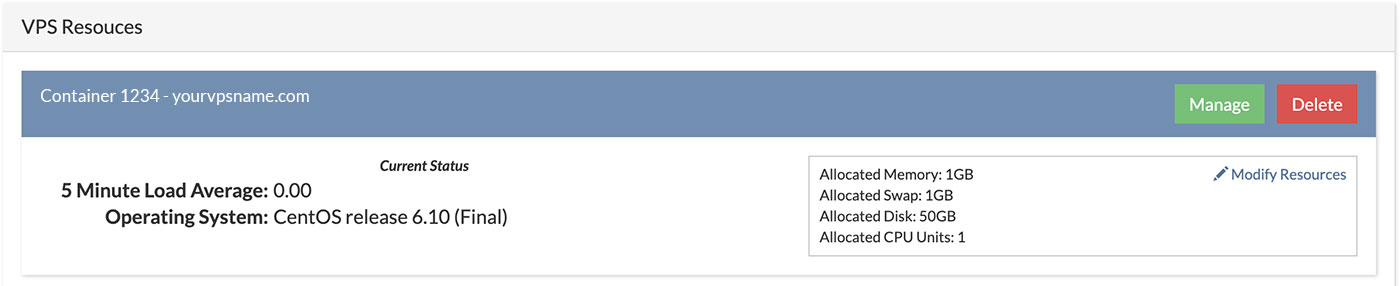
- Adjust the sliders to provision more Memory, CPUs, CPU priority and disk space to your SmartVPS
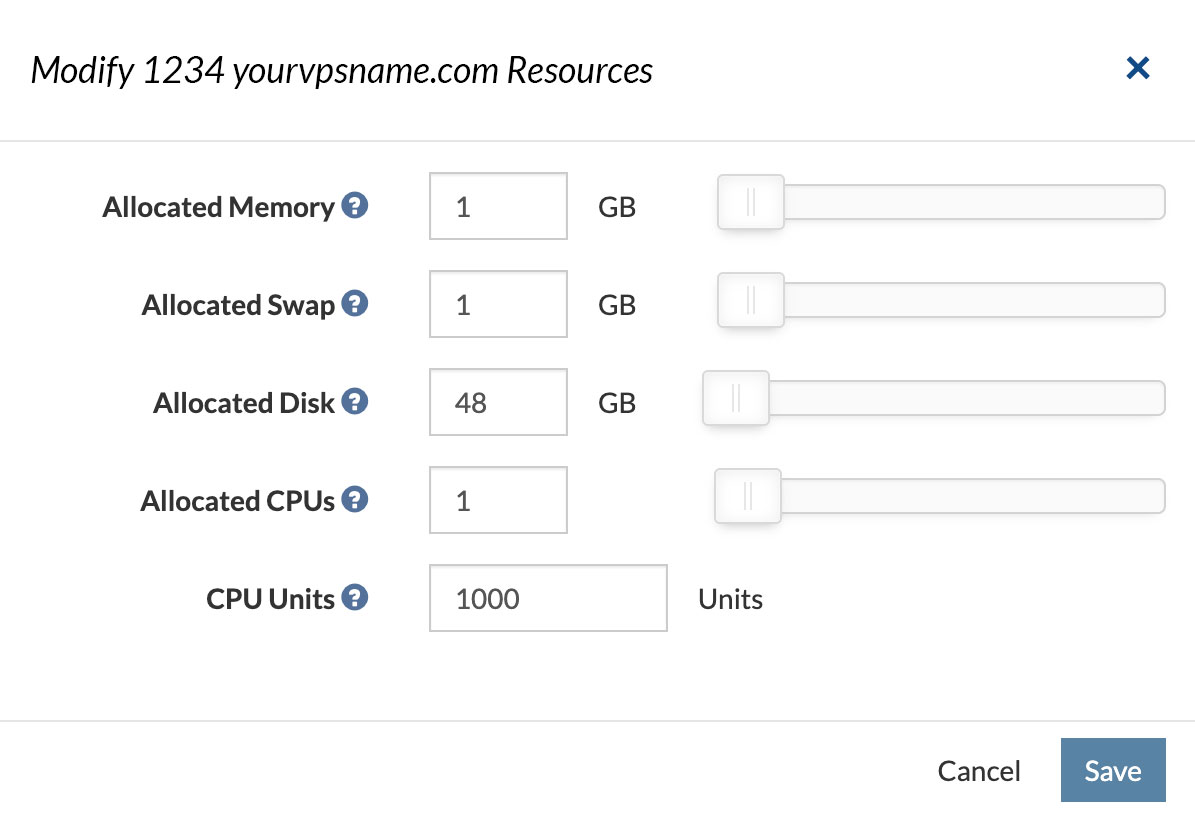
Since this is of course a dedicated server there is no charge for resource changes.
Within 5 minutes you'll an receive email about the upgrade followed by an email from our AutoTune algorithms letting you know that Apache and MySQL have been retuned to take advantage of the new resource levels.
How do I add new VPSs to my managed dedicated server?
- Log in to your Dashboard
- Navigate to DEDICATED
- Select your Private Server Name: yourvpsname.com
-> Click Manage (green button) - Click Spawn New VPS on this Server (green button)

- Enter the hostname (the primary domain you'll be hosting on this VPS), and choose your operating system. You'll most likely want to use "bri-core-6-php7". Now click "Next".
- Assign as much RAM and CPU as you like (2G RAM and 1 CPU is more than enough for a simple Wordpress site), and you're done!
Give it a few minutes to spin up, and you'll see the VPS under the VPSs section of your dashboard. You can dd / remove FTP / SSH users, MySQL databases, and even install Wordpress right from the VPS page.
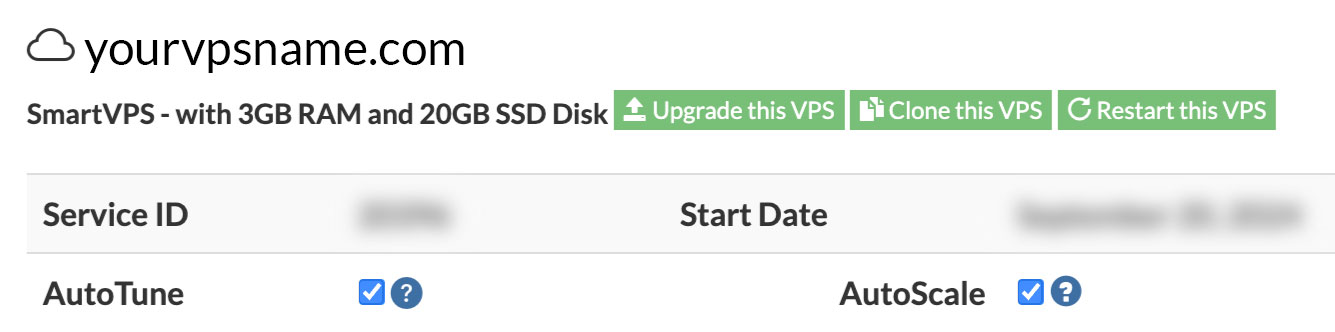
What is AutoScale?
AutoScale works with AutoTune and constantly monitors the health of your SmartVPS. If it detects a traffic surge it will upgrade your service level to ensure that your visitors continue to experience fast page loads no matter what.
How do I enable AutoScale?
- Log in to your Dashboard
- Navigate to VPS HOSTING

- Select your VPS: yourvpsname.com
-> Click Manage (green button)
- Turn the AutoScale checkbox from Off to On
How will I know if AutoScale is working?
You'll receive emails when AutoScale is invoked. These emails will include an explanation of why AutoScale was invoked, so you'll always be aware of what's happening.
How much does AutoScale Cost?
AutoScale is free and will upgrade your SmartVPS to the next service level when its invoked. So be sure to log back in to https://dashboard.brownrice.com and downgrade your SmartVPS after the traffic surge has passed. Upgrades and Downgrades during the same day are free. Upgrades and Downgrades that span more than one night have their costs prorated and are usually very inexpensive.
How do I run Node.js and NPM on my SmartVPS?
Node.js is not intended to be used as server-wide software and should be installed on a per-user basis. This allows you to use whatever version of Node that you like and manage that on your own (which is what you want!)
To install Node.js on your server
- First install nvm, like so (FYI: Use these instructions for the latest version: https://github.com/creationix/nvm#installation)
- SSH into your server
- Run the nvm install script
This will set up nvm. (Note if you see an error like "curl invalid option: -c" email us and ask us to upgrade your version of git)curl -o- https://raw.githubusercontent.com/creationix/nvm/v0.33.11/install.sh | bash - Now log out of your SSH account and then log back in. Once logged back in you'll have access to nvm. Now run this command to install the latest version of node:
nvm install node
Done!
If you want to run Node as a web server contact us and let us know what port you'll be running it on and we'll open the the firewall to allow traffic through that port.
My Wordpress site just had its SSL certificate installed, how do I make my site use the SSL address?
How to implement your SSL and change your non-secure Wordpress address (http://yourwebsite.com) to a secure address (https://yourwebsite.com)
Via our Dashboard (easiest option):
- Log in to your Dashboard
- Navigate to VPS HOSTING
- Select your VPS: yourvpsname.com
-> Click Manage (green button) - Go to the Web Sites
- Click the small pencil icon to the right of Wordpress URL.
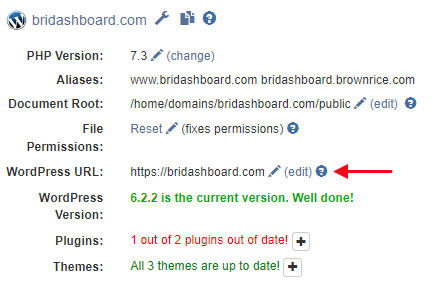
- Change the URL of the website from (http://yourwebsite.com) to (https://yourwebsite.com) and click the Set button
- Check your Wordpress site and ensure that its working correctly.
Done!
Via Wordpress Directly (harder but better if you don't have dashboard access):
- Login to Wordpess: http://yourwebsite.com/wp-login.php
- Click -> Settings -> General.
- Change both the Wordpress address and Site Address to read: https://yourwebsite.com.
- Click Save Changes.
- Click Permalinks.
- Click Save Changes (yes, you don't actually change anything on the Permalinks page, you only click Save Changes.)
Done!
How do I delete my VPS?
If you have a managed dedicated server you can follow the instructions below to delete your own VPSs
If you do NOT have a dedicated server you'll need to send an email to support@brownrice.com and have us delete your VPS for you.
For managed and dedicated / privatevz customers follow these steps to permanently delete your VPS:
- Log in to your Dashboard
- Navigate to DEDICATED
- Select your Private Server Name: yourvpsname.com
-> Click Manage (green button) - Go to VPS Resources
- Select your Container/VPS: yourvpsname.com
-> Click Delete (red button) and follow the instructions.
Please note that this is a PERMANENT function! While we can restore deleted VPSs from our backups for 10 days the IP will be placed back in our available pool and the IP may be re-assigned to another customer. Addtionally, after 10 days there will be no way to retrieve any of the data on that was on the deleted VPS.
How do I add someone else, like my web developer, to my account?
Add a web developer or access for another user to your Dashboard account
If you'd like someone else - like your web developer or another trusted employee - to be able to access our Dashboard so that they can administer your account and have all the control you have, do this:
- Log in to your Dashboard
- Navigate to USERS
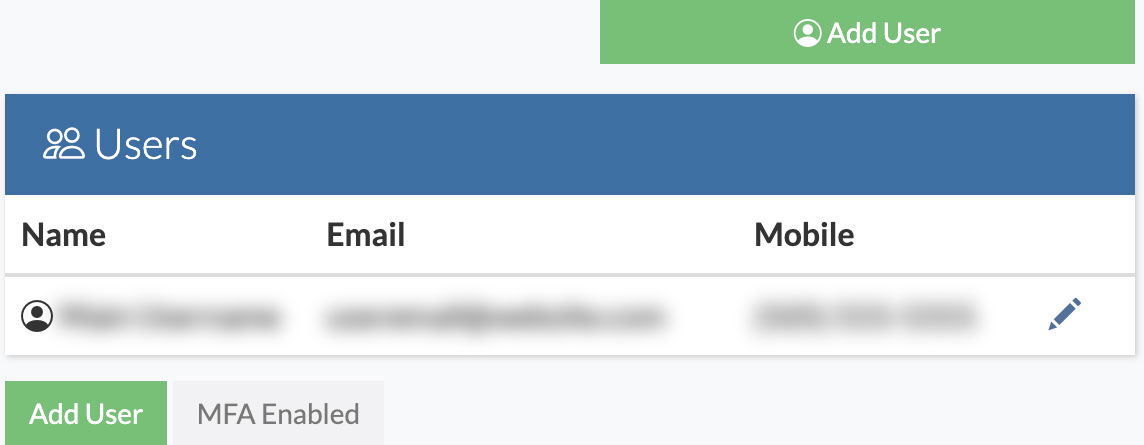
- -> Click Add User (green button, either the one in the header or the one below all contacts)
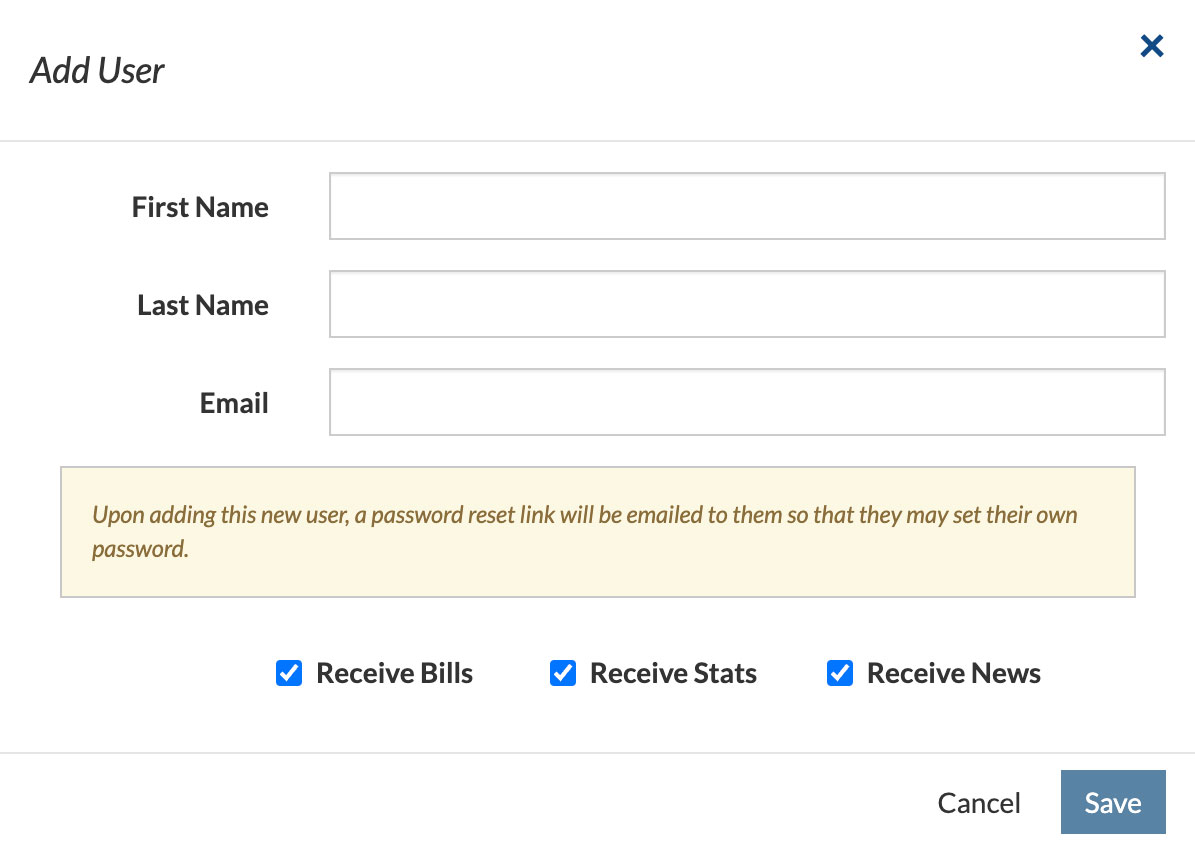
- Add user's info and select permissions with the checkboxes at the bottom of the modal and click Save, which will email your new contact with a password reset link so that they can then login to https://dashboard.brownrice.com as well.
Done!
How do I clone my website to another site, like a development site?
Introducing, the Brownrice Website Cloner!
Its easy to clone a website (including its files, database and all settings) from a live site to a development via the Brownrice Dashboard. Or you can do the opposite and clone a development website and/or database to your live site when you want to move development changes live. Or you can clone a site to a totally different site!
How to clone your website:
- Log in to your Dashboard
- Navigate to VPS HOSTING
- Select your VPS: yourvpsname.com
-> Click Manage (green button) - Go to the Web Sites
- Finally, click the small Copy icon (next to the little wrench icon!) and follow prompts, click Clone Site. (If it's a WordPress site, the cloner will copy it over for you. Otherwise, you'll need to copy the database on your own.)

Done!
Notes:
- Snapshots! We'll create a snaphot of your entire VPS before beginning the cloning process so that if things don't go the way you thought they would you can quickly revert to the pre-cloned status of your VPS.
- Options! You can clone the site to any valid domain name that you like. And by default we'll copy the files, database, Wordpress settings, and web server configurations to the new site, but you can choose which of these you'd like to be perfrormed.
- Wordpress? Yeah, this works GREAT with Wordpress sites.
- Yep, it'll overwrite things! Know that if you are cloning a site to another site that already exists on your VPS that it will overwrite the site files. This is a feature, not a bug! And this will allow you to update a development or live site as often as you need.
- Its a hammer! Keep in mind that there are no file or database merges going on here. Its either all or nothing. So if you clone from a dev site to your live site, and you've asked the script to move the files and the database, then ALL of the files and ALL of the database from the dev site will be moved live. Nothing will remain from the original live site. If you want to merge data you'll need to get your SSH and git skills going asap!
And remember, if this doesn't go the way you thought it would, restore the VPS to the snapshot that our dashboard just created for you!
Can I have root access or sudo for my web site or server?
Yes! For Unmanaged VPSs and Unmanaged Dedicated servers we'll immediately provide you with root access and you can do as you please.
However, for SmartVPSs, which is our Managed hosting option and comprises the majority of our customer service types, the answer to that is yes, you can have root access with caveats.
The key thing to know is that our SmartVPSs are Managed Servers and as such are configured to work with our monitoring scripts, automated SSL certificate installation, security services, and our Dashboard. These scripts ensure your web services are up, are always tuned for high performance, that free SSL certificates are automatically installed, that the permissions allow you to get work done easily and securely, that our clients and our support staff are automatically notified if something is wrong, and that it all works seamlessly with our Dashboard.
On a SmartVPS we will provide you with root or sudo access with these caveats:
- Do not change httpd or virtual host configurations except through our dashboard. If you need to make changes that are not available via the dashboard please email those requests to support@brownrice.com and we can make those changes for you (if they won’t break our automated systems.)
- Do not setup up any services (i.e. Node and/or Dockers!) that use ports 80, 443, 3306, 22, or 25. i.e. Do not setup any services that conflict with any of the SmartVPSs existing service ports as that'll break things on our end and cause our monitoring script to alerts us and then we'll be upset because we'll have to deal with it, and you.
- Do not change MySQL configurations anywhere other than via phpMyAdmin through our dashboard.
- Do not add, modify, or remove user accounts anywhere but via our dashboard.
- Do not change permissions schemes or groups.
And finally, if we provide you with root or sudo access and you break things - your things or our things or anything - we'll switch your account over to be an Unmanaged server. And that's OK! But with an Unmanaged server you'll need to install your own SSL certificates, fix things if they break, secure the server, and you won't have our sweet dashboard intregration to configure things. But since you'll already have root access then you are clearly a command line ninja so you can do all of this from the command line yourself!
What are VPS Snapshots?
VPS Snapshots allow you to take a "snapshot" of your VPS at any moment in time, save it, and revert your live VPS back to that state whenever you like. Additionally, we automatically save and store a snapshot for three nights for you so that you can revert back to a previous version of your VPS quickly and easily via one of these stored snapshots.
Note: Snapshotting is only available to our Generation 7 VPSs which includes all VPSs (managed or non-managed) that were created from summer 2019 on.
How to use VPS Snapshots
Access Snapshots:
- Log in to your Dashboard
- Navigate to VPS HOSTING
- Select your Gen7 VPS: yourvpsname.com
-> Click Manage (green button) - Go to the Snapshots

- From there you can view existing snapshots, create new snapshots, lock snapshots, delete snapshots, and restore snapshots.
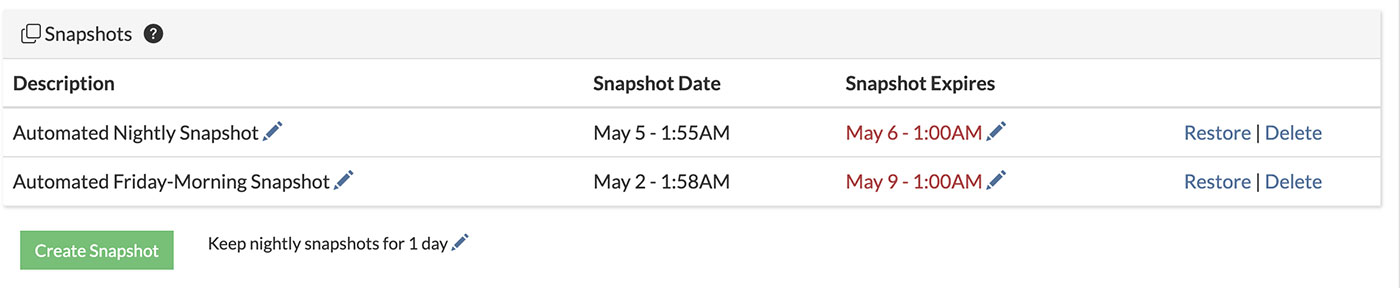
You can also change the number of days that we'll retain your snapshots from the default 2 days to any number of days that you like. Keep in mind that snapshots your first three snapshots are free (last night, last friday, and last month), any above that are charged $1.00 US per month snapshot for all snapshots, calculated on the 1st day of each month.
Note: Locking snapshots will prevent our snapshot cleanup scripts from deleting your snapshots.
My web site isn't using the SSL certificate that has been installed. How do I force visitors to only be able to visit the SSL version of my site?
Force SSL version of your site
You can force all visitors to use the secure version of your site by uploading this to your docs/.htaccess or public/.htaccess file:
RewriteEngine On
RewriteCond %{HTTPS} off
RewriteRule ^(.*)$ https://%{HTTP_HOST}%{REQUEST_URI} [L,R=301]What is the Brownrice backup schedule?
We provide full server OS and root directory backups for all services and plans:
- Daily backup, taken at 12:00AM (GMT) that we maintain for Seven Days.
- Monthly backups, taken on the first of each month and maintained for Three Months.
How do I access the file manager through my browser?
- Log in to your Dashboard
- Navigate to VPS HOSTING
- Select your VPS: yourvpsname.com
-> Click Manage (green button) - Go to the SSH Users
- Click Add User to add a user if you don't already have one. Add a username and password in the modal and click Save.
- Click File Manager in the VPS details menu, then Click Open File Manager (green button).


- Enter the credentials of the user you just created, and your in! Now you can manage your files.
Done!
How do I redirect a website I own to another URL?
Redirect a website URL to another URL
Lets say you own "mydomain.com" and want visitors who go here to land on "theirdomain.com".
For a Gen7 VPS:
- Make sure DNS is set up and the website is using our nameservers
- Log in to your Dashboard
- Navigate to VPS HOSTING
- Select your VPS: yourvpsname.com
-> Click Manage (green button) - Go to the Web Sites
- Click Add New Website or Subdomain to this VPS (green button) or if this is already complete, move on to the next step.
- Then in the public directory of that website (/home/domains/mydomain.com/public) add these lines of code in place of the contents within index.php:
<?php
header("Location: https://theirdomain.com/");
?>
Done! This allows us to safely redirect the traffic from one site to the other.
Note: You can do this on Gen6 VPS's as well, you just need to modify the directory to path to look like this:
/home/domains/mydomain.com/docsCan I increase the security of my email with DKIM and DMARC?
DKIM (DomainKeys Identified Mail) can be enabled for your email domain and will help prevent email spoofing by adding an encrypted key to the headers of all outgoing email.
DMARC (Domain-based Message Authentication, Reporting & Conformance) must also be set up. DMARC works by creating rules for receiving mailservers to check your email against in case it doesn't meet authentication requirements or breaks the DKIM policy.
Simply put, DKIM adds a layer of security to your email and in some cases can improve your deliverability with certain providers.
If you want to enable DKIM/DMARC, it will cost an $3.95/month and is valid for the entire email domain. Just email support@brownrice.com and we will take care of the rest.
How do I administer my Gen 7 SmartVPS?
Brownrice Generation 7 SmartVPSs are powerful machines that can be fully administered via the Brownrice Dashboard at https://dashboard.brownrice.com
Here is a list of things that you can do there:
- Add new web site or subdomain to your VPS
- Create new FTP or SSH/SFTP user account
- Access phpMyAdmin and MySQL databases
- ssh to the machine
- Create a cron entry
- FTP to your VPS to add new site files
Paths to important things:
Document Root (all sites live in the /home/domains/ directory)
/home/domains/yourdomainname.com/public
http://www.yourdomainname.com/MySQL
How do I create new FTP or SSH/SFTP user account?
Create new SSH/SFTP user account:
- Log in to your Dashboard
- Navigate to VPS HOSTING
- Select your VPS: yourvpsname.com
-> Click Manage (green button) - Go to FTP/SSH Users or SSH Users (depending on the Generation of your VPS)
or - Click Add User (green button)
or - Select a username and password
- Save
Done!
You can now use this user to SSH into your VPS, connect your SFTP program and other third party programs to your VPS.
What is a GeoSync Cluster?
Our GeoSync Cluster is a fully automated, three-VPS cluster of servers spread across three data centers, in three different timezones. If one data center goes offline your web site's traffic will be automatically redirected to the remaining data centers, ensuring no downtime. It is the ultimate hosting platform for those seeking redundancy, reliability, and ease-of-use.
Is this GeoSync Cluster hard to use?
No! If you are a web site user (i.e. Wordpress, Joomla, custom code, etc) or developer and your web site is hosted on our GeoSync SmartVPS Cluster service you might actually not notice the difference between it and regular hosting. The service is fully automated (and amazing!) and comes with managed support if issues or questions arise.
How does it work?
We setup three SmartVPSs for your website; one in our Taos data center, one in a Los Angeles data center, and one in a New York data center. Then we migrate your web site into this cluster and configure MariaDB Cluster and Filesync Cluster instances that automatically sync your web sites files and database data between the data centers in near real-time, which ensure that your site is the same in all three locations, at all times. Finally, we configure DNS so that an outage to any one of the SmartVPSs will result in all traffic being automatically routed away from the downed location. When the outage is over the SmartVPS that was removed from the cluster pool automatically re-syncs its file system and data base data, rejoins the cluster, and DNS then includes it again in the traffic load balancing rotation.
Does this work with Wordpress?
Oh yeah, it works great with Wordpress as well as just about any type of hosted web site, web site CMS (Joomla, Drupal, etc), or custom coded web site.
Is this for everyone?
Nope! If your website has a ton of small files that are being written to very frequently this is not the service for you. If your developer requires root access, this is also not the service for you. This is also not a service for Node.js applications.
Does this work with git?
Yes! But with caveats. Like all file syncing protocols where file changes are validated and then synced across distance there is some latency (0 to 3 seconds.) Git unfortunately demands zero latency as git uses a lot of fast, temporary files in order to determine the current status of your repository. The work-around is for us to help you configure your web site so that your git code repository is outside of the auto-file sync directories. i.e. Git code would live in one directory while user generated content directories would be auto-synced in another directory. You'll then pull your git code to each SmartVPS, or better yet, configure auto git pulls so that code releases are automatically deployed to each SmartVPS. This is actually a lot easier than it sounds and we can help walk you through the setup and process.
Is it scalable?
Yes, absolutely! Just like our standalone SmartVPSs our GeoSync Clusters can scale from 2GBs of memory with 1 CPU to 72GBs of memory with with 18 CPUs per SmartVPS (there are three in a cluster.) Upgrades and downgrades can be manually enabled via our Dashboard and applied within minutes or AutoScale can be enabled to detect high load events and do this for you.
How much does it cost?
Prices start at $99.80 per month per web site for a GeoSync Cluster with three SmartVPSs with 2GB of RAM and 1 CPU on each. Cost increases as your SmartVPSs resources are scaled up, but the base level cluster will handle a web site with a decent amount of traffic. There is also a $199.00 one-time migration fee.
How do I get started?
Just contact us and let us know that you are interested. We'll review your site to ensure compatibility and if everything checks out we'll coordinate a day and time to migrate your web site into your new GeoSync SmartVPS cluster. We are migration specialists and there will be no downtime. And we can work with any developers that you may have working with you to ensure a smooth transition.
How do I create a new Smart VPS?
Adding a new Smart VPS can be done anytime from within your Dashboard.
To Add a New SmartVPS:
- Log in to your Dashboard
- Navigate to VPS HOSTING
- Click on Add a New SmartVPS (green button)

- Enter a Host Name
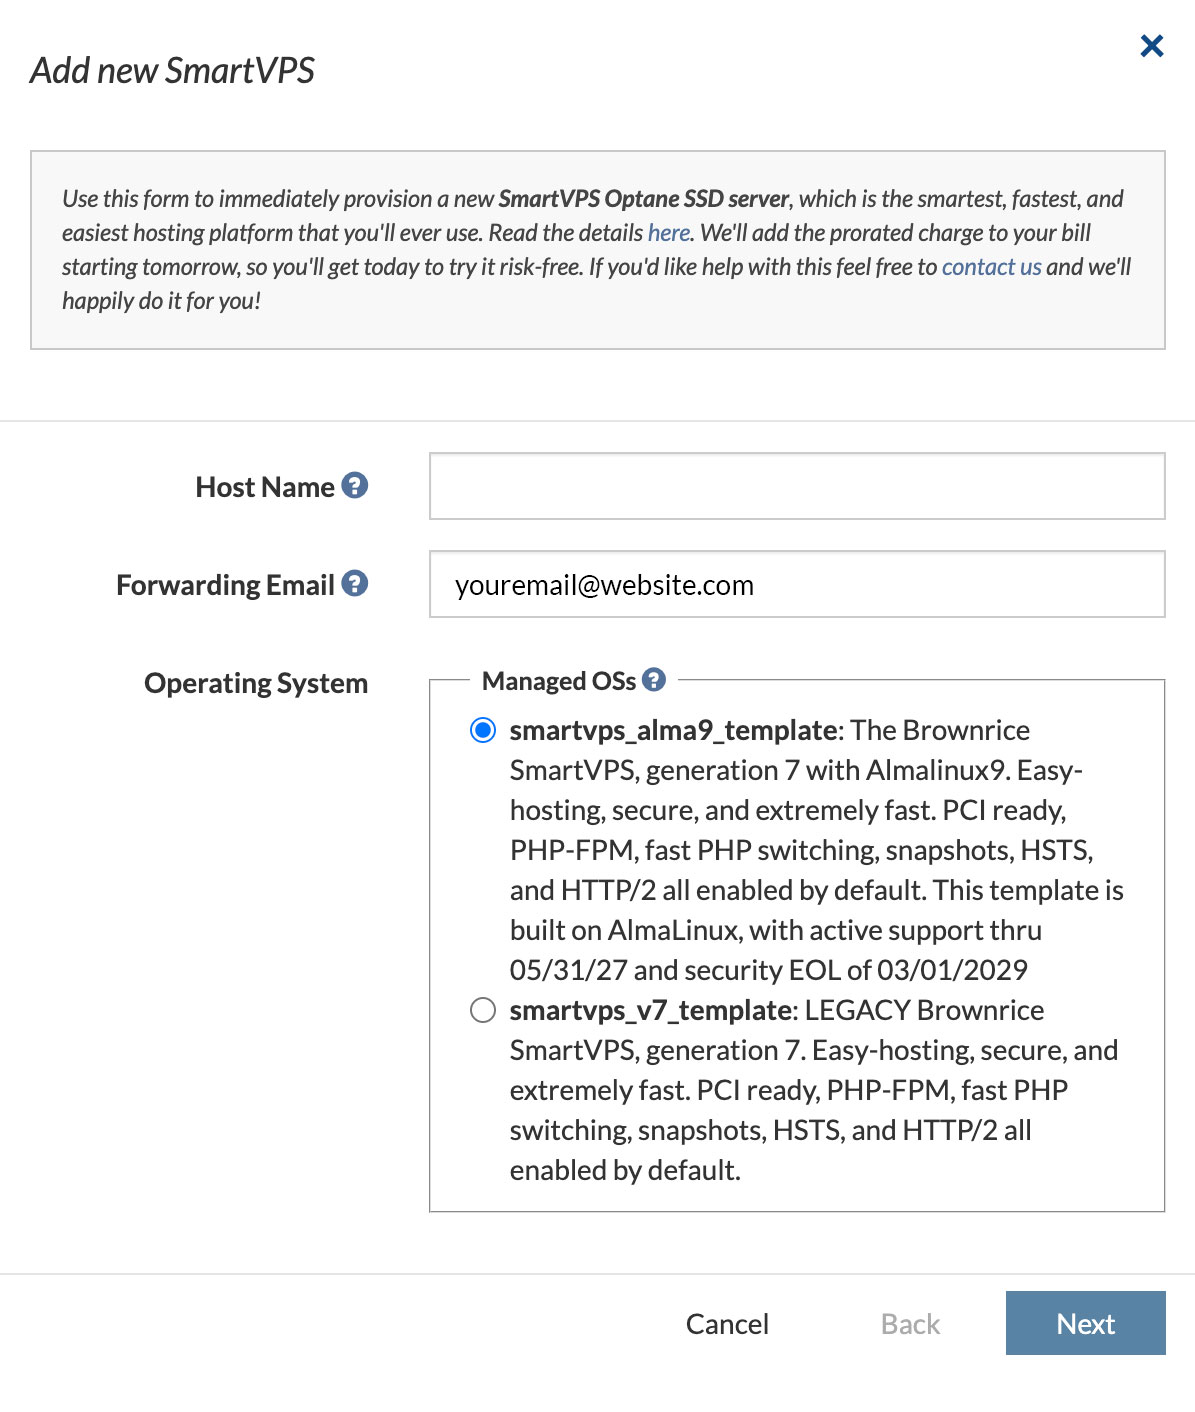
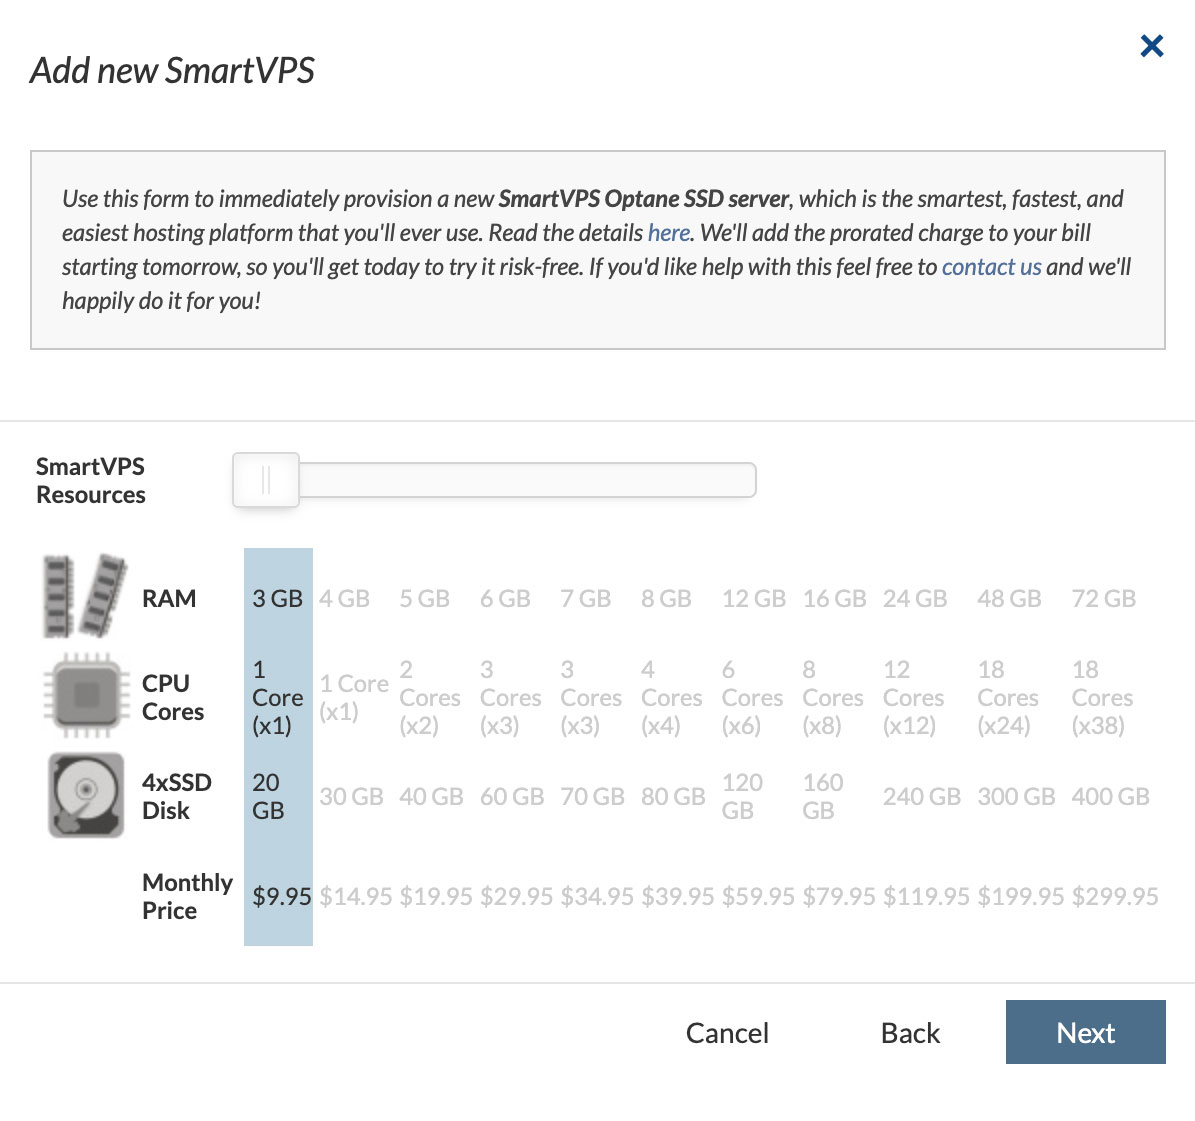
- Set Resources
- Spawn VPS
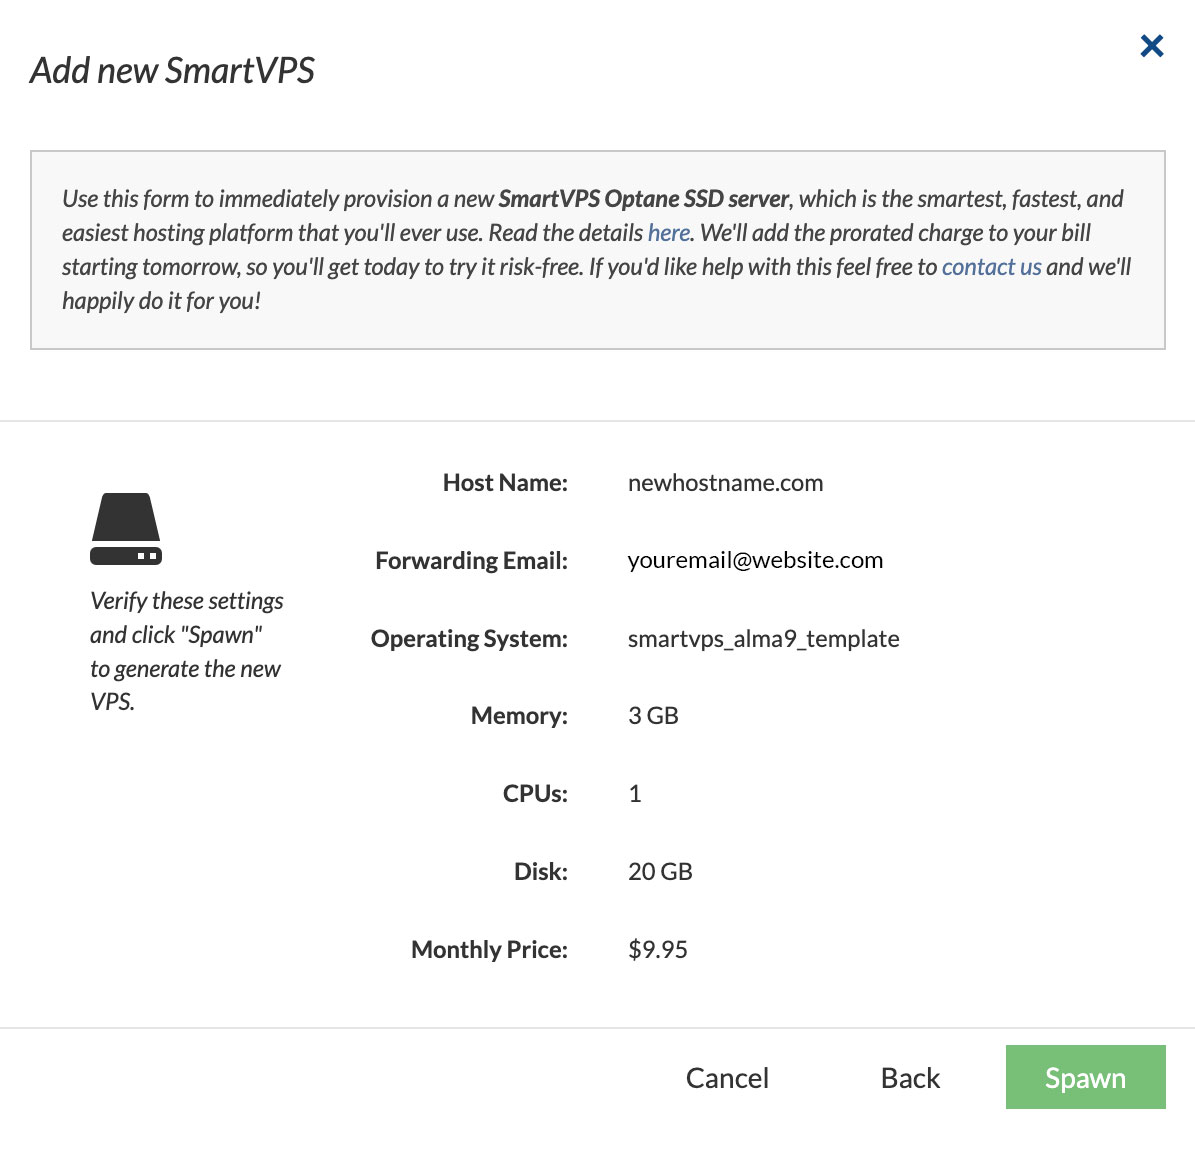
Done!
Note - this will take a few minutes to complete.
See also https://support.brownrice.com/content/2/202/en/how-do-i-administer-my-smartvps.html
How do I let a domain expire/remove it from my account/wish it didn't exist?
If for any reason you no longer need a domain or website on your account, here are the steps you can take to make sure the job is done.
- Log in to your Dashboard
- Navigate to DOMAINS
- Select the Domain that you want to remove: yourdomain.com
-> Click Manage (green button)
- Go to Renew Domain

- Select Let Expire on the Payments Page

- Type in your Name to Confirm

- Click Continue, then an additional dialogue box pops up, Click OK (we want to make certain you are removing the domain)

- You will see a confirmation message, which means your domain is all set to Expire!

Done!
As always, if you need additional support with this topic, reach out to support@brownrice.com
How do I reset my WordPress password?
Do you have a WordPress site with Brownrice, but don't know your WordPress admin password? This FAQ will guide you through getting your access back.
If you know the email address associated with your WordPress admin user, you can reset the password the easy way. If not, skip to the advanced method below.
The Easy Way (using the Wordpress reset password link):
If you know your WordPress admin email, or think you might know what email you used to set it up, you can easily request a password reset from the admin login page for the site:
- Navigate to: yourdomain.com/wp-login.php
Note: be sure to replace yourdomain.com with your actual domain. - You should see a login page like this:
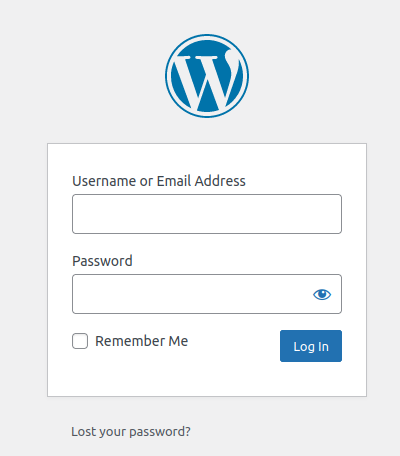
- Click Lost your password? That will take you to a page that looks like this:
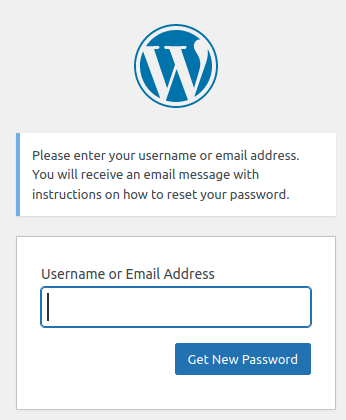
- Enter your email address and click Get New Password
- Check your email, there should be an email from your site with instructions on how to complete the password reset process. That's it!
Done!
The Advanced Method:
The Advanced method requires that you have a bit more skills, but anyone with BRI Dashboard access should be able to follow along:
- Log in to your Dashboard
- Navigate to VPS HOSTING
- Select your VPS: yourvpsname.com
-> Click Manage (green button) - Go to the Databases
- Click the "eyeball" next to the Password filed to view the MySQL root password
- Click the phpMyAdmin link and login with user name root and the password you just viewed.
- Once logged in you should see a screen like this:
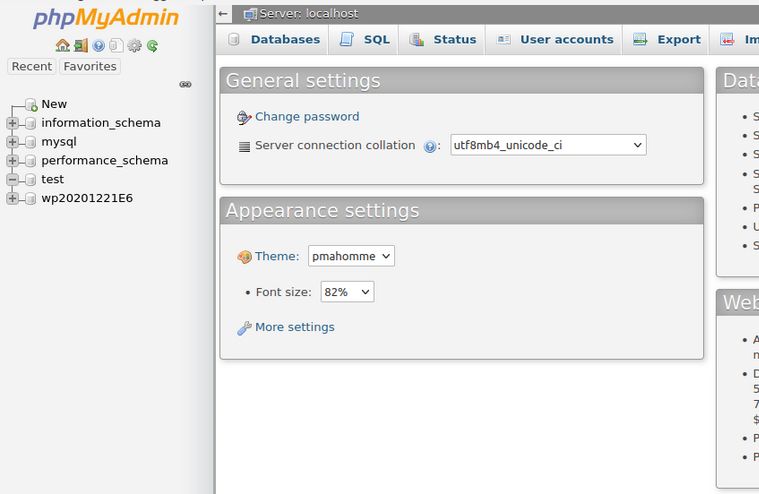
- Locate your database on the left hand side. If you only have 1 WordPress site on the VPS, it should be easy to find, it will begin with "wp20..." Note: If you multiple WordPress sites on the same VPS you can figure out which database is for which site by opening the WPoptions table in each database. The "siteurl" value in that table will tell you which site the database is for.
- Click the + icon next to your WP database, this will expand the tables to look like this:
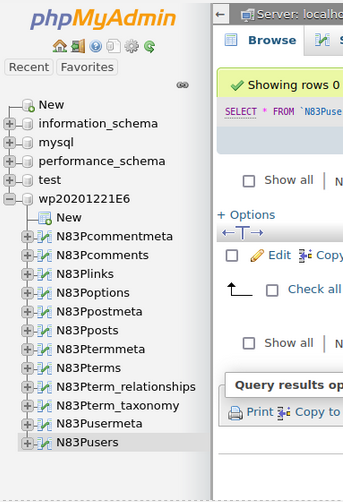
- Select the WPusers table, your prefix will probably be different as that is randomly generated. In this case the table is called "N83Pusers". Once selected you should see a list of WP users:
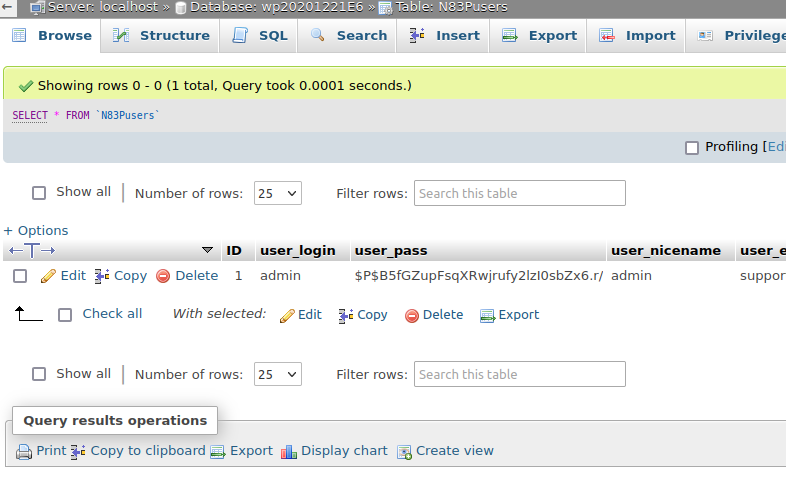
- In this case there's only a single user with the name "admin", but find your admin user and click Edit. This should take you to a page like this:

- In the user_pass field, delete whatever password is there. Replace it with whatever you want your new password to be. At the same time click the Function dropdown and change it to MD5 for the user_pass field. It should look something like this:

- Click Go in the bottom right hand side to apply your changes.

Done! That's it! You should now be able to login with the WP user that you reset the password for.
If you have any issues with this, or just want us to handle this for you, please contact Brownrice support!
How do I connect my Brownrice registered domain to Squarespace?
Step 1 - Start the connection in Squarespace
The following steps must be done within your SquareSpace account.
To connect your domain, start in the Domains panel:
- Open the Domains panel. Or, if there's a ? in the top-left corner, open that menu and click Domains.
- Click Use a Domain I Own.
- Enter the full domain name you're connecting in the Enter Domain field, then click the arrow.
- Click Connect Domain.
- Select your domain provider. For a Brownrice registered domain, select Other.
- Click Connect Domain.
- In the message that appears, click Continue.
Step 2 - View your DNS settings in Squarespace
The following steps must be done within your SquareSpace account.
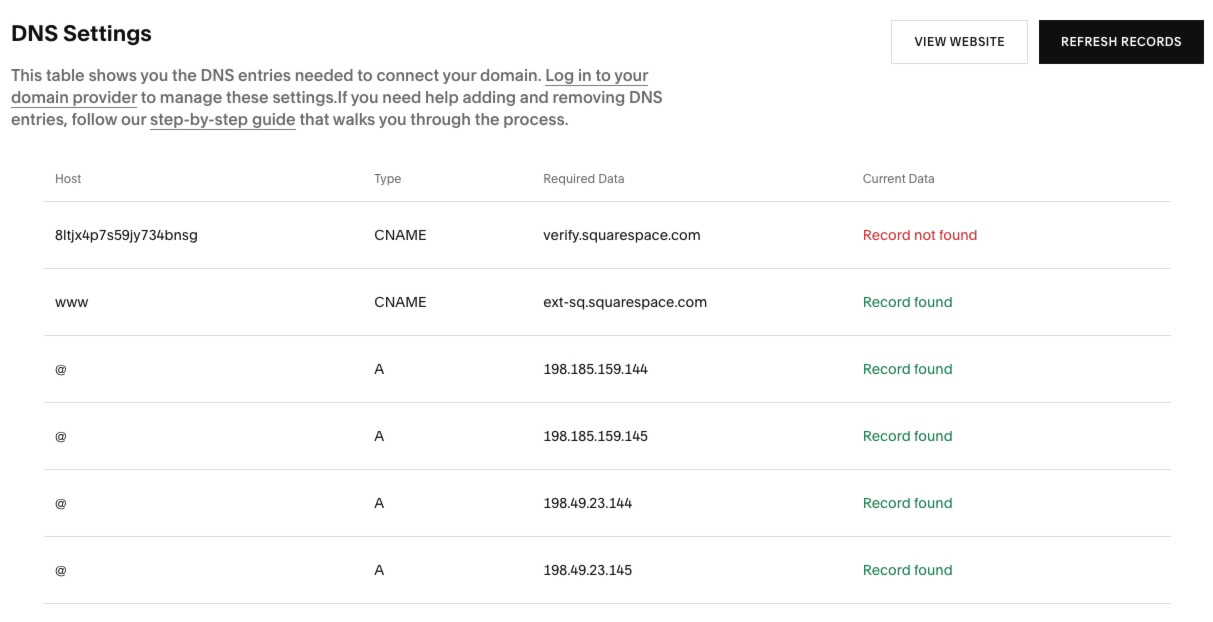
After you click connect, the DNS Settings panel will appear. This panel shows the records you need to enter in your Brownrice account.
Your domain records may be green or red, depending on the DNS information that Squarespace receives from Brownrice.
Use your unique Squarespace DNS settings and not those shown in the screenshot below:
Step 3 - Log into your Brownrice Dashboard and setup the required DNS records
The following steps must be done within your Brownrice account.
- Log in to your Dashboard
- Navigate to DNS
- Select your Domain: yourvpsname.com
-> Click Manage DNS (green button)
- If no DNS is configured, Click here to get this setup and add your domain to the DNS.

- You’ll be taken to a DNS zone editor page like this (this example is for domain: bridashboard.com):
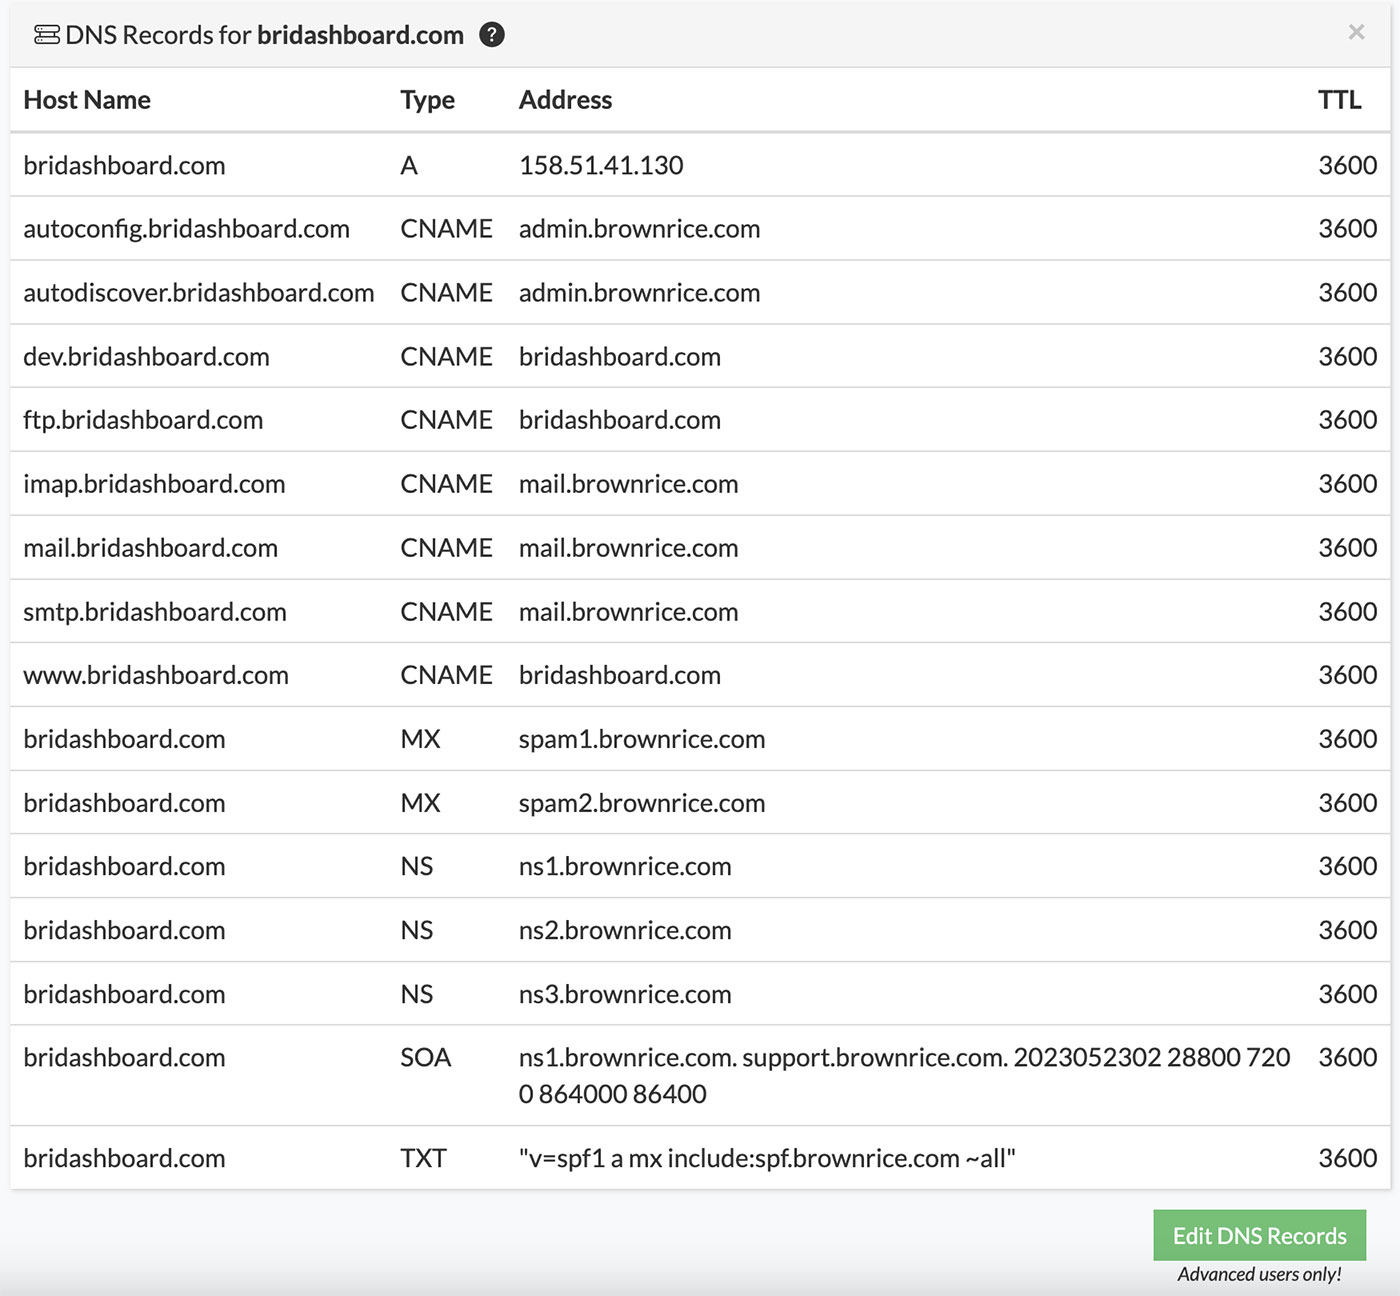
- -> Click Edit DNS Records to add or modify records based on your Squarespace values.
Step 4 - Add the first CNAME Record
Use the DNS settings from SquareSpace in Step 2.
Copy the unique code under "Host" on the first line and point it to verify.squarespace.com.
In Brownrice, create a CNAME with these values:
| Host Name | Type | Address |
| Copy and paste the unique code under Host | CNAME | verify.squarespace.com |
Note: If this CNAME is missing or incorrect, your domain will unlink after 15 days. If that happens, you can start over.
Step 5 - Add the second CNAME Record
Use the DNS settings from SquareSpace in Step 2.
Use "www" as the Host and point it to ext-cust.squarespace.com.
Edit any existing www CNAME if needed.
| Host Name | Type | Address |
| www | CNAME or CNAME Alias | ext-cust.squarespace.com |
Step 6 - Add the A records
Use the DNS settings from SquareSpace in Step 2.
Use @ as the Host for each A record and input the four IPs:
| Host Name | Type | Address |
| @ | A | 198.185.159.144 |
| @ | A | 198.185.159.145 |
| @ | A | 198.49.23.144 |
| @ | A | 198.49.23.145 |
This is how it should look in Brownrice:
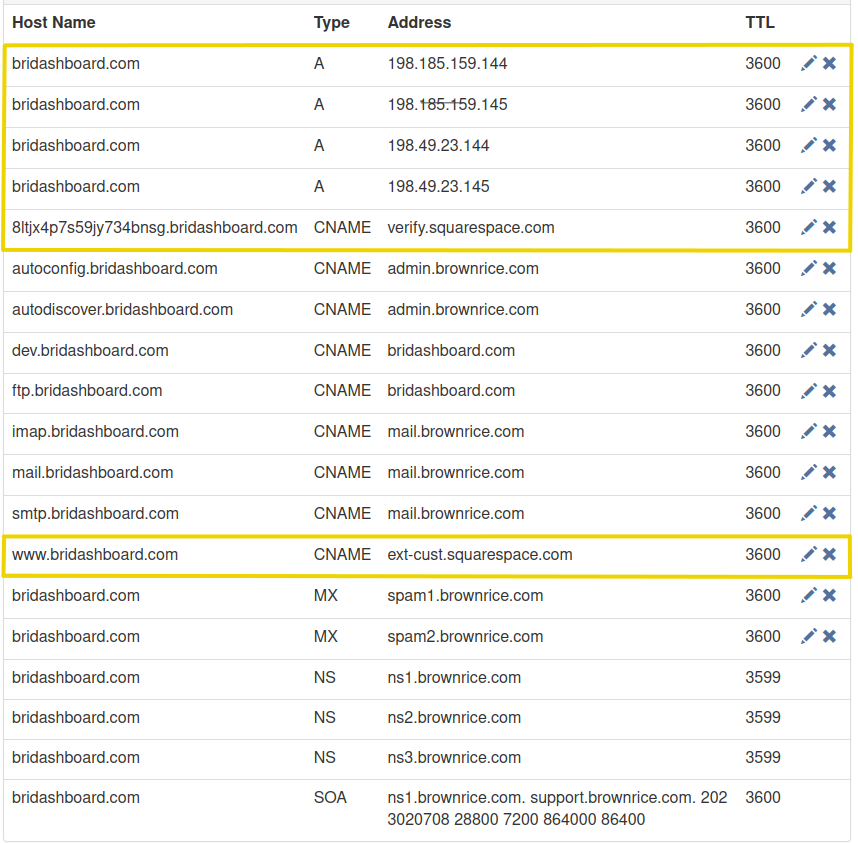
Other default records for email can remain as-is.
Step 7 - Wait for the connection to complete
You're done! It can take 24 to 72 hours for everything to propagate. You can monitor the connection in the Squarespace Domain overview panel.
If any of this is overwhelming, we can do it for you for a 1-time $59 fee. Submit a support request with your Squarespace login and the domain to connect.
Brownrice Wordpress Management
What is Brownrice Wordpress Management and the Hack Clean Guarantee?
Worry free software updates: When you sign up Brownrice Wordpress Mangement we'll update your Wordpress core software, as well as all plugins and themes each month, ensuring that your site is always running the freshest software. This also helps ensure that your site doesn't get hacked...
Hack Clean Guarantee: We'll install malware software that alerts us in case hacker code is detected in your site (it won't be since we'll be updating your software) so that we can spring to action and get the hacker out of your site, at no additional charge to you.
Performance Bottle Analysis: If your Wordpress site is running slowly you can have one of our Wordpress specialists identify performance bottlenecks so that you can get things fast again.
Monthly Reporting: We'll also send you a monthly report detailing everything we've done.
And all of this is included in the monthly price. That monthly price is $9.95 per month for the first site on a SmartVPS, and $4.95 per month for each additional site on the same SmartVPS.
Just shoot us an email to support@brownrice.com if you'd like to get signed up!
How do I change the firewall rules for my SmartVPS?
The Brownrice Dashboard has a firewall editor available on all Gen7 VPSs. By using this firewall editor you can easily edit the firewall rules for MySQL(port 3306) and SSH(port 22) to allow, block, or restrict access over that service/port.
Edit your Firewall Rules
- Log in to your Dashboard
- Navigate to VPS HOSTING
- Select your VPS: yourvpsname.com
-> Click Manage (green button) - Go to the Firewall

- A menu will appear below showing the SSH and MySQL firewall rules (Allowed, Blocked, or Restricted).
- Allowed: Access allowed for all IP addresses.
- Blocked: Access blocked for all IP addresses.
- Restricted: Access restricted to only those IP addresses added to rule.
- To change a rule status, Click the pencil icon

- Select your desired rule status from the drop-down menu
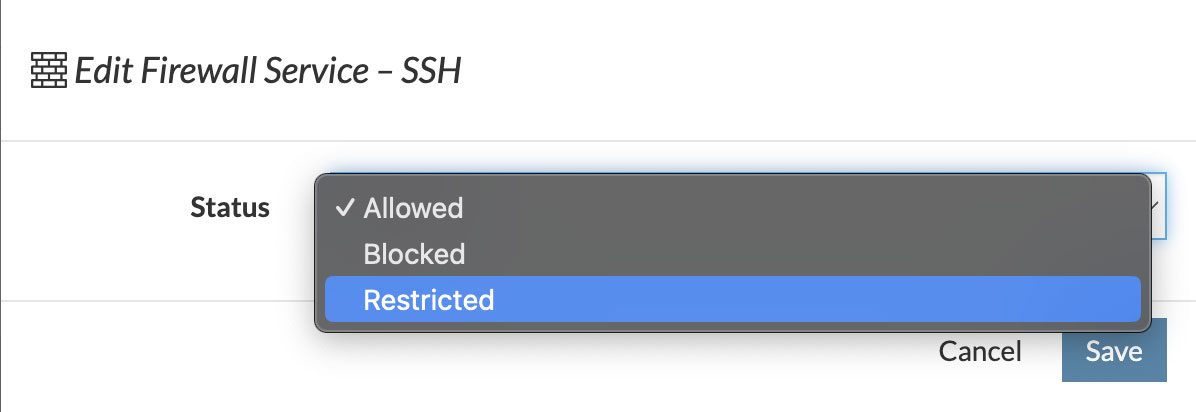
- To add an IP address to the Restricted rule, Click Add IP and input an IP address to give it firewall access.
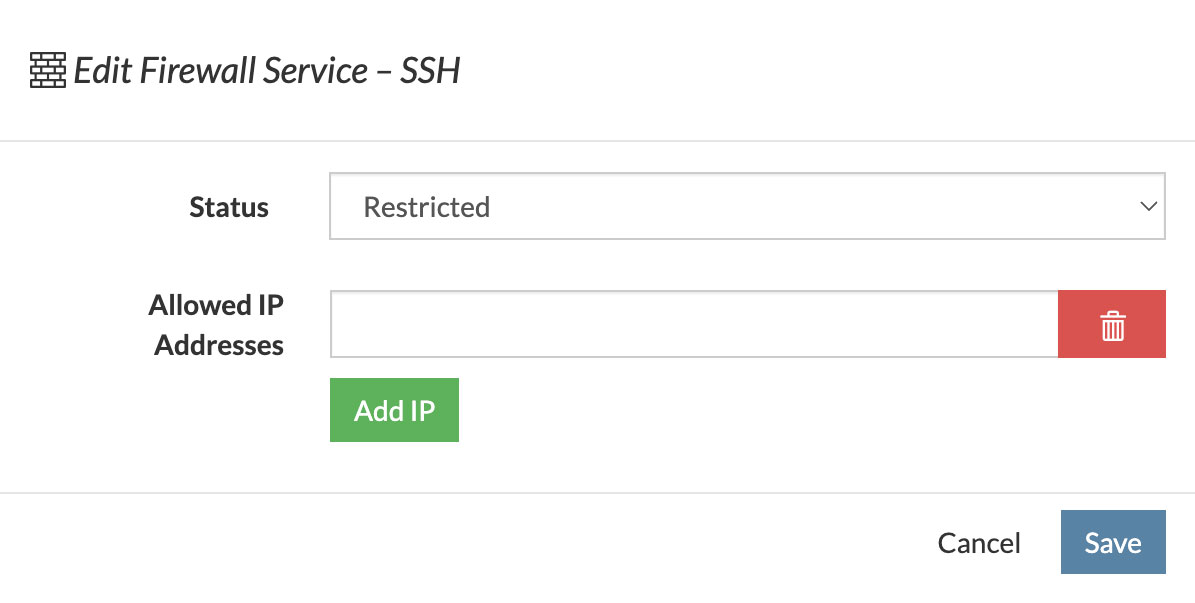
Tip: If you just want to allow or block a single IP address, leave the IP Subnet dropdown set to /32 (Single IP). If you want to allow or block a range of IPs, select an option from the dropdown that corresponds to the number of IPs you’d like the rule to cover. The start and end IP addresses of the range will be shown underneath the dropdown after you make your selection.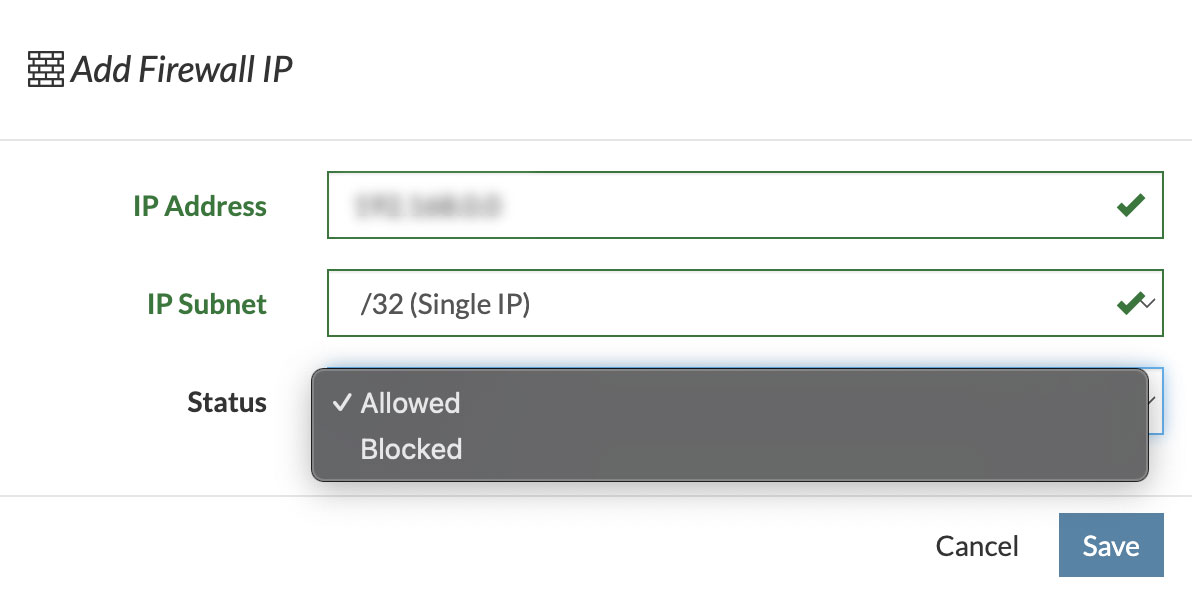
- Click Save. It may take up to 10 or 15 seconds before the changes are reflected on the Dashboard.
Done!
If you suspect that you've been locked out of your server by our security software, or if the firewall isn't behaving the way you think it should, click the Flush Firewall Rules button and all dynamic additions to the Firewall will be reset.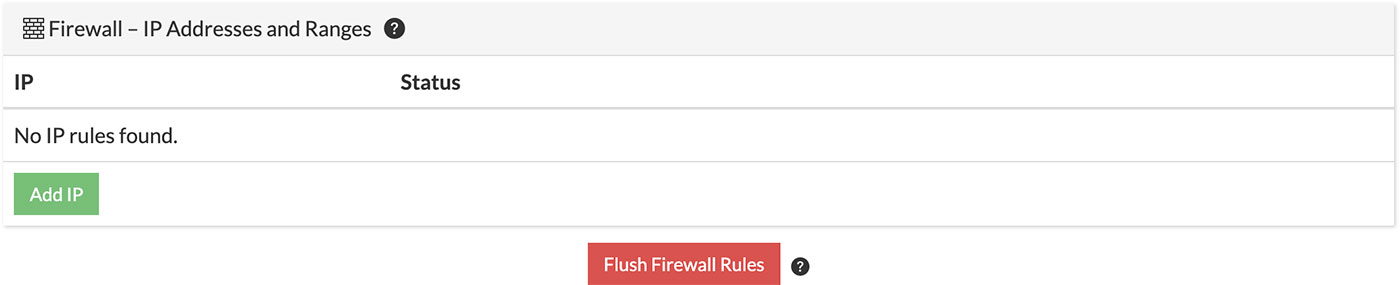
How do I add or update my accounts' current payment method?
Update your payment method and add new credit card details
- Log in to your Dashboard
- Navigate to BILLING
- On the right side of the Billing section will be Payment Details. If you already have payment information saved, the options will be Update Payment Method and Remove Payment Method. Otherwise, it will look like this:
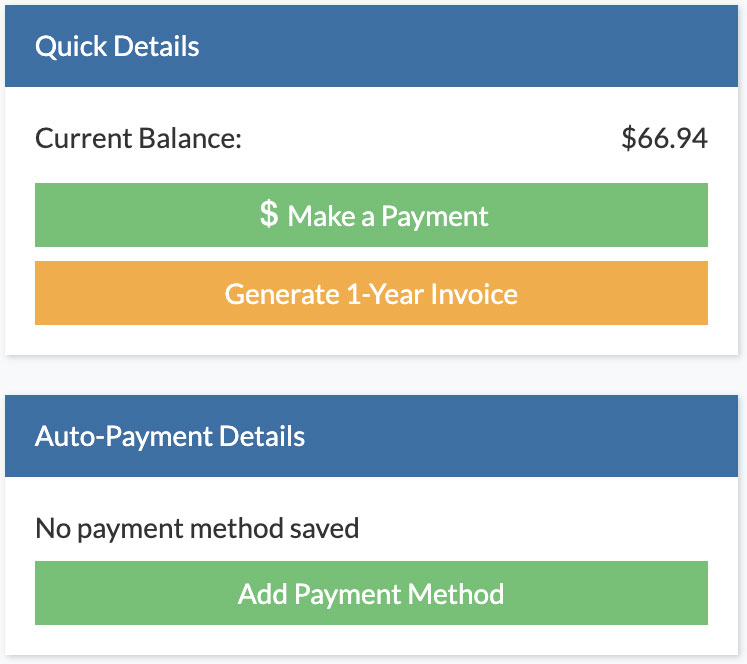
- Click Add Payment Method and fill out the form with your Credit Card Information, First and Last Name, and click Update Payment Method.
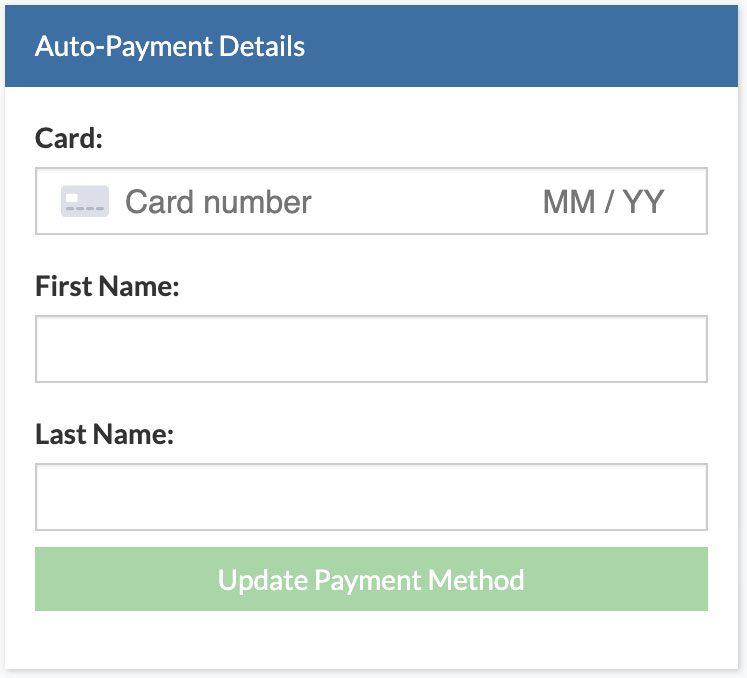
- All done! Your new CC info will be saved and used as payment for your next bill.
Is my SmartVPS PCI compliant?
Q: Is my VPS with Brownrice PCI compliant?
A: Your Brownrice SmartVPS is PCI Ready. This means that the base VPS, as we spin it up from our template, has been hardened and will pass PCI scans out of the box.
However, this does not mean that your VPS with your website and content on it will pass scans.
-----
Q: If I fail a PCI scan, can Brownrice help me get a passing server scan?
A: If you fail a server scan please contact Brownrice support. Our support staff will make sure you are on the latest PCI Ready template and everything is fully up to date.
From there you can re-scan the site and it will usually pass.
In some cases with custom applications, or depending on the scanner, some additional work might need to be done. In these cases we have additional monthly PCI services available, and once signed up for our monthly vulnerability scan support and server remediation service we'll ensure that you get a passing scan.
This is a monthly service, which means that if your site requires monthly or quarterly scans that we'll maintain your scan compliance for you. If the scanner finds any issues with your website that need attention, we can also work with your developer to help get those issues resolved.
-----
Q: Is there anything else (in addition to passing server scans) that I need to become PCI compliant?
A: Yes. A passing server scan is only one piece of the puzzle when it comes to making your business PCI compliant. Fortunately we have a whole suite of PCI services and are here to assist you with the entire process. Here are the main things that you will need:
- Passing server-side scans (see above)
- Completion of the PCI SAQ (a 180+ question self answered questionnaire) for your business type and payment methods.
- Documentation, including various security policies, employee policies/training, and whatever else your particular SAQ requires.
- A suite of security tools installed on your server, including malware detection (Maldet / ClamAV), rootkit detection (RKhunter), FIM (File Integrity Monitoring), SIEM (Security Information and Event Management), IDS (intrusion detection system), and connection to a central logging server to meet current requirements.
- Maintan a monthly server audit/review, reviewing the output of said security software, as well as a general server/log review to ensure no bad guys have gotten in.
-----
Q: That sounds like a lot, can Brownrice manage this all for me?
A: Yes!, We have an entire suite of monthly PCI services and will handle all of it for you. Pelase contact our support for more information, we'll ask you a series of questions regarding your business, accepted payment methods, and practices and can give you a detailed quote on what it will take to get you compliant.
How do I lookup my website or VPSs IP address?
Brownrice SmartVPSs are powerful machines that can be fully administered via the Brownrice Dashboard. Each VPS comes with its own, dedicated IP address.
To find your dedicated VPS IP address:
- Log in to your Dashboard
- Navigate to VPS HOSTING
- Select your VPS: yourvpsname.com
> Click the Manage (green button) - See IP address
Done!
How do I enable caching on my Wordpress site?
If you are trying to enable a page cache, database cache, (persistent) object cache. or browser cache on your Wordpress website this article will walk you through it.
Caching is supported by default on the Brownrice SmartVPS platform. Many different caching plugins and methods are supported, but this is our current recommended method.
Caching will speed up your website - however it will also use more memory and disk resources to do so. So keep in mind that if you are doing heavy caching, as outlined in this FAQ, you may start to get VPS performance alerts and be prompted to upgrade your VPS.
Step 1: Login to your wordpress site
- To login to your Wordpress site, navigate to yoursite.com/wp-admin and enter your user/password as prompted:
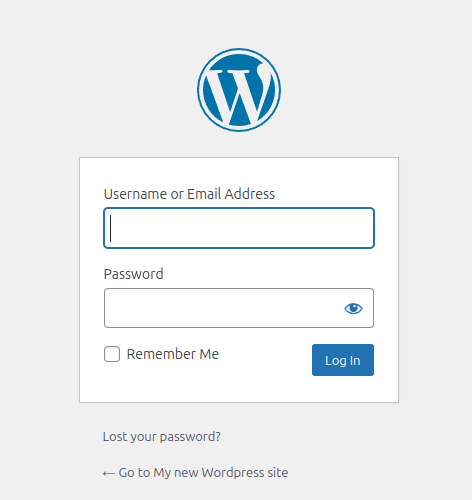
- Navigate to the Plugins menu and click Add New Plugin
You'll find this menu on the left hand side of your admin navigation bar: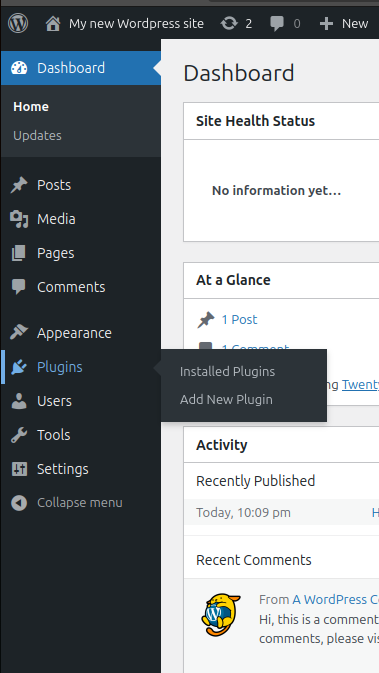
- Search plugins for "W3 Total Cache" and install it. This search bar can be found on the right hand side of the Add Plugins page. Click the Install Now button next to the plugin after you search it:
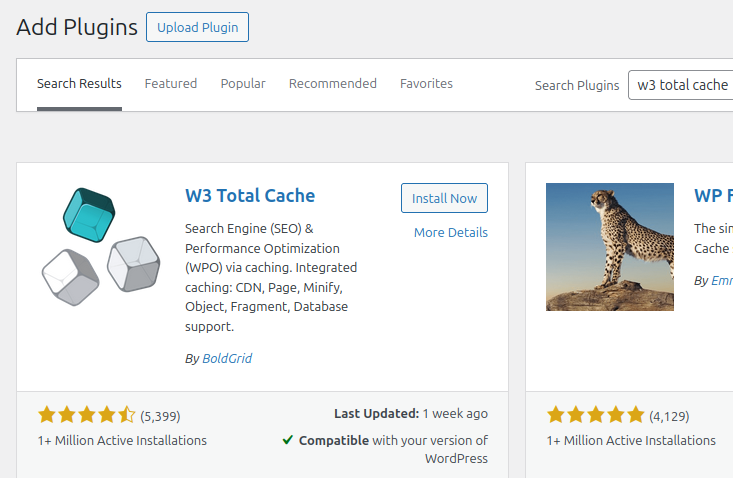
- Activate the plugin. After clicking the Install Now button, you need to activate the plugin. On this same page click the blue Activate button next to the plugin. You could also activate this plugin from the Installed Plugins page, but it's easiest to activate it right away on the same page you installed it from:
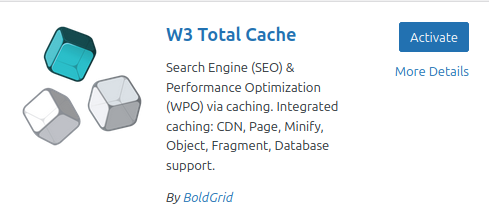
- Configure caching settings. After installing the plugin your browser will automatically take you to the plugins list, and W3 Total Cache will be in that list. Click the Settings link as shown:
- This will take you to the TOTAL CACHE: Setup guide
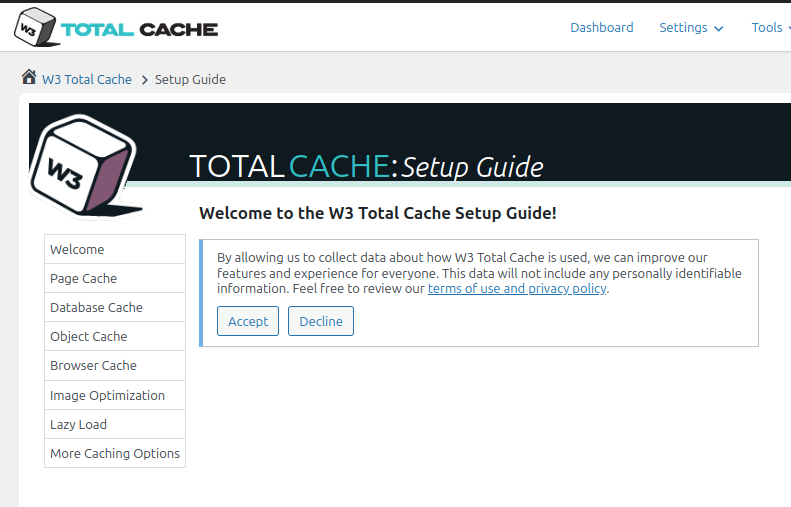
- Click the Accept button to get started. Follow the guide and use our recommended settings:
Page Cache:
Click Test Page Cache and select the recommended caching method. Either "Disk: Enhanced" or "APC" are the best options here. Disk caching will use more disk space, while APC caching will use more memory. Either are a good option for page caching.
Select your desired caching method and click the NEXT button: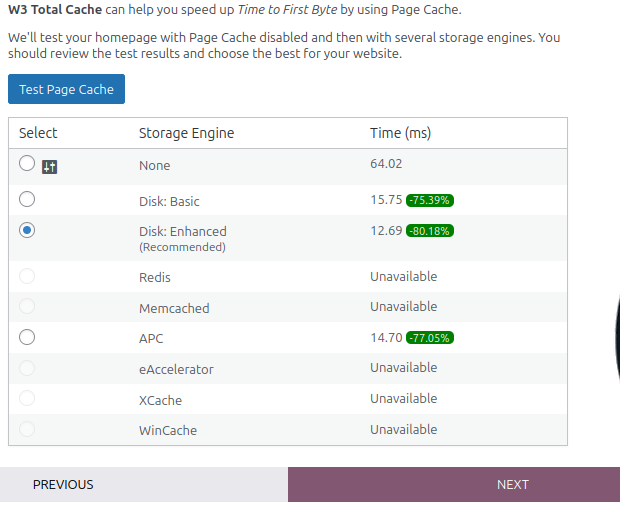
Database Cache:
Click Test Database Cache, then select APC caching method below. APC caching is by far the fastest option here in most cases. Click the NEXT button to go to the next page.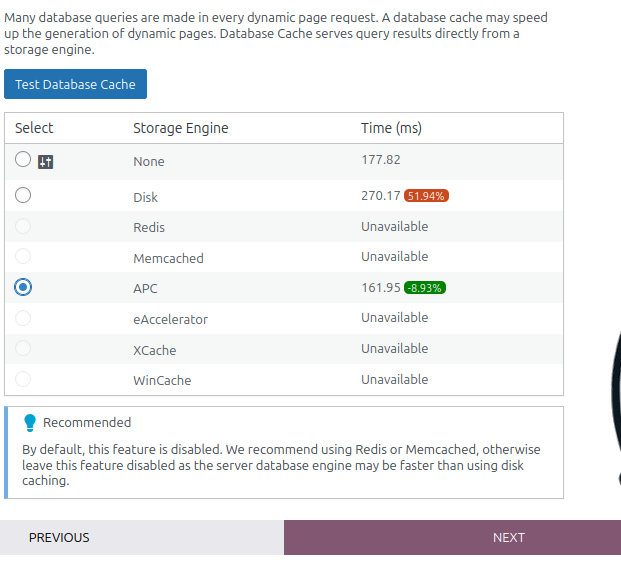
Object Cache
This is also commonly referred to as a Persistent Object Cache. Same as the other steps click Test Object Cache, then select APC caching which is typically the fastest option. Click the NEXT button once done.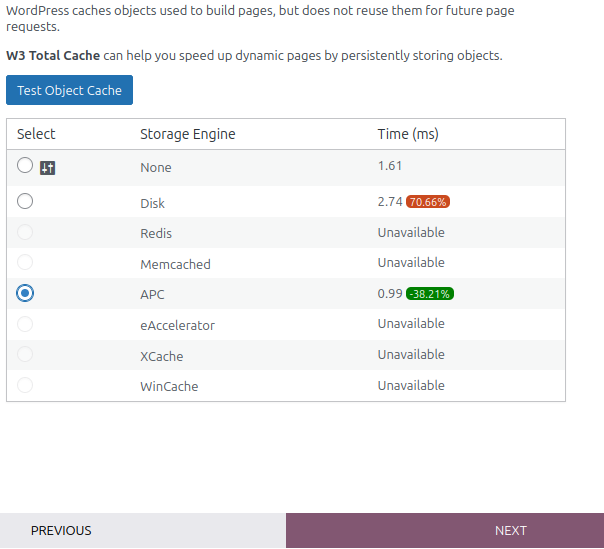
Browser Cache:
Click the Test Browser Cache button, then enable the recommended Cache-Control Header. Click the NEXT button when done: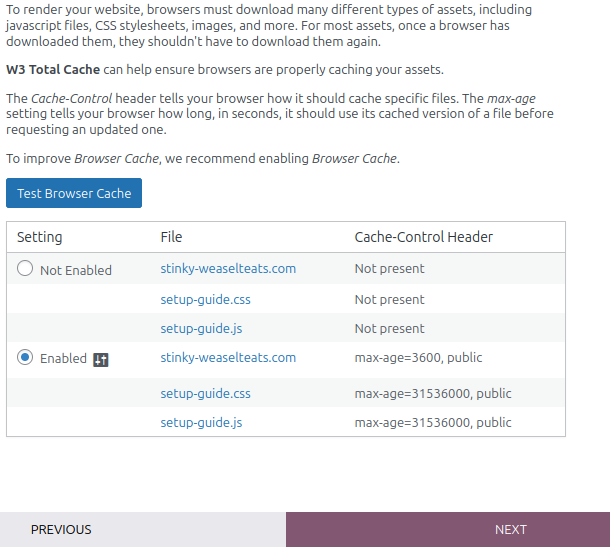
Image Optimization:
Click the checkbox to Enable WebP Converter, and click the NEXT button:
Lazy Load:
Click the checkbox to "Lazy Load Images", then click the "NEXT" button: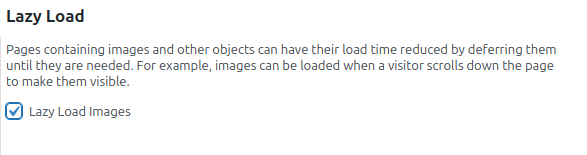
That's it!
You've now enabled every form of caching available on a WP site. Please contact Brownrice Support if you have any questions or issues!
How do I use Cloudflare CDN with my SmartVPS?
This FAQ will walk you through using Cloudflare CDN with your Brownrice SmartVPS!
This article assumes that you already have a live WordPress site with Brownrice, and that you have already created a Cloudflare account.
1. Ensure your site on BRI is configured to use https://:
Within the BRI dashboard, ensure that your Wordpress URL is set to use https:// (not http://). This is important to ensure a seucre connection to cloudflare and avoid issues like redirect loops.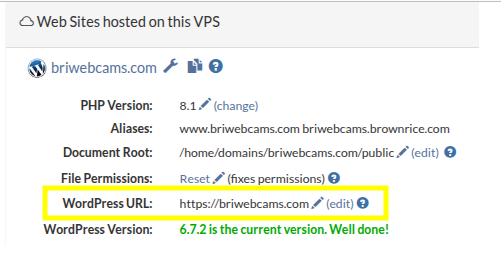
If it's not using https:// already, use our Wordpress URL tool to change it.
2. Setup your domain in cloudflare:
Login to your Cloudflare account, on the Home page Enter your domain where prompted. Keep the default option to "Quick scan for DNS records" checked.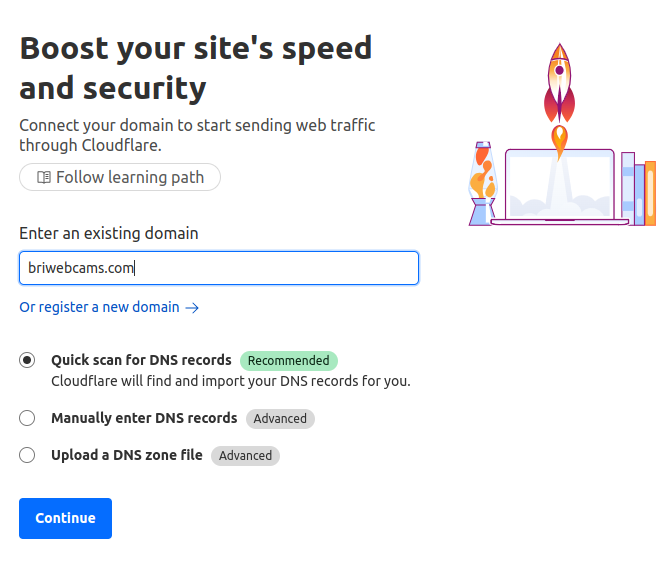
On the next page, select your plan (The free plan works great!), and click Continue: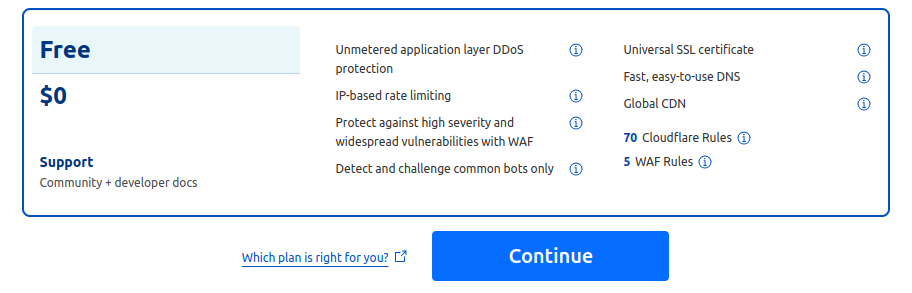
3. Setup DNS within Cloudflare:
The Cloudflare DNS scan should have automatically picked up your DNS records, including MX (mailserver), TXT, and any other records. However, at this time if you are using any custom records (you would likely know if you were), you should ensure those records are in place. Once done, click "Continue to activiation" at the bottom: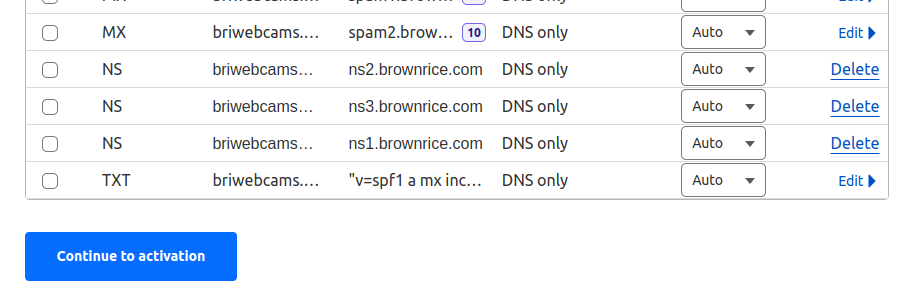
4. Switch your nameservers to Cloudflare:
At this point things are ready to switch your nameservers over to cloudflare. You should see a prompt like this showing you what nameservers to use: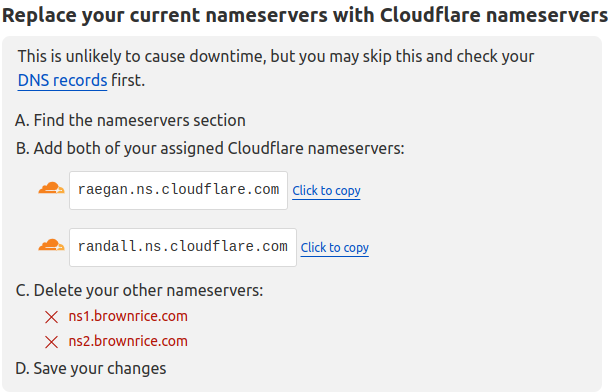
Note: Don't try to use the nameservers shown in this screenshot, Cloudflare will provide you with the nameservers that you should use upon setup and they may be different.
If you use Brownrice to register your domain, this can be done via our dashboard. If you aren't using Brownrice as your registrar, you will have to login to that provider and make change 4.a. there.
4.a. Within the Brownrice dashboard, update your nameservers to those provided by Cloudflare in step 4.
First, login to the Brownrice dashboard.
Navigate to the "DOMAINS" page on the left hand side.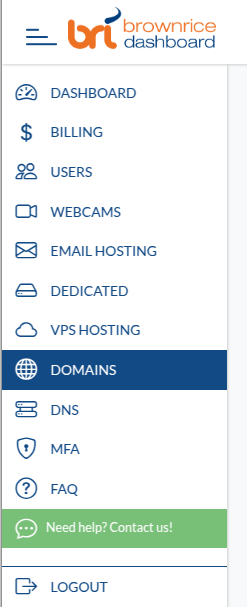
Click the green "Manage" button next to the domain you are using through Cloudflare:
Click the "DNS Servers" button next to your domain.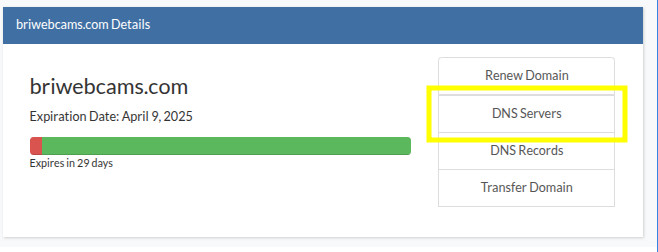
Click the "Edit DNS Servers Button at the bottom: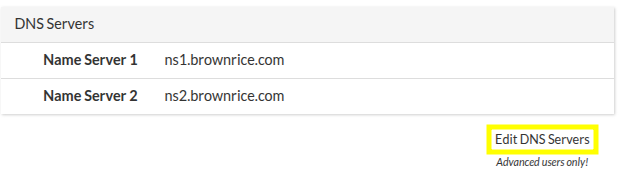
Add the nameservers provided by Cloudflare in step 4. above, then click the red "Save" button: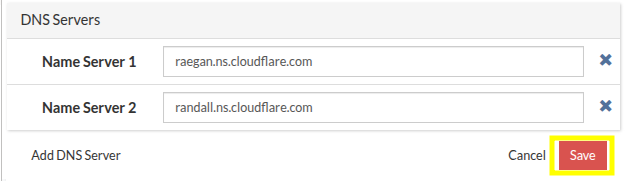
Note: Don't try to use the nameservers shown in this screenshot, Cloudflare will provide you with the nameservers that you should use upon setup and they may be different.
5. Finish the setup in Cloudflare:
Back in Cloudflare, click the "Continue" button at the bottom of the page:
You should see a notice about DNS propagation, like this: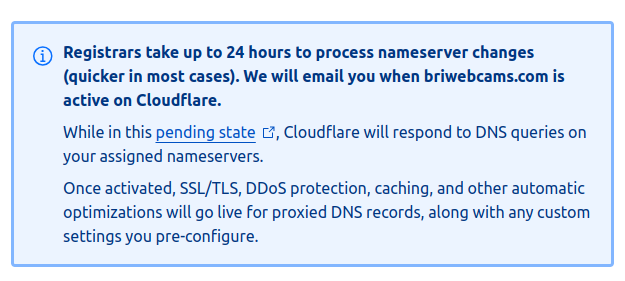
This is accurate, but your site will continue to work during the transition. You can check back after 24 hours and confirm that the change has propagated.
6. Switch SSL mode to Full (non-strict) mode.
This step is very important to prevent redirect loops and other issues.
Within Cloudflare, navigate to the SSL/TLS area of the dashboard: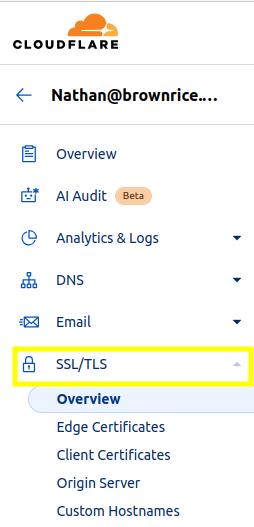
On the "Overview" page, click the blue "Configure" button: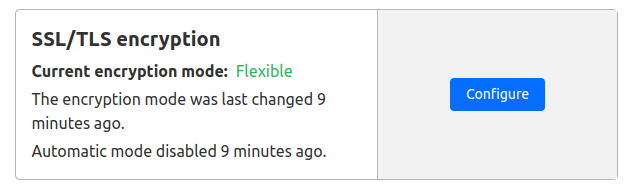
Scroll down to Custom SSL/TLS, select the checkbox for "Full" encryption, and click the blue "Save" button at the bottom: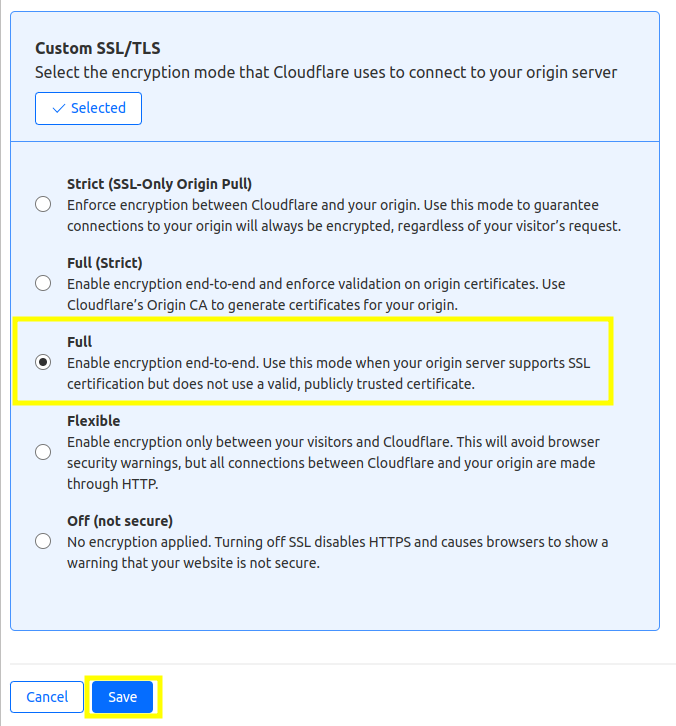
That's it! Your site is now fully configured to use Cloudflare CDN! Please contact BRI Support if you have any issues or questions!
What can I do to speed up my Wordpress site?

A fast-loading Wordpress site doesn't have to be a unicorn! Follow these proven steps to optimize your WordPress site's speed on our hosting platform:
Hosting environment:
Brownrice SmartVPS hosting is optimized for Wordpress with webhosting speed in mind - utilizing things like SSD's with dedciated resources for your VPS, optimized Apache configs with http compression enabled, http/2, optimized MariaDB (database) configs, autotune, and php-fpm with the latest PHP versions to speed up load times.
The first thing you should do is confirm that you are on our latest Gen7 VPS template from within the dashboard. Just navigate to your VPS hosting service in the dashboard and confirm that your "VPS OS" is on AlmaLinux release.
If you find that you are on one of our older Gen6 or CentOS templates, please contact our support for a free upgrade!
VPS Resources:
As much as we'd love to sell you more VPS resources, typically a slow site isn't due to a lack of hosting resources or any limits being hit. If it is, likely you are getting emailed about it constantly and already know this is the case - and you should definitely upgrade (as recommended in the email).
You can review your performance metrics via our dashboard to ensure that your hosting isn't bottlenecking! Feel free to contact our support if you need any help determing this!
PHP version:
You should ensure that your site is on the latest available PHP version that the site will function on. You can adjust your PHP version on a per-site basis via our dashboard, as outlined here.
Note: If your site throws errors on a given PHP version, try a different version! If your site has to run on older PHP versions (older than PHP8+) you likely have an outdated WP core, theme, or plugin and that should be addressed. The newer versions of PHP are always faster, so you should aim to use the newest version available to you via the dashboard if possible.
Keep WordPress, Themes, and Plugins Updated:
You should always ensure that your Wordpress core, all Themes, and active plugins are kept up to date! This is done via your wp-admin area, or if you need a hand with this we can do it for you if you sign up for our Wordpress Management Service!
Use a Lightweight Theme:
Wordpress is an opensource application and on its own is very fast. Bloat and slowness comes with added code, which is usually in the form of themes or plugins. Your theme is the foundation that you build the site on. It's important to choose a good theme that's designed with performance in mind and will be supported by its developers for years to come.
You should ensure that your theme is a well-coded, lightweight theme that is optimized for speed. Avoid bloated themes with unnecessary features and scripts. If you are having speed issues you can rule out a theme by enabling a different one for testing, such as one of the default Wordpress themes.
Audit plugins:
You should only run plugins that are absolutely necesarry for the site. On each and every page load every single plugin and every line of code in each of those plugins has to be executed. This means that the more plugins, the slower a site gets. This is always true, though some plugins are optimized better than others and don't affect performance as much.
You should be very mindful about which plugins you install, ensuring that you are using only well-coded lightweight plugins that are necesarry for the site to function. Plugins that aren't needed should be removed or disabled whenever possible. You should ensure that any plugin you install has positive reviews and is being maintained by its developers.
If you are having speed issues, try disabling all of your plugins and test again. If this speeds things up, start re-enabling your plugins one at a time and re-test to see which plugin is the biggest contributor to your speed issue.
You can also use Wordpress code profiler to determine which plugins are memory hogs so that you can remove or replace them.
Note: If you install any "one time use" plugins that you just need to run once for some task (such as wordpress code-profiler) and don't need to be running all the time, be sure to disable or remove those once done!
Utilize caching:
Caching is extremely useful to speed up page load times and TTFP (time till first byte) and is supported by default on the Brownrice SmartVPS platform. Please follow our caching FAQ to get this setup.
Note: This caching FAQ goes over not only Wordpress image/page/database caching, but Image Optimization, Lazy Load, and browser caching as well! An optimized Wordpress site should be using all of these techniques.
Database optimization:
If you have a larger website with a busy database it might need some cleaning/otimization. You can use a plugin to handle that! There are many different options available, but advanced-database-cleaner is a good option here.
Note: As with most one time use plugins, you should disable or delete this plugin once you are done with it!
Use a CDN:
While definitely not required, a CDN can help speed up page load times by serving heavy content (such as images) from a geographically closer location. Your brownrice SmartVPS works great with Cloudflare, and you can follow our guide to using Cloudflare CDN with your SmartVPS to set that up if desired!
Note: This definitely complicates things and is for advanced users, or those who know what a CDN is and want to leverage that to speed things up. Most users don't need this.
Monitor, test, and debug!
All of the things outlined in this FAQ are very helpful, but it's always recommended that you take a scientifc approach to speeding up your site. You should first take a baseline speed test of the site using a tool like Pingdom Website Speed Test or Webpagetest to get a baseline. Then you can tweak your site as outlined in this FAQ and test again for quantifiable results!
It's important to pay attention to any external elements taking a long time to load, which will be shown in the test results "waterfall" graphs. Remote elements like external fonts, images, icons, embeds, etc. taking a long time to load could be slowing down your site! If this is the case you'll want to remove those elements, or replace them with something speedier.
Note: If you see that "server response time" or "time till first byte (TTFB)" is slow, typically that's not due to server performance (if it were, we'd know about it as it would be affecting a lot more than just your site). Speeding up these metrics is actually done from within the application, as per the steps outlined above.
If you've followed all the steps outlined in this FAQ and still need help, don't hesitate to contact Brownrice Support!
What Powers Brownrice's 100% Green Hosting?

Our Annual Energy Report
How much electricity does Brownrice use each year?
We use approximately 246 megawatt-hours (MWh) of electricity per year to run our datacenter and operations.
Download our latest Annual Energy Report (PDF) ›
Where does that power come from?
On-site solar: Our own rooftop solar array generates 81.1 MWh/year, supplying about 33% of our annual demand.
Renewable grid power: We purchase electricity through Kit Carson Electric Cooperative (KCEC) and its wholesale supplier Guzman Energy. Roughly 60% of KCEC’s retail load is served by renewable resources under a 15-year contract extension. This gives Brownrice 98.9 MWh/year of renewable grid energy (?40% of our load).
Renewable Energy Certificates (RECs): To cover the remaining non-renewable grid energy, we purchase and retire certified RECs from Terrapass. In 2025, we retired 66 MWh of RECs (certificate no. XZSTXLD3-tpus-1182583, dated 08/22/2025), slightly exceeding the gap and pushing us to 100% renewable on a net annual basis.
Why buy RECs if you already have solar and renewable grid power?
Because grid power is still partially fossil-fueled. RECs ensure that every kilowatt-hour we consume is matched with clean generation. We actually overshoot by about 0.05 MWh each year to be safe.
Do you publish this data?
Yes — we release an Annual Energy Report showing all sources, totals, and supporting links to Guzman Energy, KCEC, and Terrapass certificates. This transparency lets you verify that your hosting is genuinely powered by renewables.
View the full Annual Energy Report ›
Our Green Datacenter
What makes Brownrice’s datacenter “green”?
Our facility in Taos, New Mexico was built to minimize energy use and maximize on-site renewables. Key elements include:
On-site solar array directly feeding our servers and cooling systems.
Efficient hardware & cooling: We use energy-efficient servers and cooling methods designed for the high desert climate, reducing power draw compared to typical datacenters.
Local renewable grid: Thanks to Kit Carson Electric and Guzman Energy’s large solar and battery projects (like the 41 MW Taos Mesa Solar Array plus 15 MW battery), the electricity we import is majority renewable during peak hours.
Verified offsets: Any residual non-renewable usage is offset through RECs retired in our name.
How does this benefit my website?
When you host with Brownrice, your website runs at full speed on verified 100% renewable power — on-site solar, renewable grid electricity, and certified RECs — not just marketing buzzwords.
Explore our Green Datacenter ›
Where can I learn more?
What are my email server settings and which email programs can I use with Brownrice?
Here's the quick answer to what your server settings need to be in order to connect to our servers:
- Incoming (IMAP and POP3) server: mail.brownrice.com
- Outgoing (SMTP) server: mail.brownrice.com
- Be sure to turn SMTP authentication ON. How do I turn on SMTP authentication?
- SMTP with STARTTLS: mail.brownrice.com and port 587
Incoming Server name and ports you can choose from:
- IMAP with STARTTLS: mail.brownrice.com and port 143
- IMAP with TLS/SSL use: mail.brownrice.com and port 993
- IMAP without encryption: mail.brownrice.com and port 143
- POP/POP3 without encryption: mail.brownrice.com and port 110
You can send and receive email via our excellent web-based email here: https://webmail.brownrice.com. Or you can use any of the email programs listed below to send and receive email via our servers:
How do I configure my Android device for email?
How do I configure iPhone or iPad mail for Brownrice email?
How do I configure Mac Mail for email?
How do I configure Thunderbird for email
If you have further questions please feel contact us.
Can I check my email when traveling or otherwise away from my own computer?
If you are away from your computer and have no smartphone, well, congratulations! We hope you are on a tropical island. But if you still must check your email, you always can at this web site address:
I can't send email! The error says: 553 sorry, that domain isn't in my list of allowed rcpthosts.
This is the cryptic way our servers say "Relaying denied." Or, more specifically "You are coming from an untrusted place on the Internet and we aren't going to allow you to send mail through our servers."
How to make this go away:
You'll need to change two settings:
- SMTP authentication needs to be turned "on"
- Your Outgoing server (SMTP) port needs to be changed from 25 to 587.
Here's how to do it in Outlook:
Click Tools -> Accounts -> View or change existing e-mail accounts -> Next -> Select your account -> Change.
- Click -> "More Settings"
- Click the "Outgoing Server" tab.
- Check the box next to "My outgoing server (SMTP) requires authentication."
- Make sure "Use same settings as my incoming mail server" is selected.
- Select the "Advanced" Tab.
- Change the "Outgoing server (SMTP):" port from 25 to 587.
- Done!
Here's how to do it in Mac Mail :
- Open Mail. In the menu bar, choose Mail -> Preferences, and then click Accounts.
- From the Accounts list, select your account, and then click the Account Information tab.
- Click on the the Outgoing Mail Server (SMTP) drop down, then on the pop-up menu, choose Edit SMTP Server List.
- From the list of servers, select your server and then click the Advanced tab.
- Uncheck the Automatically dectect and maintain account settings button.
- Change the "Server port" to 587.
- Use SSL should be checked.
- Authentication should be MD5 Challenge-Response
- Allow insecure authentication should be unchecked.
- Enter your full email address in the User Name: field
- Enter your email password in the Password: field.
- Click OK.
- Close the Account Settings window.
- Done!
Here's how to do it with an iPhone or iPad:
- Select -> Settings -> Mail, Contacts, Calendars
- From the Accounts list, select your account.
- On the next screen, select your account again.
- Scroll down and select "SMTP mail.brownrice.com"
- Select "mail.brownrice.com" under Primary Server.
- Make sure that "Server" is ON.
- Set Host Name to be: "mail.brownrice.com"
- Set User Name to be your full email address.
- Enter your email password in the Password field.
- Use SSL can be either ON or OFF (though ON is more secure)
- Set Authentication to be Password
- Change the "Server port" to 587.
- Click Done.
- Done!
These settings will allow you to send mail through our servers from anywhere, at anytime.
How do I forward my email to another account?
Note: We do not allow forwarding to yahoo.com, aol.com, gmail.com, earthlink.net, sbscglobal.com, hotmail.com, live.com, msn.com, frontier.net, gmail.com, comcast.net or any outside provider. If you set up forwarding to any outside provider our systems will remove the forward within the hour.
However, if you want to set up forwarding between accounts or email domains on our mail servers, here are the instructions:
- Log into http://admin.brownrice.com directly with the email address and password info of the account you wish to foward:
- Your Username is the first half of your e-mail address (to the left of the @ symbol).
- Your Domain Name is the second half of your e-mail address (to the right of the @ symbol).
- Your Password is the password that you use to check your email.
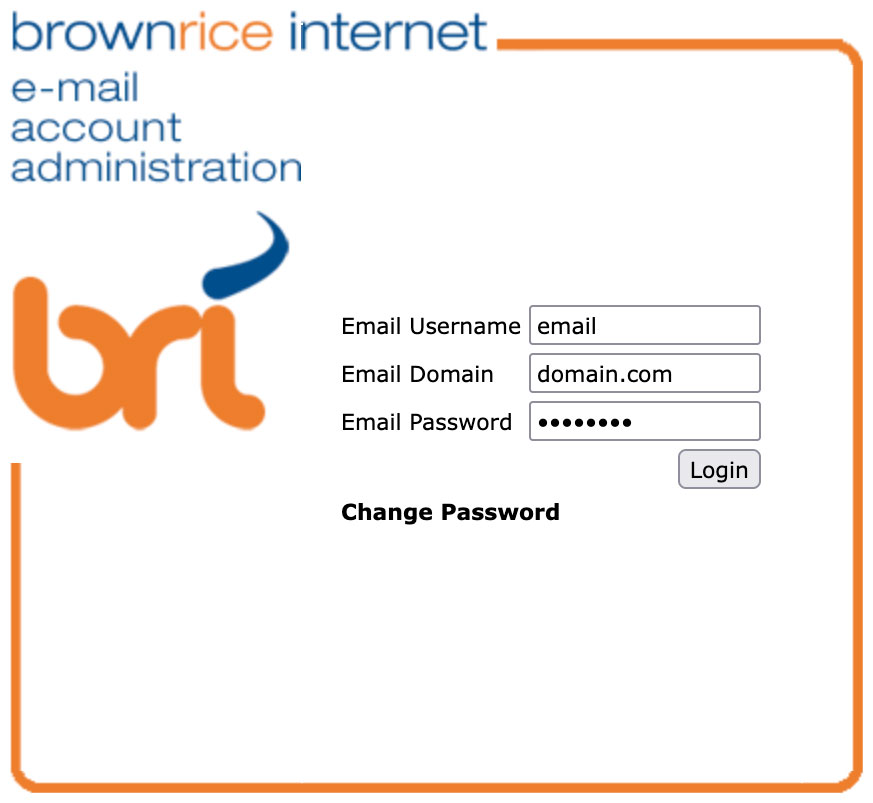
Once logged in...
- Check the box next to Forward To:
- Fill in the email address that you'd like to forward your email to.
- Click the "Modify User" button at the bottom of the page.
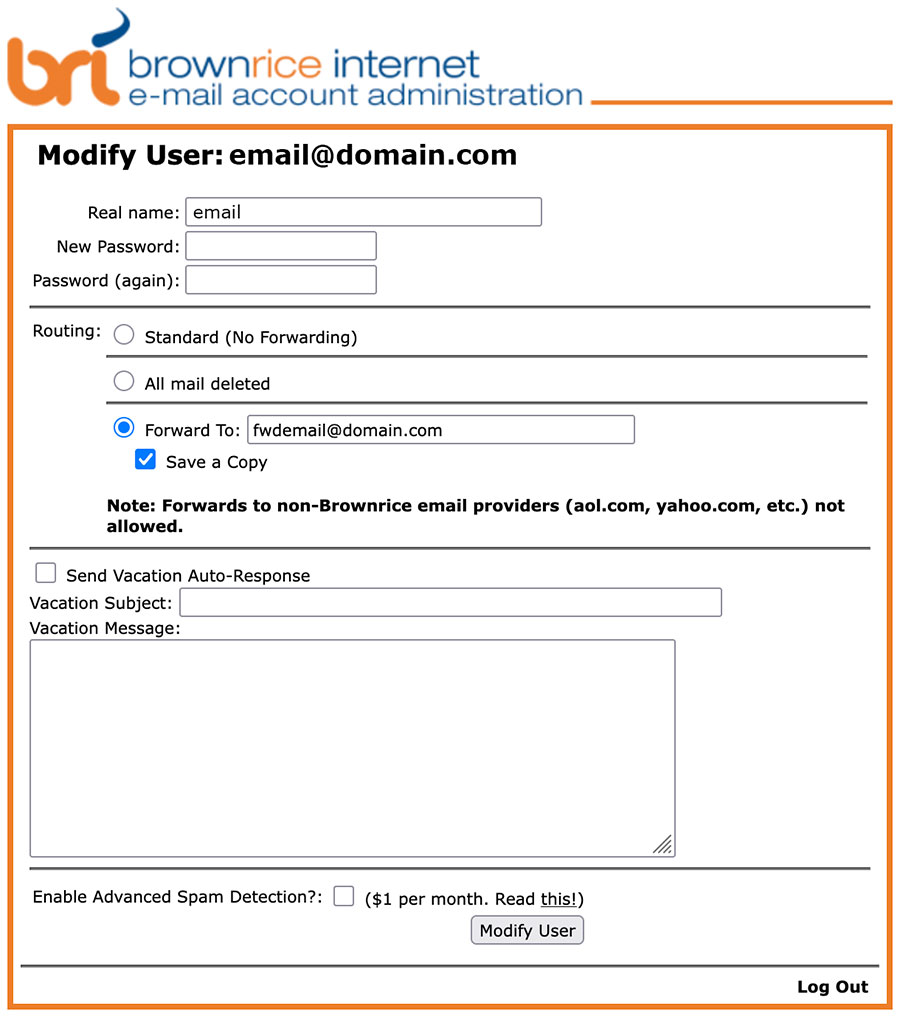
Done.
Note: We do not allow forwarding to outside providers and only allow forwarding to email accounts on the brownrice servers. If you setup a forward to an outside provider it will be removed within the hour.
Note: If you'd like to keep a copy of the email on your brownrice account (not recommended unless you know what you are doing as it'll fill up your account quickly) then select the "Save a Copy" check box.
How do I set up an auto-reply, auto-responder or vacation message?
There are two ways you can set up your email auto-responder:
Via the Brownrice Dashboard:
- Log in to your Dashboard
- Navigate to EMAIL HOSTING
- Select your VPS: yourvpsname.com
-> Click Manage Email Accounts (green button)
- Scroll to the bottom and click 'Manage Email Accounts' again.

- Click 'Email Accounts' then click the blue modify icon next to your account.
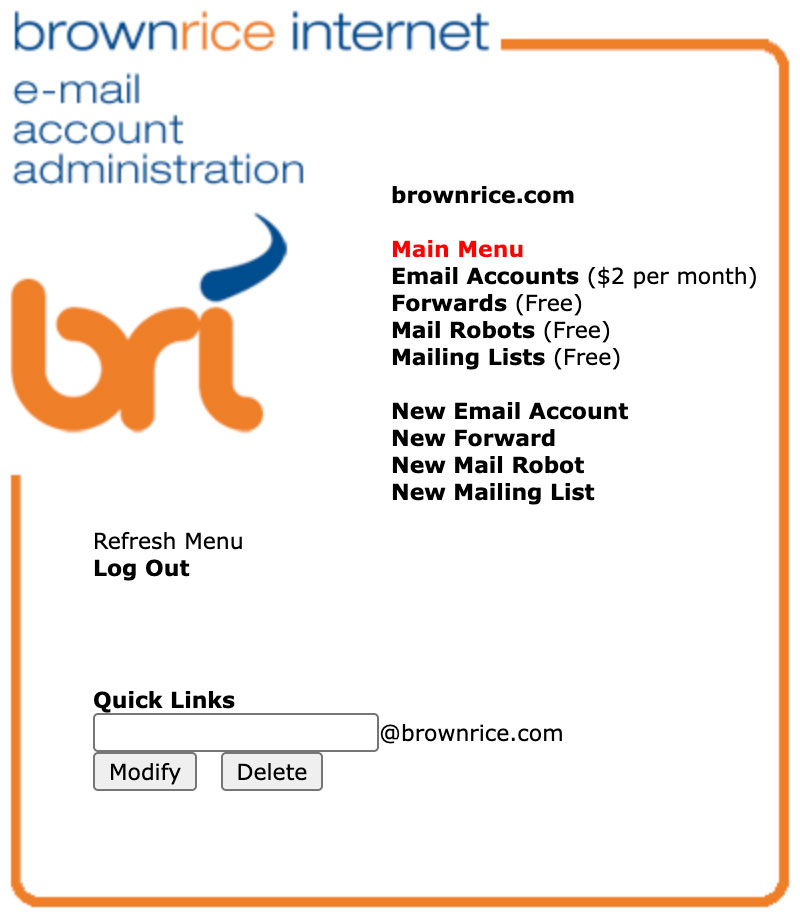
- Check the box next to 'Send Vacation Auto-Response'
- Fill in an email subject and body
- Click 'Modify User' at the bottom
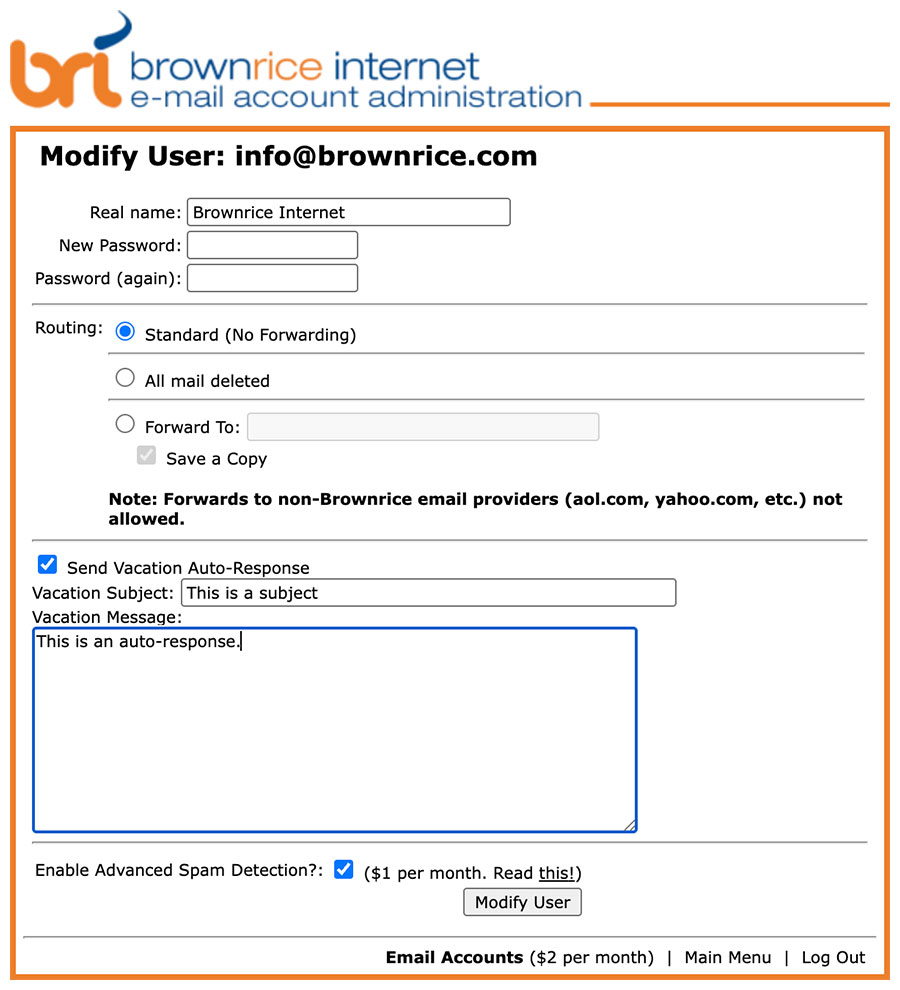
Via the Email Control Panel:
- Log in to your Email Administration Dashboard: https://admin.brownrice.com
- Log in with the account information for which you want to set up the auto-reply. For example, if it's john@yourwebsite.com you would login with this information:
User Name: john
Domain: yourwebsite.com
Password: (enter your password) - Once you've logged in, click the Send Vacation Auto-Response checkbox, fill in the Vacation Subject and Vacation Message boxes, then click the Modify User button.
Done.
I noticed the "catchall" option for each email account. What does that do?
A catchall is an account that receives ALL email that is sent to your domain that isn't addressed to a live account. For example, if sales@YourWebSite.com is your catchall account, and someone sends an email to "abc123@YourWebSite.com" or "xxxx@YourWebSite.com" (these being invalid addresses), their email message would go to your catchall account (sales@YourWebSite.com). Normall the catchall is set to "bounce", and all messages that are not addressed to a real email account would bounce.
We don't recommend setting up a catchall, as it will mostly catch spam. i.e. Setting up the catchall to go to a real email account is not advised. Either set it to "Catchall - Bounced" or "Catchall - Deleted."
What is a mail robot?
Mail Robots: A Mail Robot allows you to create an account that sends an automated reply to the sender while forwarding the original email to one or more individuals. For example, you could set up a Mail Robot called "info" and when someone sends an email to "info@<yourdomain>.com", they get an automated reply ("Thank you for your email. Someone will contact you soon."). At the same time, the sender's email is forwarded to the addresses of your choice.
How do I create an email mailing list? Please explain all of my mailing list options.
You can manage your mailing lists through your email administration page (link below), the same interface that you use to configure email accounts, vacation messages, forwards and autoresponders (mail robots).
To Add a Mailing List
- Log in to your Email Administration Dashboard: https://admin.brownrice.com
- Use postmaster as your Username, your own domain name (e.g. "example.com") and your postmaster password. If you don't know your postmaster password please contact us for it.
- On the Main Menu, under quick links, select New Mailing List.
- This will bring you to the Add Mailing Lists screen. We'll go through the options one by one.
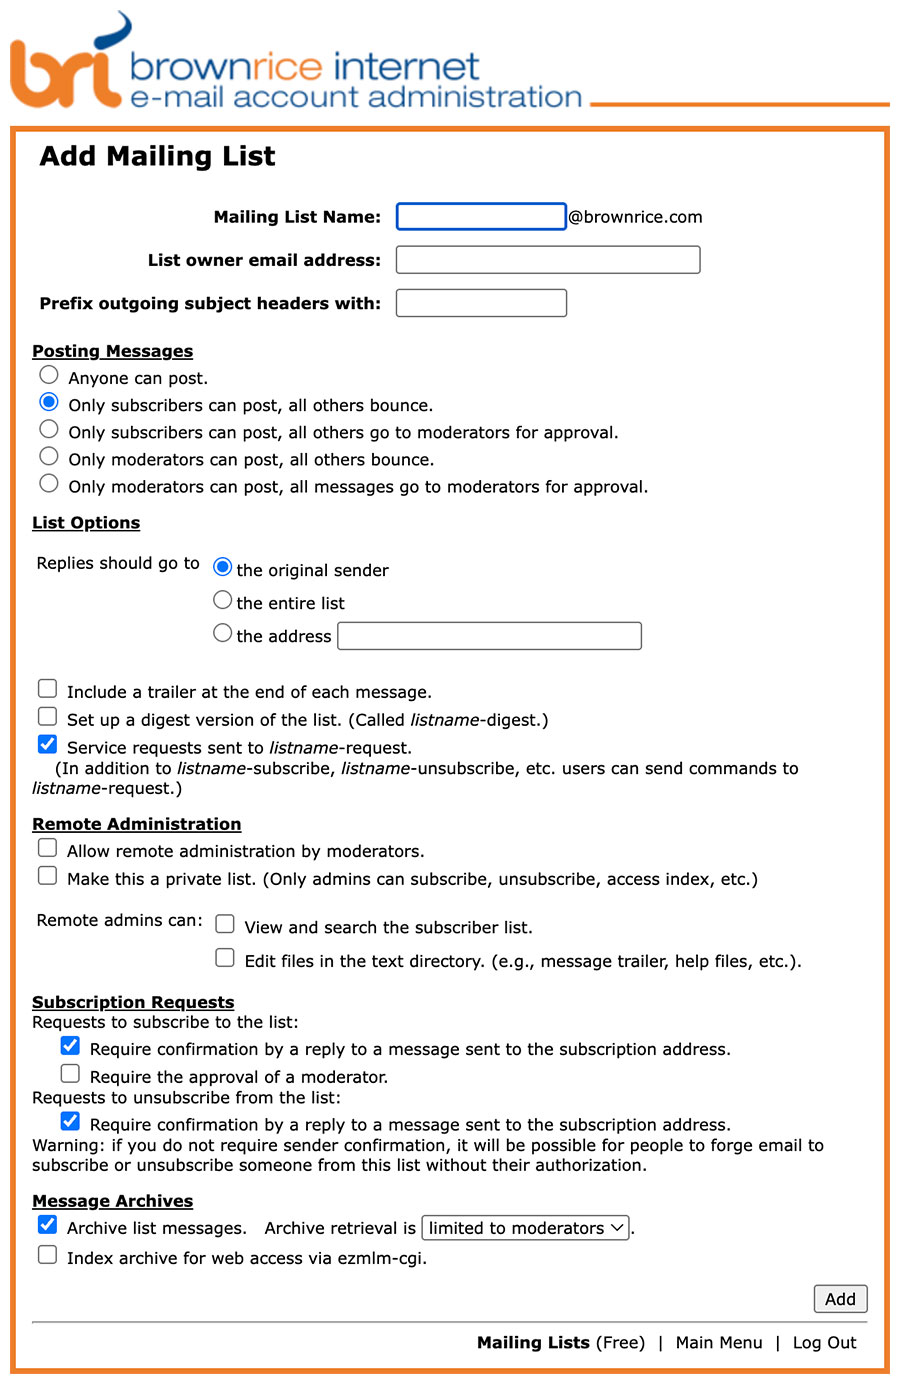
Mailing List Name
This is the "handle" of your mailing list. You should use a name without spaces or dashes (-). This handle will be the first part of the posting address for your list: handle@domain.com.
List Owner Address
The List Owner Address is your email address, or the email address of the person who will act as the owner/administrator of the list.
Prefix outgoing subject headers with
This enables you to put some text at the beginning of the subject of each list message that is sent out, for example [mary's recipes] or [plone-users]. This is optional.
Posting Messages
This allows you to set your list posting policy.
Anyone can post. - Your list is entirely open and will shortly be overrun with spammers. Not recommended.
Only subscribers can post, all others bounce. - Only those who are receiving list messages can post. An open discussion list. Non-list-members' emails are bounced back to them.
Only subscribers can post, all others go to moderators for approval. - Only those who are receiving list messages can post. An open discussion list. Non-list-members' emails are sent to the moderator so he can potentially allow them to be posted. This is good for a discusson list.
Only moderators can post, all others bounce. - Only those designated as moderators can post. Anyone else's emails are bounced back to them. This is good for a one-way, or announcement-type, mailing list.
Only moderators can post, all messages go to moderators for approval. - Only those designated as moderators can post. Anyone else's emails are sent to the moderator so he can potentially allow them to be posted.
List Options
Replies should go to ... the original sender - This setting is good for announcement lists where you want people to reply right back to you, and you are sending the emails.
Replies should go to ... the entire list - This is appropriate for discussion lists.
Replies should go to ... the address - If yours is an announcement list and you want people to reply back to say your support email so you can reply to them from there and archive your messages, then you can select this option and input the email where you want replies to go to in the text filed.
Include a trailer at the end of each message. - You should always check this box. This will add a note about the list at the bottom of each email, including the email address for leaving the list.
Set up a digest version of the list - If you would also like to add a digest version of your list, check this box. A digest sends groups of list messages to subscribers, instead of sending each message out as it comes in. Digests are generated for every 30 messages or 64Kb of message body.
Service requests sent to listname-request. - This a good idea to enable as it gives subscribers another way to control their subscription.
Remote Administration
Allow remote administration by moderators. - This will allow moderators to administer the mailing list via email. Its recommended you check this box.
Make this a private list. - This will make the list entirely private. Only moderators can add and remove subscribers. Its only recommended you use this option if your list is an internal one for your company or organization.
Remote admins can... View and search the subscriber list. - If you trust your moderators then you can check this.
Remote admins can... Edit files in the text directory. - If you would like your moderators to be able to adjust the list footer, faq, info blurb and other available list information, then enable this. Its recommended that you enable it.
Subscription Requests
Requests to subscribe to the list... Require confirmation by a reply to a message sent to the subscription address. - This is a good idea, so that you make sure people really opt-in.
Requests to subscribe to the list... Require the approval of a moderator. - If you operate a discussion list and want to monitor who is subscribing, this is a good idea.
Requests to unsubscribe from the list... Require confirmation by a reply to a message sent to the subscription address. - This is good idea to prevent one person from unsubscribing another, without their knowledge.
Message Archives
Archive list messages. - This is always a good idea.
Index archive for web access via ezmlm-cgi. - You should select this, in case we deploy ezmlm-cgi in the future.
Archive retrieval is... - this depends on how private your list is.
MySQL Settings
This feature is not currently available.
Submit
Now click the Add button and Qmailadmin will bring you to the Mailing Lists screen, where you can see your mailing lists and manage each one individually. You can also reach this screen by clicking on Main Menu > Mailing Lists.
Management Options
Delete - You can delete the list by clicking on the trashcan. Be careful, there is no undo button!
Modify - You can click on the pen and paper icon to revisit the configuration options we discussed above. The options for managing subscribers, moderators and the digest version, if you have created one, are self-explanatory.
NB - You should avoid manually adding subscribers who have not explicitly agreed to join your list.
How Subscribers Interact with your Mailing List
Subscribe
To subscribe, a person simply sends an email to listname-subscribe@example.com from the email address he or she wishes to subscribe with.
Unsubscribe
The unsubscription command is similar: listname-unsubscribe@example.com
More Commands
People can also retrieve general information about the list, a FAQ, archived emails and more, if you allow them. See the link to ezmlm.org at the end of this document for more information.
Remote Administration (via Email)
Remote administration means that you can administer your list via an email interface, instead of a web-based one like what you find in a program like Mailman or MojoMail. Moderators can add or remove subscribers, retrieve a subscriber list, the number of subscribers and edit list-related files, among other things, with simple email commands.
list
Moderators can send an email to listname-list@example.com to get a subscriber list.
listn
Moderators can send an email to listname-listn@example.com to get the total number of subscribers.
edit
Moderators can send an email to listname-edit@example.com to get a list of editable files.
edit.filename
Moderators can send an email to listname-edit.filename@example.com to edit the editable file called filename.
For example, if you wanted to make a FAQ available to subscribers, you could write one and put it in the body of an email.
Now send that email to listname-edit.faq@example.com.
When an email is now sent to listname-faq@example.com, EZMLM will reply with your FAQ.
There are other commands as well. See the link to ezmlm.org at the end of this document for more information.
Digest Administration
To manage your digest "sub-list", you can use the same commands as for the main list, but using listname-digest instead of listname.
Moderation
When required, moderation is straightforward and easy. The moderator receives an email with the moderated email attached. To approve the email he or she can simply reply with a blank email. To reject, you can manually reply to the From header address. Sending a message to listname-help@example.com will provide some additional information on moderating.
Retrieving Archived Emails
Your list's archived emails can be retrieved via email.
Message Index
To get the message index, send an email to listname-index@example.com.
Retrieve Single Message
To get a single message, you will need to know its number. Once you have the number, you can send a blank email to listname-get.1@example.com.
Range of Messages
Each archived message is numbered from 1 on up. So you can retrieve any range of messages. For example, to retrieve messages 1-99, send an email to listname-get.1_99@example.com.
There are still more ways to retrieve messages. See the link to ezmlm.org at the end of this document for more information.
Web Access to the Archives
We are looking into this and may or may not be able to offer it. In the meantime you can always grab your archives via email.
More Information
EZMLM has even more useful features and security safeguards than what is described above. Find out more about EZMLM at ezmlm.org
I've got a message stuck in my outbox and I'm using Outlook. How can I get rid of it?
It doesn’t happen too often but when a message is stuck in the Outbox it can be a real pain. Below you’ll find three methods to get the message out of the Outbox.
Method 1
Open the message from the Outbox and close it again. Now select the message and press DELETE
Method 2
Put Outlook in offline mode. To do this go to File-> Work Offline. Now restart Outlook and see if you can delete it (you can try this in combination with method 1). Don’t forget to put Outlook back On-line again.
Method 3
- Create a new pst-file; File-> New-> Outlook Data File…
- Set this pst-file as your default delivery location in your Account settings; Tools-> E-mail Accounts-> button Next
- When you now restart Outlook your original pst-file will show up as the secondary set of folders where should easily be able to remove the file from or even the complete Outbox folder
- Set the original pst-file as the default delivery location again and restart Outlook; the Outbox folder will be recreated and will be empty.
How do I create new email accounts?
Once you have set up an email server...
- Log in to your Dashboard
- Navigate to EMAIL HOSTING
- Select your VPS: yourvpsname.com,
-> Click Manage Email Accounts (green button) - Scroll to the bottom and click 'Manage Email Accounts' again.
- Click 'New Email Account'.
- Enter the new email account information and then click the Add button.
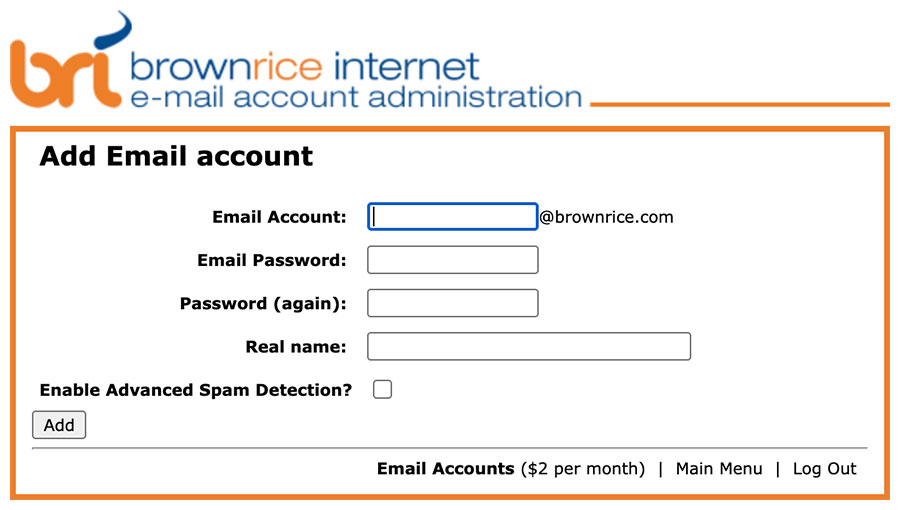
- Done!
Once you have created the new email account, then you can set it up inthe email program of your choice (like Outlook, Thunderbird, etc.) to receive email on your computer. See also: What are my email server settings and which email programs can I use with Brownrice?
I am receiving every email twice in my outlook account – anything come to mind as to why or how I can remedy this?
Doubled emails in Outlook is a known bug in Outlook. This bug usually happens up after you've left too much POP mail on our servers for Outlook to handle successfully. The Microsoft explaination and possible fix is here:
http://support.microsoft.com/?kbid=885870
There are three possible solutions:
- Follow the Microsoft instructions in the link above and ensure that you have the latest updates and services packs that Microsoft recommends.
- Stop leaving a copy of your email on the server.
- Convert your account from POP to IMAP as IMAP is a big improvement over POP when using more than one computer to check your email.
I've just moved to Brownrice but I need to get some email from my old account into my new email account on Brownrice. What do I do?
This can probably be done from other email programs. However, we know this works with Thunderbird:
- Set up a Thunderbird POP email account to download your oldemail from your old host (ask host for instructions)
- Set up another Thunderbird IMAP account (within the same Thunderbird program) to check their current mail on Brownrice. (Click this link for instructions )
- Drag all email from the old POP account into the new IMAP account (this will take awhile)
- Once complete delete the old POP account.
Server error on send: The connection to the server has failed. Account: Protocol: SMTP, Port: 25, Secure(SSL): No, Socket Error: 10060, Error Number: 0x800CCC0E
Getting a server error on send that looks like this?
The connection to the server has failed. Account: Protocol: SMTP, Port: 25, Secure(SSL): No, Socket Error: 10060, Error Number: 0x800CCC0E.
And you've tried many configurations, and are still unable to send using the brownrice server. Here's some info that may help:
The issue here is with your person's ISP. Many ISP's now block outgoing email (on port 25) to prevent spammers from using their networks to send spam. Because of this common issue we setup an alternate port for people to send email through our servers.
Follow the steps in this FAQ entry and you'll be sending email from anywhere, always.
How do I copy and send email headers to Brownrice Internet?
In order to determine why an email is not being sent to or received from certain mail servers we'll often ask our clients to send us the original email with headers. Here is how you do it.
Hotmail
- Log on to Hotmail.
- Click the Options tab on the top navigation bar.
- Click the Mail Display Settings link.
- Change the Message Headers option to Full.
- Click the OK button.
Yahoo Mail
- Log on to your Yahoo! Mail account.
- Click the Options link on the navigation bar.
- Click the General Preferences link.
- Go to the paragraph titled Messages and Locate the Show Headers heading and select All.
- Click the Save button to put your new settings into effect.
Once this setting is saved, go back and open your email and you should view the headers.
Gmail
- Log on to your Gmail account.
- Open the email whose headers you want to view.
- Click on the more options link in the message next to the date of the email. If the link says hide options then do not worry. You have already clicked on the more options link.
- Now click the link called show original.
- This will bring up a new window with headers and the body of the message.
Thunderbird (Firefox - Mozilla)
To view email headers, go to View, Headers and select All to view email headers.
Microsoft® Outlook® Express 4, 5 and 6
Start by opening the message in its own window (or when viewing the message in the preview pane). Then:
With the keyboard:
- Ctrl + F3 (Message Source Window).
- Ctrl + A (select all).
- Ctrl + C (copy).
- Alt + F4 (close).
With the mouse:
- Click the File menu.
- Click Properties.
- Click the Details tab.
- Click Message Source.
- Highlight, copy and paste everything from this window (Ctrl-A, Ctrl-C).
With viruses, worms and trojans being spread via email, many users now work with the preview screen in Outlook Express turned off. Viewing the contents of email in the preview screen is no different than opening the message. If the email has malicious content, it may execute in the preview screen.
The following is instructions to obtain the full message source if you have the preview panel turned off:
Using the keyboard:
- Highlight the message in the folder.
- Press Alt + Enter - This will open a message information window.
- Press Ctrl + Tab - This changes to the Details tab.
- Press Alt + M - The opens the message source.
- Press Ctrl + A - To select all the text.
- Press Ctrl + C - To copy the selected text to the clipboard.
- Press Alt + F4 - To close the message source window.
Press the Esc key to close the information window.
Microsoft® Outlook® 97
Outlook® 97 may require an update called the Internet Mail Enhancement Patch in order to display the email headers AT ALL.
Outlook® 98 and 2000
- Open the message in a separate window (double-click)
- Under the View menu select Options.
- Copy the text in the Internet Headers window (unfortunately it does not include the message itself).
- Paste
- Close the Options window.
Outlook Express for Macintosh
- Select the email.
- From the View menu, choose Source. A new window will appear containing the email with full headers.
- Press command + A, to select all, then command + C to copy.
Microsoft Exchange
- To get the complete headers and message source using Microsoft Exchange, click the File menu
- Click Properties.
- Click the Details tab.
- Click Message Source.
- Highlight, copy and paste everything from the Message Source window (Ctrl + A, Ctrl + C)
Microsoft Entourage
To access the full message source with Microsoft Entourage:
- After clicking on the message, select Source from the View menu.
- A new window will open showing the full message source with complete headers.
- Copy and paste.
Mac Mail
To get the full message source:
- Select a message.
- Select menu item Message, Show, Raw Source.
- Click on the resulting text.
- Click Edit, Select All, then Edit, Copy.
- Paste.
Netscape
Preferred method: Click on the View menu, then Page Source, (ctrl + U in windows, meta + U in UNIX,? + U on the Mac) then copy the contents of the window (Ctrl + A, Ctrl + C windows).
Old versions: Click on the View menu, then Headers, then All. Note: This method will not work correctly with HTML.
Web-Based Email Software
Hotmail
To see the full, untangled headers in Hotmail, first, configure your options:
- Click on Options.
- In the Additional Options column, click on Mail Display Options and find the item Message Headers.
- Choose Advanced and click the OK button.
Then, to report spam:
When viewing a message, use the View E-mail Message Source to display the message in raw mode before copying.
Yahoo Mail
Follow these steps:
First you must turn on Full Headers.
- From your Yahoo! mail account, click on Mail Preference.
- Scroll down the page to Message Headers and click on the all radio button.
- Save your preferences at the bottom of the page.
Next, view the message you want to report. If the message is in plain text, copying from this page and pasting it will work.
If the message to be reported is HTML, a two stepped process must be used:
View the message and copy the complete headers. Paste these then add a blank line.
Go back to the Yahoo! window and select to Forward the message as inline text (drop down menu). Scroll down the message to the start of the message body. (The first line of the HTML body will usually begin <HTML). Copy the body of the message and paste. Make sure a blank line remains between the header and body.
Netscape Webmail
While viewing the message, click on the yellow triangle to the right of the brief message headers. This will display the full headers along with the message body, which can be cut and then pasted.
To close the full headers and return to brief headers, click the yellow triangle again.
Outlook Web Access
(as accessed through http://mymail.outlookmail.com/exchange/logon.asp)
- Left click on the letter you want to open and click on properties.
- When that opens click on the details tab.
- Then on message source.
- This will open the email so the full headers will be available for viewing.
- Select and copy the text then paste it.
How do I change my email password?
If you DO know your email password:
- Navigate to this link to update your password using our Reset Password form:
https://admin.brownrice.com/cgi-bin/qmailadmin/passwd/ - Enter your email address, existing password, and the new password that you'd like (twice) then click the Change Password button.
Done!
If you DO NOT know your existing password:
- Log in to your Dashboard
- Navigate to EMAIL HOSTING
- Select your VPS: yourvpsname.com,
-> Click Manage Email Accounts (green button) - Scroll to the bottom and click 'Manage Email Accounts' again.
- You are now in the e-mail account administration area! Select Email Accounts.
- Click the Modify User icon,
then update the password on this screen.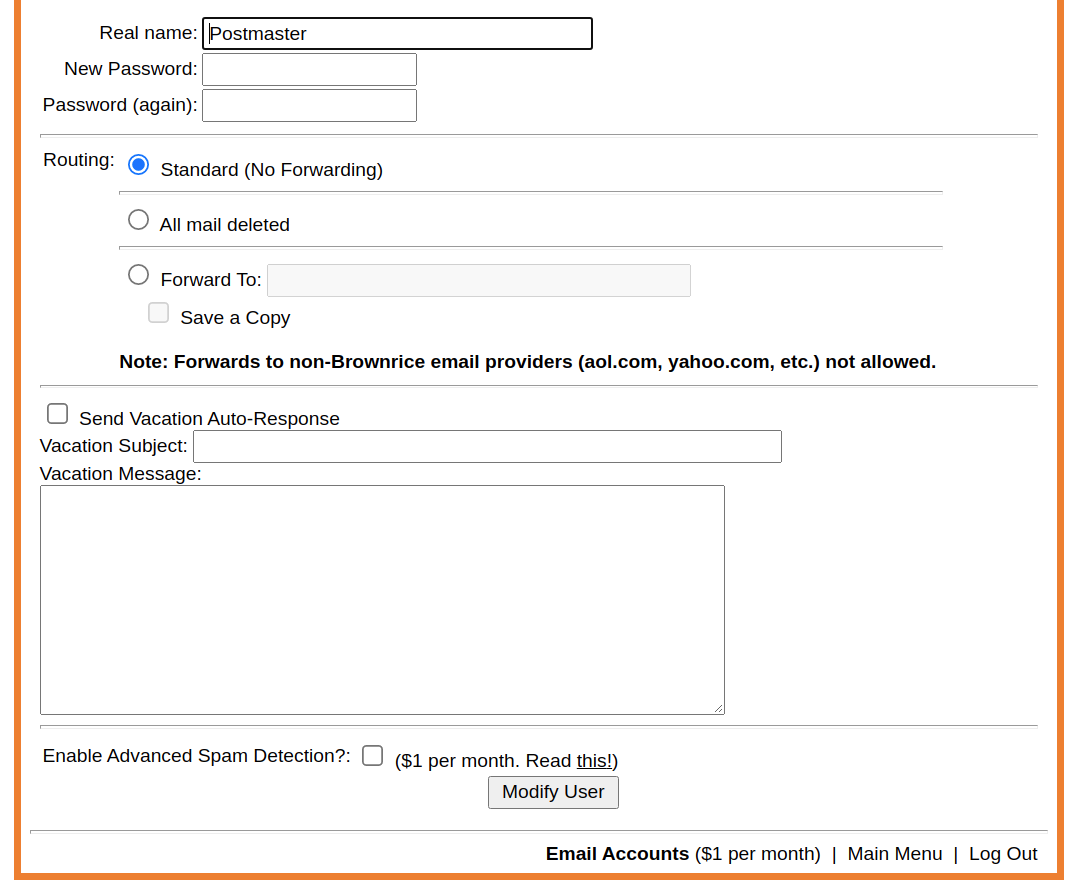
- After you have updated the password in both fields, be sure to click the Modify User button once to save it.
- Done! Your password has been reset. Be sure to save this somewhere safe and log back into your devices using your new password!
And if all else fails you can contact us and we'll take care of you!
Why do I keep getting a "delayed delivery notice" when I send email to Yahoo?
It turns out that this is a fairly large scale issue affecting many, many ISP's and hosting providers (MSN, Hotmail, Verizon, etc. are all companies where their users are having this trouble) that are trying to send timely emails to Yahoo. See here:
http://www.google.com/search?q=yahoo+email+delays
A common theory amongst Systems Administrators now is that Yahoo is getting ready to begin charging mail servers to send their customers "priority email."
Regardless, we are doing everything in our power to get our users email delivered to Yahoo in a timely manner.
Someone sent me an email and it was returned to them with a 554 mail server permanently rejected message message. Why did this happen?
This only happens when the sender of the message is sending from an IP address that is listed on an IP blacklist. Often this is the result of the sender using an IP address that has previously been used by a spammer, or the content of the incoming message has "spam-like" words.
The proper way to get this fixed is to ask the sending to contact their ISP and let them know of the issue - they should also forward their ISP the bounce message that our servers sent them.
However, in order to expedite receipt of their messages you can also send us an email to support@brownrice.com and ask us to "whitelist" the senders address and this will never happen again.
My iPhone won't delete messages and won't save Sent Mail and Drafts in my Brownrice Sent and Drafts folders
Properly sort Drafts, Deleted, and Sent mail on the iPhone
Configure your mobile Mail client so that Sent Mail, Deleted Mail, Drafts, and Junk are reflected properly after syncing back between the iPhone client, webmail and any other desktop clients you may have.
- Open ‘Settings’ > ‘Mail’ > [Your Brownrice IMAP account] > ‘Advanced’
- Select ‘Drafts Mailbox’ > ‘On the Server’ > ‘[Brownrice IMAP account] Drafts’. Return to the ‘Advanced’ view.
- Select ‘Sent Mailbox’ > ‘On the Server’ > ‘[Brownrice IMAP account] Sent. Return to the ‘Advanced’ view.
- Select ‘Deleted Mailbox’ > ‘On the Server’ > ‘[Brownrice IMAP account] Trash’. Return to the ‘Advanced’ view.
Still having trouble? Try this:
- Press the Home button and choose Settings.
- Scroll down and click Mail, Contacts, Calendars.
- Tap your email account.
- Scroll to the bottom and click Advanced.
- Scroll to the bottom and tap the empty IMAP Path Prefix.
- Enter INBOX in capitals, then click ‘Accounts’ at the top left and click ‘Done’ at the top right twice to close the settings.
- Press the Home button and then re-open Mail.
What is the difference between an email "forward" account and a regular email account?
Note: We do not allow forwarding to yahoo.com, aol.com, gmail.com, earthlink.net, sbscglobal.com, hotmail.com, live.com, msn.com, frontier.net, gmail.com, comcast.net or any outside provider. If you set up forwarding to any outside provider our systems will remove the forward within the hour.
An email address listed in your list of Forwards is not a true email account. These are also free. A forward also just receives email and immediately sends it off to the final, and real, destination. You can never set up an email program to check this type of address nor can you check it via webmail. Most people use this type of address for "non-real" addresses such as "info" and "support" so that email can be redirected to different, or multiple, real addresses at will.
An address listed in your list of Email Accounts with a forward in it is a true email account and is $1 per month. You can turn forwarding on or off and check this type of account via webmail or an email program. You can also set this type of account up to both forward and to keep a copy on the server (so that you can view it with webmail) by clicking the "Save a Copy" checkbox under the "Forward To:" option.
See also:
How do I forward my email to another account?
How do I set up email aliases?
How do I change my email password?
How do I turn on SMTP authentication?
Here's how to do it in Outlook:
- Click File -> Accounts -> View or change existing e-mail accounts -> Next -> Select your account -> Change.
- Click -> "More Settings"
- Click the "Outgoing Server" tab.
- Check the box next to "My outgoing server (SMTP) requires authentication."
- Make sure "Use same settings as my incoming mail server" is selected.
- Select the "Advanced" Tab.
Here's how to do it in Thunderbird:
- Click Tools -> Account Settings
- At the bottom of the left side of this window click -> Outgoing Server (SMTP)
- Select your email account and click -> Edit...
- Ensure that the "Server Name" field says "mail.YOUWEBSITEADDRESS.COM" or "mail.brownrice.com"
- Ensure that "Use name and password" is checked
- Enter your full email address in the "User Name:" field.
Here's how to do it in Mac Mail:
- Click Mail -> Preferences.
- At the bottom of the window under Outgoing Mail Server (SMTP) click the up/down arrows next to server name.
- Click -> Edit Server List
- On bottom of window is Authentication: click on up/down arrows next to "None"
- Select "Password"
- Enter your full email address in the "User Name:" field.
- Enter your Password.
- Click "OK".
Here's how to do it in Entourage:
- Click Entourage -> Account Settings -> Mail
- Highlight the email account in window.
- At the bottom of the Account Settings window click -> Click here for advanced sending options.
- Check the box next to "My outgoing server (SMTP) requires authentication."
- Make sure "Use same settings as my incoming mail server" is selected.
- Select the "Advanced" Tab.
These settings will allow you to send mail through our servers from anywhere, at anytime.
What is the size limitation for attachments in email?
The maximum message size any user can send through Brownrice mail servers is 34MB (34,000 KB). However, it is recommended that you do not send a file larter that 1-2 MB to eliminate problems in sending or receiving mail attachments. If you would like to send a large attachment to someone, consider using a "Zip" application, such as Winzip to zip and compress your attachment files or break down your attachment into parts and mail them as separate, smaller email messages. Bear in mind that the size of the message will include, in addition to the attachment, some overhead - namely, the encoding to convert the file to text when sent then back to its original form when received.
Very large mail attachments may be rejected by the recipient's mailserver and cause their email box to exceed the mail quota; the email with attachment may be bounced back to the sender as "undeliverable". Large attachments may also cause the recipient's email to "hang" when he or she attempts to download the message. Note that, on a dial-up, a 500k file takes about two minutes.
Outlook timeout while connecting to my IMAP account. What can I do to prevent this?
This is a known Outlook issue. The Outlook program handles IMAP poorly, at best. Thunderbird - or any other email program for that matter - does a much better job with IMAP.
And this is a result of the amount of email in your IMAP account growing large, and Outlook not being able to handle it properly.
Short of switching to a good IMAP email program, try the following:
- Click on "Tools", "E-Mail Accounts", "View or Change existing e-mail accounts".
- Select your Brownrice Email account and click on "Change".
- Click on "More Settings" and finally on "Advanced".
- Change the "Server Timeouts" to the maximum (10 minutes) and click on "OK", "Next" and "Finish" to save your changes.
- Exit and then restart Outlook.
How do I configure iPhone or iPad mail for Brownrice email?
iPhone / iPad Mail Email Settings
- On your iPhone or iPad, select Settings.
- Select Mail, Contacts, Calendars.
- Select Add Account.
- Select Other.
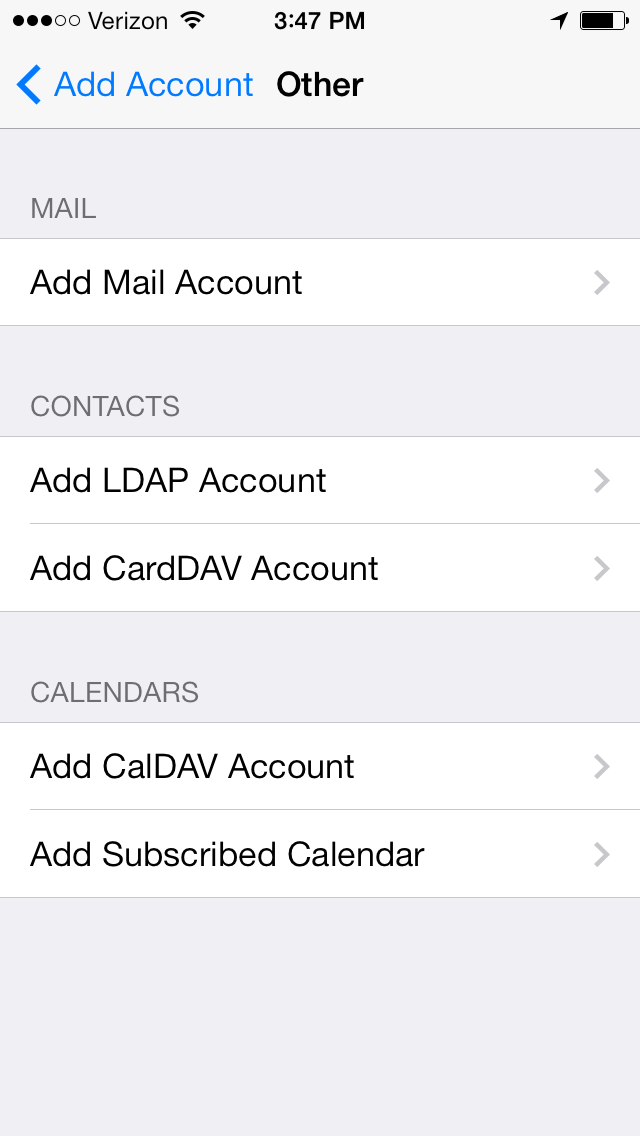
- Select Add Mail Account.
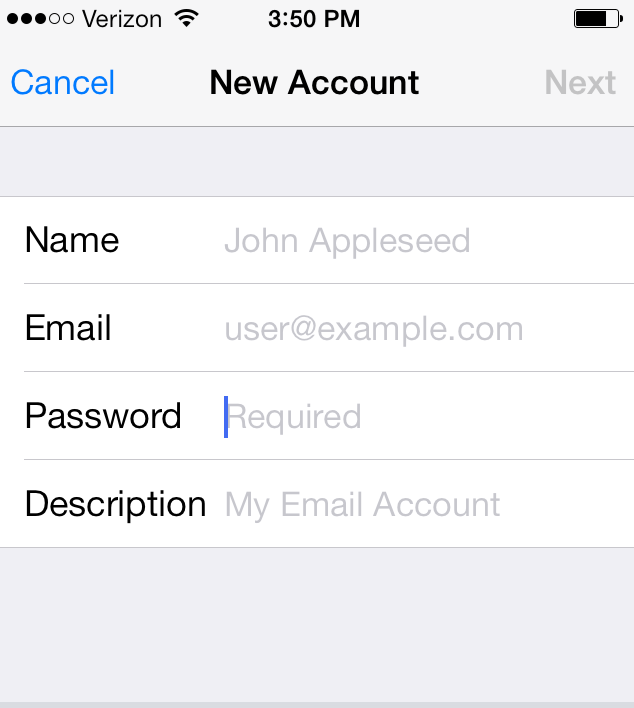
- In the Name field, enter your full name.
- In the Address field, enter your full email address (e.g., yourusername@yourdomain.com).
- In the Password field, enter your password (case-sensitive).
- Select Next.
- The IMAP option should be the default.
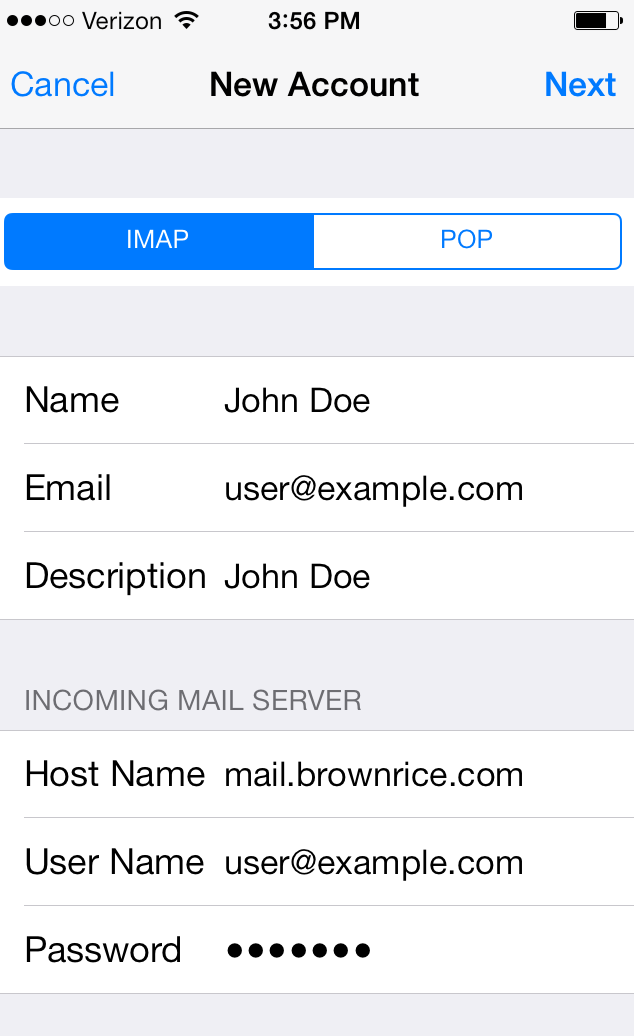
- Scroll down to the Incoming Mail Server and in the Host Name field, enter mail.brownrice.com.
- In the User Name field, enter your full email address.
- In the Password field, enter your password (case-sensitive).
- Scroll down to Outgoing Mail Server and in the Host Name field, enter mail.brownrice.com.
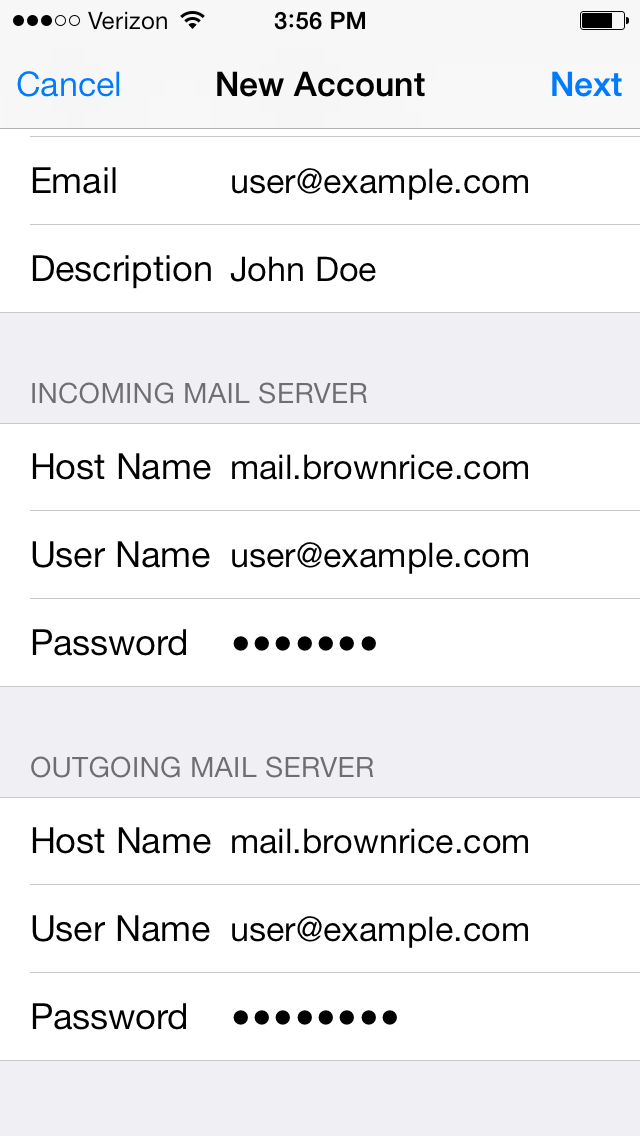
- In the User Name field, enter your full email address.
- In the Password field, enter your password (case-sensitive).
NOTE: The User Name and Password fields default to optional. This is NOT true; these fields are not optional and must be entered.
- Scroll down to Outgoing Mail Server > SMTP and select mail.brownrice.com.
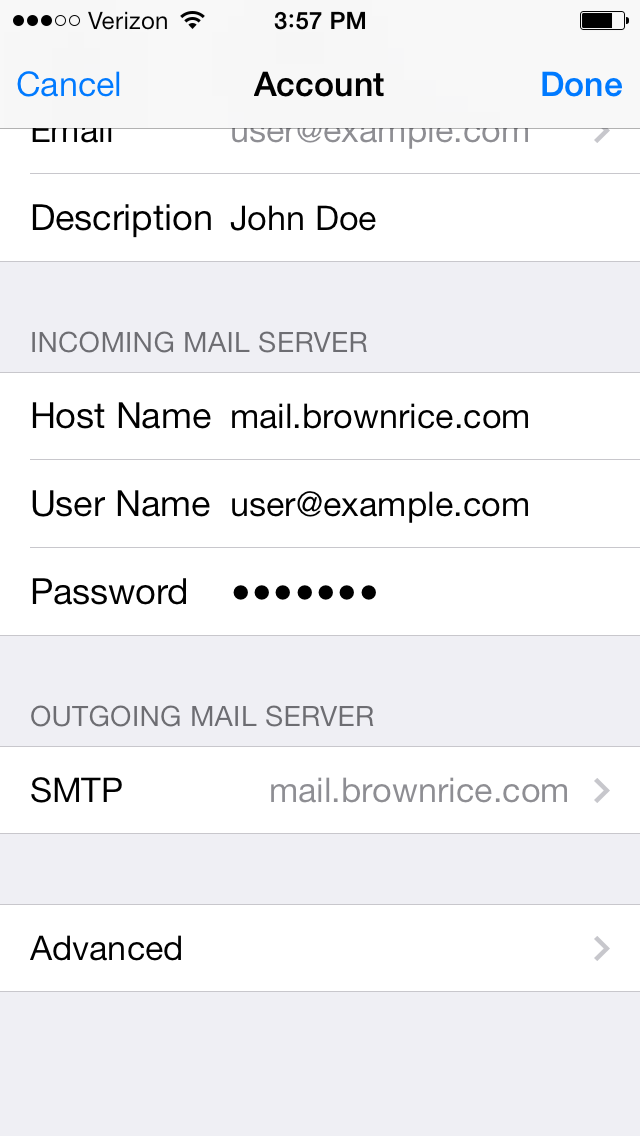
- Add your Full Email Address as Username (it is not optional).
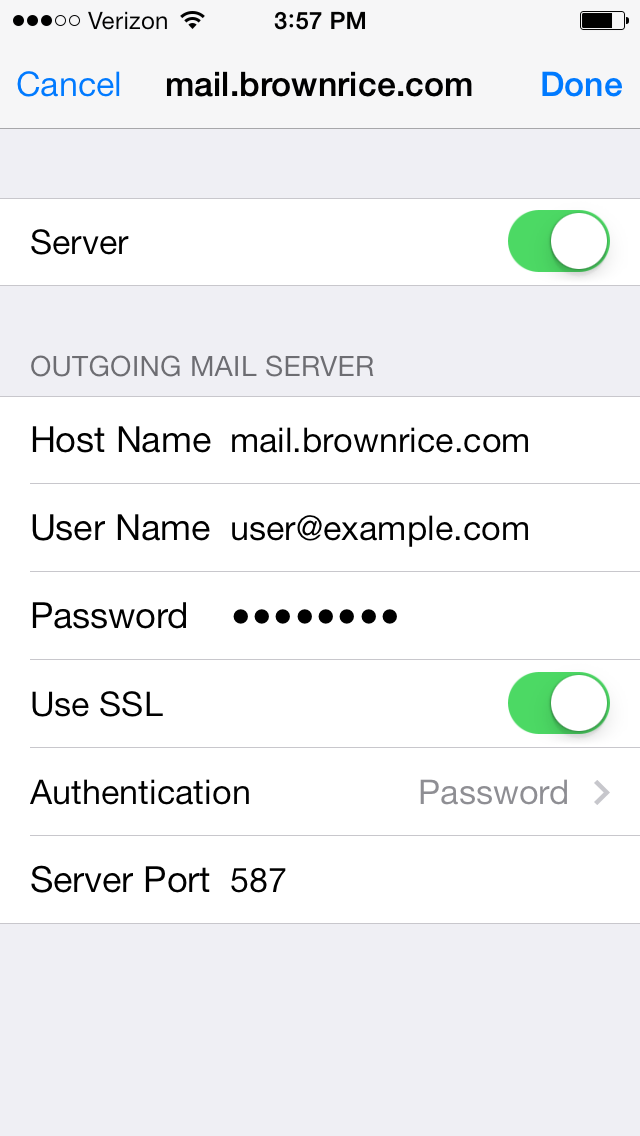
- Add email Password (it is not optional).
- Set Use SSL to On.
- Set Authentication to Password.
- Select Done.
Voila! Setup is complete!
Properly sort Drafts, Deleted, and Sent mail on the iPhone
Once you have set up your email, you may notice that when you try to drag email into the trash icon, it doesn't allow you to do so. If that is the case, you'll want to map your trash to the trash folder.
Configure your mobile Mail client so that Sent Mail, Deleted Mail, Drafts, and Junk are reflected properly after syncing back between the iPhone client, webmail, and any other desktop clients you may have.
- Open Settings > Mail > [Your Brownrice IMAP account] > Advanced.
- Select Sent Mailbox > On the Server > [Brownrice IMAP account] Sent. Return to the Advanced view.
- Select Drafts Mailbox > On the Server > [Brownrice IMAP account] Drafts. Return to the Advanced view.
- Select Deleted Mailbox > On the Server > [Brownrice IMAP account] Trash. Return to the Advanced view.
That's all the magic there is to it!
You are now ready to send and receive email from your iPhone or iPad until the cows come home! Enjoy.
How do I configure Mac Mail for email?
- Open the Mail program on your Mac. In the upper-left corner of your monitor, click Mail -> Add Account.
- Choose Other Mail Account... and click the Continue button.
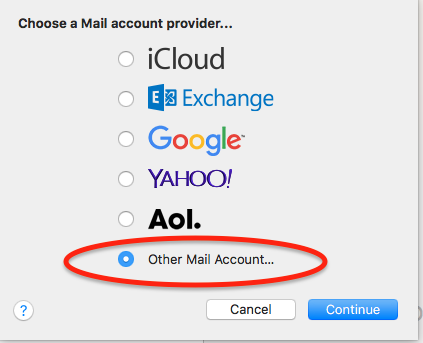
- Enter your real name (e.g., Emily Brown) in the Name field, your new Brownrice email address in the Email Address field, and your new Password.
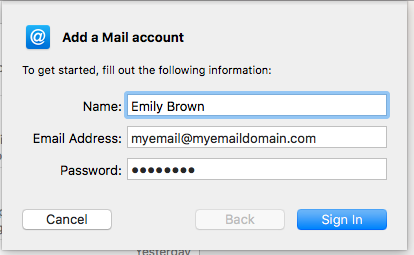
- We recommend that the Account Type is set to IMAP, as IMAP allows email and folder synchronization between all of your devices and works with our Advanced Spam Protection. However, if you prefer, you can select POP and use that instead.
- Enter mail.brownrice.com into both the Incoming Mail Server and Outgoing Mail Server fields.
- Leave all other fields as is (User Name can be left at Automatic).
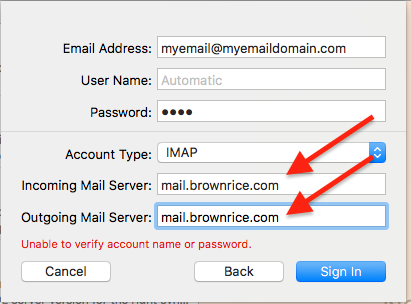
- That’s it! You are now ready to send and receive emails in Mac Mail!
Important Note: If you have trouble sending email, follow these instructions.
How do I forward my emails to Gmail?
- In your browser, sign in to the Gmail account you want to import to.
- In the top right, click the gear shaped icon, and pick "Settings"
- Click the "Accounts and Import" tab.
- In the "Check mail from other accounts" section, click "Add a mail account".
- Type the full email address of your Brownrice email account, then click Next.
- Select "Import emails from my other account (POP3)
- Make sure the Username is your full address
- Type your Brownrice email password (not your Gmail password).
- Make sure the POP server says "mail.brownrice.com" (without the quotes)
- Check the option to "Leave a copy of retrieved message on the server" (so you always have a backup on our servers)
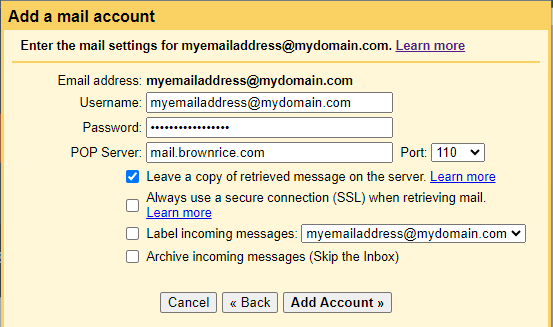
- Click Add Account.
To send mail from within Gmail as a Brownrice account, see these instructions: https://support.brownrice.com/content/3/350/en/how-do-i-send-mail-from-google-using-my-brownrice-email-address.html
Mac Mail Error: Mail can't verify the identity of "mail.brownrice.com"
If you are receiving this error using Mac Mail:
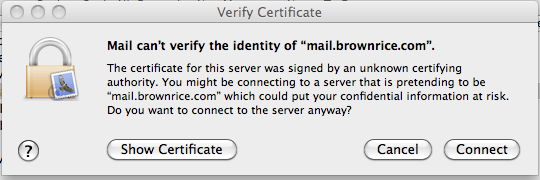
Follow these instructions to make this error go away:
- Click the Show Certificate button.
- Click the small arrow to the left of the word Trust on the next screen.
- When change "When using this certificate:" from Use System Defaults to "Always Trust"
- Finally, click the "Connect" button.
Done.
How do I set up a signature in webmail?
- First, log in to webmail with your email address and password at http://webmail.brownrice.com.
- Click the Settings tab.
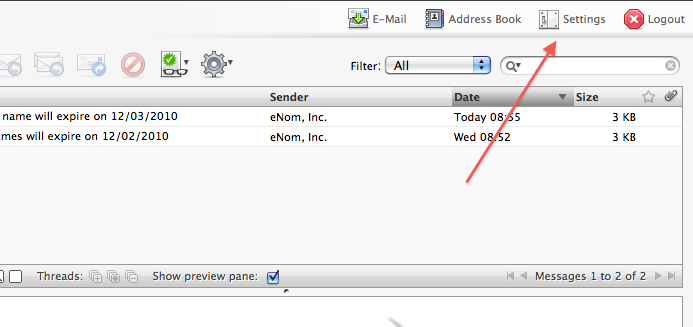
- Click the Identities tab, then click your email address on the left.
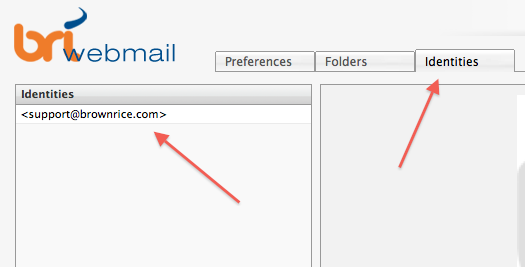
- Finally, fill in the Signature box and click the Save button when you are done.
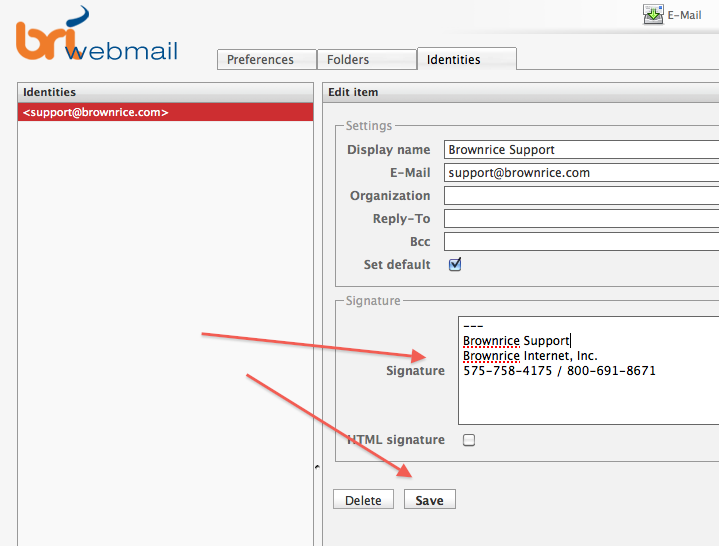
Note: You might want to fill in the Display Name field with your real name while you are at it. It'll make your outgoing emails look a bit more professional.
How do I configure Thunderbird for email
Mozilla Thunderbird Email Settings
Download Thunderbird here.
- Open Thunderbird and click Email.
_(1).jpg)
- In the prompt that appears, click Skip this and use my existing email.
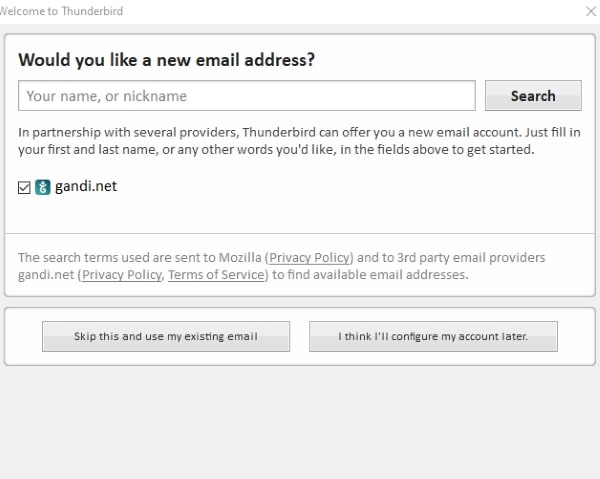
- Enter your name as you would like others to see it when you send an email, then enter your full email address and password. Click Continue.

- Thunderbird will try to automatically identify and populate the fields. Once it completes, click Manual config.
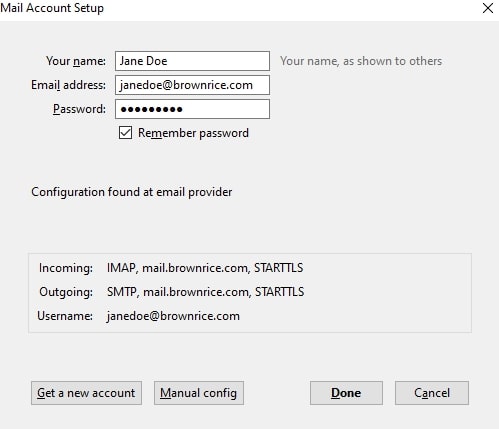
- For both incoming and outgoing Server hostname, enter mail.brownrice.com. Then, enter your FULL EMAIL ADDRESS in both the incoming and outgoing Username fields.
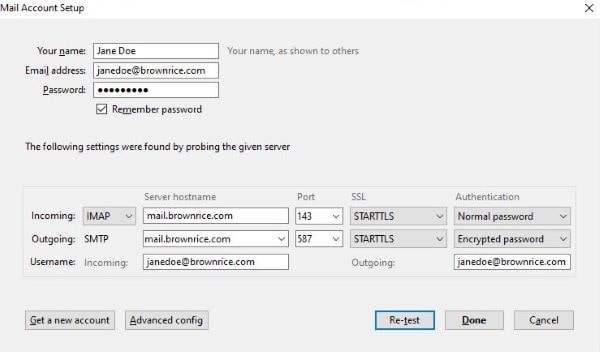
- Click Re-test. If the test passes, click Done.
- If the test fails, double-check your username, password, and hostname settings, then try again.
Ta-Da! You are now done and can start sending and receiving emails!
Here is how to setup Thunderbird with your server to contain Drafts, Sent, Junk and Trash inside the Inbox rather than outside in Local Folders:
- Go to -> Inbox Panel & right-click your new account name (in the folder panel)
- Choose Settings
- In the Account Settings panel, go to -> Copies & Folders
- Under When sending messages, automatically, check Place a copy in:
- Choose Other, then select the correct Sent folder (under Inbox, if available)
- Under Drafts and Templates, set the Drafts folder the same way (pick the one under Inbox)
- Click OK to save changes
- Restart Thunderbird for good measure, or right-click the account and choose Subscribe again just to refresh everything
What email server names, ports, and encryption can I use with my email program?
Full email program setup instructions are here: https://support.brownrice.com/content/3/1/en/what-are-my-email-server-settings.html. However, if you are looking for our support of specific ports and protocals we've got them listed below:
Non-encrypted connections:
- SMTP use: mail.brownrice.com and port 25
- IMAP use: mail.brownrice.com and port 143
- POP/POP3 use: mail.brownrice.com and port 110
Use these protocols and ports if you'd like to encrypt the connection between your email program and our servers (recommended):
- SMTP with STARTTLS use: mail.brownrice.com and port 587
- SMTP with TLS/SSL use: mail.brownrice.com and port 465
- IMAP with STARTTLS use: mail.brownrice.com and port 143
- IMAP with TLS/SSL use: mail.brownrice.com and port 993
- POP: We don't support secure POP accounts and highly recommend that all email be configured as IMAP accounts.
Please note that using the ports and protocols above will encrypt your email connection between our servers and your email program but this does not make your email secure! Once the email leaves our servers it travels across the internet in plain text. Bottom line: Email is NOT secure so don't email sensitive data!
What is DSPAM?
For the majority of our email users, our free anti-spam software, Proxmox Mail Gateway, adequately protects their inboxes from receiving spam. In addition to greylisting, our Proxmox Mail Gateway servers scan all incoming messages for spammy words, images, blacklisted IP's (using DNSBL's) and real-time URL blacklists (using URIBL) and rejects and quarantines spam emails. However, for a small percentage of our users, this isn't enough, and in those cases, we provide Advanced Spam filtering (DSPAM).
Here's what you need to know about DSPAM:
- DSPAM is incredibly effective at classifying spam as it builds a personalized anti-spam database and applies machine learning for each email user that uses it.
- Since this is server-side filtering, it works across all of your devices. However, in order to achieve this, DSPAM only works with IMAP email accounts and does not work with POP email. All email programs can be configured as IMAP, and nearly all mobile phones use IMAP by default. Brownrice Webmail uses IMAP. If you would like to convert from a POP account to an IMAP account, you can do so by following these instructions: What email server names, ports, and encryption can I use with my email program?
- DSPAM must be trained by you in order for it to be effective, which takes a few minutes per day at first and just a few seconds per day after DSPAM is trained.
- DSPAM costs $1 per month! (It’s not free. It costs a buck per month!) Whomever is responsible for paying your hosting bill will be paying the $1.00 per month, so check with them before clicking the sign-up checkbox!
- DSPAM does NOT work with Outlook 2013 and Outlook 2016. New versions of Outlook strip message headers from email when messages are moved from folder to folder (so wrong, so bad!). This Outlook behavior removes DSPAM header information, which effectively disables server-side spam filtering.
And it’s very easy to sign up! Just log in here http://admin.brownrice.com with your email username, domain name, and password, then scroll to the bottom of the page and check the box next to this:
| Enable Advanced Spam Detection and Learning?: [ ] <<<< Check this box. |
Next: How do I train DSPAM?
How to convert a POP account to IMAP account
IMAP email accounts are much better at syncronzing email between devices (your desktop computer, smart phone, and webmail) than POP accounts. Additionally, Brownrice Advanced Spam protection (DSPAM) only works with IMAP and POP accounts can behave strangely if you are leaving a copy of your email on our servers. So we highly recomend creating your email account as an IMAP account instead of a POP account.
Below are instructions for converting your email from a POP to an IMAP account for different email programs. Be sure to back up your email before doing this as a mistake could cause you to lose your email.
- Mac Mail: How to convert a POP account to an IMAP account
- Outlook 2003, 2007, 2010: Convert from a POP3 account to IMAP
- Thunderbird: Switch from POP to IMAP
Also note: You must convert ALL of your devices (phones, computers, laptops) in order for this to work correctly. Phones typically use IMAP by default or if they are POP accounts they leave mail on the server so that those accounts can simply be deleted and recreated as an IMAP account.
How to add my Gmail address book to Brownrice Webmail?
To enable your Gmail address book so that its available to you in Brownrice webmail you'll need to modify your Gmail security settings. Here's how you do it:
- Login to your Google security settings page: https://www.google.com/settings/security
- Select "View all" under the "Account permissions" area
- Select "Manage application-specific passwords"
- You'll now need to set up a new application-specific password
- In the "Enter a name to help you remember..." box enter Brownrice Webmail
- Click the generate password button
- Make sure this password screen is available to you for the next step! (i.e. Don't close the browser window)
- Login to Brownrice Webmail using your email username and password http://webmail.brownrice.com
- Select Settings -> Address Book
- At the bottom of the Address Book screen enter your full gmail email address. e.g. myname@gmail.com
- Copy and paste your new Application-specific gmail password (the one you saved above) into the Google password box
- Click Save.
- Click Logout.
- Log back into Brownrice webmail.
- Your Gmail addressbook should now be available to you in Brownrice webmail. If its not, log out and log back in one more time.
- Done.
How do I change my iPhone or iPad's SMTP (outgoing) password?
To change your SMTP (outgoing) email password on your iPhone, follow these settings:
- To get to this setting, click on the SETTINGS icon on your iPhone.
Once on the settings screen, scroll down to MAIL > CONTACTS > CALENDARS, and select it:
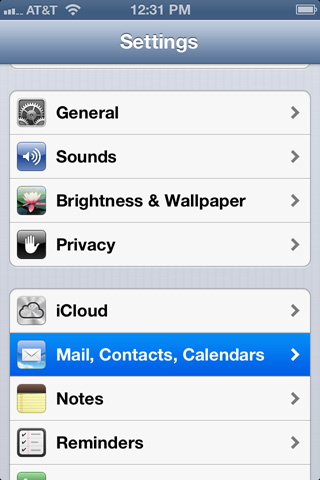
- Then click on the account you need to update the SMTP password for:
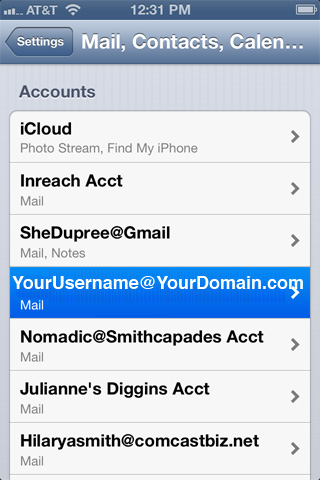
- Next, click on the OUTGOING SERVER.
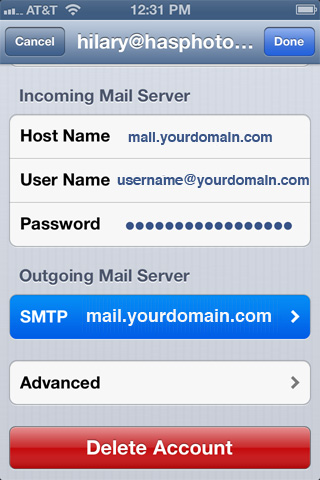
- Now you will see a list of OUTGOING SERVERS that have been configured on your iPhone or iPad. Select your email domain:
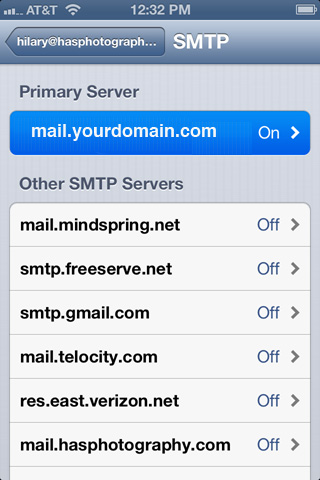
- Now you will see the settings for that PRIMARY OUTGOING SERVER:
Make sure that:- SSL is OFF.
- Authentication is set to "PASSWORD".
- Outgoing Port is set to "587".
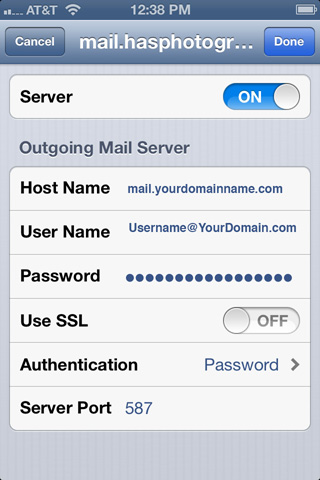
- And don't forget to enter your new password!
Click "Done".
It will VERIFY these settings. If it does NOT verify, something is wrong. It could be that your password is typed incorrectly or did not get saved to this part of the email setup.
Type in the password for your email account again if you're getting an error, and see if that helps.
It should verify. Then simply click back to the main settings window.
Done!
How do I configure my Android device for email?
Configuring Android Mail
- First, open your mail application. Go to your "apps" and tap on the icon that looks something like this:

You'll be shown several options for what type of account you want to create. Choose "other".
- Enter your email address and password, and tap "Manual Setup".
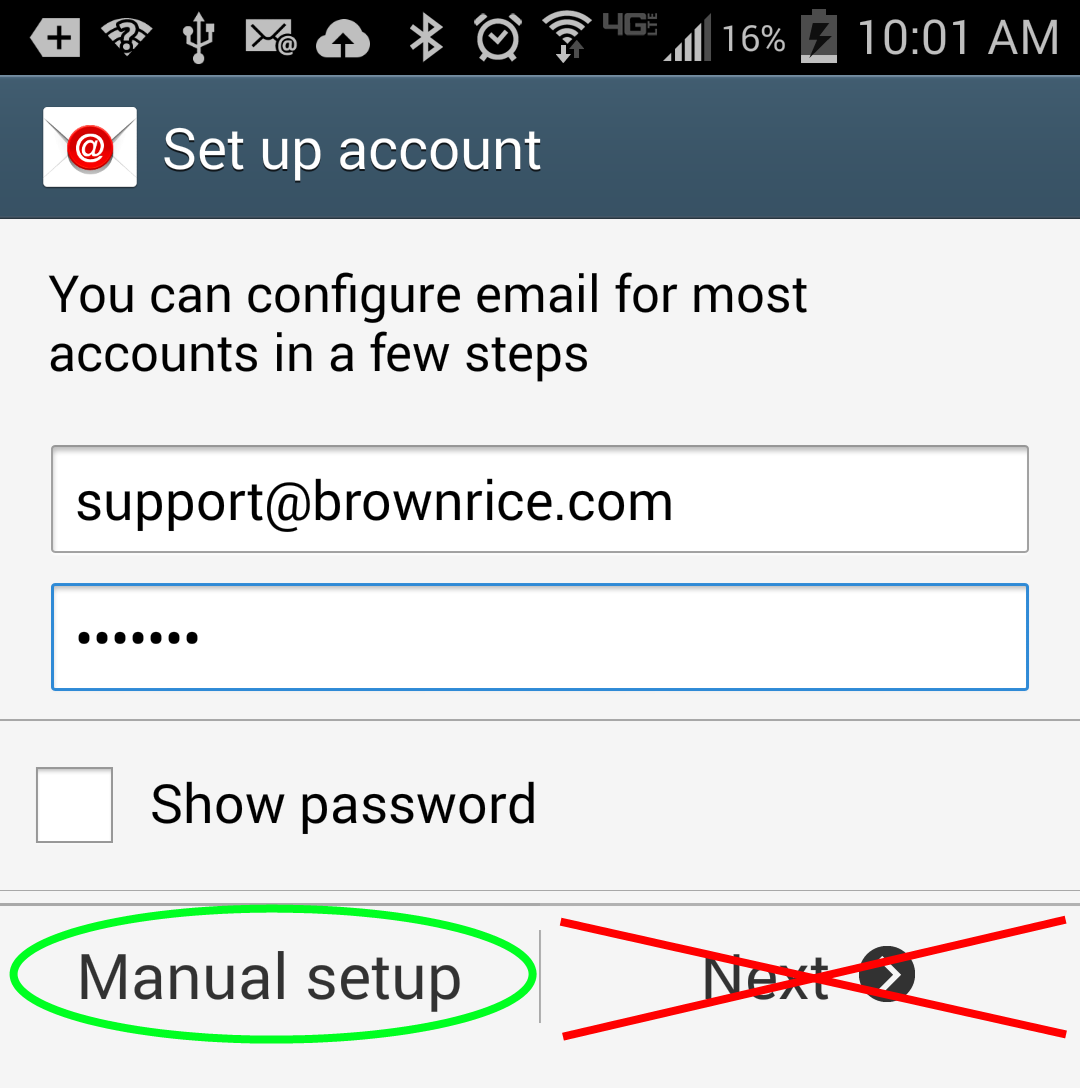
- Choose "IMAP Account".
IMAP is intended to work with multiple devices, and will synchronize your email between them. It also keeps a backup copy on our servers. POP, on the other hand, unless specifically configured not to, will download all emails to the device, store them only on the device, and not synchronize between devices. That means if your device is lost, damaged, or stolen, all your email goes with it; so use IMAP.
- Replace "support@brownrice.com" with your email address, and enter your own password. Other than that, all settings should exactly match the ones shown here:

- Aside from username (your full email address again) and password, your outgoing settings should exactly match the ones shown here:

Optional Settings
You can research and adjust these settings to fit your needs. The ones shown here are optimal for an account that receives a lot of email. If you choose a longer period to sync email, it may slow down features of your mail app such as the ability to search your inbox.

Done!

I just transferred my email to BRI from another host. How do I configure Apple Mail to work with Brownrice email?
- To get your Apple Mail client talking to our email servers, you'll need to edit your account preferences by opening up Mail and navigating to Mail > Preferences in the top menu.
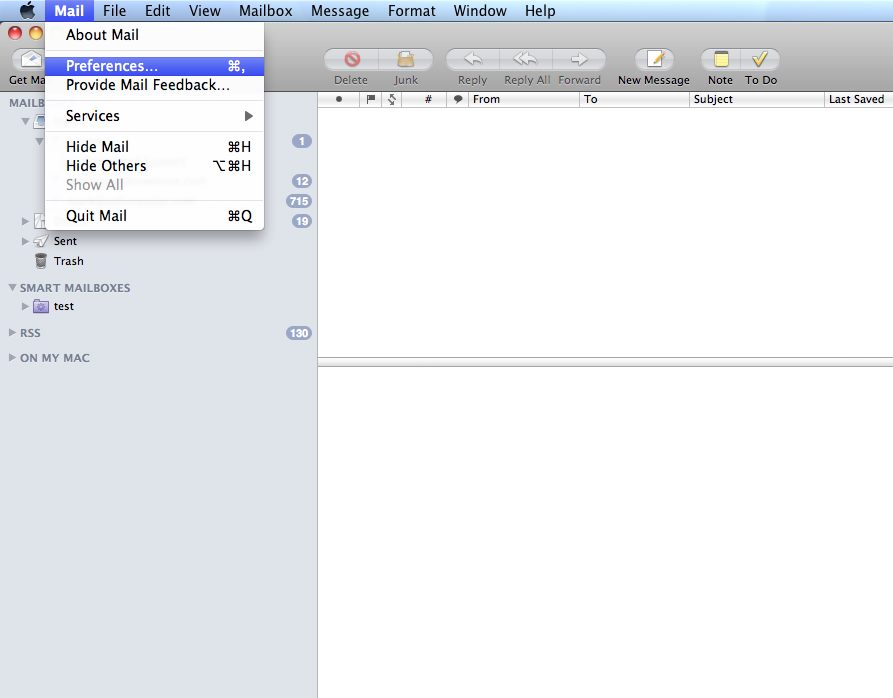
- Next, you'll need to change your incoming mail server and ensure that your username is your full email address.

- Switch over to the "Advanced" tab. For best results, your settings should match exactly what's shown here.
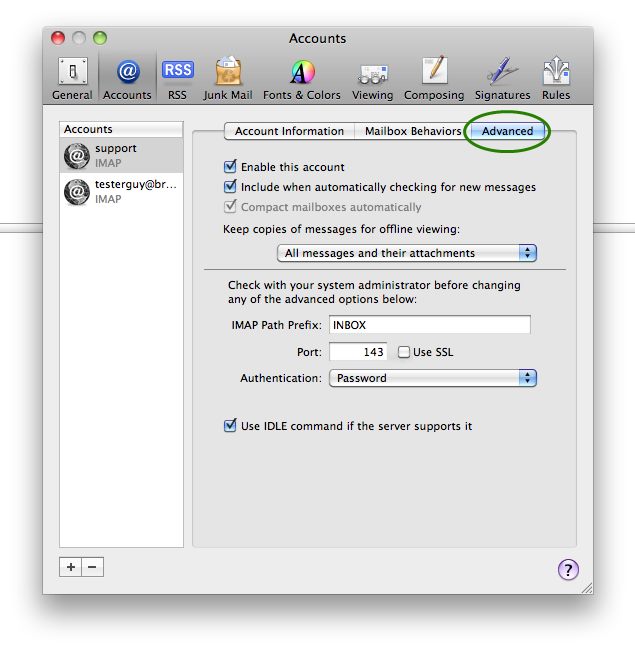
- Go back to the "Account Information" tab, and click the drop-down next to Outgoing Mail Server (SMTP). Then select "Edit SMTP Server List" from the bottom of the drop-down.
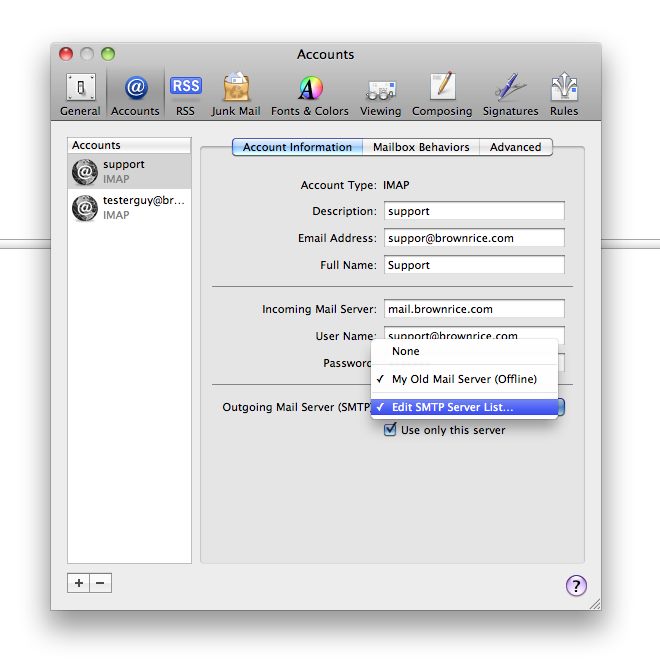
- Click the plus sign to add a new SMTP server.
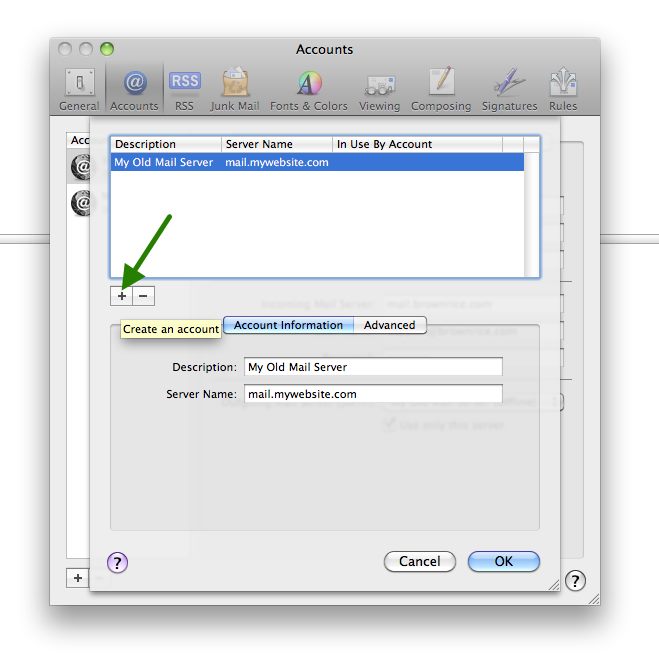
- On the "Account Information" tab, specify mail.brownrice.com as the mail server, and enter a description of your choice.
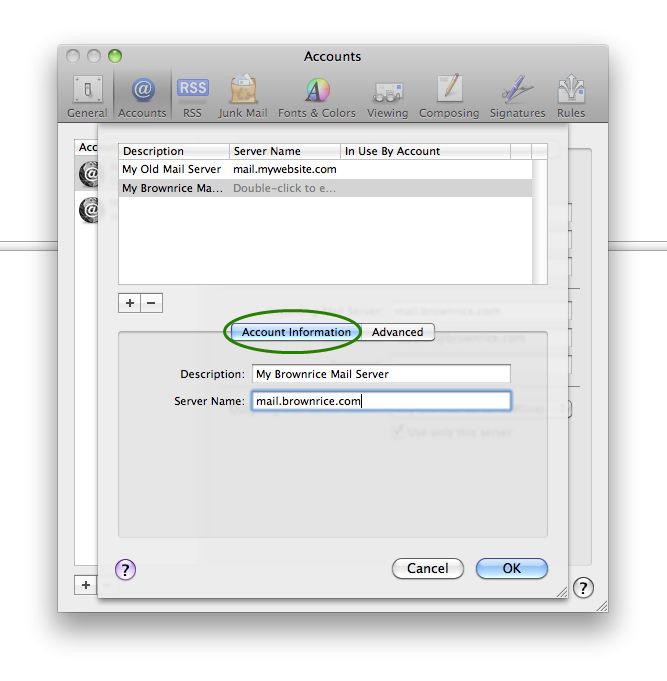
- Navigate to the "Advanced" tab, make sure that the username is again your full email address, and that the rest of the settings match these exactly.
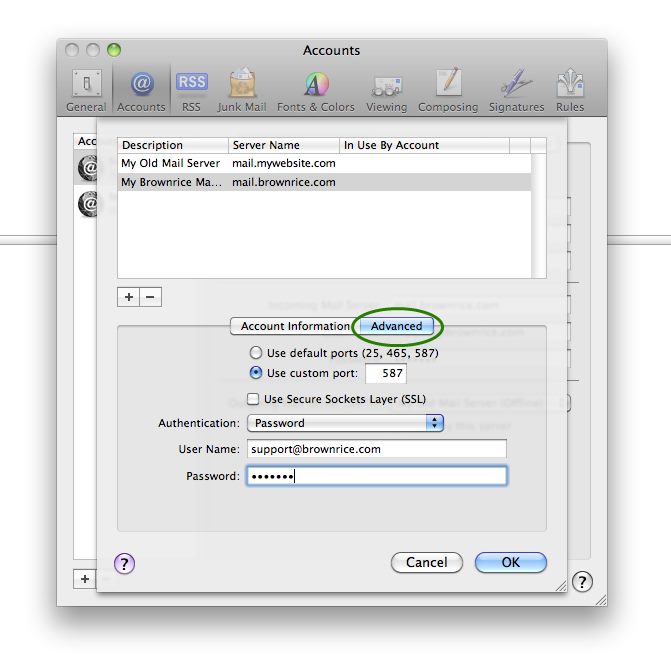
- Click OK to close the SMTP settings, and make sure to select the server you just created from the drop-down menu. Also, be sure to check "Use only this server."
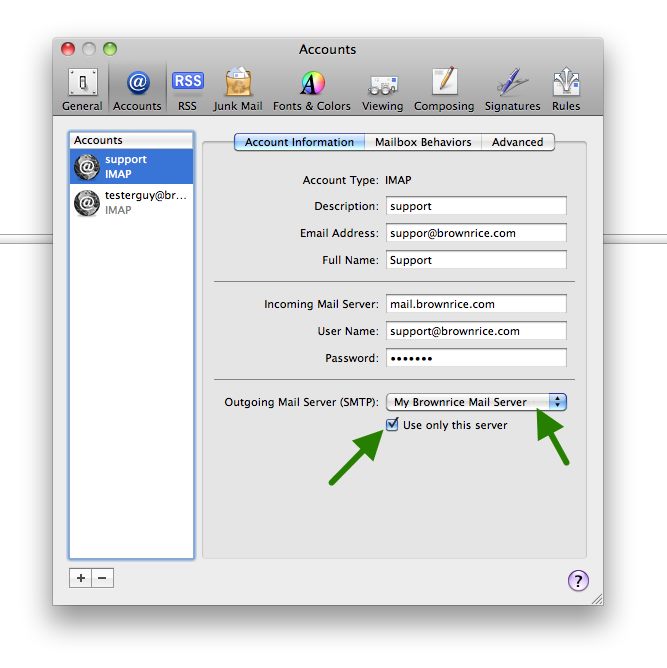
- Finally, click the red close button in the top-left corner to close the preferences window, and be sure to SAVE when prompted.
All Done!
I just moved my email to BRI from another host, how do I configure my Outlook to work with Brownrice email?
- To change your existing account so it uses Brownrice mail servers, you will need to edit your account settings. Start by clicking the "File" tab in the top left, and choosing "Account Settings".
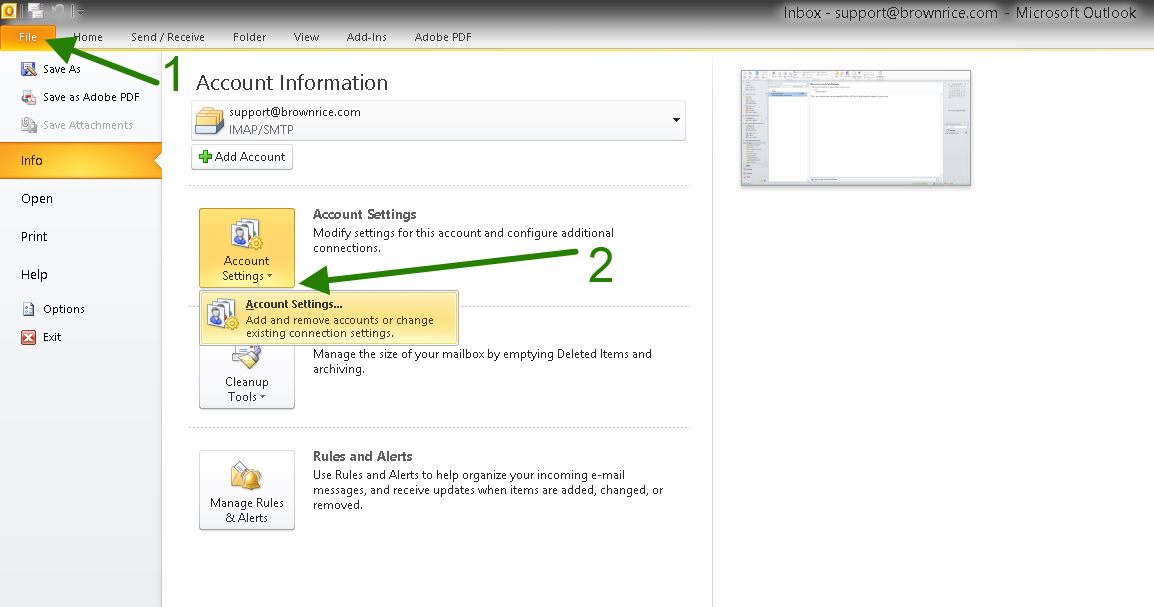
- Next, click on the name of the account you want to modify to highlight it, then click the "Change" button.
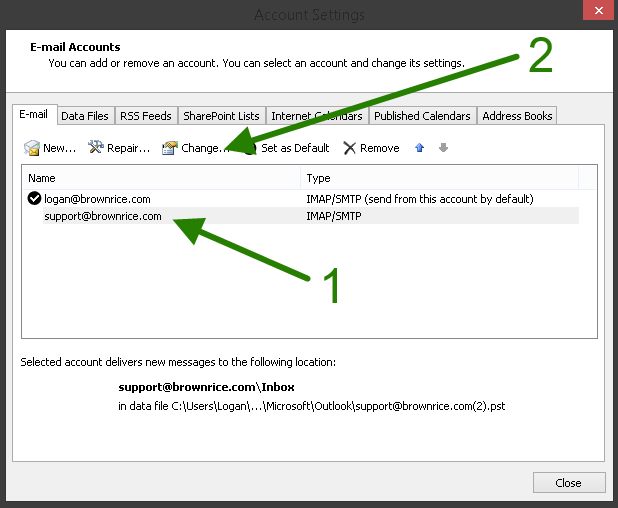
- Make sure that your email address is entered properly, that your username matches your full email address exactly, and that both incoming and outgoing servers are set to mail.brownrice.com. Once that's done, click the "More Settings" button.
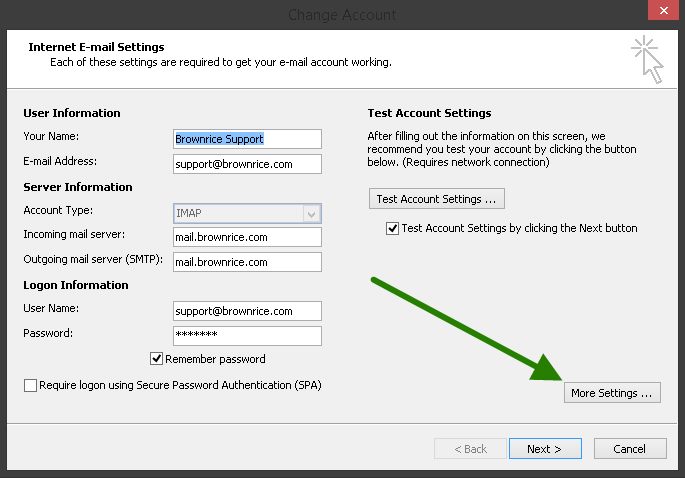
- Click on the "Advanced" tab. For best results, ensure that your settings match the ones shown below exactly.
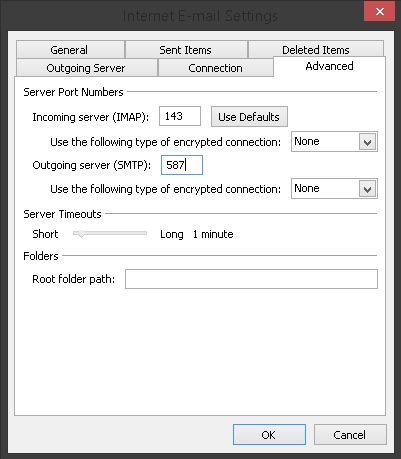
- Click on the "Outgoing Server" tab, and again, make sure your settings match these exactly, substituting your own email address and password of course.
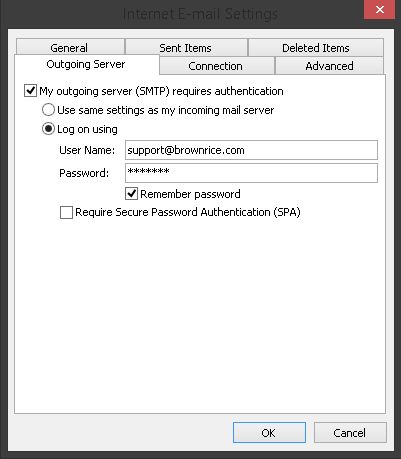
- Now click OK or NEXT on all remaining windows to save and close your account settings. You are done!
Troubleshooting Mac Mail
Mac Mail, or Apple Mail may sometimes trouble you by suddenly becoming unable to send or receive email. This is often accompanied by a notification that the server is offline, that the message "could not be sent using the Brownrice mail server," etc.
This is a well-documented issue that affects many Apple Mail users, with many different email providers. There are just as many suggestions out there on how to fix the problem if you start searching the web. This FAQ takes those which we have found to be most effective and presents them in order from easy to advanced.
Often, closing and restarting Mail, or restarting your computer are enough to correct the problem, but first, let's get any mail that's stuck in the outbox saved as a draft so you don't lose it.
1. Click on your outbox in the left column (where all your folders are), select a message, and go to Message > Move To > Drafts in the main menu.

2. Next, let's close out Mac Mail. After you close it down, try restarting it from your Applications folder.


3. If you restart the application and are still having the problem, save any ongoing work, and restart your computer.

If you are still having trouble at this point, the next step is to remove SMTP server passwords from your keychain.
- Open your Applications, and locate the Utilities folder.
- Open Utilities, and find the "Keychain Access" utility.
- Keychain Access has a search box in the top right corner.
- Enter "mail.brownrice.com" in the search box, and delete any passwords that appear in the list.
- Enter "mail.yourdomain.com" (substituting your actual domain, of course) in the search box, and delete any passwords that appear in the list.
- Enter "smtp.yourdomain.com" (substituting your actual domain, of course) in the search box, and delete any passwords that appear in the list.
- Enter "imap.yourdomain.com" (substituting your actual domain, of course) in the search box, and delete any passwords that appear in the list.
This will require you to enter your passwords again. If you do not have your Brownrice email password, we can provide it for you. We cannot provide passwords for other accounts/services not related to Brownrice, so don't delete a password that is not directly associated with your Brownrice email account.
If you are uncomfortable with the procedure at this point, we highly recommend you contact Apple tech support or a local IT specialist to assist you.
Now let's verify your settings to make sure Mac Mail is communicating with our servers properly:


Once you have verified the settings and corrected any inconsistencies, restart your Mac again.
Different Settings if you have a POP account:


How do I train DSPAM?
-
When a spam message arrives in your inbox drag it to your new isSpam folder!
-
When DSPAM determines that a message is spam it automatically places it in your Quarantine folder.
-
Check your Quarantine folder from time to time - especially at the beginning when DSPAM is learning your email - and drag good email which shouldn't be in the Quarantine folder to the isNotSpam folder. Within a few minutes DSPAM will learn that this message isn't spam and will place it back in your inbox.
-
Delete spam messages from your Quarantine folder. Once a spam message is in your Quarantine folder there's no need to save it.
That's it!
A quick recap: If a spam message arrives in your Inbox, then you drag that to your isSpam folder. Within a few minutes DSPAM learns that message is spam and then moves it to your Quarantine folder. You also want to occassionally scan your Quarantine folder for non-spam messages and move those into your isNotSpam folder. After a few minutes DSPAM willl learn that those messages are not spam and will place them back in your inbox. You can, and should, delete spam from your Qurantine folder since there is no need to save this spam.
To review: Place spam in the isSpam folder and drag misclassified real emails that were Quarantine'd into theisNotSpam folder.
And give it a few days and watch the magic happen!
NOTE: DSPAM does NOT work with Outlook 2013 and Outlook 2016. New versions of Outlook strip message headers from email when messages are moved from folder to folder (so wrong, so bad!) This Outlook behaviour removes DSPAM header information which effectively disables server-side spam filtering.
Where is your control panel?
Our mobile-friendly control panel is located here:
https://dashboard.brownrice.com
You can login with any email address that is associated with a Brownrice billing account. Click the Password Reset link to get yourself a password.
Someone just sent me an email from my own email address?
Help! Am I hacked? What do I do?
Worry not, this is just a common and simple ploy that spammers use to send you email called "spoofing". It does not mean your account has been hacked and it does not mean that anything is wrong. It simply means that the spammer faked the return address when they sent it to the recipient, which is extremely easy to do.
Just delete the email, or move it to your isSpam folder, just like you do with any other spam, and then go about your business.
How can I help my email get successfully delivered to AOL, Gmail, and hotmail users?
AOL
Make sure that the email recipient's address @aol.com has specifically added your sending address to their AOL address book as follows:
- Select "Mail Options" menu and click "Address Book"
- From the "Address Book" click, "Add"
- From the "Address Card for New Contact" window type the senders email address into the "Other E-Mail" field.
- From address set to "Primary E-Mail" by checking box to right.
- Click SAVE
If the incoming email is already in your SPAM folder you can then go ahead and click the button labled "This Is Not Spam"
Gmail
Add the From address you want to receive mailings from to your Gmail Contacts:
- Click "Contacts" along the left side of any Gmail page.
- Click "Create Contact".
- Copy and paste user@domain.com into the primary email address dialog box.
- Click "Save".
If the mailing is in your SPAM folder, check the box next to the mailing and click the "Not Spam" button along the top.
Hotmail
Add the From address you want to receive mailings from to your Hotmail Safe List:
- Open your mailbox and click “Options” (upper right hand corner).
- Click the “Junk E-Mail Protection” link.
- Select the “Safe List” link.
- Copy and paste username@domain.com into the dialog box titled “Type an address or domain”.
- Click the “Add” button next to the dialog box.
If the mailing is in your "Junk E-Mail Folder", open the email and click the "Not Junk" button.
What should I use for my SPF record?
If you are hosting your email on Brownrice servers and are having email deliverability problems, go to our Dashboard and enter this TXT record (the quotes are important) under the DNS Tab:
"v=spf1 mx a include:spf.brownrice.com ~all"
A SPF record (Sender Policy Framework) works to reduce spam and email spoofing by specifying which mailservers are allowed to send mail from your domain.
On the receiving side of things, SPF works by verifying emails against the SPF record to ensure that emails came from your domain.
In addition to SPF, Brownrice recommends you use DKIM and DMARC, especially if you are having problems with message delivery and incorrect spam flagging.
I need to migrate my email, how do we make that happen?
This is a common question, and while the process is typically very simple and straight forward, a number of things need to happen, in order, to prevent any interruption to your email service.
Note: This only applies to hosted email accounts (yourname@yourdomain.com) If you have an email account through another provider's domain (i.e. google.com, kitcarson.net, etc.) you'll need an IT person to help you find another solution.
So how do we do this?
First and foremost (this is the most common error) do not change your name servers or MX records before coordinating with us! We have to set up your accounts on our servers first. If you start sending mail to our servers before that's done, it's just going to bounce.
The full procedure is as follows:
- Send us a full list of your existing email accounts, and the passwords for each. We'll set these up on our servers with the same passwords, which you can change later if you wish.
- Once that's done, we'll advise you that it's ok to change DNS, either the name servers, or just the MX records. This will result in all new incoming mail going to our servers, so it won't show up in your Outlook, Mac Mail, etc. yet. You can check for new email through http://webmail.brownrice.com during the transition.
- We'll run a program on our mail server which acts as an IMAP client, and pulls all your messages from the old server, over to ours. It authenticates with a username and password, just like Outlook, which is why we need the account passwords. If you're not comfortable divulging that info, you can set a temporary password with your current host.
- Once all your email messages have been migrated to our server, we'll advise you that it's ok to change your email client settings to connect to us. The settings to do this can be found here: What are my email server settings?
That's it! Once your Outlook, MacMail, Thunderbird, etc. is connected to our server, you'll see all your messages just like before, rovided the above steps were done in the correct order.
How do I archive my emails in Mac Mail, and free up server space?
Here is how to archive in Apple Mail:
- Start Apple Mail
- From the Mail menu select Mailbox > New Mailbox…, The “New Mailbox” window should now appear
- For Location select “On My Mac”
- For Name enter any name for your new local mailbox
- Click OK and Your new mailbox should appear in the mailbox listing
- Open the mailbox on the server that contains the message or messages you’d like to move
- Select the messages you wish to move
- ctrl-click on the highlighted messages to see a menu of options and select “Move To”
- Then choose the folder you created previously from the pop-up menu
Result: The messages you selected are moved to the folder on your local machine. If you have a lot of messages this could take a long time to complete. Do not power off the machine, allow the battery to die, or disconnect it from the internet until this is complete.
By selecting “Move To” the messages will disappear from the mail server and will no longer count against your email quota.
Repeat the steps as needed to move mail from multiple mailboxes on the server to your preferred set of mailboxes on your local machine.
There's an Apple discussion on this here: https://discussions.apple.com/thread/3841507
If you'd prefer to have an IT person assist with this, (which we recommend) just email support@brownrice.com and we will refer you to people who can help!
How do I archive my emails in Outlook and free up space on the IMAP server?
The process is fairly straightforward, but we recommend that you consult an I.T. professional who can sit sown with you and walk you through it if you have never attempted the procedure before, or are uncomfortable with such things. Detailed instructions for archiving emails in different versions of Outlook (back to 2007) can be found here:
https://support.office.com/en-us/article/Archive-items-manually-ecf54f37-14d7-4ee3-a830-46a5c33274f6
Older versions of Outlook & Outlook Express may remain somewhat functional, but are not supported.
How do I add someone else, like my web developer, to my account?
Add a web developer or access for another user to your Dashboard account
If you'd like someone else - like your web developer or another trusted employee - to be able to access our Dashboard so that they can administer your account and have all the control you have, do this:
- Log in to your Dashboard
- Navigate to USERS
- -> Click Add User (green button, either the one in the header or the one below all contacts)
- Add user's info and select permissions with the checkboxes at the bottom of the modal and click Save, which will email your new contact with a password reset link so that they can then login to https://dashboard.brownrice.com as well.
Done!
How do I subscribe to email folders in webmail?
If you have IMAP email folders that aren't showing up in webmail, it's likely because you are not yet subscribed to them. Here's how to enable them:
- First, login with the email account here: https://webmail.brownrice.com/
(be sure to use the full email address as the username and the correct password associated with the account.) - Next, select the "Settings" button in the upper right hand corner:
- Then, in the "Settings" menu select the "Folders" category:
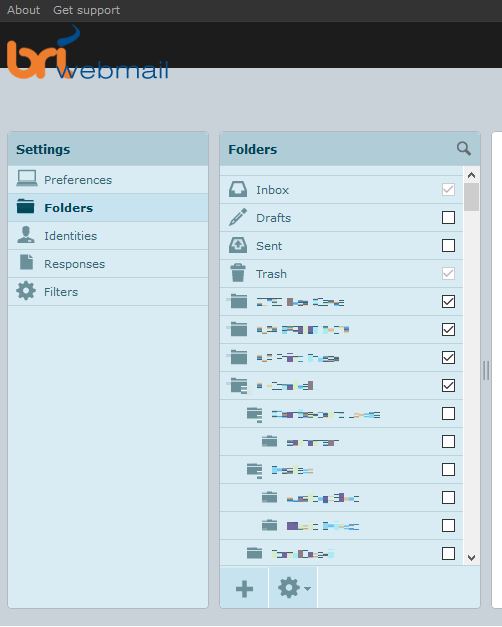
On this page you simply select the checkbox next to the IMAP folders that you want displayed. That's it!
As always, simply contact support@brownrice.com with any questions.
How do I configure Windows 10 for email?
Windows 10 Settings
- Open Windows 10 Mail and click Accounts > Add Account.
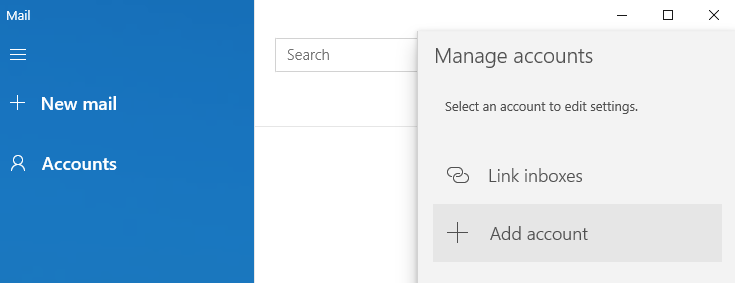
- Scroll to the bottom and click Advanced setup > Internet email.
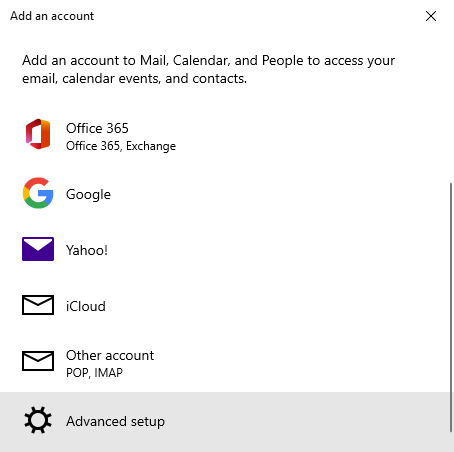
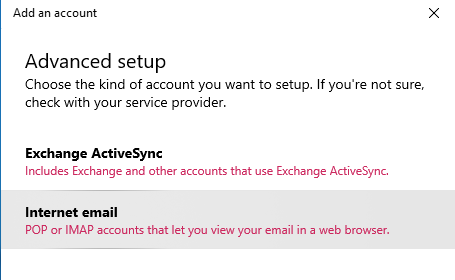
- Enter your email address in the Email address field.
- Enter your email address again in the User name field.
- Enter your email password.
- Enter an identifying name of your choice in the Account name and Send your messages using this name fields.
- Enter mail.brownrice.com for both the Incoming and Outgoing email servers and select IMAP4 as the account type.
- Keep the default checkboxes checked.
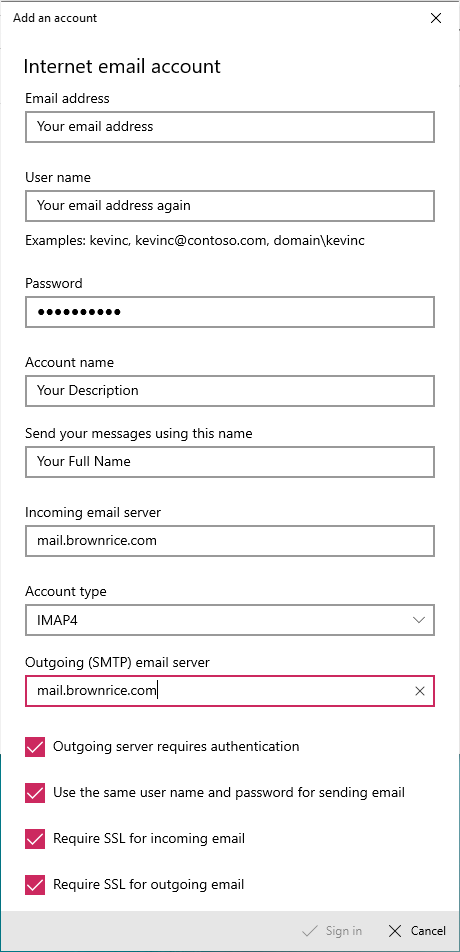
- Click Sign in.
Voila! You are set up!
How do you change your skin in webmail?
Do you not like something about your current webmail interface? Maybe you logged in and now things look different?
Here's how to change your skin in webmail!
- Login to webmail: https://webmail.brownrice.com
- Navigate to "Settings" on the left hand side.
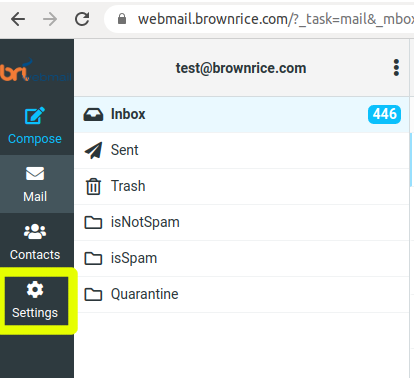
- On the settings page, under "Preferences", select "User Interface":

- On the "User Interface" select a different skin from the "Interface skin" list:
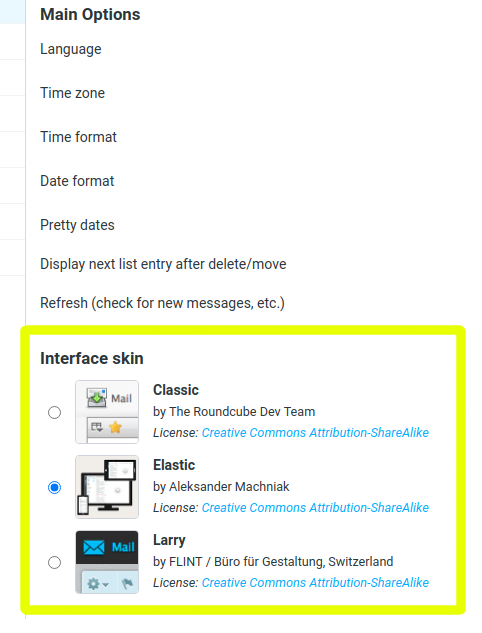
- Click the "Save" button at the bottom of the page.
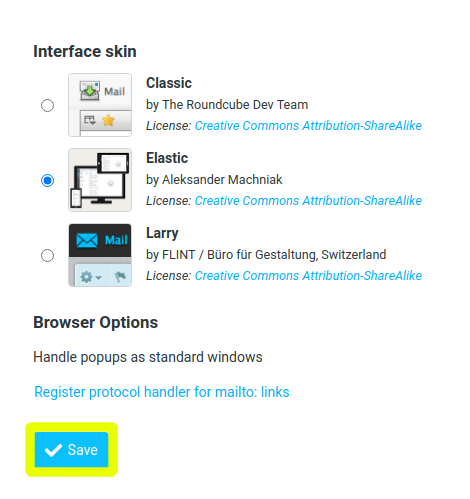
- That's it! You can try out the different available themes this way to figure out which one is right for you!
As always, please contact us at support@brownrice.com if you have any questions or issues!
How do I set up an email forwarder?
Note: We do not allow forwarding to outside providers and only allow forwarding to email accounts on the brownrice servers. If you setup a forward to an outside provider it will be automatically removed within the hour.
- Login to https://dashboard.brownrice.com then...
- Click the Email Hosting tab and then the Manage Email Accounts button next to the appropriate domain
- Scroll to the bottom of the list of Email Accounts and click the green Manage Email Accounts button.
- Click the Forwards button to view your existing forwards or click the New Forward to create a new one.
- Fill in the email address that you'd like to forward your email to
- Click the "Modify User" button at the bottom of the page
Done.
Note: If you'd like to keep a copy of the email on your brownrice account (not recommended unless you know what you are doing as it'll fill up your account quickly) then select the "Save a Copy" check box.
How do I add Email Hosting?
We currently offer Email Hosting for our Smart VPS, Dedicated and Webcam Hosting customers.
Email Hosting is $2/month per domain and $2 per email account. Or $4 for the first email (including the domain) and $2/account thereafter. So for five email addresses @yourwebsite.com, you would pay $12/month.
Important: In order to have email hosted through Brownrice, the MX records of the domain you are trying to use will need to be set to:
mx1.brownrice.com and mx2.brownrice.com
Here are the instructions for getting started:
- Log in to the Dashboard > Click on EMAIL HOSTING
- Click Add Email Hosting
- Enter your email domain--the part of your email address after the @ symbol (ie 'yourwebsite.com' within "you@yourwebsite.com")
- Wait a few minutes for the service to be added to account and the computers to finish their process.
- Click on Manage Email Accounts - this will take you to a different page where you will also click Manage Email Accounts
- This opens a new window with the email account administration panel from which new email accounts, forwards, email robots, and mailing lists are all managed.
- Click New Email Account.
- Enter the new email account information and then click on ADD.
- Once you have created the new email account, then you can set it up in the email program of your choice (like Outlook, Thunderbird, etc.) to receive email on your computer. Click here for full instructions for each email program.
Does your email service have DKIM?
We support DKIM signing. It requires DNS access so please ensure you can log in to your DNS control panel, or host DNS with us. See here for more information on this topic.
Once we have access to DNS, we will need to set up DMARC and SPF records as well as server-side email signing in order for DKIM to work.
Note : After DKIM is set up, all SMTP connections should be made on our servers, so if you plan to use third party providers(Mailchimp, etc.), they will need to be set up with DKIM as well.
If this is starting to sound too technical, don't worry, we will handle all of the setup, just send support@brownrice.com an email to get started.
Emails from my website are ending up in SPAM, how do I fix this?
By default, some content management systems such as Wordpress use sendmail, the server native email application, to send email. This causes the email message to be sent from your VPS’s IP address, which can lead to blacklisting and email deliverability problems if the email recipients mark these messages as spam.
Maintaining your own IP reputation while using sendmail can be an uphill battle.
If you are having email deliverability issues, you can configure WordPress to send emails using SMTP authentication using a valid email account.
You can use a plugin such as this one to enable this functionality: https://wordpress.org/plugins/wp-mail-smtp/
You would install your plugin and then follow these instructions so that the plugin sends your web site emails through a real email account.
How do I send mail from Google (gmail) using my Brownrice email address?
It is possible to send mail from a Brownrice hosted email using Gmail's online interface.
Here is how:
- In your browser, sign in to the Gmail account you want to import to.
- In the top right, click the gear shaped icon, and pick "Settings"
- Click the "Accounts and Import" tab.
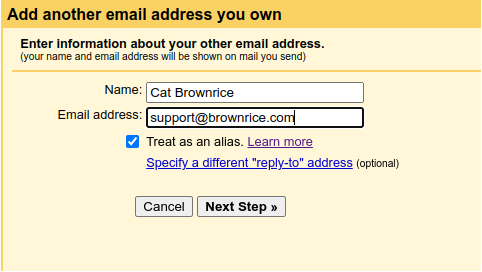
- In the Send Mail As section, click on "Add another email address"
- Follow the prompts.
- When asked about SMTP server, use
mail.brownrice.com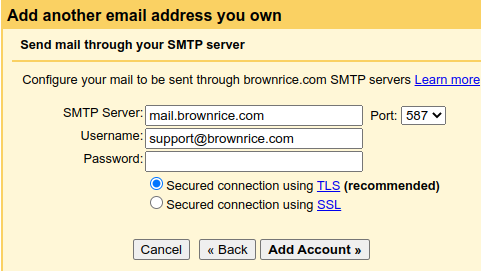
- Enter your email password, then click Add Account
- Check your email using Webmail for a code/link from Google.
- Click on Verify.
Done.
How do I block or whitelist an email address?
Each night our email users will receive an email from us itemizing their spam messages that have been quarantined by our anti-spam gateway servers. The subject of this email is always "Daily Spam Report for you@emailaddress.com."
Here are few frequently asked questions and answers about these emails:
What do I need to do with this Daily Spam Report email?
Not much! We suggest that you quickly scan this email and if it lists all spam messages then there's nothing else to do. Those quarantined spam messages will be automatically removed from our antispam servers after seven days.
What if I see an email in the Daily Spam Report that I actually want to receive?
If you see something in the list of quarantined messages that you'd like delivered just click the "Whitelist" link next to the message and it'll immediately be delivered to your inbox and never spam checked again.
Do I need to block or delete the spam messages in my Daily Spam Report email?
Nope, you don't and really shouldn't block or delete those spam messages as both actions will likely be wasted time. Ignore them. Those quarantined spam messages will be stored for 7 days then removed.
I'm not receiving a message that I need right now and I can't wait to receive tonights Daily Spam Report Email. What can I do to see if this message was just quarantined?
You can always view the very latest messages that our anti-spam servers have quarantined by doing any of these things:
- Go to the very bottom of any old Daily Spam Report emails and click the link that says "Please use the web interface to manage your spam quarantine" and you'll be logged in without a username and password and see the real-time list of your latest emails that have been quarantined.
- If you don't have an old Daily Spam Report email you can email support@brownrice.com and ask us to send you a fresh one at any time.
- Send us an email to support@brownrice.com and let us know who the sender was of the email you haven't been receiving. We'll review our anti-spam server logs to see if the message has been quarantined and, if so, whitelist it for you so it'll be immediately delivered.
How do I blacklist someone's email address that isn't in the Daily Email Report?
Go to the very bottom of any Daily Spam Report email that you've received and click the link that says "Please use the web interface to manage your spam quarantine" and you'll be logged in without a username and password. Once in the web interface you'll enter the email address that you want to block in the Blacklist field on the left side of this web page.
Why don't I have to login to this web interface?
If you hover over any of the links in the Daily Spam Report email you'll see that the URL is very, very login. The length of linked URLs links include a special hash to automatically login you in to the web interface so that you don't have to use your email username and password. So if you want to bookmark your anti-spam web interface be sure to use the full URL from your Daily Spam Report email.
I haven't received a Daily Spam Report email in a few days. Is something wrong?
Our anti-spam servers will only send you the Daily Spam Report email on days when we've quarantined at least one spam message. So if you didn't receive it, we didn't quarantine anything that day.
What do these Daily Spam Report emails look like?
Email Summary screen (you'll receive these once per day if you have quarantined spam)
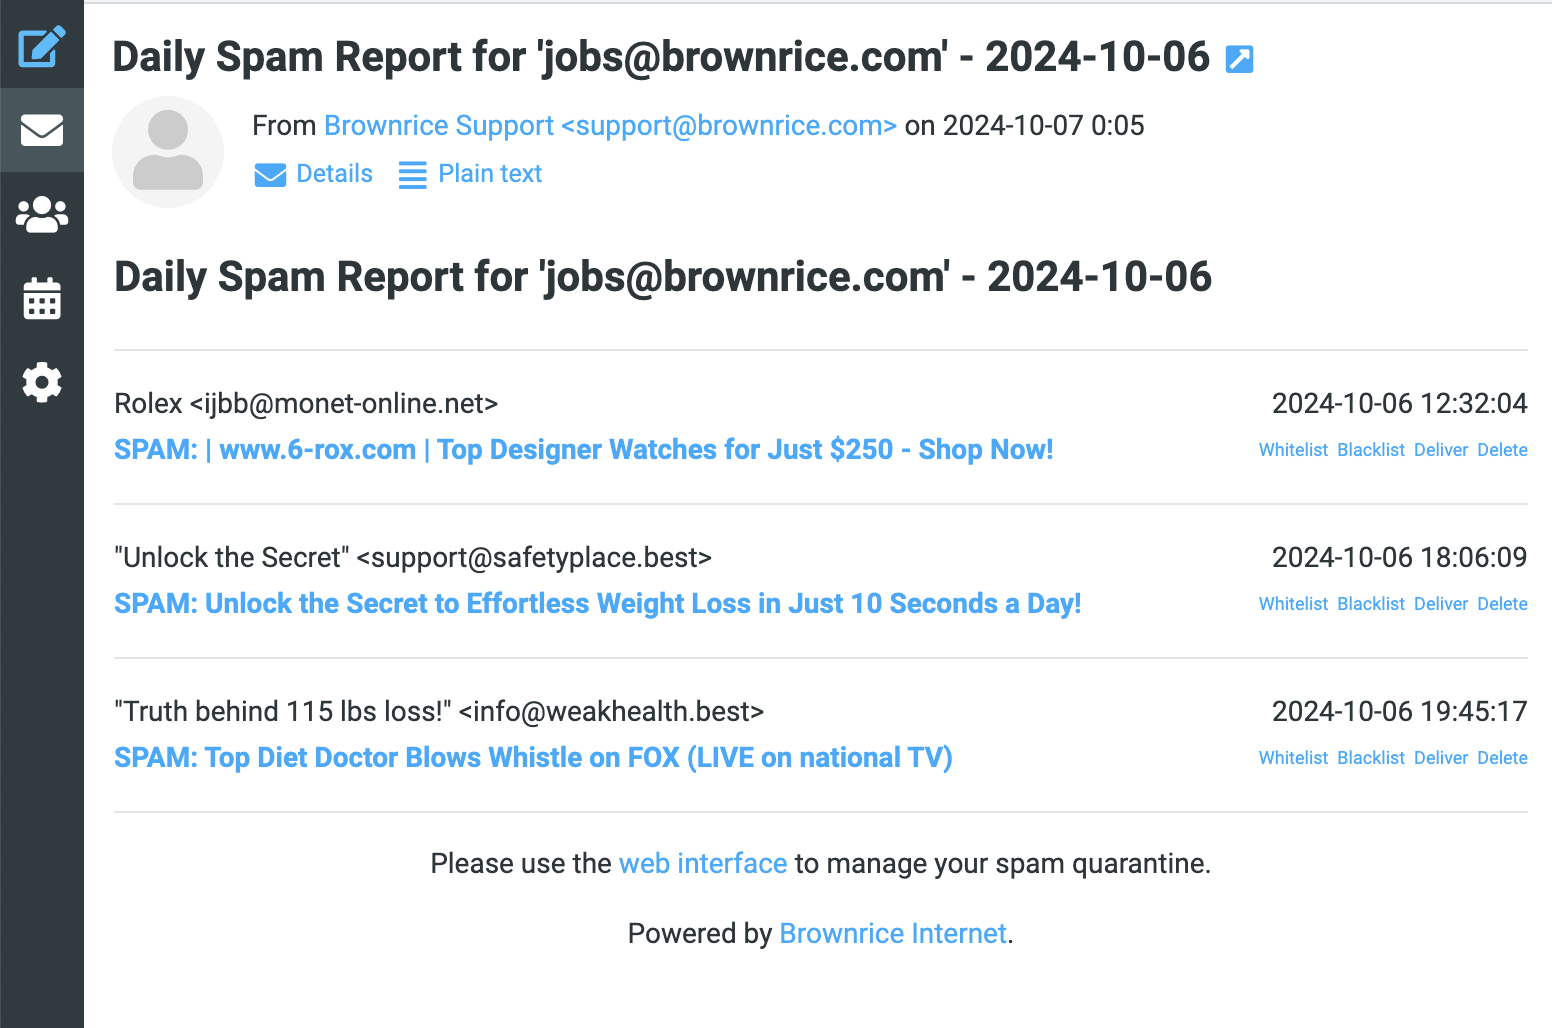
Web interface view where you can whitelist, blacklist contacts and forward spam tagged message on to your inbox:
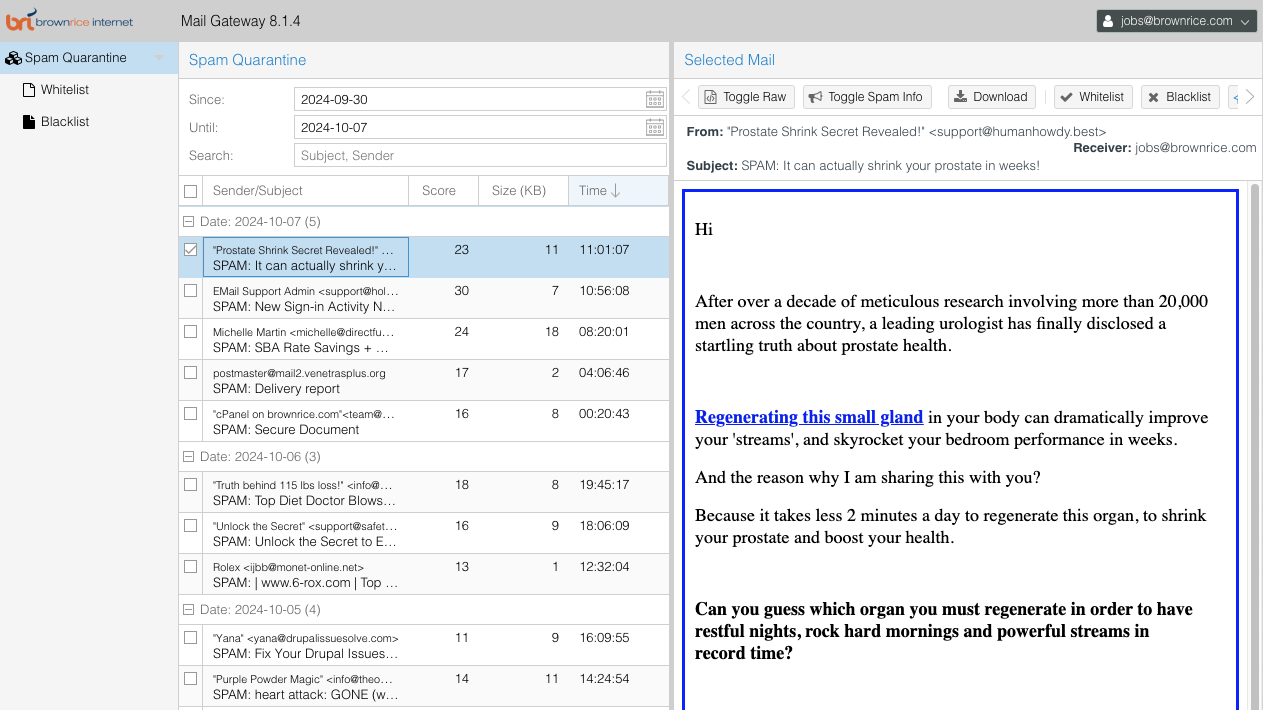
Mobile website view where you can blacklist or delete spam messages:

How do I configure my email in Microsoft Outlook (new)?
Microsoft Office Outlook:
Warning:
Microsoft Outlook (new) does not fully support IMAP connections at the time of writing this (More info here). It may not be possible for your account to be setup in Outlook (new) and we recommend you follow our FAQ here to setup Outlook (classic) instead: https://support.brownrice.com/content/3/367/en/how-do-i-configure-my-email-in-microsoft-outlook-classic.html
- Open Outlook by opening your task bar and searching for "Outlook," then clicking the application.

- Click the Hamburger dropdown menu (3 horizontal stacked lines), then select "Add Account."

- Enter your FULL EMAIL ADDRESS and select "Continue".

- Enter your email password when prompted and then select "Show More". This will bring up additional servers settings. Outlook does its best to guess the correct server settings but we may need to adjust it a bit.
- For "IMAP Incoming server", use "mail.brownrice.com" and port 993 with "SSL /TLS" connection type (recommended), OR port 143 with encryption type "STARTTLS".

- Use your full email address and password for the SMTP username & password

- For "SMTP Outgoing server", use "mail.brownrice.com" and port 587 with "STARTTLS" connection type, OR port 25 with no encryption, and click "Continue".

That's it! Outlook should now be set up and fully functional.
How do I configure my email in Microsoft Outlook (classic)?
Microsoft Office Outlook:
- Open Outlook by opening your task bar and searching for "Outlook," then clicking the application.

- Click the 'File' at the top left, then select "Add Account."

- Enter your FULL EMAIL ADDRESS, select "Advanced Options", check the box for manual setup, then and select "Connect".

- Select "IMAP"

- Enter your email password when prompted and then select "Connect".
- You may get a security certificate warning, which is expected. Agree to continue using the server by clicking "Yes".

That's it! Outlook should now be set up and fully functional.
Domains & DNS
Go to categoryHow do I transfer a domain name to another registrar?
To transfer a domain name to another (non-brownrice) registrar you'll need to:
- Ensure your current balance due to Brownrice is paid.
- Login to https://dashboard.brownrice.com
- Click Domains -> yourdomainname.com Manage -> Transfer
- Ensure that you have access to the email address that the EPP/Transfer key will be mailed to, then click Request Transfer Key
- Send an email to support@brownrice.com and ask us to forward you the transfer key that you just requested (for added security keys are usually emailed to us first, and we'll gladly forward it on to you)
- Work with your new registrar for the final steps.
How do I access my account to see what domain names I have registered?
If you are a Brownrice billing contact you can login and administer your domain names in our control panel:
http://dashboard.brownrice.com
Once logged in click the Domains link at the top of the site.
How do I transfer a domain name to Brownrice?
If you want to transfer your domain registraton to Brownrice, here's how to do it!
Owner of domain must have access to their current domain registration account.
Before transferring a domain, please make sure that your existing DNS settings have been replicated to Brownrice name servers, and that your name servers have been changed to ns1.brownrice.com and ns2.brownrice.com.
This first step is critical as your current registrar will likely drop your DNS zone once the transfer is complete. Here's how to set up DNS on our servers: https://support.brownrice.com/content/2/276/en/how-do-i-setup-dns.html
Your A record, CNAME records, MX records, and any TXT records are usually the most important. If you have any questions, just shoot an email to support@brownrice.com and we'll be happy to take a look.
1. The domain owner must unlock the domain and "request transfer authorization code". This is done via the current registrar account and can only be requested or done by the owner of the domain.
2. Also note that the domain owner must have access to the existing email address on file for the domain account owner. If the email address on the domain owner's contact information isn't correct then it must be updated via the current registrar account, prior to requesting the transfer authorization code (also known as the EPP key.)
3. The transfer authorization code is emailed to the domain owner's email address. Keep the code handy as you'll need it in the next steps.
4. Login to https://dashboard.brownrice.com with a Brownrice billing email address and click Domains. 
5. Then click on Transfer Domain to Brownrice.
6. Enter the Transfer Authorization Code into the EPP Key field, and the Domain Name, without the www into the Domain Name field. 
7. After clicking the Initiate Transfer button the existing domain owner will receive an email from the old registrar (usually within 24 hours) asking them to approve the transfer by clicking an approval link. Follow the instructions and do so. Once done the transfer can take up to 5 days to complete.
8. You'll receive email communication from Brownrice when the transfer is completed and the domain is in your account or if there are any issues with the transfer.
How do I modify DNS server addresses?
Here's how to modify DNS servers:
- With an email address that is associated with Brownrice hosting account login to our Dashboard: http://dashboard.brownrice.com
- Click Domains
- Select the domain you'd like to modify.
- Click the green Manage button.
- Click the DNS Servers button.
- Click the Edit DNS Servers button.
- Enter your DNS server addresses.
- Note: If you are hosting your site with Brownrice enter: ns1.brownrice.com and ns2.brownrice.com
How do I modify DNS records?
How to modify DNS records
- Log in to your Dashboard
- Navigate to DNS
- Select your VPS/Domain: yourvpsname.com
-> Click Manage DNS - Click -> Edit DNS Records -> Add DNS Record
- Make your changes.
Done!
Notes: Changes made here are immediately reflected in our DNS servers (ns1.brownrice.com and ns2.brownrice.com.) However, propagation may be slowed by DNS record TTL times, which are listed in seconds. TTL is the last field in each record above.
Where is your control panel?
Our mobile-friendly control panel is located here:
https://dashboard.brownrice.com
You can login with any email address that is associated with a Brownrice billing account. Click the Password Reset link to get yourself a password.
How do I setup DNS?
How to add your domain to the Brownrice DNS servers
Find the hosting service that is setup and note the IP address that we've assigned to it:
- Log in to your Dashboard
- Navigate to VPS HOSTING
- Select your VPS: yourvpsname.com
-> Click Manage (green button) - Go to the Web Sites
- Find and note the IP Address for mydomainname.com
Add a DNS Domain:
- Navigate to DNS
- Click the Add DNS Domain button (green button on right side of page)
- Enter your domain name (e.g. "mydomainname.com") and either select the correct IP address from the drop down list or click Enter Manually and manually enter it.
or - Click Add Domain
Done!
Important: This will only work if the DNS server address associated with your domain name are pointed to: ns1.brownrice.com and ns2.brownrice.com
If Brownrice is your registrar you can set this in the Domains tab of the http://dashboard.brownrice.com by following these instructions.
I need to migrate my email, how do we make that happen?
This is a common question, and while the process is typically very simple and straight forward, a number of things need to happen, in order, to prevent any interruption to your email service.
Note: This only applies to hosted email accounts (yourname@yourdomain.com) If you have an email account through another provider's domain (i.e. google.com, kitcarson.net, etc.) you'll need an IT person to help you find another solution.
So how do we do this?
First and foremost (this is the most common error) do not change your name servers or MX records before coordinating with us! We have to set up your accounts on our servers first. If you start sending mail to our servers before that's done, it's just going to bounce.
The full procedure is as follows:
- Send us a full list of your existing email accounts, and the passwords for each. We'll set these up on our servers with the same passwords, which you can change later if you wish.
- Once that's done, we'll advise you that it's ok to change DNS, either the name servers, or just the MX records. This will result in all new incoming mail going to our servers, so it won't show up in your Outlook, Mac Mail, etc. yet. You can check for new email through http://webmail.brownrice.com during the transition.
- We'll run a program on our mail server which acts as an IMAP client, and pulls all your messages from the old server, over to ours. It authenticates with a username and password, just like Outlook, which is why we need the account passwords. If you're not comfortable divulging that info, you can set a temporary password with your current host.
- Once all your email messages have been migrated to our server, we'll advise you that it's ok to change your email client settings to connect to us. The settings to do this can be found here: What are my email server settings?
That's it! Once your Outlook, MacMail, Thunderbird, etc. is connected to our server, you'll see all your messages just like before, rovided the above steps were done in the correct order.
I received a domain expiration notice that isn't from BRI, is it a scam?
First and foremost, if your domain is registered with Brownrice, your expiration notices will always come from a Brownrice email address. If your site is hosted with us, but your domain name is registered with another company, Brownrice will still send you expiration notifications as a courtesy, although we cannot renew 3rd party domains for you. You may also receive such notifications from your registrar.
The email you receive from Brownrice will state clearly that you can either click a link to renew with us, or it will advise you to contact your registrar. We do our best to alert you to any expirations, but we can't keep track of all your domains if they aren't registered with us. When in doubt, email support@brownrice.com and we'll investigate for you! But always keep in mind:
You can EASILY avoid most scams yourself!
Do they want an exorbitant amount of money for the "renewal", say $50-$60 or more? Some "premium" domains may cost that much, but the average .com, .org, or .net should never be that high. If you are being charged that much, you may need a new registrar.
Look at the FROM address in the email you received. Is it from a reputable company you may have done business with, such as GoDaddy, Enom, Tucows, etc?
Great! Still skeptical? Forward it to support@brownrice.com, and we'll tell you if it's legit!
Or...
Is it from a Gmail, Hotmail, AOL, or other "freemail" address? Is it from a party you've never heard of, or a seemingly random address, like ing97[dot]org, or superawesomeSEOservices?
If so, Delete it, and go on with your day.
Look for keywords!
Such as "solicitation", "SEO" , "proposal", "offer" etc. Look for UNSUBSCRIBE links at the bottom. Your registrar will rarely, if ever, offer an option to opt out of expiration notifications, as doing so could result in you losing your domain name. If you find any of those items, chances are it is a scam. Do NOT click on any links in that email. Either delete the email, or add it to your junk / spam filter.
Was it written by an infant?
Look for lack of punctuation, nonexistent grammar, broken English, ALL CAPITAL LETTERS, and truncated text that looks like it was copied and pasted, or written by a computer. This should go without saying, but we'll say it anyway: these emails are bad. Beware of incoherent emails asking for money. Just because they know your name and your domain name, does not make it legitimate.
Be smart, be safe, never enter your payment info when in doubt. If you have questions, just ask!
I received an email from "ICANN" claiming that my domain requires IMMEDIATE VERIFICATION, what should I do?
If you've recieved an email with the subject "IMMEDIATE VERIFICATION required for yourdomainname.com" do not just ignore it, it may be a very important email that requires action on your end in order to prevent your domain name from being suspended.
The Internet Corporation for Assigned Names and Numbers (ICANN) has mandated that all ICANN accredited registrars begin verifying the WHOIS contact information and has begun suspending domains that have not been verified. Verification is done by clicking on the verification link that was sent to the "registrant contact" email address associated with the domain. Here's how to tell if the email is legitimate:
If we are your registrar the ICANN verification email will be from: donotreply@name-services.com
The email will look like this: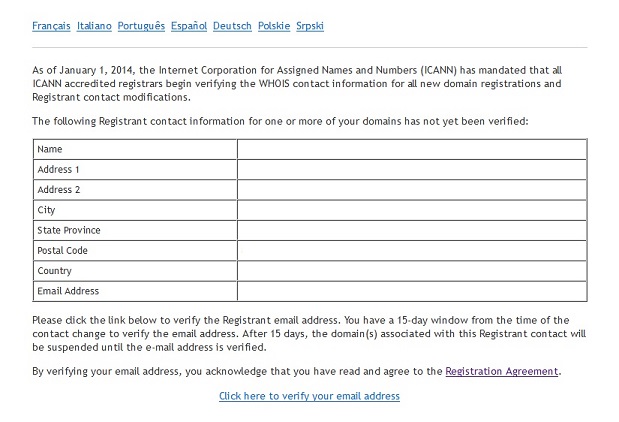
If you receive an email like this please look at the contact information in the email and confirm that it's correct. If the information is already correct, then all you need to do is click on the link that says "Click here to verify your email address". This will verify your identity and domain ownership and prevent your domain from being suspended.
If you need any of the registrant contact information changed, or if you are unsure that an email you receieved is legitimate, please contact BrownRice support at: support@brownrice.com
I want to use Outlook (Office 365) for my email, but how do I create these SRV records?
SRV records may seem a little tricky, but they're just TXT records that are formatted a certain way. Take a look at the screenshots below, and enter the information into your Brownrice DNS editor exactly as you see it here. That's all you have to do! You can copy and paste the data from here:
- Host Name: _sip._tcp
- Address: "1 443 sipdir.online.lync.com"
- Host Name: _sipfederationtls._tcp
- Address: "1 5061 sipfed.online.lync.com"
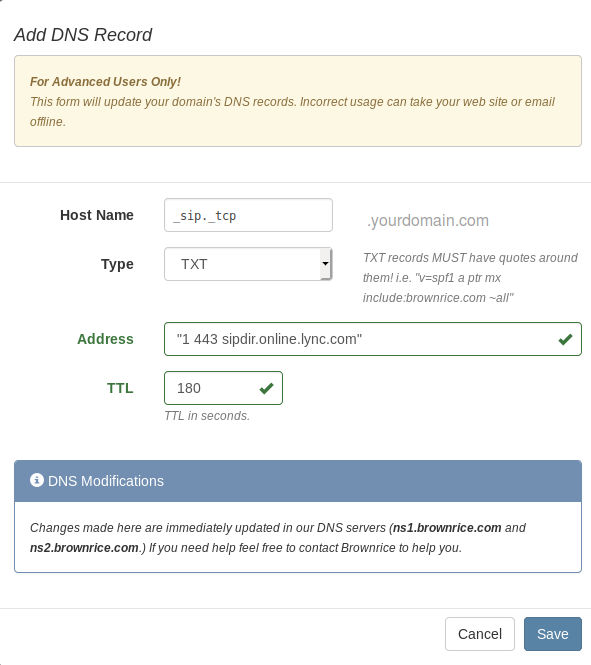
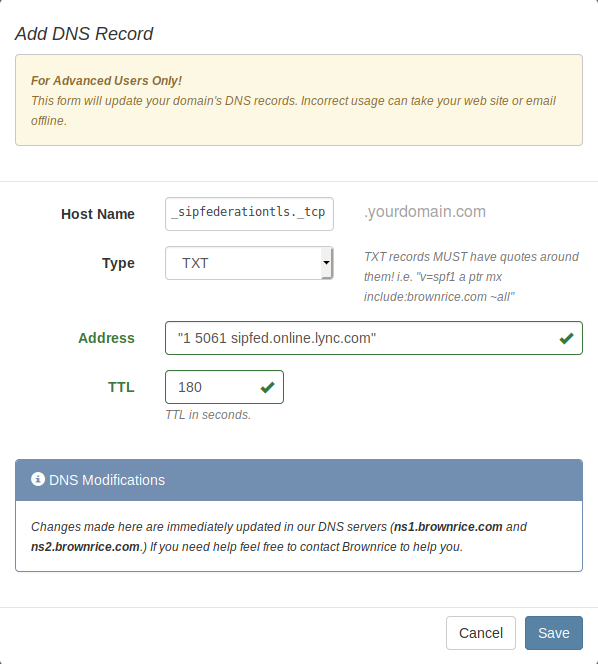
How do I add someone else, like my web developer, to my account?
Add a web developer or access for another user to your Dashboard account
If you'd like someone else - like your web developer or another trusted employee - to be able to access our Dashboard so that they can administer your account and have all the control you have, do this:
- Log in to your Dashboard
- Navigate to USERS
- -> Click Add User (green button, either the one in the header or the one below all contacts)
- Add user's info and select permissions with the checkboxes at the bottom of the modal and click Save, which will email your new contact with a password reset link so that they can then login to https://dashboard.brownrice.com as well.
Done!
How do I connect my Brownrice registered domain to Wix?
Do you have a domain registered through Brownrice, but want to point that domain to a Wix-hosted third party website? This is how:
Step 1: Add the domain to your Wix account
Before updating the DNS settings in your domain host account, go to Domains in your Wix account and add the domain.

Note: Before you proceed with Step 2, if you are using this domain for email you will first need to ensure that your MX records are properly setup within Wix. If Brownrice is your email provider, our MX records can be found here. You can setup those MX records within Wix as outlined here.
If you aren't using the domain for email (and don't have any other custom DNS records), then proceed to Step2.
Step 2: Find your new nameservers within Wix:
You need to find your new nameservers within Wix. This is easily done, but you will need to Login to Wix:
1. Login to Wix, here.
2. Navigate to this page, which will display your Wix nameservers.
3. Copy the nameservers within the Wix Name Servers Widget (or keep this page open in a different page), you will need those for Step 3.
Step 3: Point your domain's nameservers to Wix:
Once the domain has been added within Wix and the appropriate MX records setup (only if you use the domain for email), the rest is done through the Brownrice Dashboard.
1. Login to the Brownrice Dashboard.
2. Navigate to the "Domains" tab:
3. Click the green "Manage" button next to the domain that you are connecting to Wix:
4. Click on the "DNS Servers" button on the right hand side:
5. Click on the "Edit DNS Servers button in the bottom right hand corner:
6. Enter your Wix Provided nameservers from Step 2 above:
Do not just copy the nameservers from the above screenshot. You must get your personal Wix nameservers by following the steps outlined in Step 2. above.
7. Click the red "Save" button to save your new Wix nameservers.
8. Once this is done you will need to allow up to 48 hours for the nameserver change to propagate - so please be patient!
That's it! You've just successfully pointed your domain to Wix via their recommended "Nameserver pointing" method. More info can be found here outlining this method as well as the other methods of pointing to Wix:
Pointing vs. Name Servers Domain Connection Methods
Connecting a Domain to Wix Using the Pointing Method
Connecting a Domain to the Wix Name Servers
If any of this is overwhelming, or you just want us to handle this for you, we can do so for a 1-time $59 service charge. We'll need a support request from you including your Wix login info as well as the domain that you wish to connect to Wix.
Webcams
Go to categoryWhat is the embed code for my webcam?
Our web camera video player is a fully responsive HTML5 video player and is compatible with every modern browser and mobile device. You can always find your full-list of embed options for both your live video as well as Timelapse videos in the Dashboard.
Embed your Webcam Stream on Your Website
- Log in to your Dashboard
- Navigate to WEBCAMS

- Select your WEBCAM STREAMNAME: yourwecamstreamname
-> Click Manage (green button)
- Go to the Emed Code

- Copy and paste the provided embed code into your website, there are two options: 1.) You can use the javascript embed code or 2.) (Recommended for Wordpress sites) Use the iFrame embed code, as illustrated below.
JavaScript Player:
Replace [STREAMNAME] with the camera name that we provided you when you signed up for service.
<script id="bri_cam_1" class="bri_embed" src="https://player.brownrice.com?sn=STREAMNAME&em=1"></script>iFrame Player (use for Wordpress and CMSs that don't allow JavaScript):
<iframe src="https://player.brownrice.com/embed/STREAMNAME height="100%" width="100%" allowfullscreen mozallowfullscreen></iframe>Share your latest Time-Lapse video
https://player.brownrice.com/embed/WEBCAMNAME/timelapse/24hr
List of Camera Options, all controlled by logging into https://dashboard.brownrice.com
- Remove and/or replace video overlay logo with your own.
- Hide the white box PTZ controller area below the web cam video player.
- Set AutoStart/AutoPlay to on or off.
- Set Video Timeout duration (default is 10 minutes)
- Enable email alerts when our servers can't reach your camera.
- Set custom player aspect ratios. Default is 16:9.
- Restrick playback URL's to only web sites that you approve.
Done! If you have any issues let us know.
How do I view my webcam viewer analytics?
Our web camera hosting customers can view live and historical webcam viewer analytics in our Dashboard.
- Log in to your Dashboard
- Navigate to WEBCAMS
Here you'll see live webcam viewer graphs for each of your cameras. These update every two seconds and show your viewers, the amount of bandwidth that your cameras are sending to our servers, plus the amount of bandwidth that all of your viewers are currently consuming.
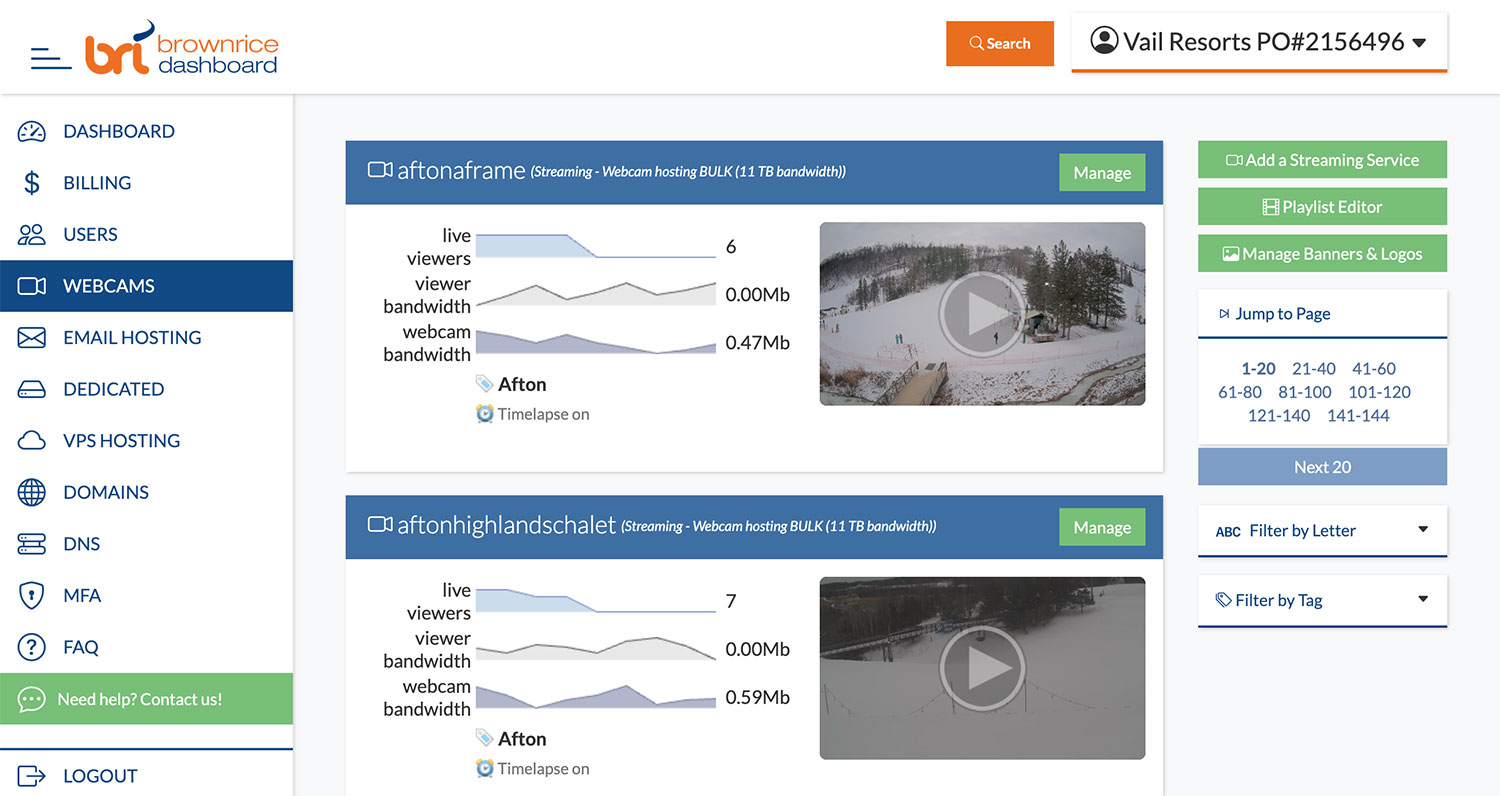
- Viewers/Listeners is the number of people who have your webcam player open in their browser. These people may or may not be actively watching the video, which is why you may see Viewers with no or very little Viewer/Listener Bandwidth.
- Viewer/Listener Bandwidth is the amount of all of the active Viewers bandwidth that our servers are sending to those viewers. So if your camera is sending us 2Mb/s and 100 people are actively watching the stream, this number will be about 200Mb/s.
- Device Bandwidth is the amount of video bandwidth that your camera is sending to us via a single video stream. No matter how many viewers are watching the stream, we'll only pull one video stream out of your camera.
To view historical webcam viewer statistics:
- Select your WEBCAM STREAMNAME: yourwecamstreamname
-> Click Manage (green button) - Go to the Statistics

Here you'll be able to select any date range and view all of the Viewers, Unique Viewers, and Total Bandwidth for the period:
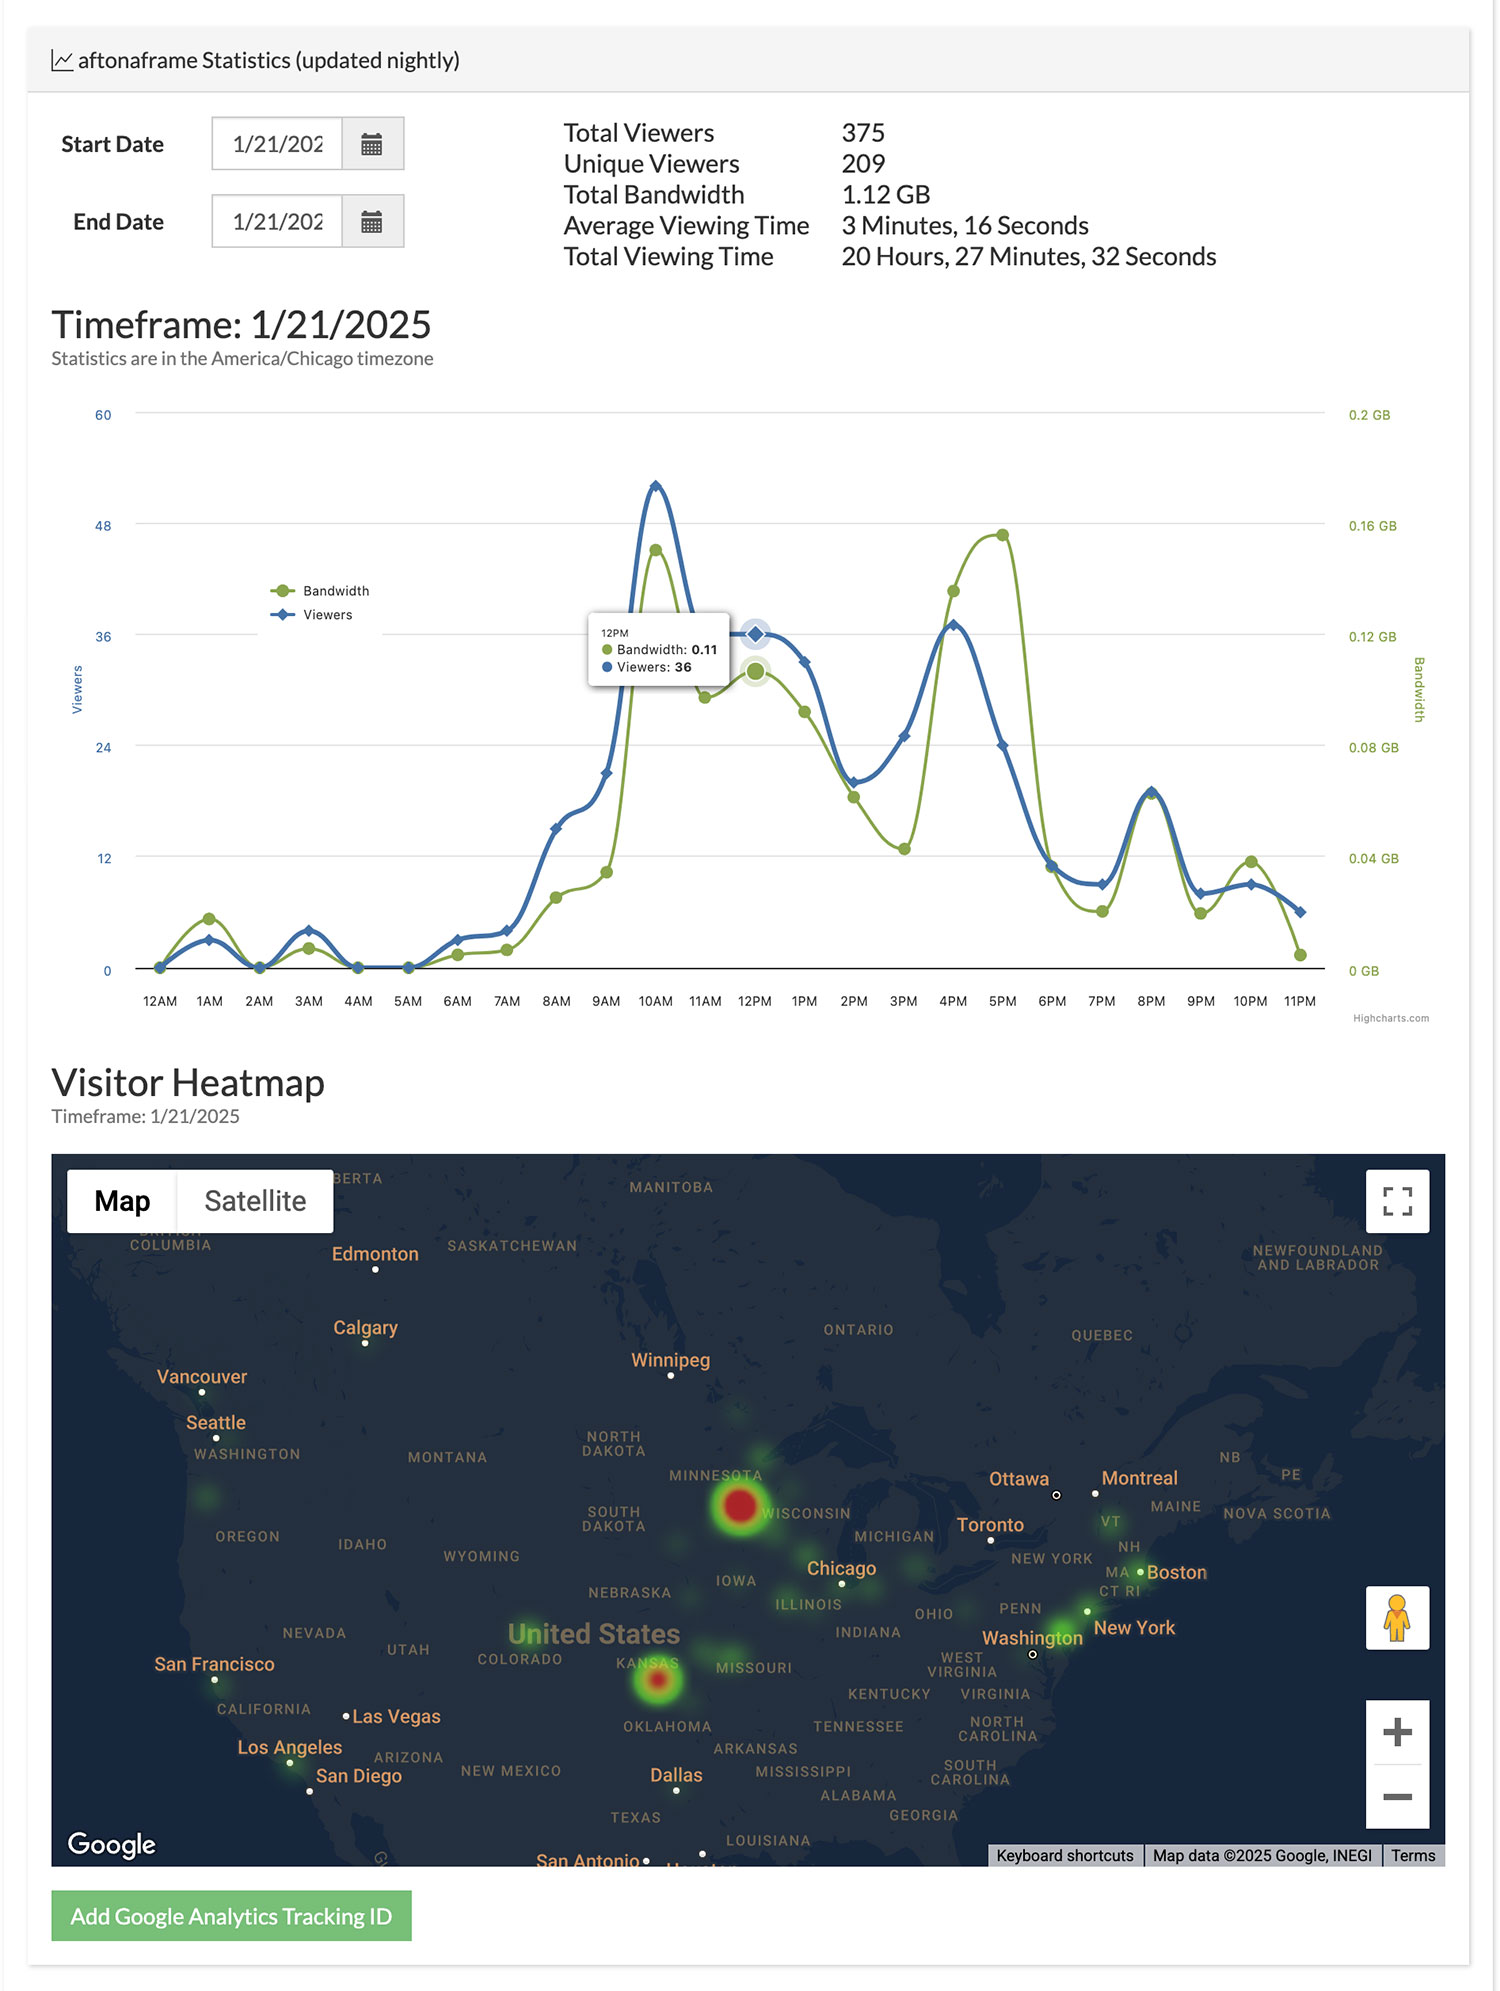
These statistics are updated each night at approximately midnight in the camera's specified timezone and itemize the number of viewers and the bandwidth they've used watching your webcam video during the date range that you select. Additionally, the heat map shows an approximation of where they are watching your webcam from based on their IP address. Your monthly webcam service levels are based on these statistics.
How can I embed my web cam player into my Wordpress site?
Here's how you'll embed the code into Wordpress with an iframe plugin:
First, install the "iframe" Wordpress plugin via Wordpress:
https://wordpress.org/plugins/iframe/
Once iframe is stalled you'll embed the web cam video by placing this shortcode into your Wordpress page or post:
[iframe src="https://player.brownrice.com/embed/[STREAMNAME]" width="970" height="550"]
Another way to embed an Iframe into your site is to use the code editor.
First, choose the page that you wnt to add your player into. On that page click the top right button with three dots. A menu will drop down where you can then click CODE EDITOR.
Finally paste in the iframe we provided you just after we set up your camera. The iFrame should look similar to this:
<iframe src="https://player.brownrice.com/embed/STREAMNAME" width="100%" height="" sandbox="" allowfullscreen="allowfullscreen"></iframe>
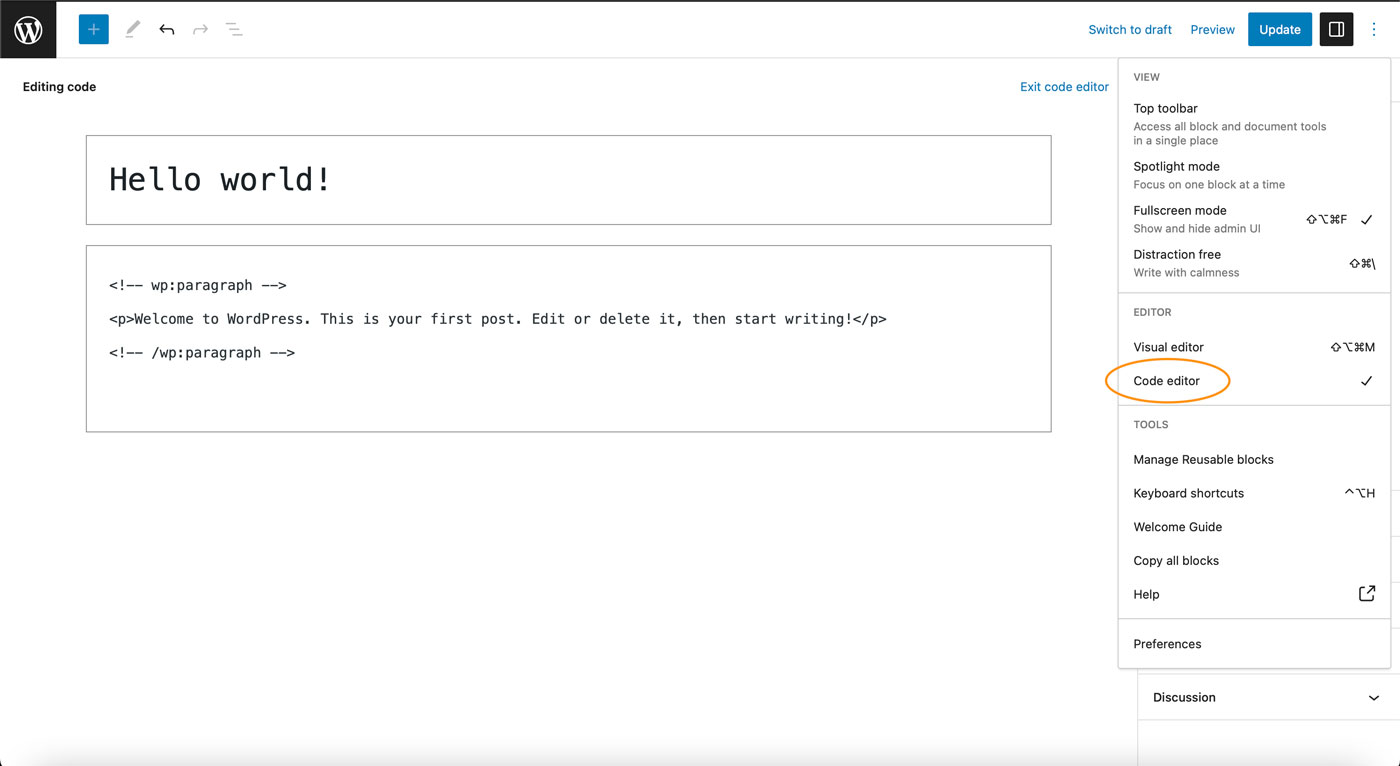
Where is your control panel?
Our mobile-friendly control panel is located here:
https://dashboard.brownrice.com
You can login with any email address that is associated with a Brownrice billing account. Click the Password Reset link to get yourself a password.
How do I place ads and logos on top of my webcam video player?
You can overlay images over the upper-right, upper-left, and over the top area (as a banner advertisement) of your webcam using our Dashboard Media Manager. Additionally, you can set destination URLs for each, so when clicked, the user is sent to the web site of your choice.
Here's how:
- Log in to your Dashboard
- Navigate to WEBCAMS
- Select your Webcam Stream: yourwebcamstreamname
-> Click Manage (green button)
- Go to the Player Images & Overlays

Add a Banner (advertisment) with a target link to a promo or any other featured link
- To upload your banner, if you haven't already, click the small pencil icon next to Banner Overlay.
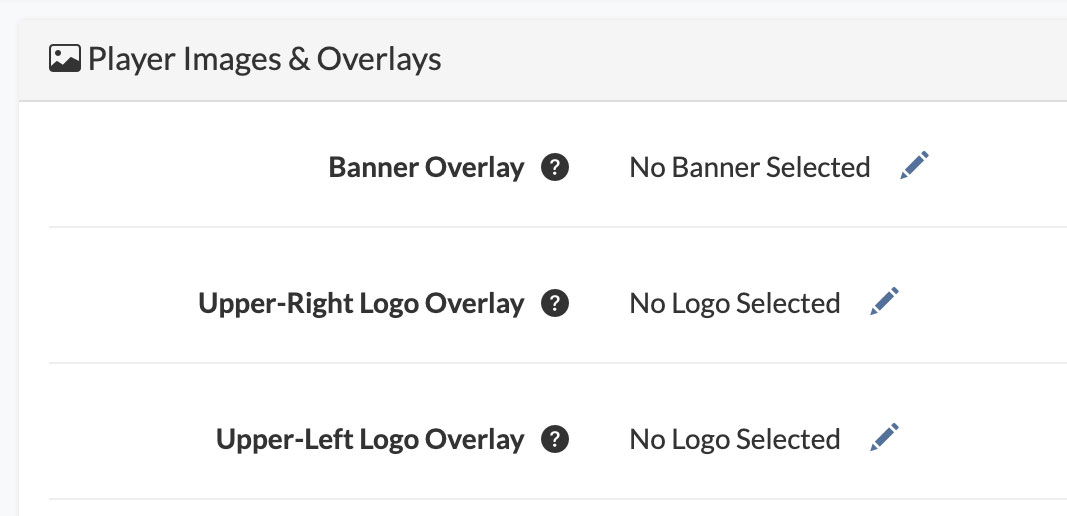
- Click Upload Banner.
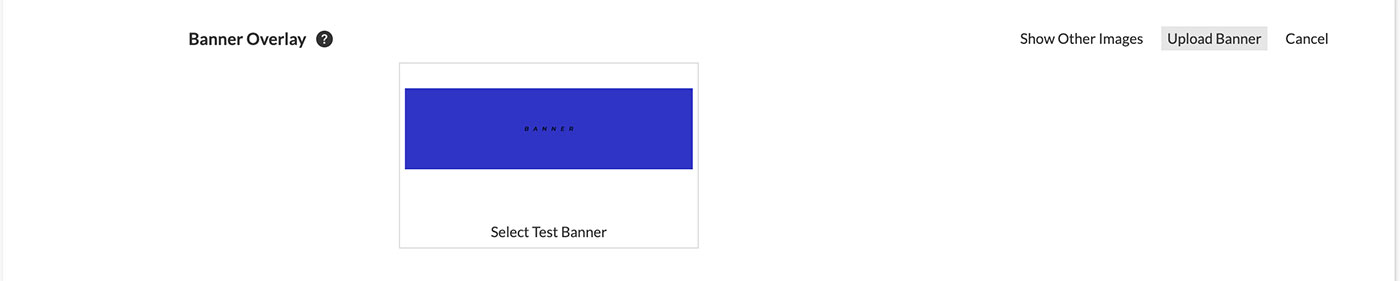
- Browse to your banner image, and click Upload to upload your banner image.

- All banner images that have been uploaded will be displayed here. If you don't see the uploaded banner you are looking for, you have the option to Show Other Images in the upper right. When you see your desired banner image, click the Select Banner button below the image thumbnail.

- Make your banner clickable on your webcam player, which will send users to the URL that you specify, by entering the URL that you'd like clicks to go to in the Logo Link field.
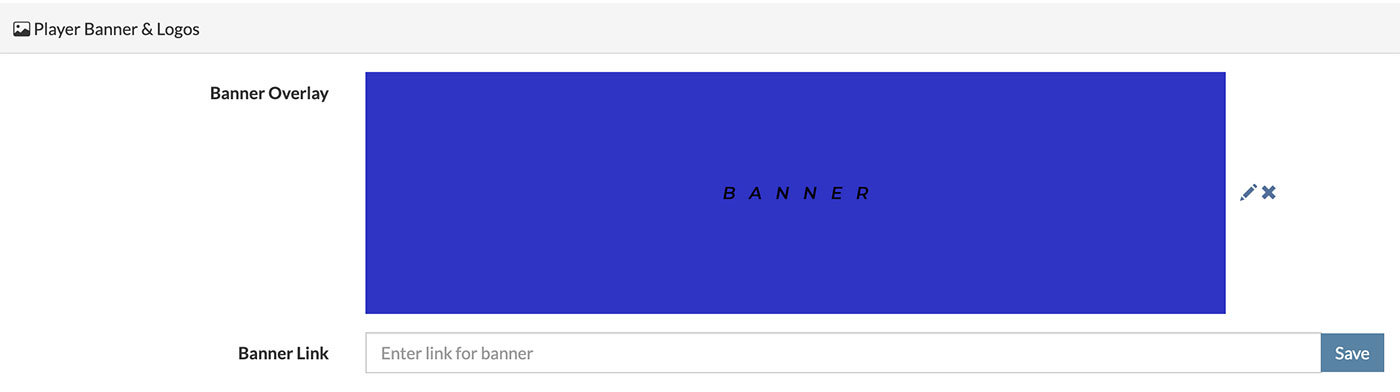
- Done! Your banner has been successfully added to your webcam player.
Add a Logo to the Upper Right and/or Upper Left of your Webcam Player. Logos can be displayed with or without a featured link.
- Click small pencil icon next to Upper-Right Logo Overlay, or Upper-Left Logo Overlay and then Upload Logo.
- Click Upload Logo.
- Browse to your logo image, and click Upload to upload your logo image.

- All logo images that have been uploaded will be displayed here. If you don't see the uploaded logo you are looking for, you have the option to Show Other Images in the upper right. When you see your desired logo image, click the Select Logo button below the image thumbnail.
- To make your logo clickable on your webcam player, which will send users to the URL that you specify, click the small pencil icon next to Upper-Right(Left)-Logo-Link Default Link Set.
- To add a custom link select Set Custom Link.

- Enter the full custom link url including the http:// or https://

- OR if you prefer for you logo to not have a link, select No Link.

- You will see a confirmation: No Link Set.

- Done! You have successfully added a logo and set the link preferences.
Have a look at your webcam to ensure that your banner ads and logos look and behave the way you want them to!
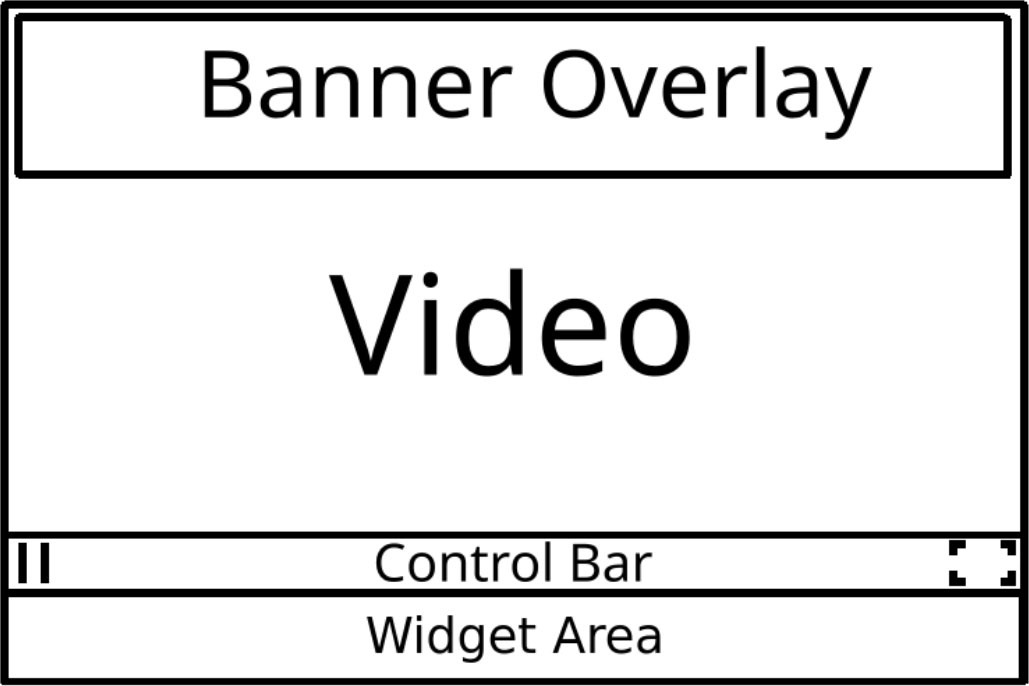
![]()
Note: Any logos or banners that are uploaded will be available to be used on any of your webcams, so you only need to upload a logo or banner ad once.
Note: When an image is deleted from the Manage Images section, automatically remove it from any cameras where it is used as a logo, banner, poster, or similar.
See also:
- How do I customize the Poster image or Offline image for my webcam player?
- Where Can I Upload and Manage Player Images (Banners, Logos, Poster, and Offline)?
If you need help with this just contact us and we'll be happy to give a hand.
How do I enable timelapse videos for my webcam?
Timelapse videos are enabled by default and are a free service as long as your total timelapse storage is under 1GB (and so far none of our clients have gone over 1GB.) However, if for some reason timelapse is not turned on for your camera do this:
- Log in to your Dashboard
- Navigate to WEBCAMS
- Select your WEBCAM STREAMNAME: yourwecamstreamname
-> Click Manage (green button) - Go to the Timelapses

- Toggle the Enable Timelapse button
Done. Wait until tomorrow morning and log back into https://dashboard.brownrice.com and you'll see your first timelapse video!
Click here for instructions on how to view and embed your time-lapse videos into your website.
By default we store timelapse videos for 10 days.
Storing timelapse videos is free for up to 30 days. Beyond 30 days we bill 50 cents for each 30 days of additional storage.
Example: A customer sets the storage setting to 150 in our dashboard, like so "Automatically delete timelapses older than 150 days." In this case the customer would receive a $2.00 US charge on their account on the first of each month.
How long are recordings stored in my account and how much does it cost?
By default web camera recordings are not enabled. However, this is a setting that you can change at any time. Here's how:
- Log in to your Dashboard
- Navigate to WEBCAMS
- Select your WEBCAM STREAMNAME: yourwecamstreamname
-> Click Manage (green button) - Go to the Recordings

- Click on the small pencil icon to the right of "Automatically delete older than 30 days."
- Change to the number of days that you'd like the video to be stored
- Click the big blue Start Recording button
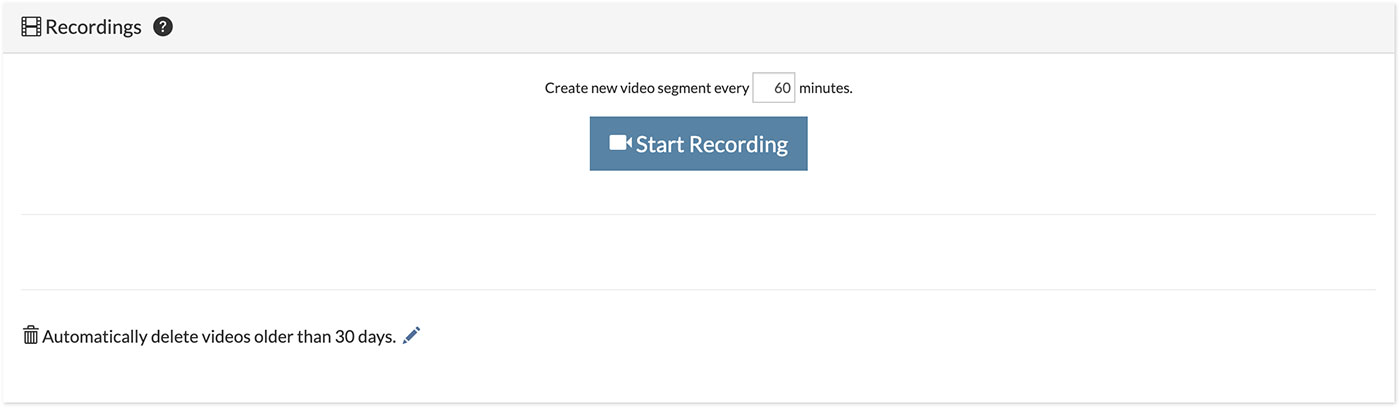
- Wait awhile (about 10 minutes) and you'll see your videos show up on this page. Watch, download, embed them or share them!
Note: This service is billed by the number days that we store your video on our servers, which is calculated on the 1st of the month. The cost is 50 cents US per day that we store your video recordings.
For example, if you set the Automatically delete videos older than xx days to 10 then you'll be charged $5.00 US on the 1st of the month.
How do I record my webcam video?
Enable 24x7 video recording and cloud video storage for your camera
- Log in to your Dashboard
- Navigate to WEBCAMS
- Select your WEBCAM STREAMNAME: yourwecamstreamname
-> Click Manage (green button) - Go to the Recordings
- Toggle Enable Recordings
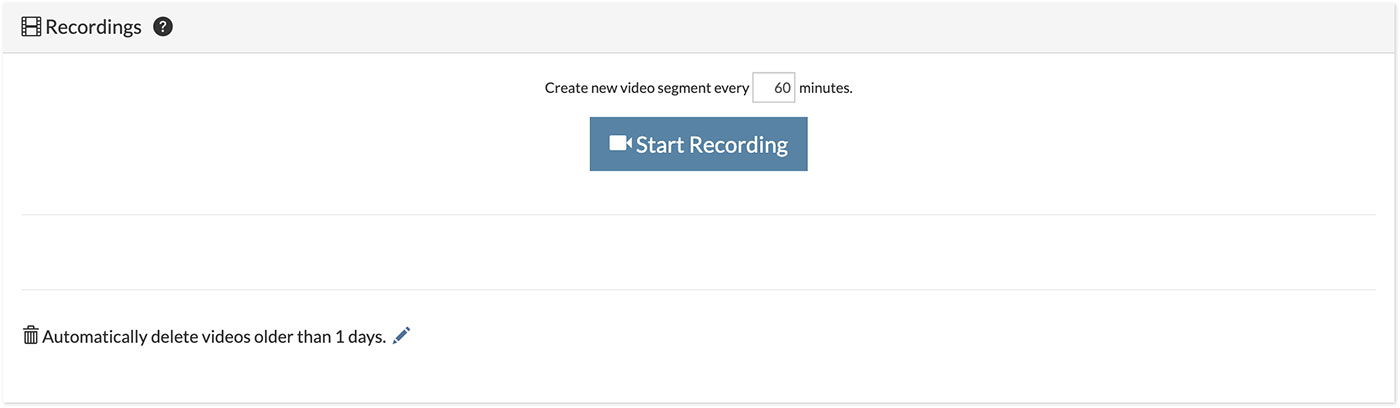
Done.
Your video will immediately start being recorded 24 hours per day and stored. You'll be able to view your first video when the intial segment time is over. i.e. If the video segment duration is set to 10 minutes your videos will automatically show up in the dashboard every 10 minutes. This is a setting that can be changed by you at any time.
To change the number of days that we store your video you'll change the Automatically delete videos older than XX days setting to something else.
We charge 50 cents US per day for cloud video storage. Example: If you set Automatically delete videos older than 10 days a charge of $5.00 US (10 days x 50 cents = $5.00) will appear on your invoice once per month, per camera.
How do I view my timelapse videos?
Timelapse videos are created each night from the previous day's webcam video and by default are displayed on your webcam player. Additionally, a weekly timelapse is created from the previous week on Sunday night, and a month timelapses is built on the 1st of each month.
To view ALL of your videos do this:
- Log in to your Dashboard
- Navigate to WEBCAMS
- Select your WEBCAM STREAMNAME: yourwecamstreamname
-> Click Manage (green button) - Go to the Timelapses

- Click the timelapse thumbnail you'd like to view and your video will play
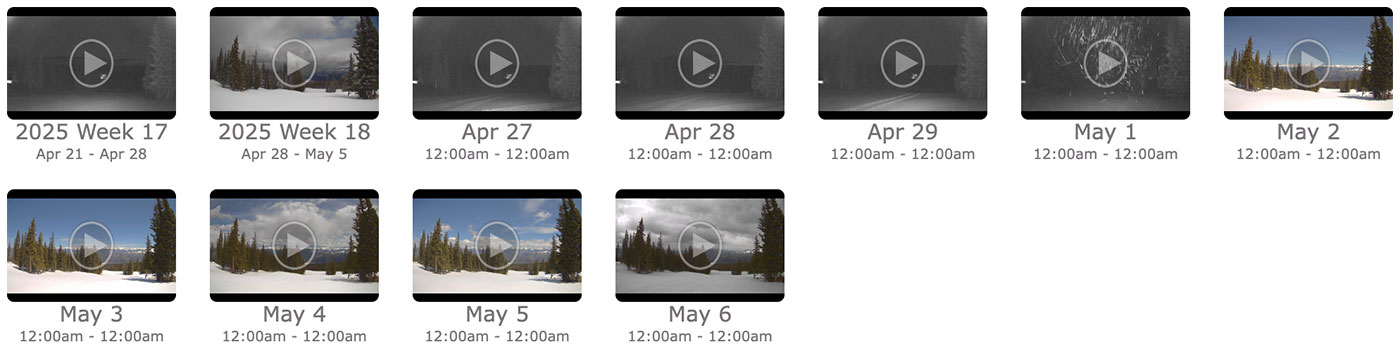
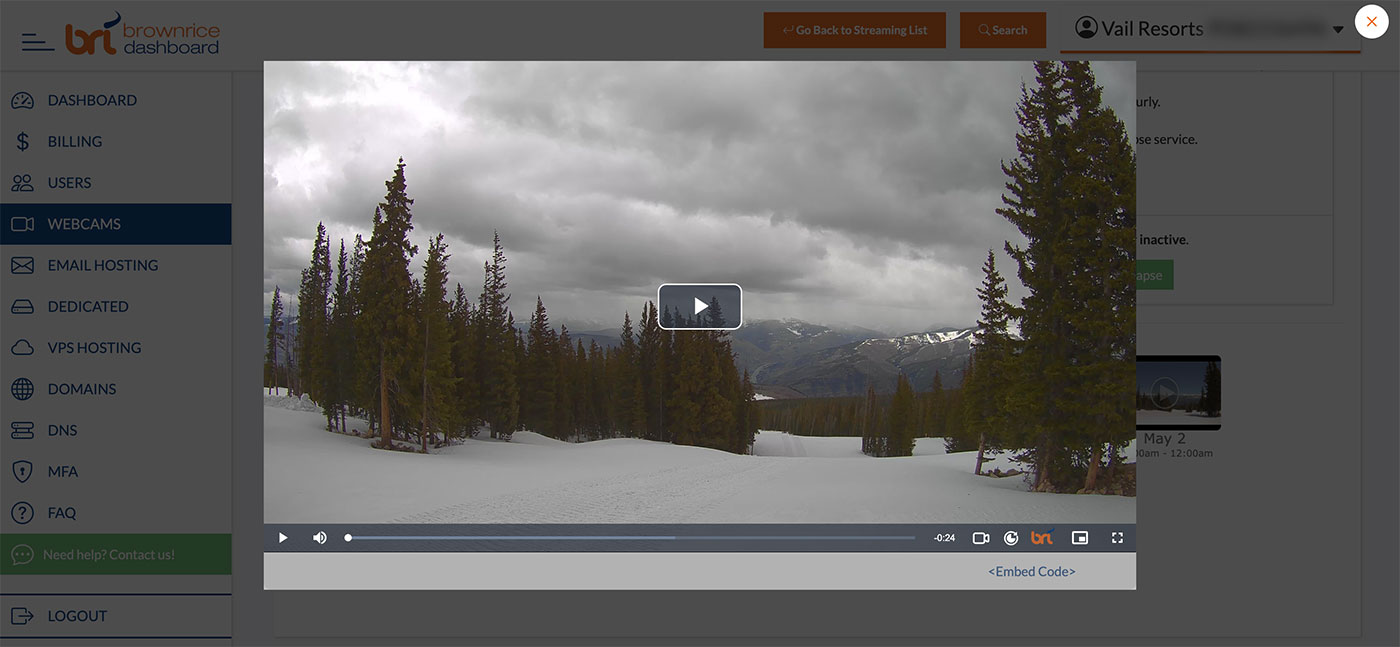
Keep in mind that if you click the Embed Code link while watching the timelapse video you'll be able to view code to embed the timelapse into your web site and a link share it with others or on social media.
What type of webcam should I purchase?
Nearly any modern IP camera will work. Here's a list of indoor cameras that are affordable and good. We recommend these outdoor cameras for their high quality video and all-weather reliability. But nearly ANY internet connected IP camera that supports h.264 video will work! (worry not, most moderately modern cameras support this)
Let us know what type of camera you have and we'll tell you if we can re-stream it. Or contact us and we'll let you know if a camera that you are interested in purchasing will work.
How do I create a playlist for my web camera streams?
Video playlists are easily created within our Dashboard and come as a free service with your Brownrice web camera accounts.
Things you can do with playlists: You can run video advertisements before, during, or after your web cam video. You can run a video advertisement every 5 minutes in the middle of your live webcam video (i.e. like youtube does.) You can play all of your web cams in one video player and have each run for 10 seconds before switching to the next, and then repeat. You can also run a favorite timelapse video, then a video advertisement, then transition into your live webcam video. The possibilities are truly limitless.
Here's how to create a playlist and embed it in your web site, or share it with a link:
- Log in to your Dashboard
- Navigate to WEBCAMS
- Select your WEBCAM STREAMNAME: yourwecamstreamname
-> Click Manage (green button) - Go to Playlist Editor

Note: You must have more than one Streaming service in order to use playlists - -> Click Create New Playlist (green button)

- Name your playlist anything you like. i.e. "Video ad pre-roll with live streams" and click Okay
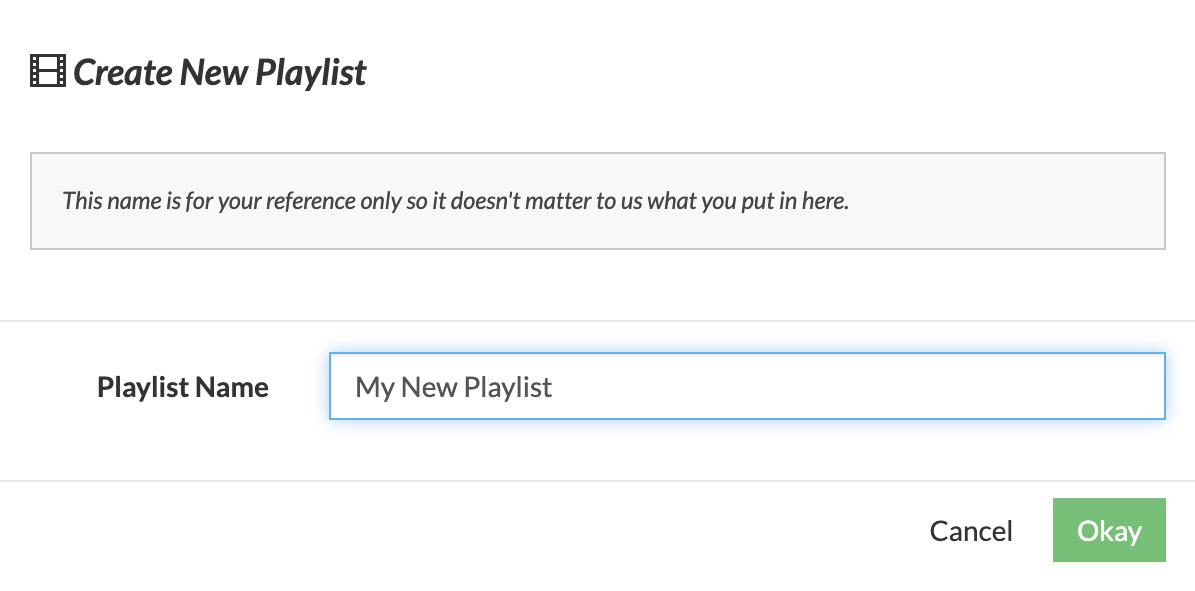
- -> Click + Add Stream (green button)
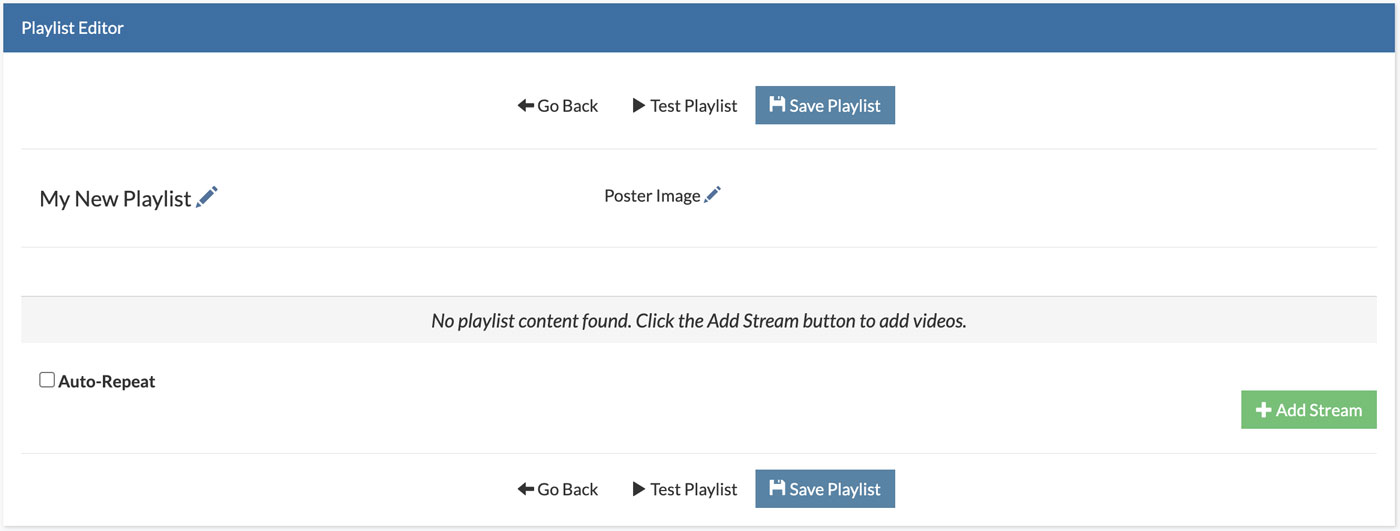
- Select Stream Name by clicking on the stream you would like to add to your playlist
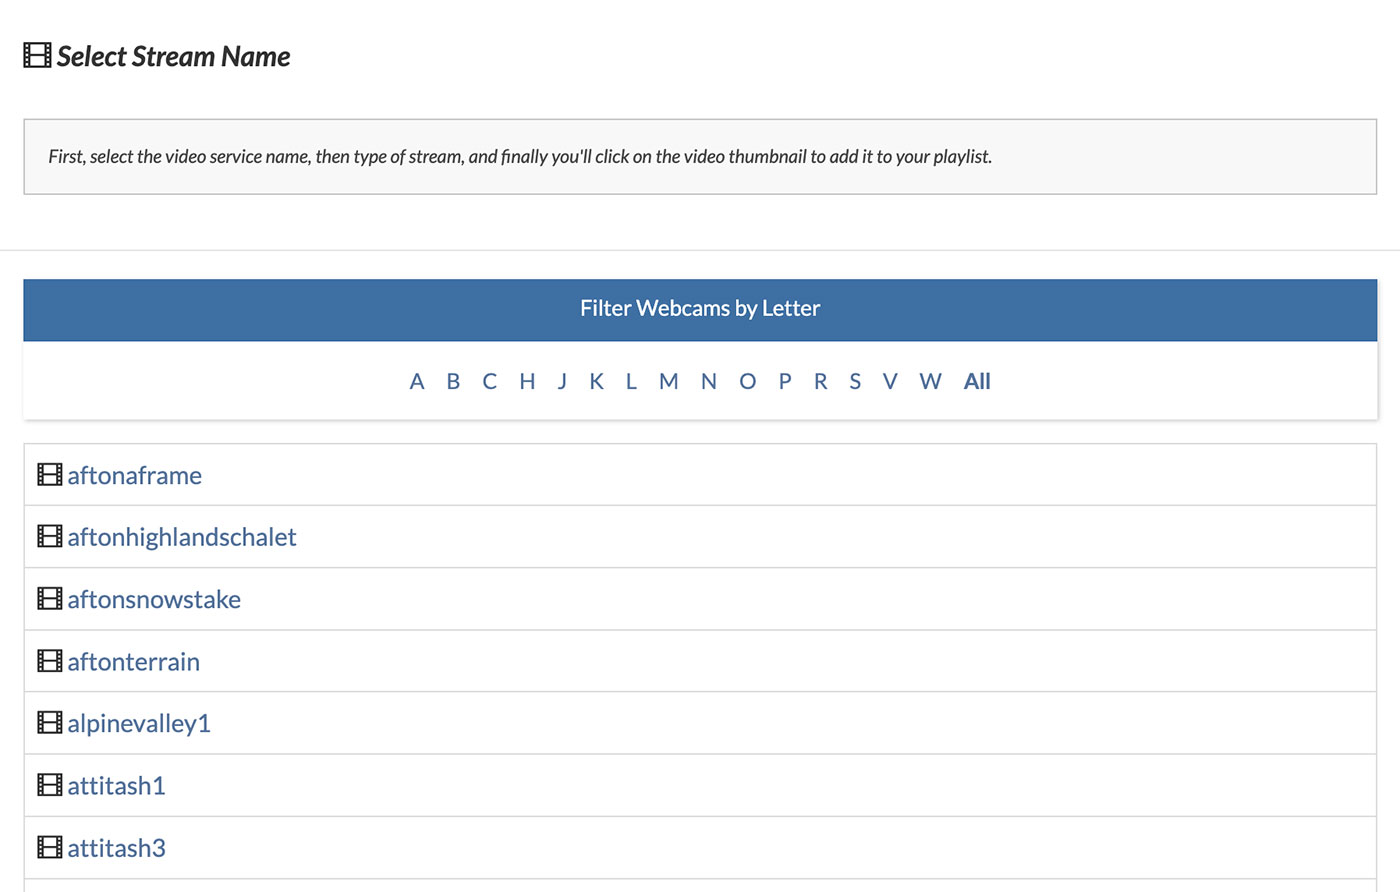
- Depending on the stream type you'll be able to select from Livestream, Timelapses, Recordings or Video on Demand, click a folder to navigate more videos and click on a video thumbnail to select a video for your playlist
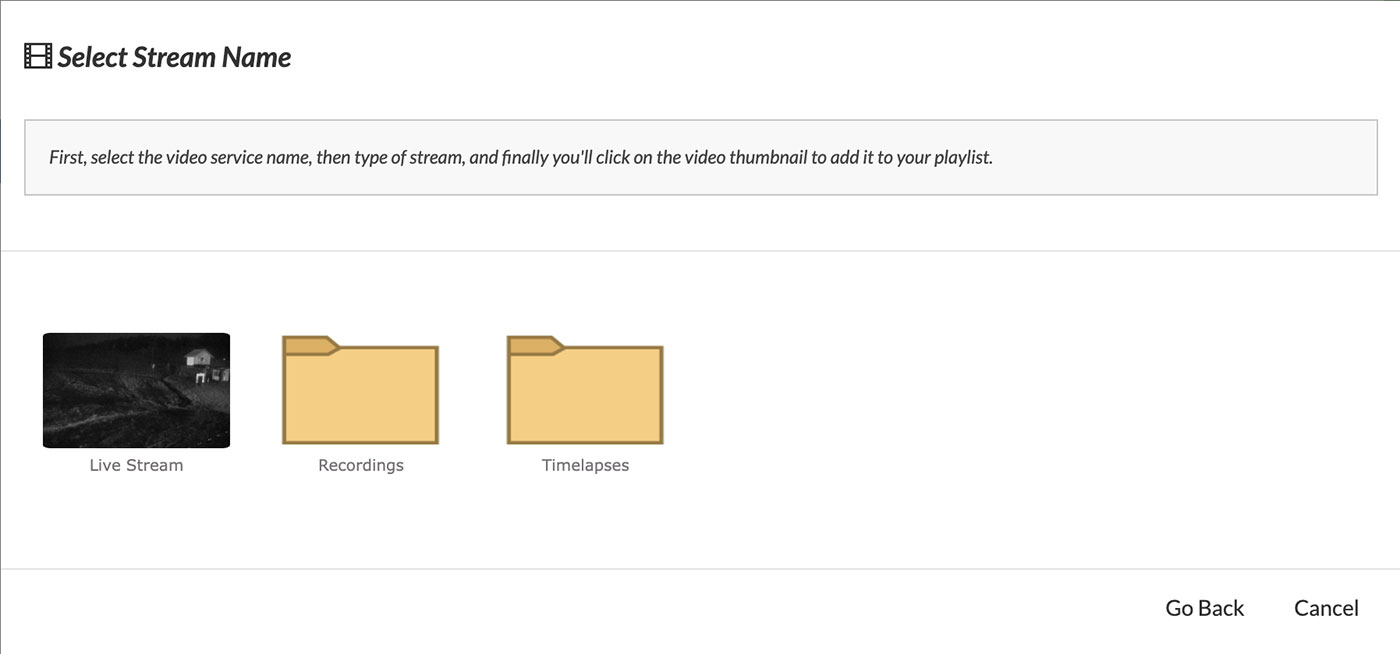
- -> Click + Add Stream (green button) to add more videos to your playlist.
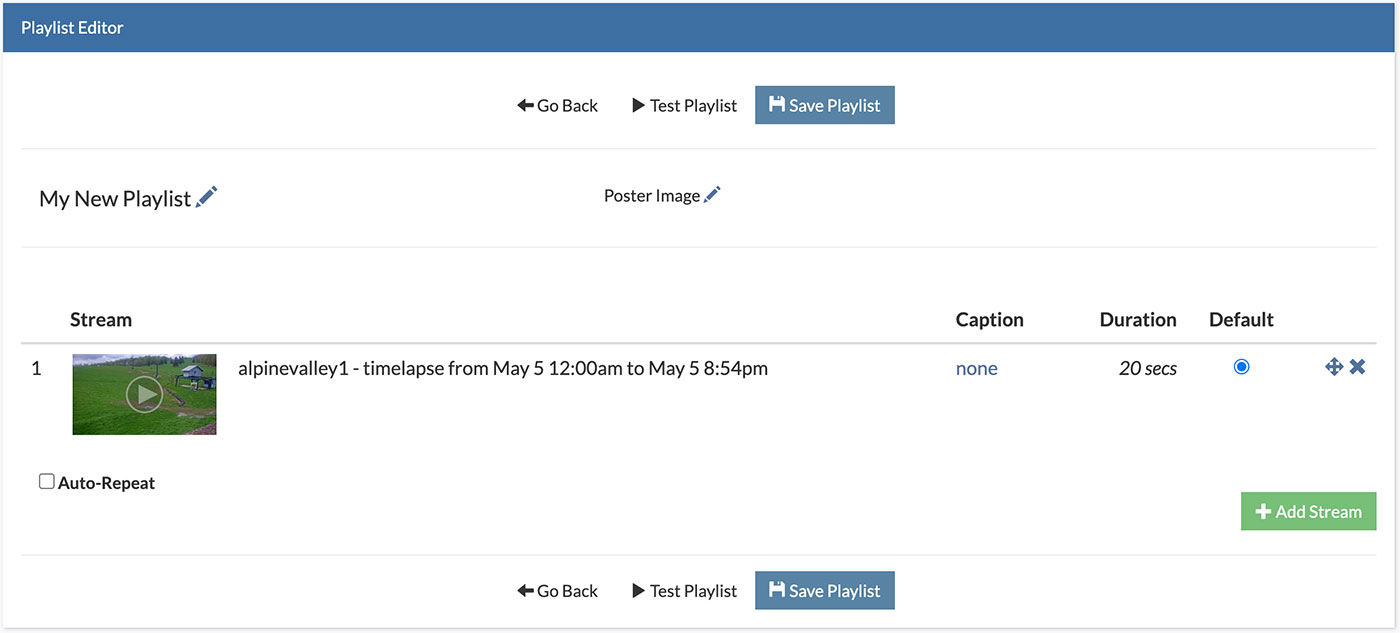
- Arrange the playlist order, set the duration of the streams, and added any captions that you'd like, then click the Save Playlist button, then click the Test Playlist button to view your playlist.
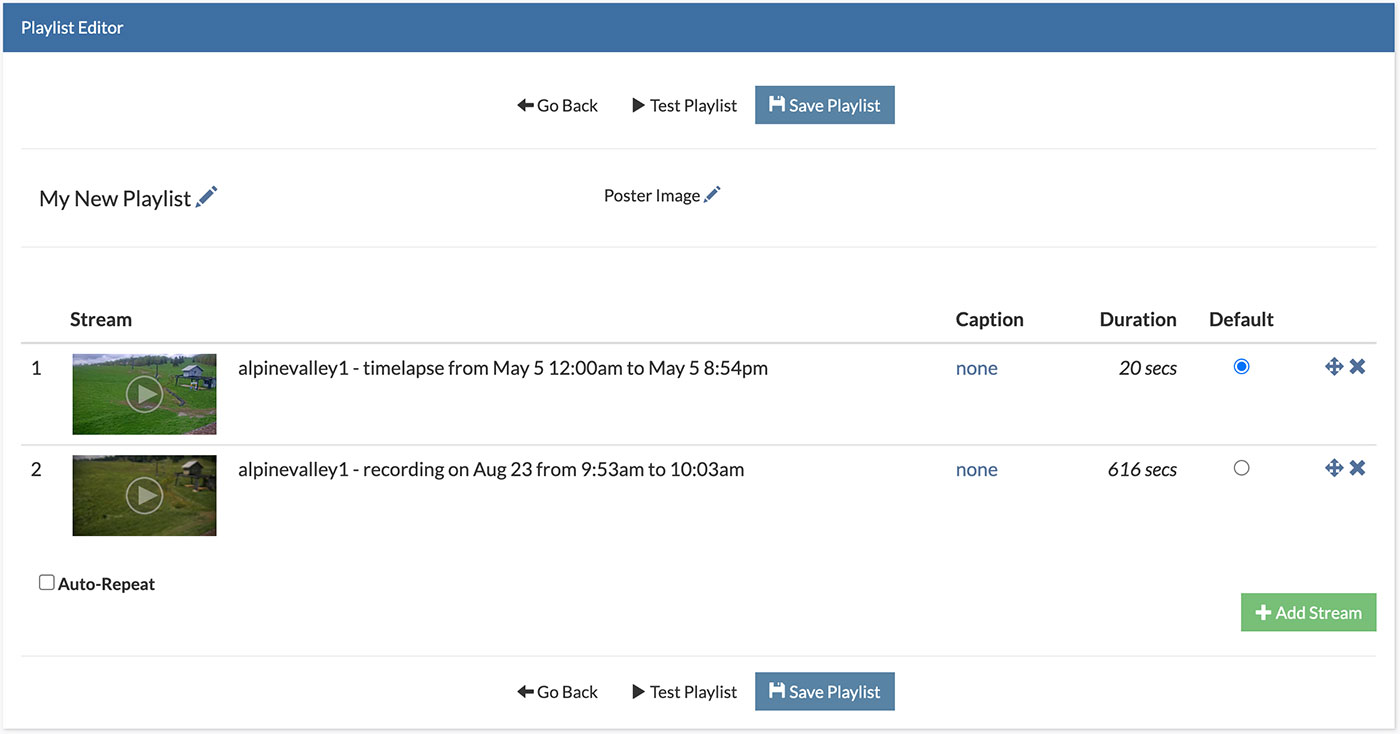
- While watching your playlist click Embed Code to get the code to embed this playlist into your web site and also retrieve the Simple View link url to send the playlist to friends, customers, and embed on social media.
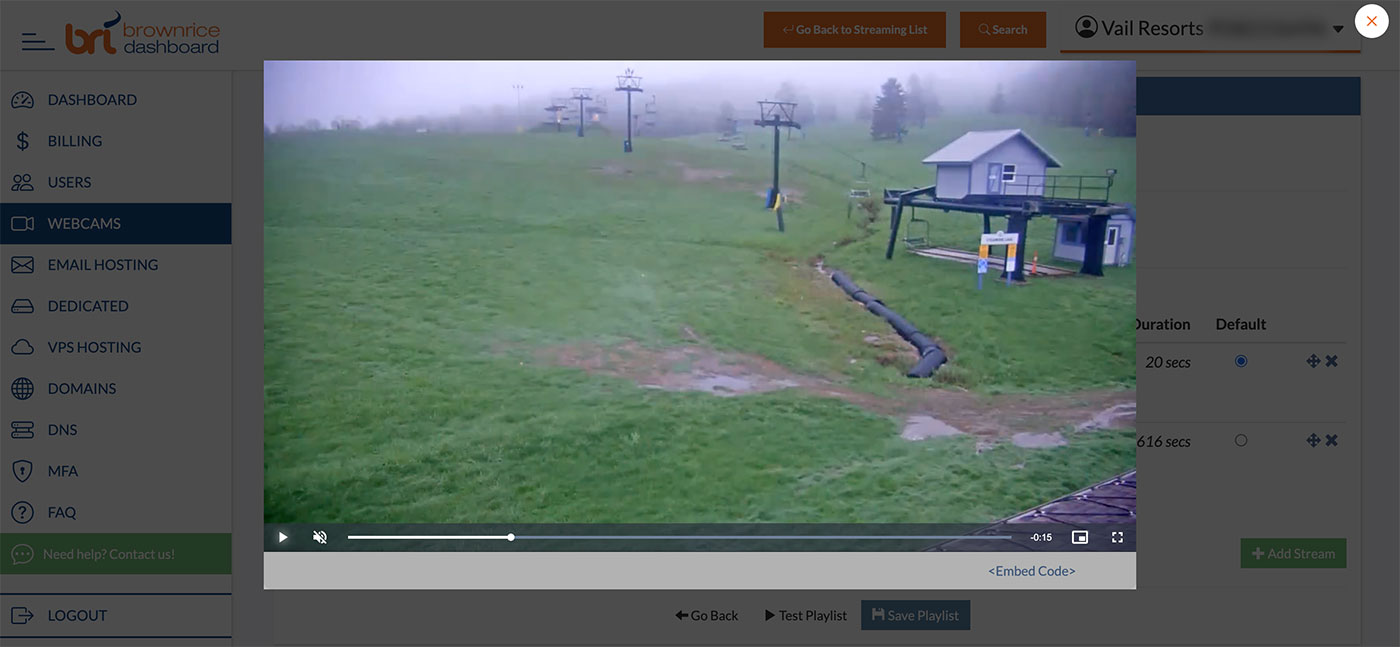
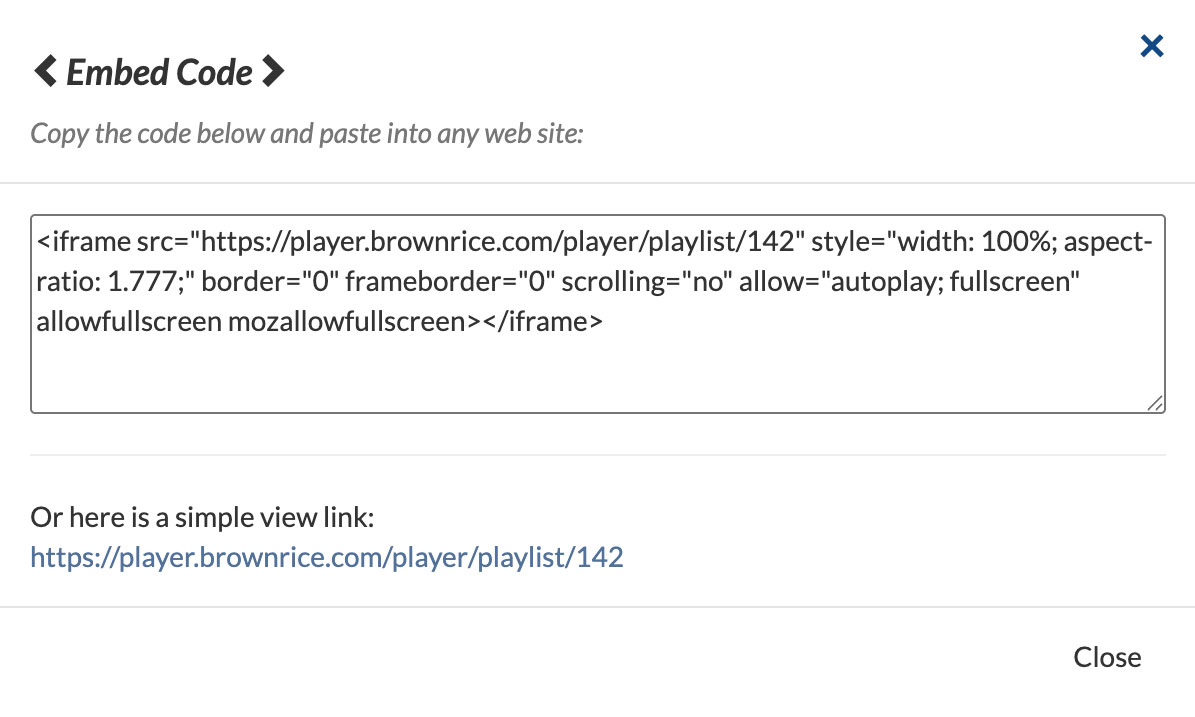
Note: In order to use video advertisements in your playlists you'll need to sign up for a Brownrice Video on Demand service. This is a $9.95 per month service which allows you to upload and easily embed as many vidoes as you like.
How do I upload a video advertisement so that viewers will see an advertisement before my web camera live stream?
Our Video on Demand (VOD) service is available for any webcam customer who has a 2TB plan or above. Just send us an email to enable the service.
- Log in to your Dashboard
- Navigate to WEBCAMS
- Select your WEBCAM VOD SERVICE STREAMNAME: yourwecamstreamname
-> Click Manage (green button)
- Go to Videos

- Upload Video
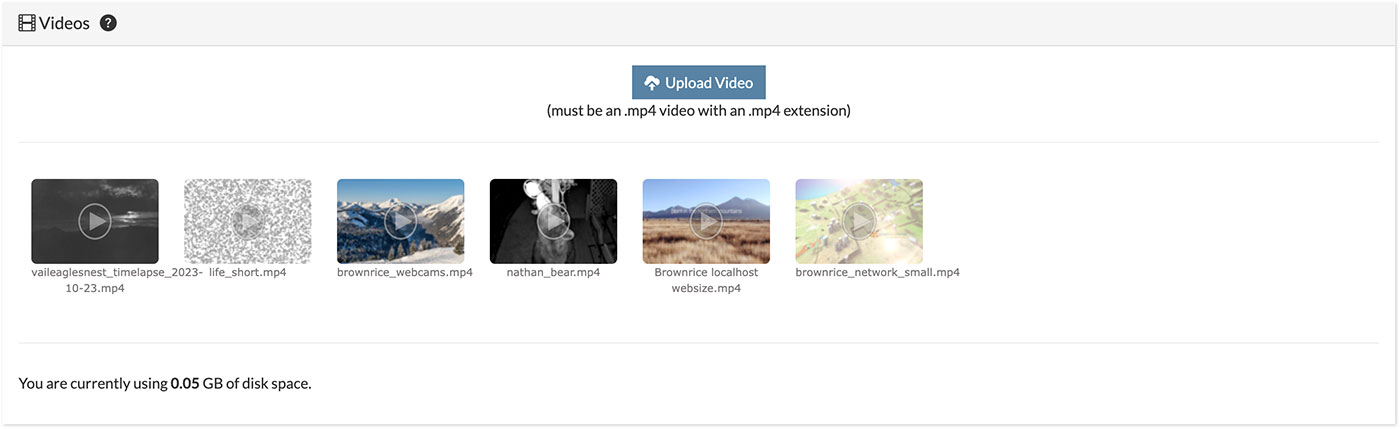
Note: You can upload as many .mp4 videos to your VOD service account.
Once your video is uploaded you can view it via the dashboard or optionally embed it into any web site with the embed code.
However, what you are really wanting to do is to add this VOD to a playlist.
So after your VOD is uploaded you'll click:
- Go to Playlist Editor (green button)
- Click the + Add Stream button
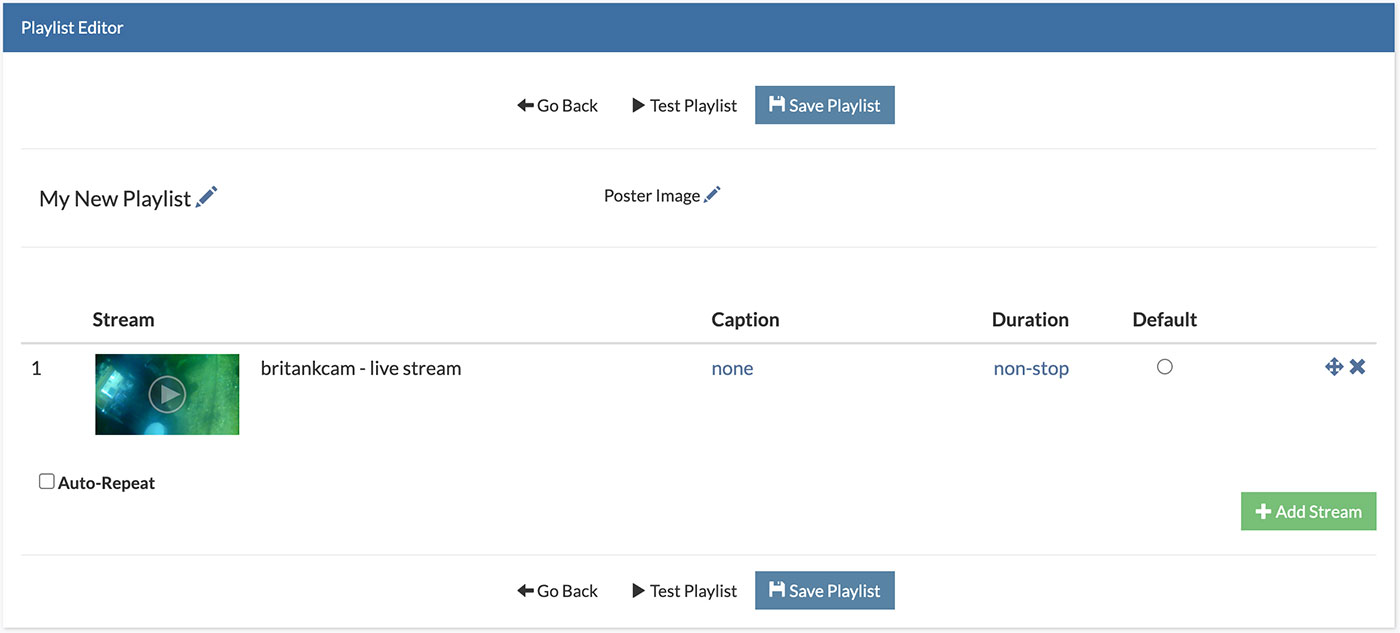
- Select VOD Service
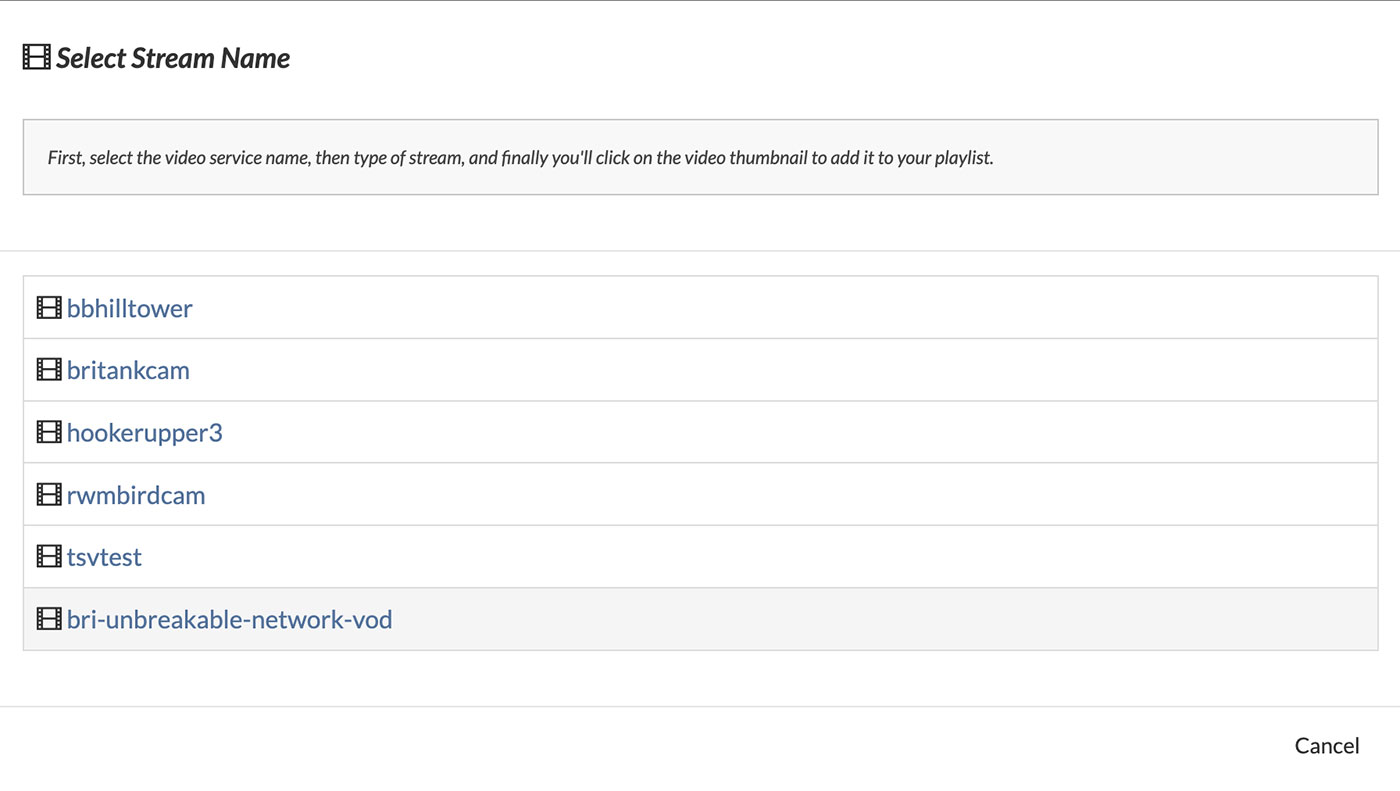
- Select the video you've just uploaded.
- Now your VOD is in your playlist. You can drag it to the front of your playlist to play it first (or in any order.)
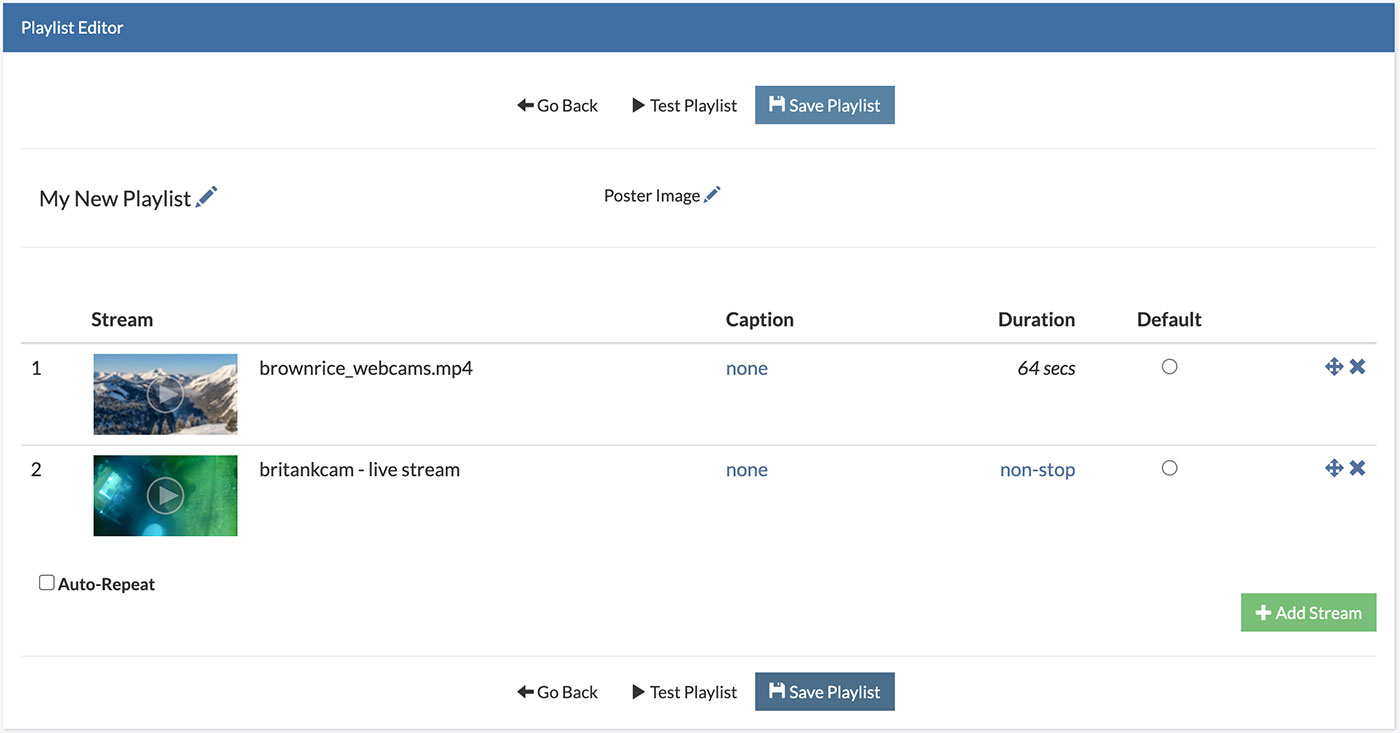
- Be sure to click the Save Playlist button before the Test Playlist button to see how it looks.
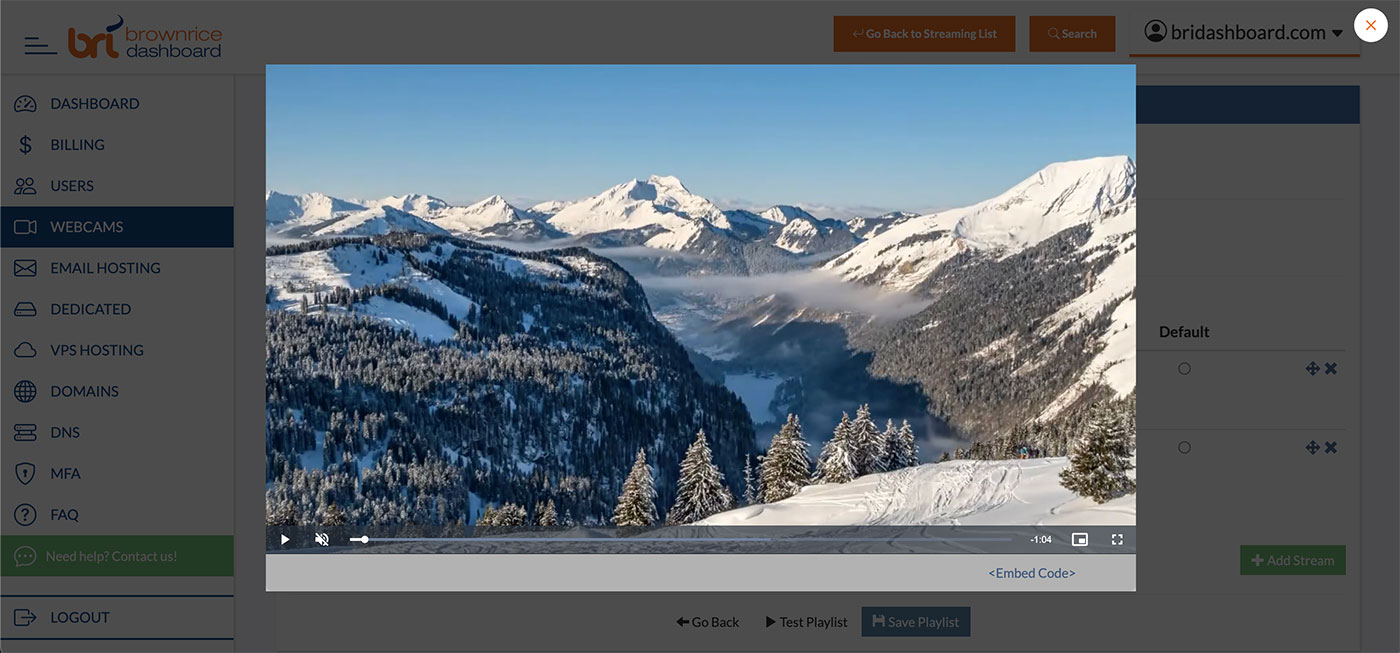
- Finally, while watching the playlist click the Embed link to get the embed code to place this playlist in your site.

My camera is offline! What do I need to do to get it back online?
Here is a list of things to do and check to get your camera back online:
- Make sure your camera has power and internet.
- Most cameras have a light on them to indicate power. If you don't see a light make sure its plugged in.
- Make sure your internet connection is up and working. Usually connecting a computer to the same network that the camera is connected to will allow you to determine if the internet is working
- Reboot the camera.
- If a camera has become unresponsive often a reboot will fix it. To reboot your camera you'll unplug it from its power source, wait 15 seconds, then plug it back in.
- Make sure that the IP address and port forwarding for the camera has not changed
- When you first got your camera setup and streaming we connected to it via an IP address (or a special DDNS address) and we had a couple of ports forwarded through your router so our servers could pull the video out of your camera. If any of this information has changed we won't be able to connect to your camera.
- Your IP address and port forwarding will almost always change if you change service providers, or replaced your router.
- In order to determine what IP address and port we're using to connect to your camera follow these instructions and review the IP:port of your RTSP URL (or contact us and we'll do that for you)
- Then, from the same network as your camera, go to https://ip.brownrice.com and compare the IP address and open ports to the RTSP URL above. If they are different you can update the RTSP via the dashboard using the instructions in step 3. Or you can contact us and we'll do that for you.
- Did you pay your bill?
How can I restrict playability of my webcam to just certain web sites?
Restrict playback to your web site, or a group of web sites:
- Log in to your Dashboard
- Navigate to WEBCAMS
- Select your WEBCAM STREAMNAME: yourwecamstreamname
-> Click Manage (green button) - Go to the Camera Settings

- In the Restrict Playback to URLs box type in your domain name, or part of your domain name, and click save. Do not type "http://" just the domain name.
If your web site address is www.whiterice.com simply typing whiterice would restrict access to only web sites with the word whiterice in the URL.
If you'd like to allow access from multiple sites you would seperate each name with the pipe symbol "|". And yes, regular expressions are allowed.
Entering "whiterice.com|greenrice.com" would match any addresses at those two domains names, including www.whiterice.com and www.greenrice.com.
How do I get alerted if my camera is having a problem?
You can easily sign up to be alerted by email if our servers can't reach your camera. To do so follow these steps:
- Log in to your Dashboard
- Navigate to WEBCAMS
- Select your WEBCAM STREAMNAME: yourwecamstreamname
-> Click Manage (green button) - Go to the Camera Settings
- Switch Camera Offline Email Alerts from Off to On
Done.
All contacts listed on the account that are set to receive "News" will be emailed if we can't reach your camera for more than 30 minutes.
How do I schedule offline time for my camera?
If you want to schedule days and times when public viewers can not view your webcam video you can do that with our Scheduler. Here's how:
- Log in to your Dashboard
- Navigate to WEBCAMS
- Select your WEBCAM STREAMNAME: yourwecamstreamname
-> Click Manage (green button) - Go to Scheduler

- Click hourly blocks that you don't want viewers to view your camera. Doing so will change the color to red.
- When you've selected all of the days and times that you do not want users to be able to view your camera click the Save button.
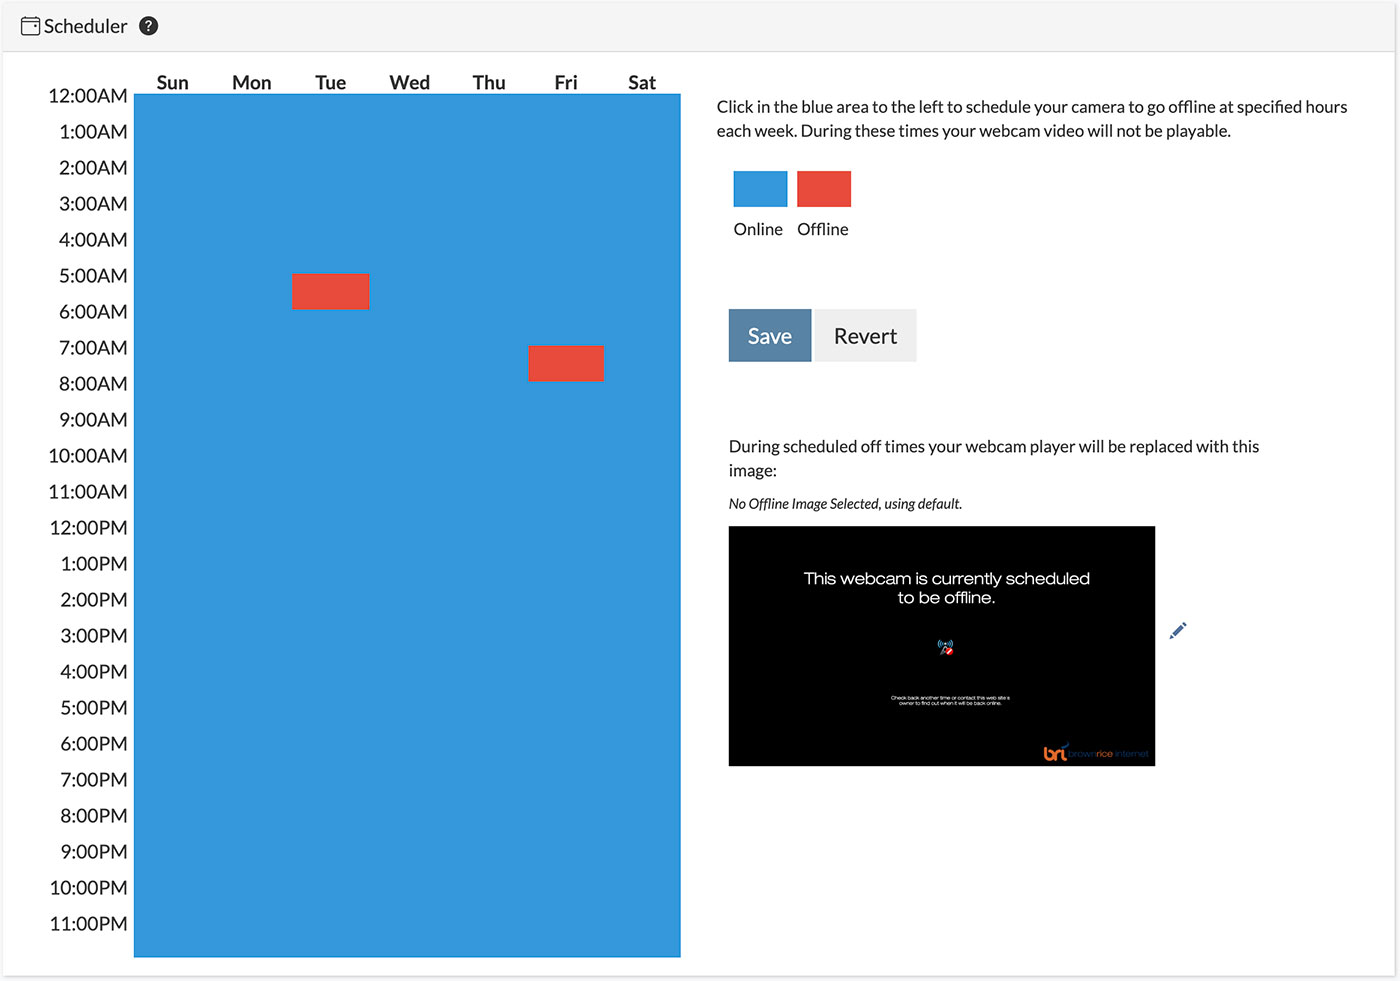
That's it! During the red hourly blocks that you've selected your webcam player will no longer load and instead will be replaced with an image that says "This webcam is currently scheduled to be offline."
If you'd like to replace our default "This webcam is currently scheduled to be offline" image with your own custom image, you can do that too! Here's how:
- Create your custom image (recommended dimensions: 1280 pixels x 720 pixels).
- In the Scheduler module, click the Pencil icon next to our Default Image and click the Select Custom Offline Image link.
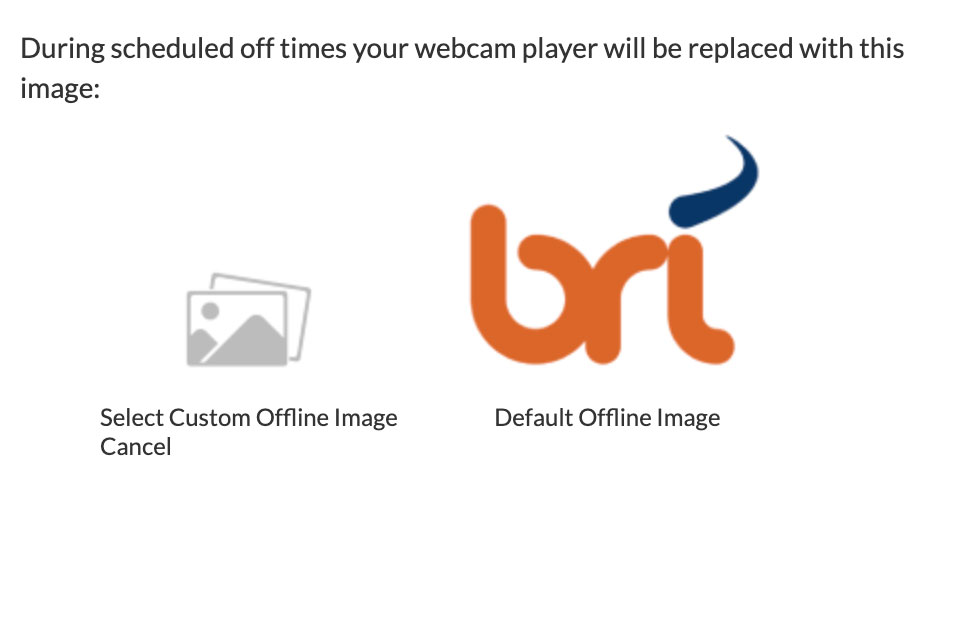
- Click Choose File to navigate to your custom image on your computer, select the Full Size Image Type, click Upload (green button) to upload your custom image. Click the SAVE button to save your Scheduler Settings. Done! This will apply this custom image to be displayed when the Scheduler has blocked out timeblocks.
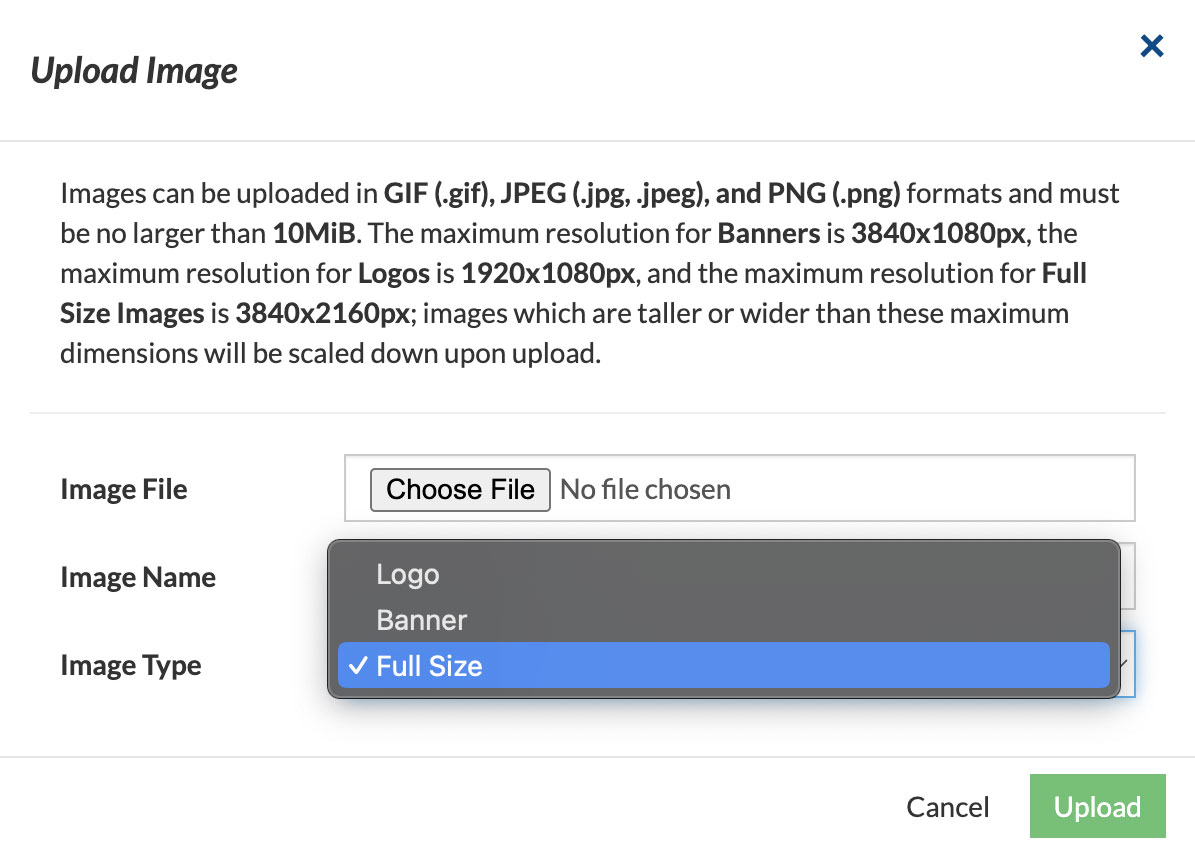
How do I add someone else, like my web developer, to my account?
Add a web developer or access for another user to your Dashboard account
If you'd like someone else - like your web developer or another trusted employee - to be able to access our Dashboard so that they can administer your account and have all the control you have, do this:
- Log in to your Dashboard
- Navigate to USERS
- -> Click Add User (green button, either the one in the header or the one below all contacts)
- Add user's info and select permissions with the checkboxes at the bottom of the modal and click Save, which will email your new contact with a password reset link so that they can then login to https://dashboard.brownrice.com as well.
Done!
How do I password protect my webcam video?
Password protect your webcam video
- Log in to your Dashboard
- Navigate to WEBCAMS
- Select your WEBCAM STREAMNAME: yourwecamstreamname
-> Click Manage (green button) - Go to Player Settings

- Turn the Password Protected toggle from Off to On, then set a password by clicking the pencil icon.

- Enter password and click Save.

- Done.
Now each time some wants to view your webcam, no matter where it is embedded, they'll have to enter the password that you set in the steps above. 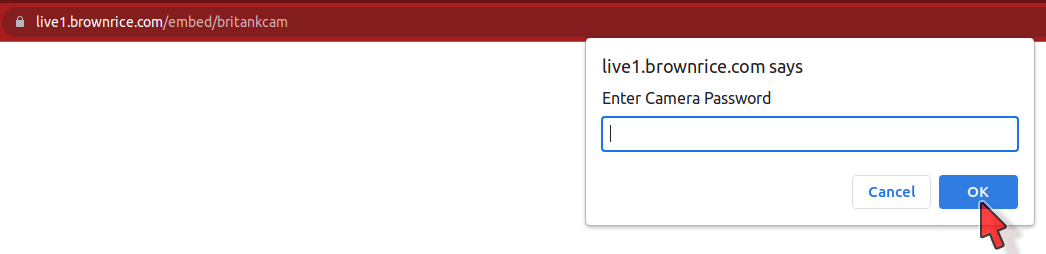
Note: You can enable or disable and change the password as often as you like.
How do I optimize my webcam video settings for the best quality?
Our servers can ingest and re-stream any resolution that your webcam sends to us. There are literally no restrictions on our end. However, if you want to optimize your webcam settings these are things to keep in mind:
- You don't have to do this! If we have access to the camera administration pages we can optimize your camera settings for you. We do this all of the time and take great pride in making our customer streams perfect. You'll of course need to forward an external port to your camera's web admin pages so we can get into the camera ourselves to do this.
- Whatever bandwidth your camera sends to us is what our servers will re-stream to your customers. For example: Sending us a 10mbs at 4k stream might look amazing to customers on high bandwidth connections but it simply won't work at all for customers on lower bandwidth connections and cell phone connections. So we typically feel that aiming for a 2 to 4mbs stream is good balance of video quality and accessibility for most viewing audiences.
- Be sure to run a speedtest on the network that your webcam is on to determine how much upload speed it has available to it. Sending our servers more video bandwidth that your internet upload speeds can handle will result in choppy and very poor looking video, not to mention the fact that your Internet connection will be swamped.
- Once you have a webcam up and streaming through our servers its very helpful to login to https://dashboard.brownrice.com and watch how much video your camera is sending to us. We've got live graphs and numbers that you can watch in real-time. View full instructions for viewing your webcam analytics. Webcam Bandwidth is that number that you will want to watch as that's how much bandwidth your camera is sending to our servers.
Here are the things to know when self-optimizing your webcam video:
It's important that each time that you make changes to your cameras settings that you Reset your Camera Stream
- Log in to your Dashboard
- Navigate to WEBCAMS
- Select your WEBCAM STREAMNAME: yourwecamstreamname
-> Click Manage (green button) - Go to Camera Settings
- -> Click Reset Camera Stream in order for our servers to pick up the new settings.
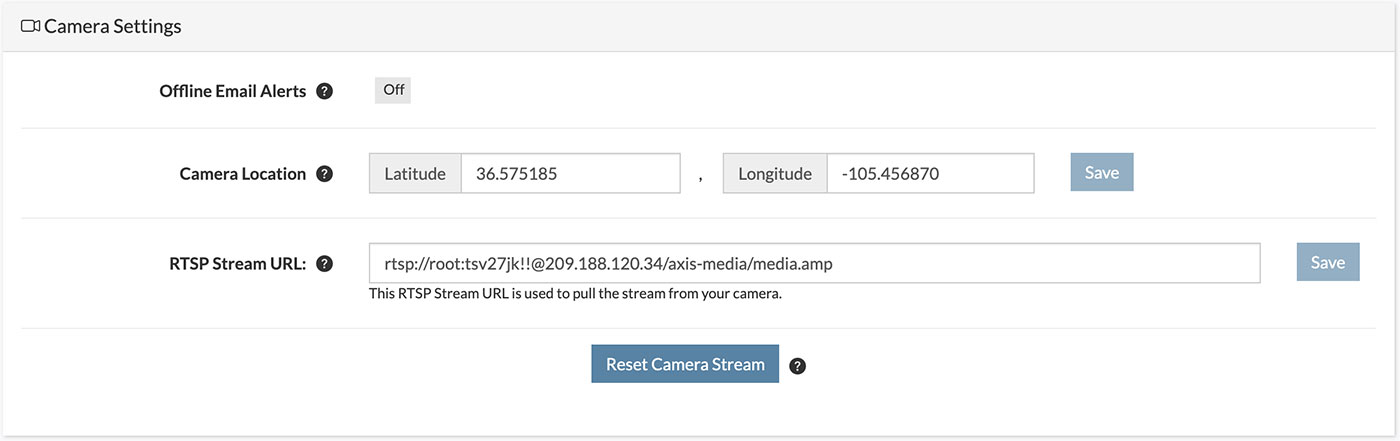
Also remember that the more things that move in your video means the more bandwidth that your camera will be sending to us. Things like trees and waves on a calm day might not cause much bandwidth to be sent, but on a windy day swaying, leafy trees or a sea of white-capped waves might easily quadruple the amount of bandwidth that your camera sends to us. So "setting and forgetting" may work one day, but not the next.
Frames per second (FPS): FPS greatly affects bandwidth. The greater the FPS the more bandwidth that will be pushed to our servers and your customers. This typically does not need to be more than 20 FPS for web viewing, which is what we shoot for often. Change this number and see what looks best and how it affects bandwidth (and be sure to reset the camera steam in our dashboard and reload your video player each time you do.)
Resolution: Resolution also greatly affects bandwidth. Resolution can be defined in various ways by different camera manufacturers. Sometimes its defined as 1080p, 720p, etc, and sometimes its listed as 1024x720, 640x480, etc. 720p (or 1024x720) is usually MORE than sufficient, since your webcam video player will likely only take up a small amount of real estate on your customers monitor or cell phone. 1080p and 4k video can look amazing but requires a LOT more bandwidth and is nearly always overkill on a web video player. Again, our servers support any resolution so try various settings and be sure to reset the camera steam in our dashboard and reload your video player each time you do for the changes to take.
GOV/Index rate: Gov is sometimes called Index frames, depending on the camera manufacturer, and mostly affects how quickly your video will start playing after the customer presses the play button. GOV frames also send more bandwidth, but not a lot more. As a general rule you'll want to send our servers 1 GOV frame per second. So if your camera is set to 20 FPS, then you'll want to set your GOV setting to be 20. (and be sure to reset the camera steam in our dashboard and reload your video player each time you make changes to the GOV setting.)
Video Compression: Different manufacturers use different naming schemes for compression. Often its listed as a percentage and sometimes its listed as a video quality, like so: High, Medium, Low. If compression is listed a percentage then lowering the percentage will lead to less compression with higher quality video but will use more bandwidth. So change it up and down, reset the stream in our dashboard, and watch how the video looks.
Again, there are a LOT of knobs to turn. Each change to a setting can impact other settings and bandwidth. So plan on spending a lot of time watching your video, adjusting, and resetting the camera stream if you plan on doing this yourself. But of course we'd be always be happy to optimize your streams for you! Just ask, its a free service!
How do I set up port forwarding to my webcam?
The general and simplistic overview to get connected to our webcam streaming service is that we need to connect to your camera from the internet to configure it and pull a single video stream from it. We'll also need your camera's internet IP address, username and password.
The details are that we need to connect to the camera on ports 80 (web port) and 554 (rtsp video port) to do so. Most users setup port forwarding on their modem or router to forward those two ports to the camera, then we take it from there. If you don't know how to do this, or don't have a tech person to help you - we'd be happy to walk you through the steps or we can set up a screen share with your computer so we can do it for you.
For example here's a tutorial on how its done with Netgear routers:
Here's a great site that shows you how to setup port forwarding on nearly any router:
And here is a tester that you can use to confirm whether the port forwarding rules you set are working correctly:
And finally, if you have confirmed that your port forwarding is working correctly, and you are technically savvy and can determine your camera's RTSP URL, you can then use our RTSP URL tester to test it! https://brownrice.com/webcam_rtsp_test
If our RTSP URL tester says that our servers can pull video from your camera then you'll just send your RTSP URL over to us at support@brownrice.com and we'll get your camera streaming!
Security Note: If you don't want to open your camera ports 554 and 80 to the entire internet feel free to only open those ports to our streaming server's IP address range, which is this: 172.97.100.0/24
How do I update my RTSP URL?
If you'd like to update your the RTSP URL for your camera, such as if your camera has a new IP address:
- Log in to your Dashboard
- Navigate to WEBCAMS
- Select your WEBCAM STREAMNAME: yourwecamstreamname
-> Click Manage (green button) - Go to the Camera Settings
In the RTSP Stream URL box, type in the full RTSP URL for your camera, and click save. This should start with "rtsp://" and should include the port (usually 554) as well.
Example RTSP URL
rtsp://username:password@209.188.114.123:554/?channel=1&stream=0
Note: We strongly recommend using tour RTSP Stream Tester to ensure that the new RTSP URL works before changing it:
https://brownrice.com/webcam_rtsp_test
Note: There are certain characters that do not work properly within an RTSP username and password. So be sure that these characters are not in your camera's username or password:
@ $ : < > # % / \ | } { ] [How do I make my webcam play automatically?
Here's how to set up your webcam to play automatically, without users having to press the play button, when they come to your web site (note: This will not work on mobile as there is no way to auto-start a video on a mobile device.)
- Log in to your Dashboard
- Navigate to WEBCAMS
- Select your WEBCAM STREAMNAME: yourwecamstreamname
-> Click Manage (green button) - Go to the Camera Settings
- Click small pencil icon next to the Autostart option
- Click Enabled
Done.
How do I integrate my webcam player with Google Analytics?
While our built-in webcam analytics provide a myriad of great viewer information, some of our users want more. Specifically, our webcam video servers have no way to provide you with data about which websites have embedded your webcam player into them, which websites have referred viewers to your webcam player, or which users have clicked on the logos that you've overlayed onto your webcam player via our Dashboard. When you follow these instructions all of that information will be available to you via your own Google Analytics 4 reports.
- Obtain your Google Analytics 4
You'll need your own Google Analytics account. Once your account is created and running you'll need to then create a new Google Analytics 4 Property (name it something like "My Webcam" so that you can identify which webcam you are monitoring) and then copy that property's Tracking ID. Full instructions are here: https://support.google.com/analytics/answer/10269537?ref_topic=1009620 - Copy and paste your Tracking ID into our Dashboard
- Log in to your Dashboard
- Navigate to WEBCAMS
- Select your WEBCAM STREAMNAME: yourwecamstreamname
-> Click Manage (green button) - Go to Statistics
- Click the green Add Google Analytics Tracking ID button and enter your Tracking ID, which you copied from Step 1 and 2.
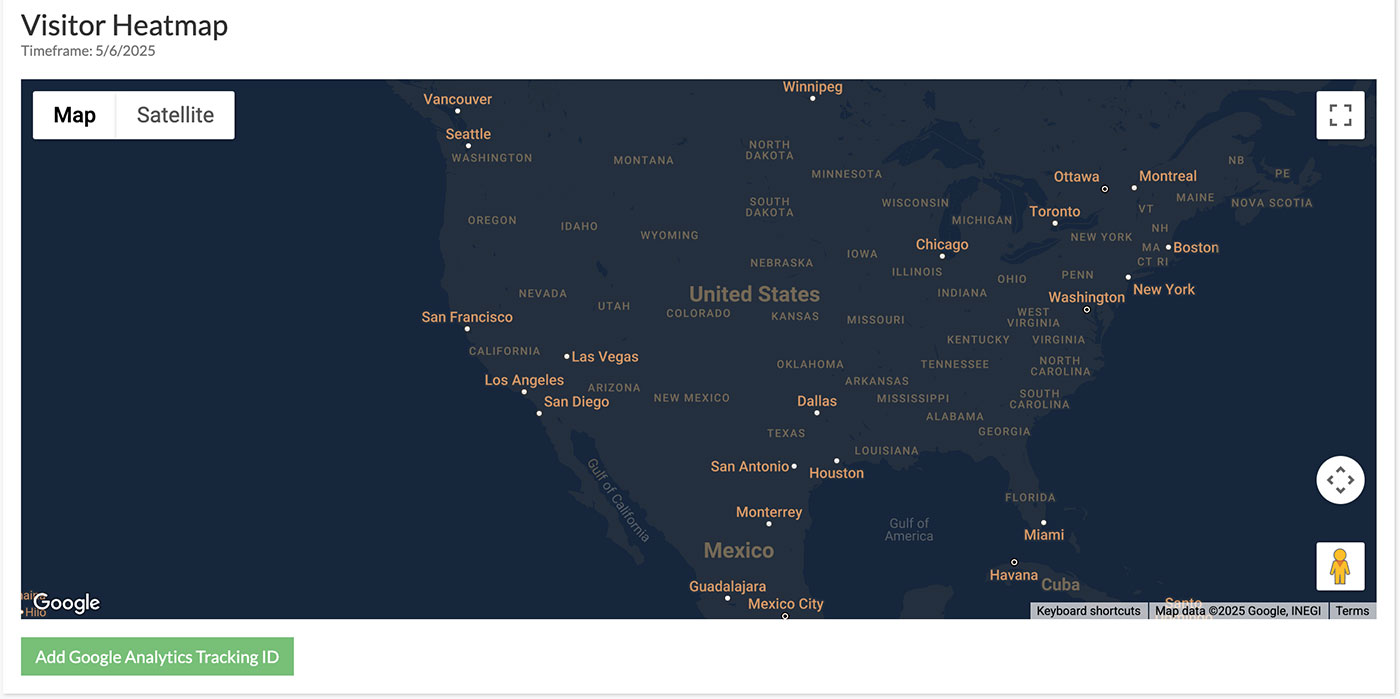

Done.
It typically takes only a few minutes for statistics to start showing up in your Google Analytics 4 reports.
Custom Events that we send to Google Analytics
We send this customer Event data to Google Analytics in order to provide webcam player specific information in your reports -in addtion to the wealth of information that Google provides by default:
- webcam_video_loaded (the number of times your webcam player was loaded in a website)
- webcam_video_played (the number of times your webcam video was played)
- webcam_logo1_click (the logo overlay in the upper-right side of your webcam player)
- webcam_logo2_click (the logo overlay in the upper-left side of your webcam player)
You'll see these events in your Google Analytics Events reports, in addtion to all of the other data the Google Analytics provides by default. You can also drill down into each event for more data by clicking on them. For example, if you can click on the webcam_logo1_click Event you'll see which websites each user was sent to when they clicked on the the upper-right logo on your webcam player (if you set up a logo overlay.)
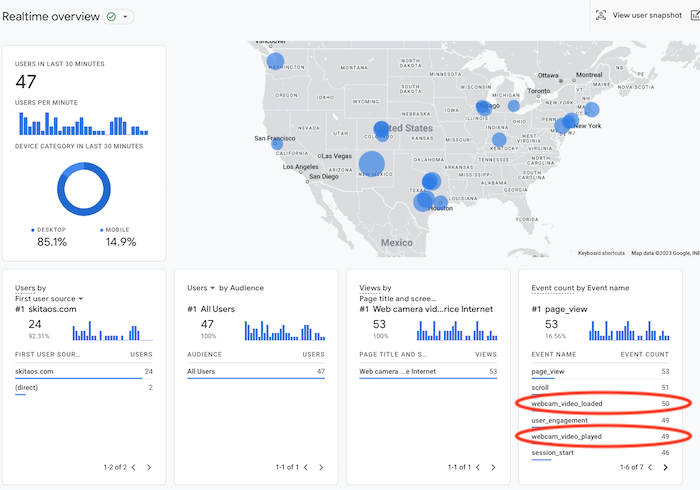
Notes:
- This only works with Google Analytics 4
- You can embed the same Tracking ID into multiple cameras, or you can create a seperate Tracking ID for each of your webcams.
- We can not help you set up or configure your Google Analytics reports. If you need help, ask and we'll get you in touch with a web marketer or developer who can consult with you to get this done.
How can I embed my webcam player into my Wordpress site?
Embed an iFrame into Wordpress
- Choose the page that you want to add your player into. On that page click the top right button with three dots. A menu will drop down where you can then click CODE EDITOR.
- Paste in the iframe embed code we provided you just after we set up your camera. The iFrame should look similar to this:
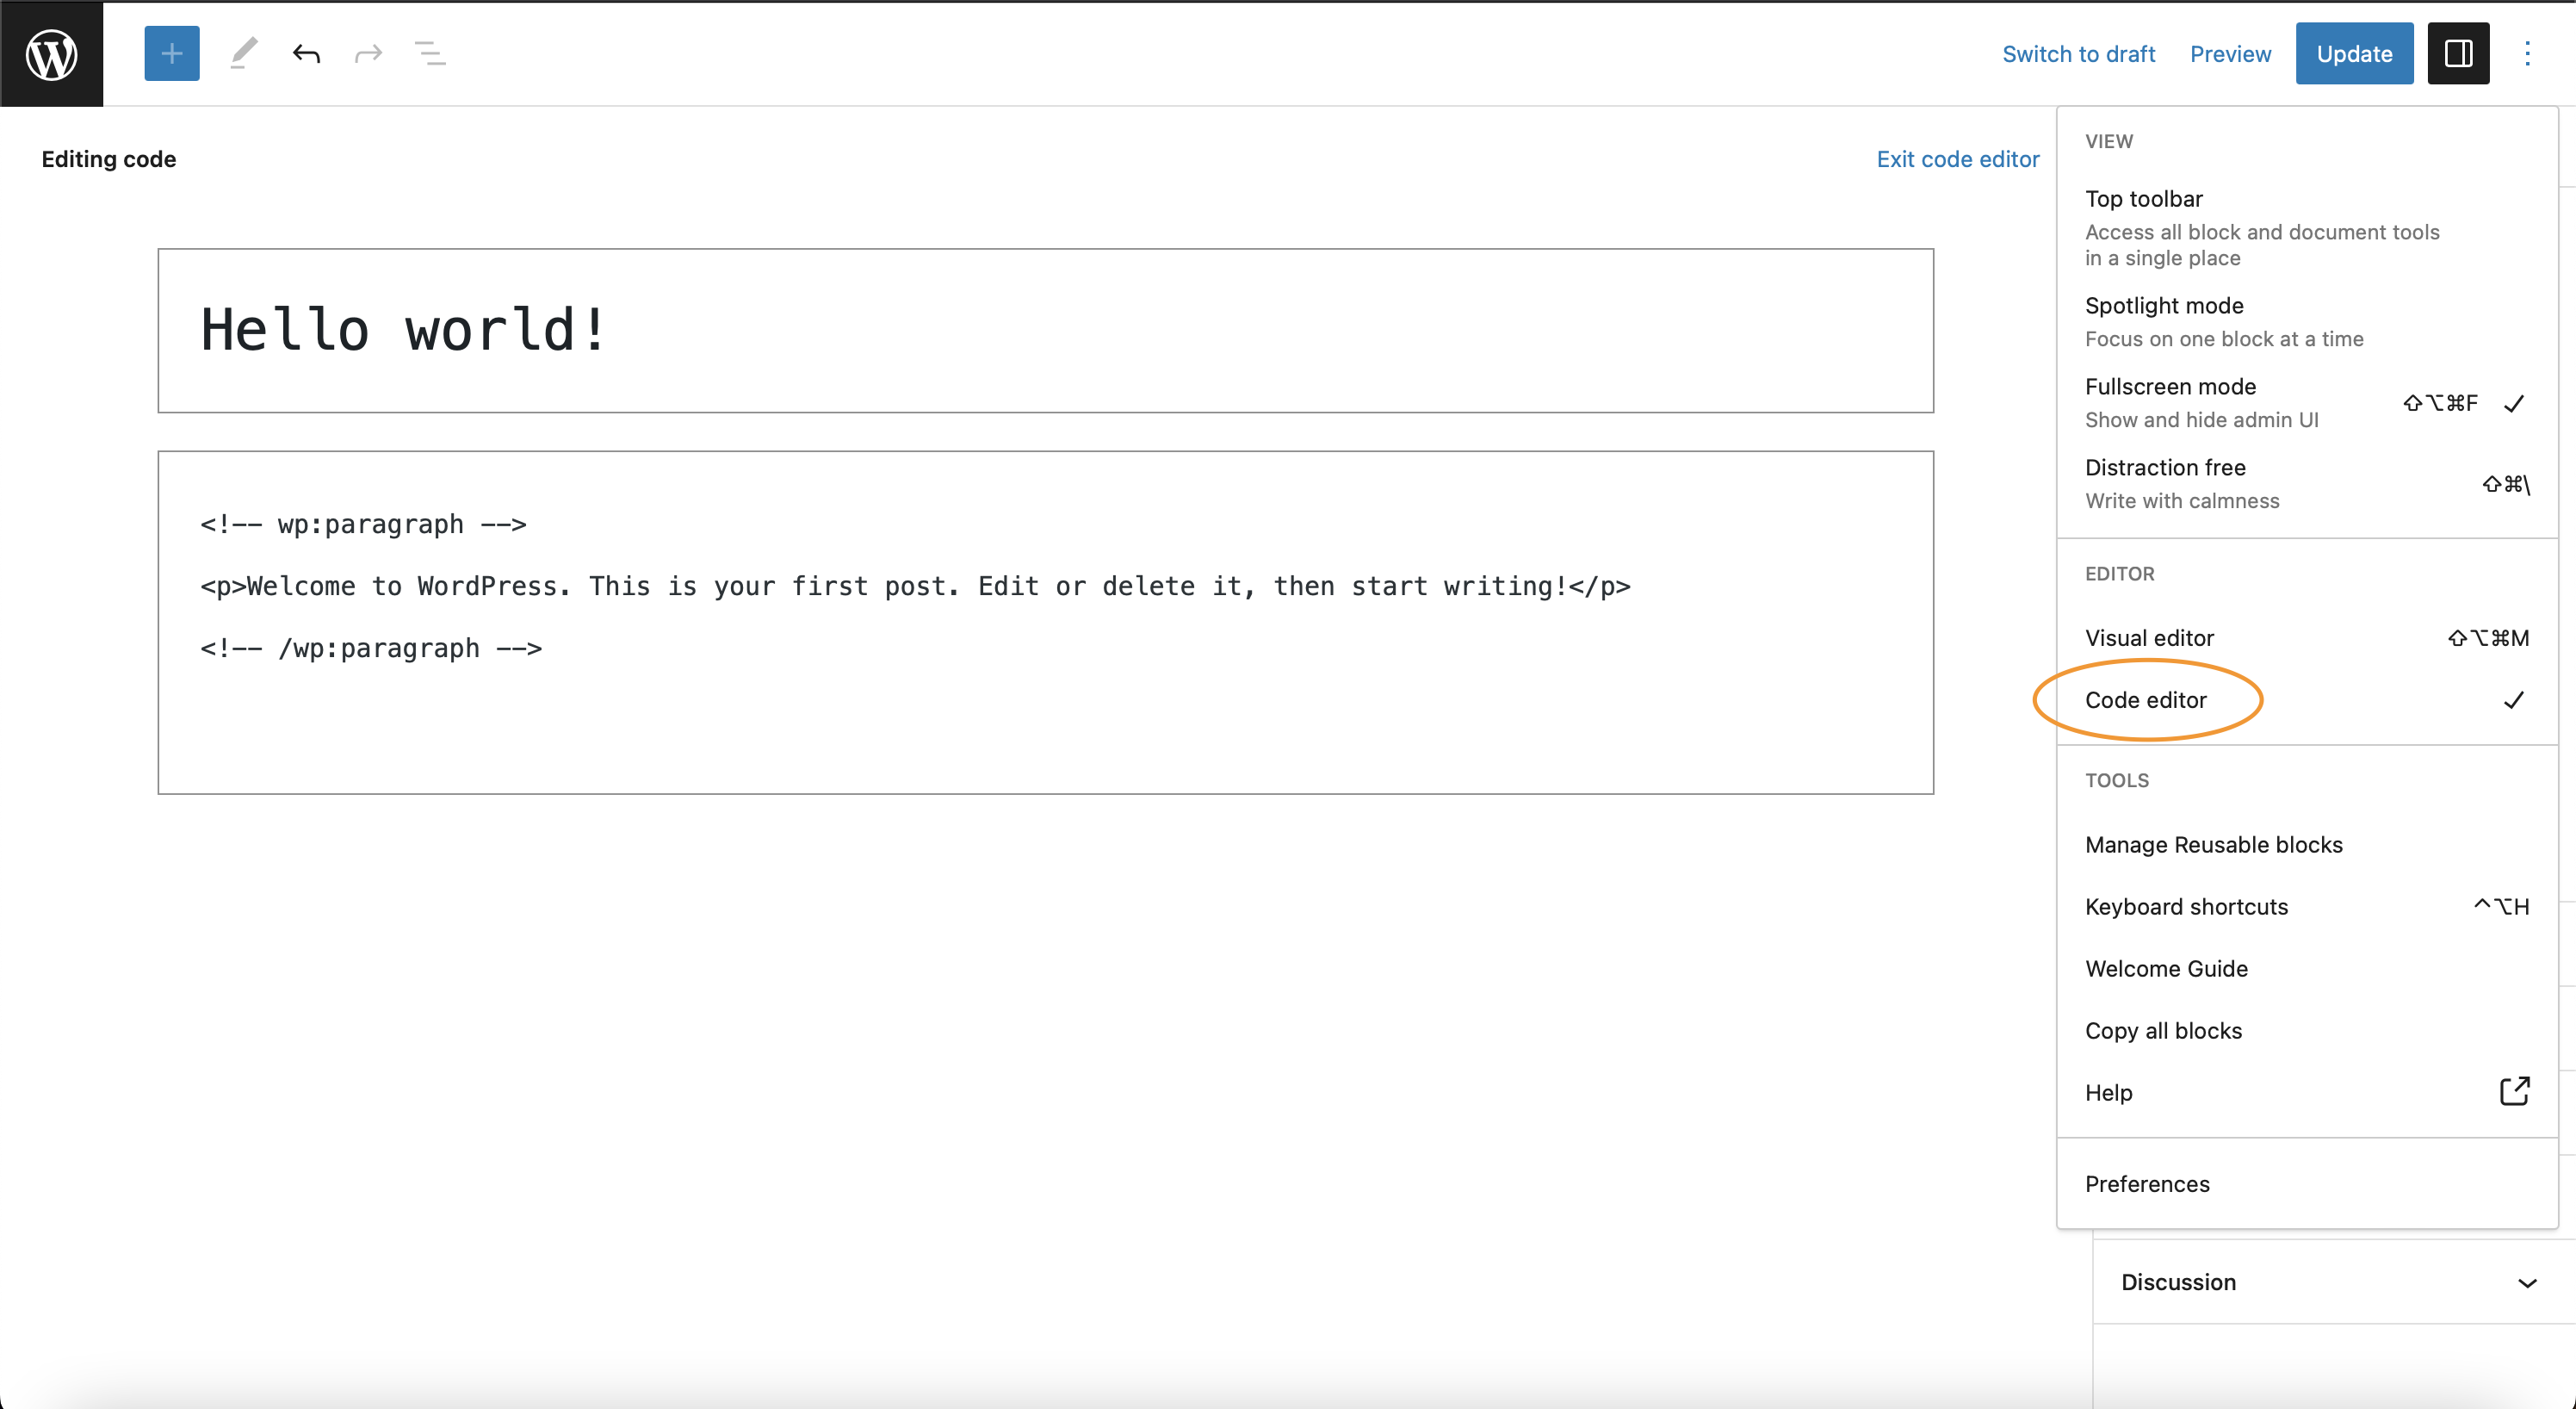
How do I change my camera timezone so that my statistics, recordings, and timelapses are synced to my timezone?
By default all new webcams are set to be in the Mountain Timezone, because that's where our servers live. However, you should set your camera location so that all of your statistics, recordings, and timelapses are synced to your cameras true time zone.
While our built-in webcam analytics provide a myriad of great viewer information, some of our users want more. Specifically, our webcam video servers have no way to provide you with data about which websites have embedded your webcam player into them, which websites have referred viewers to your webcam player, or which users have clicked on the logos that you've overlayed onto your webcam player via our Dashboard. When you follow these instructions all of that information will be available to you via your own Google Analytics 4 reports.
- Log in to your Dashboard
- Navigate to WEBCAMS
- Select your WEBCAM STREAMNAME: yourwecamstreamname
-> Click Manage (green button) - Go to Camera Settings
- Enter the exact Latitude and Longitude of your camera. To obtain your cameras exact latitude and longitude on your computer, open Google Maps then right-click your camera's exact location on the map. This will open a pop-up window. You can find your latitude and longitude in decimal format at the top.
- Click Save
Done! From now on all webcam services will know your cameras timezone and sync its statistics, recordings, and timelapse videos to your timezone.
How do you stream your webcam video to Youtube?
Follow these instructions to stream your webcam video to Youtube
Things you need to get started:
- Ensure that you have a Youtube account that you can publish a live stream to: https://www.youtube.com/howyoutubeworks/product-features/live/#youtube-live
- Download the OBS Studio software (its free and open source) on to a computer that will be available 24x7 to run your live stream. Note: This computer does not need to be on the same network as your webcam. It can live anywhere as long as it has a good internet connection. https://obsproject.com/download
- Request your HLS URL from Brownrice. Email support@brownrice.com and ask us for your HLS URL for your webcam. We'll email you back with something that looks like this: https://streamer6.brownrice.com/mywebcamname/mywebcamname.stream/main_playlist.m3u8
Once you have have your Youtube Live account ready, OBS installed on your computer, and your camera's HLS URL from Brownrice then you can follow these instructions to publish to Youtube:
- Open OBS Studo and follow the Auto Configuration Wizard. You can also reach the Auto Configuration Wizard in OBS Studo by clicking Tools -> Auto Configuration Wizard. Select "Optimize for streaming, recording is secondary" then Next.
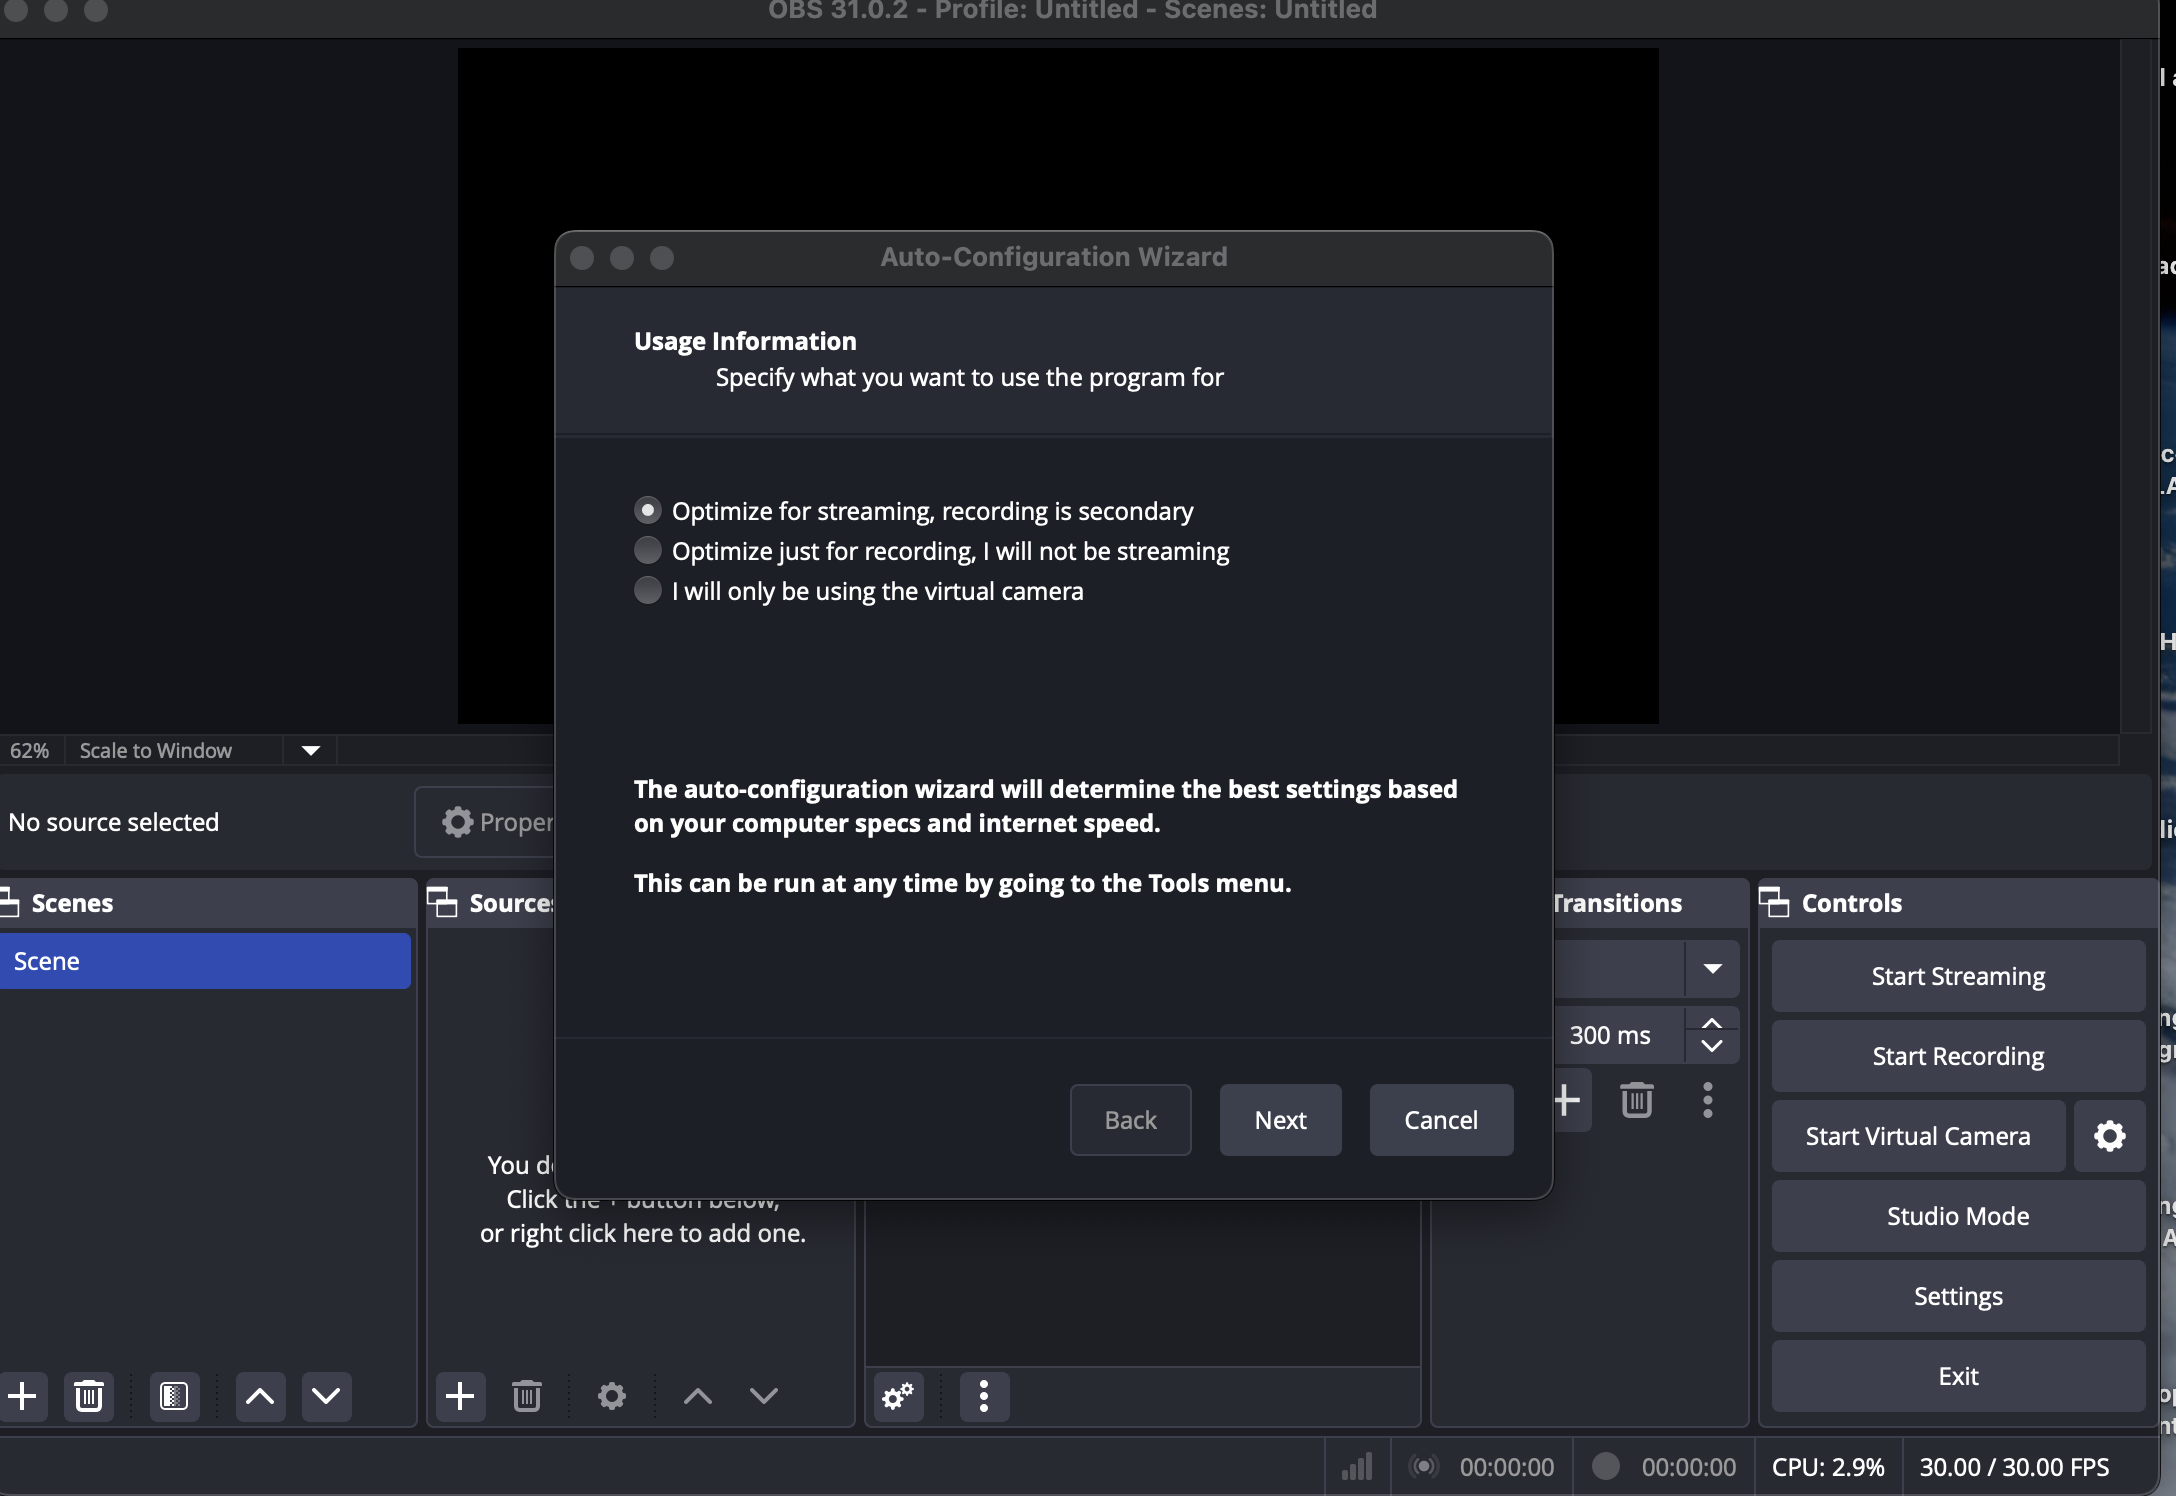
- Select the default settings for both Base (Canvas) Resolution and FPS then click Next
- Select Service: YouTube - RTMPS and then click Connect Account (recommended) and follow the YouTube instructions to link OBS Studio to your YouTube account (you'll need your YouTube login information for this). Leave all other settings set to the defaults.
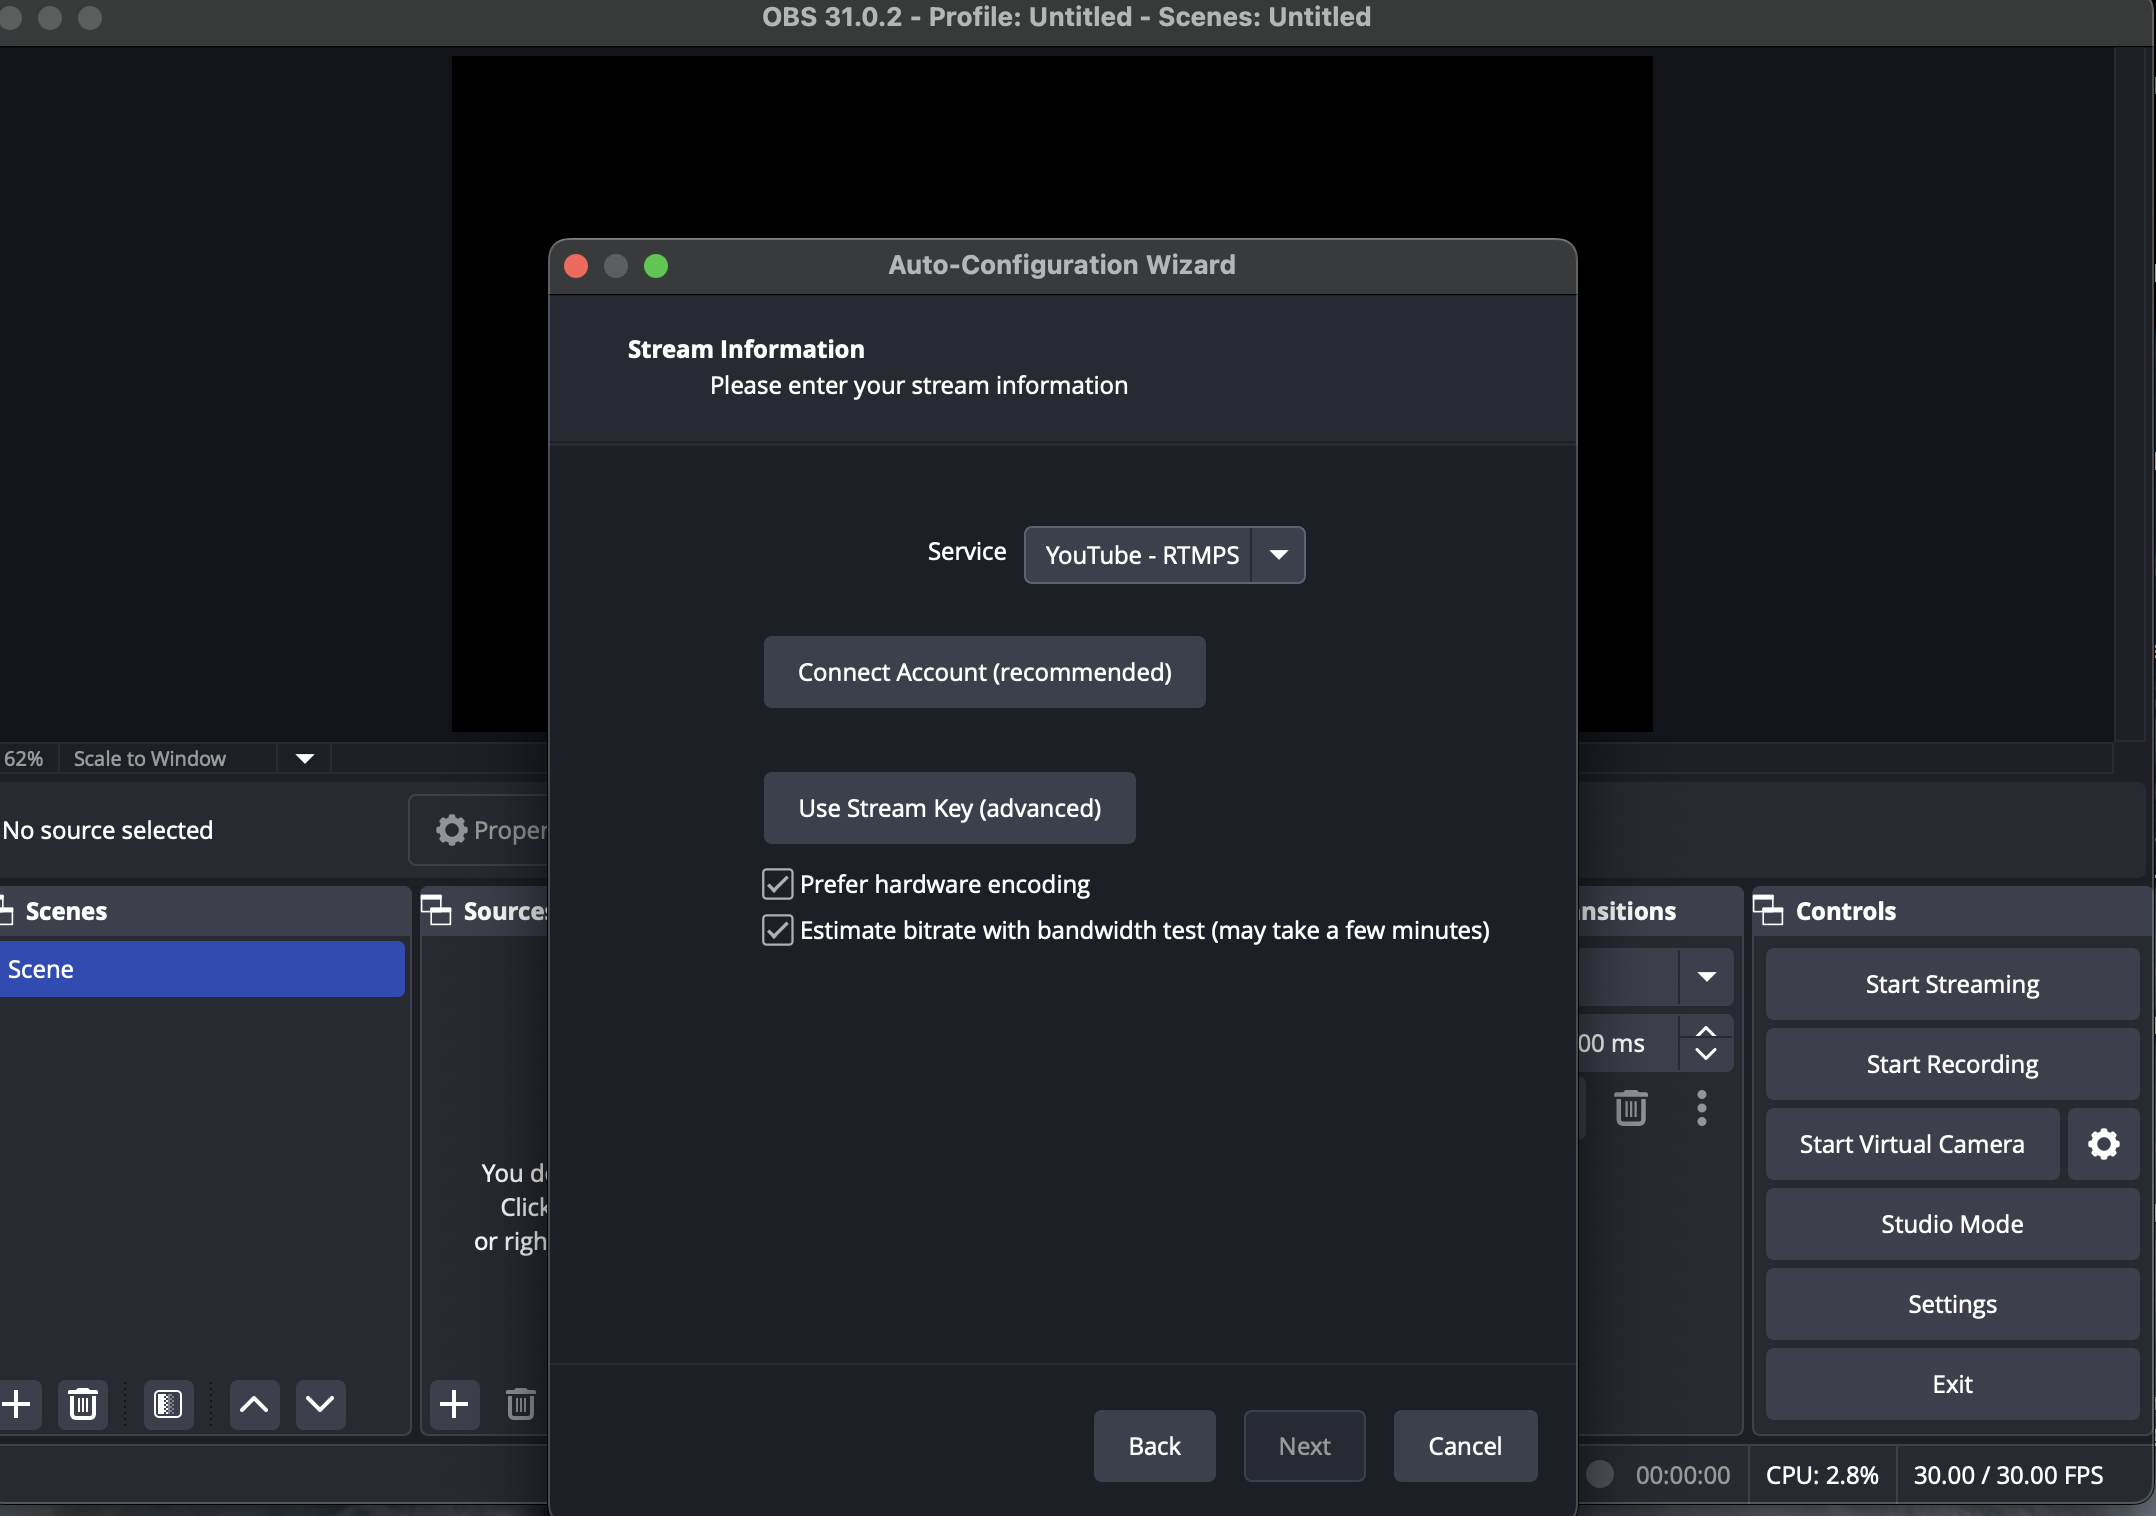
- Once your YouTube account has been selected allow OBS to test your connection to YouTube. This takes about a minute.
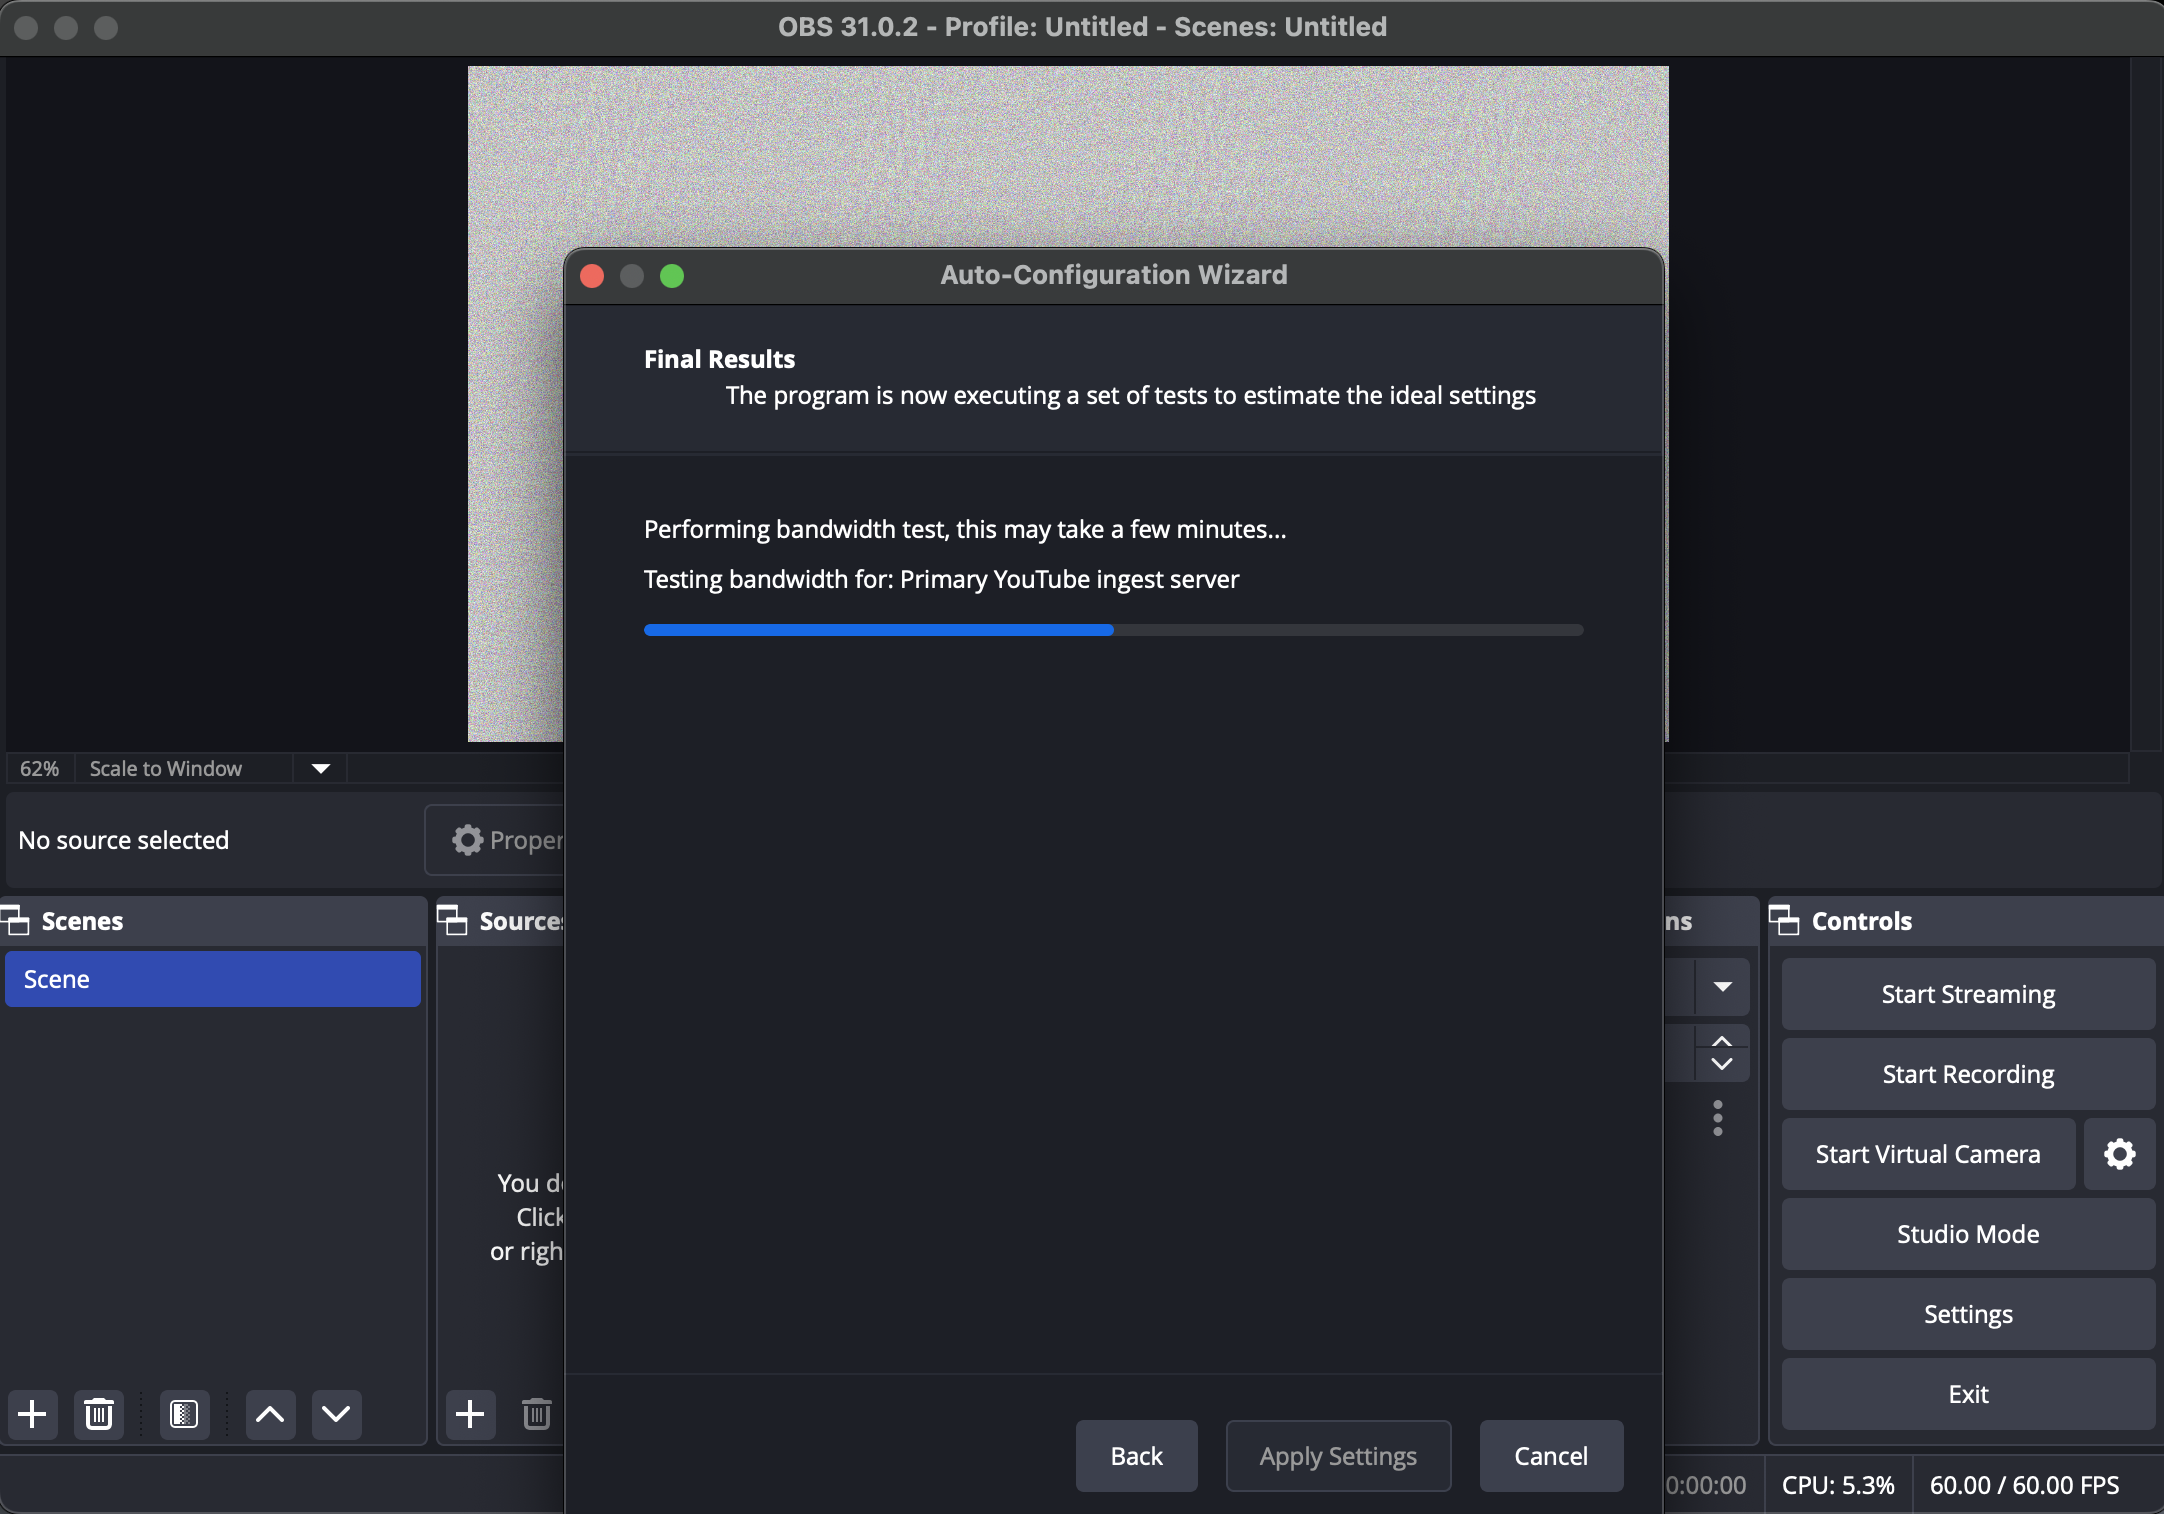
- Click the + button under Sources to add a Source. We'll be linking your webcams HLS URL that we sent you previously in these steps.

- Select Media Source then Create New then give it any name you like such as "My webcam."
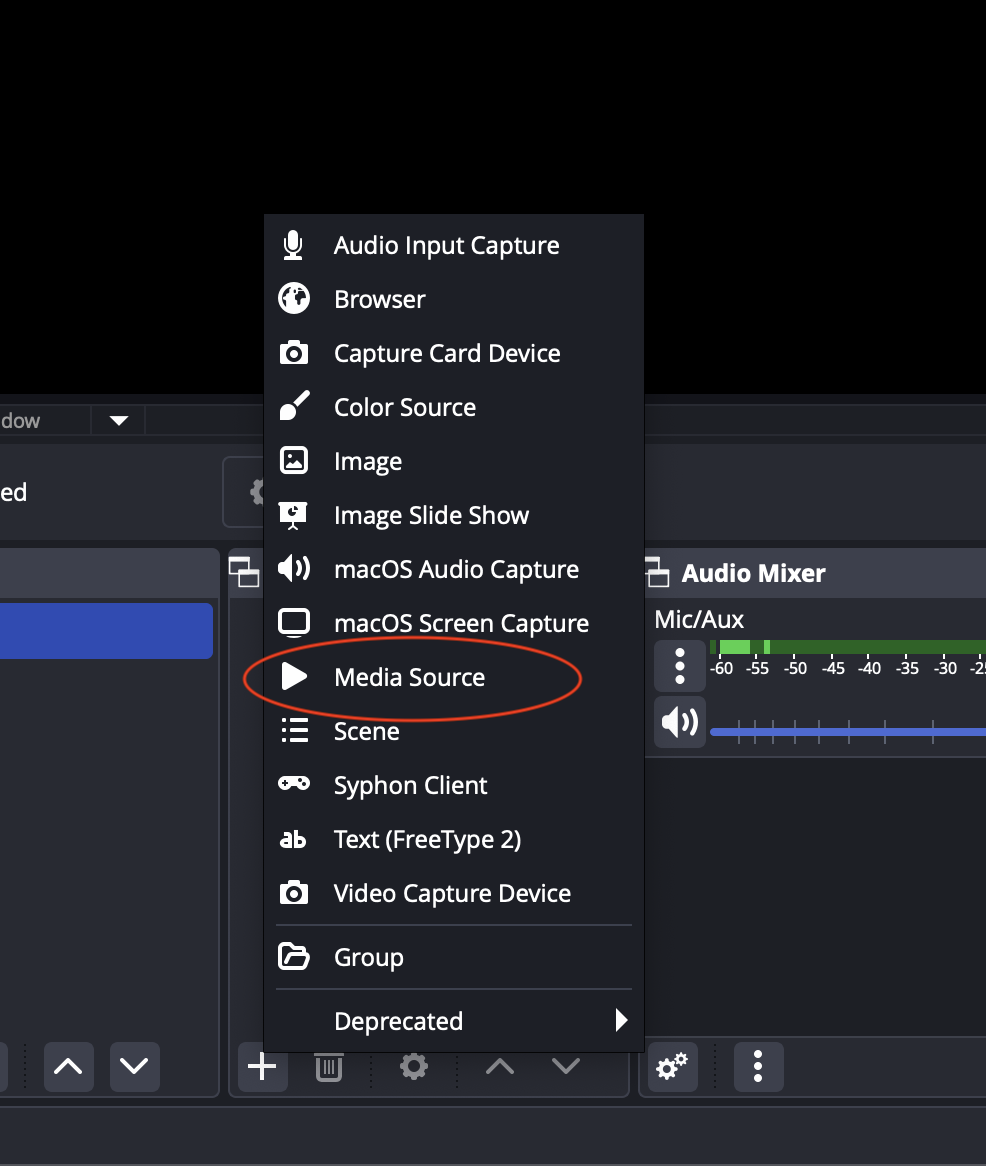
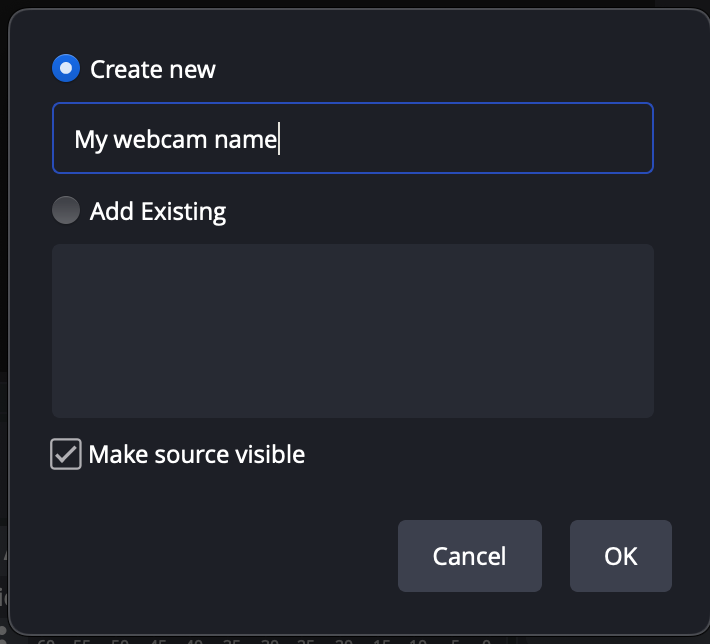
- Uncheck "Local File" and then enter your HLS URL in the Input field. Leave all other settings as they are, then click OK
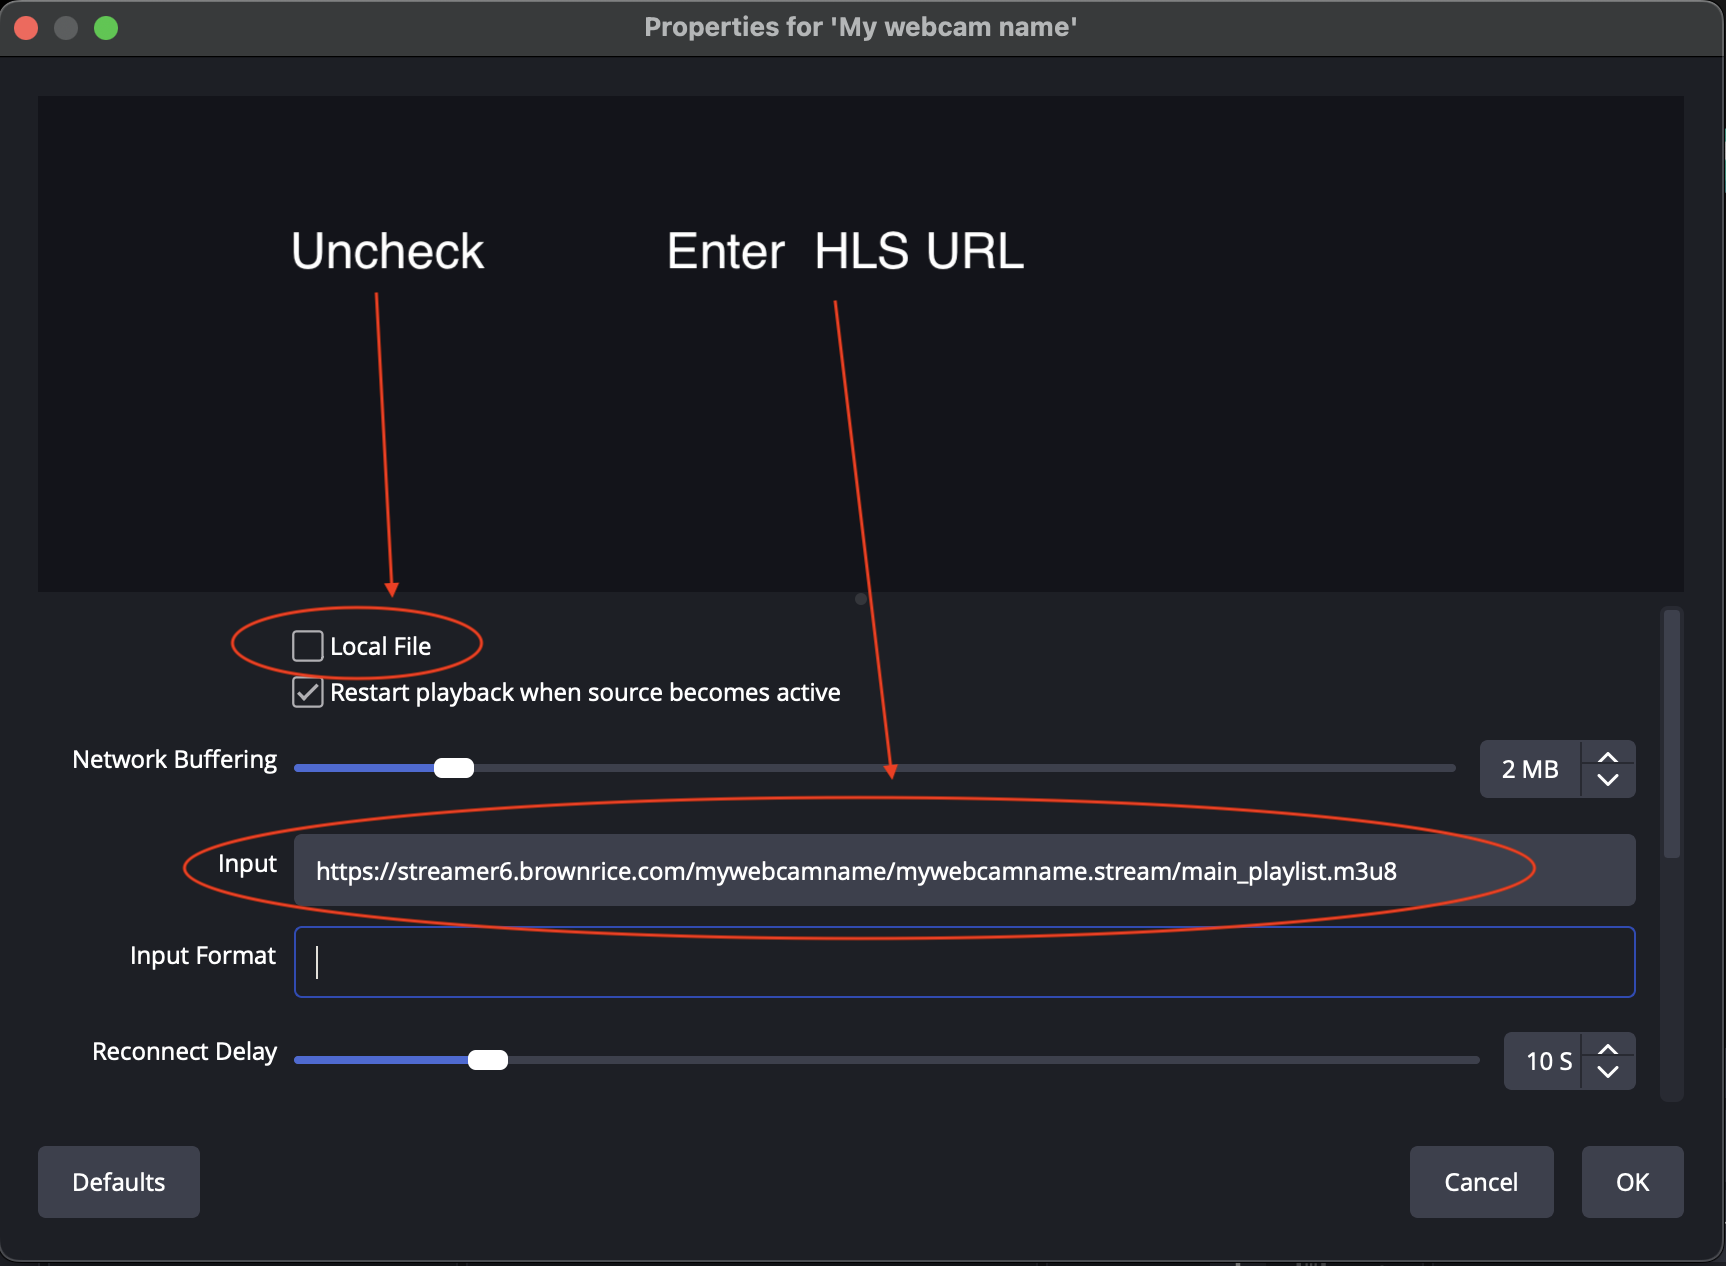
- We're almost there! Now click the Start Streaming button at the bottom of the main OBS screen, a pop will ask you to Manage Broadcast. Click the Manage Broadcast button then name the stream and set all setting to whatever you like, then click Create broadcast and start streaming
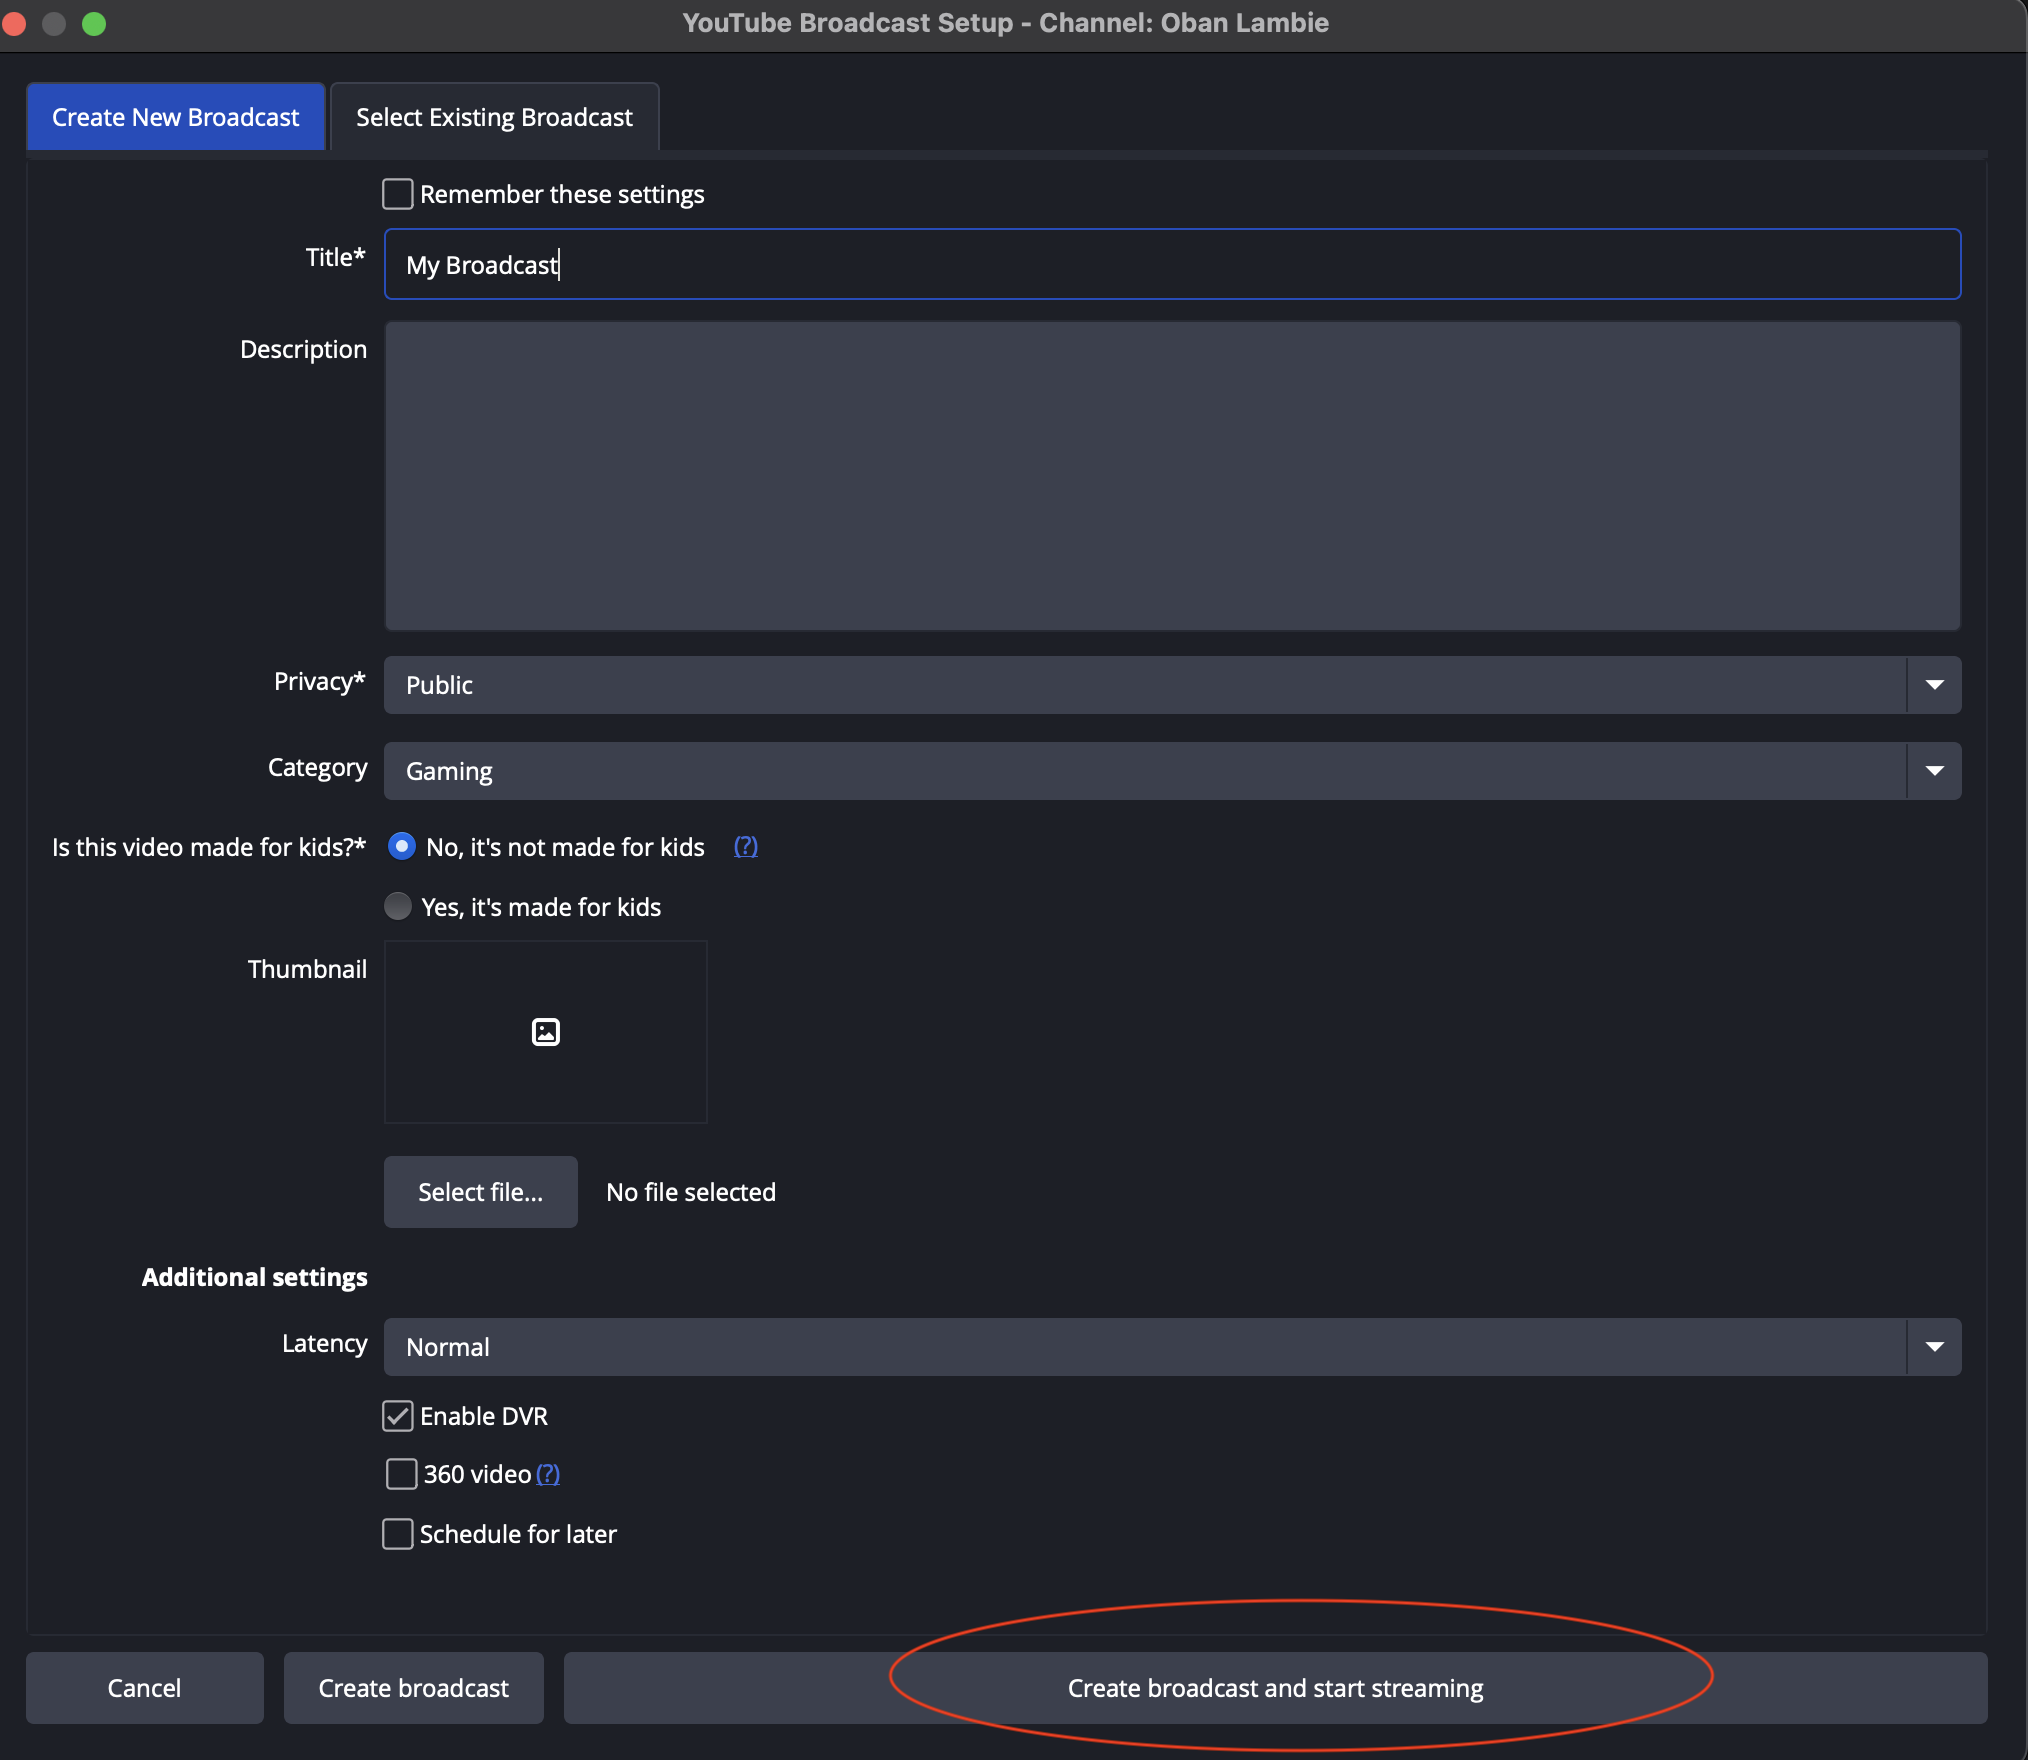
That's it! Check your YouTube page and you should now be live streaming to Youtube.
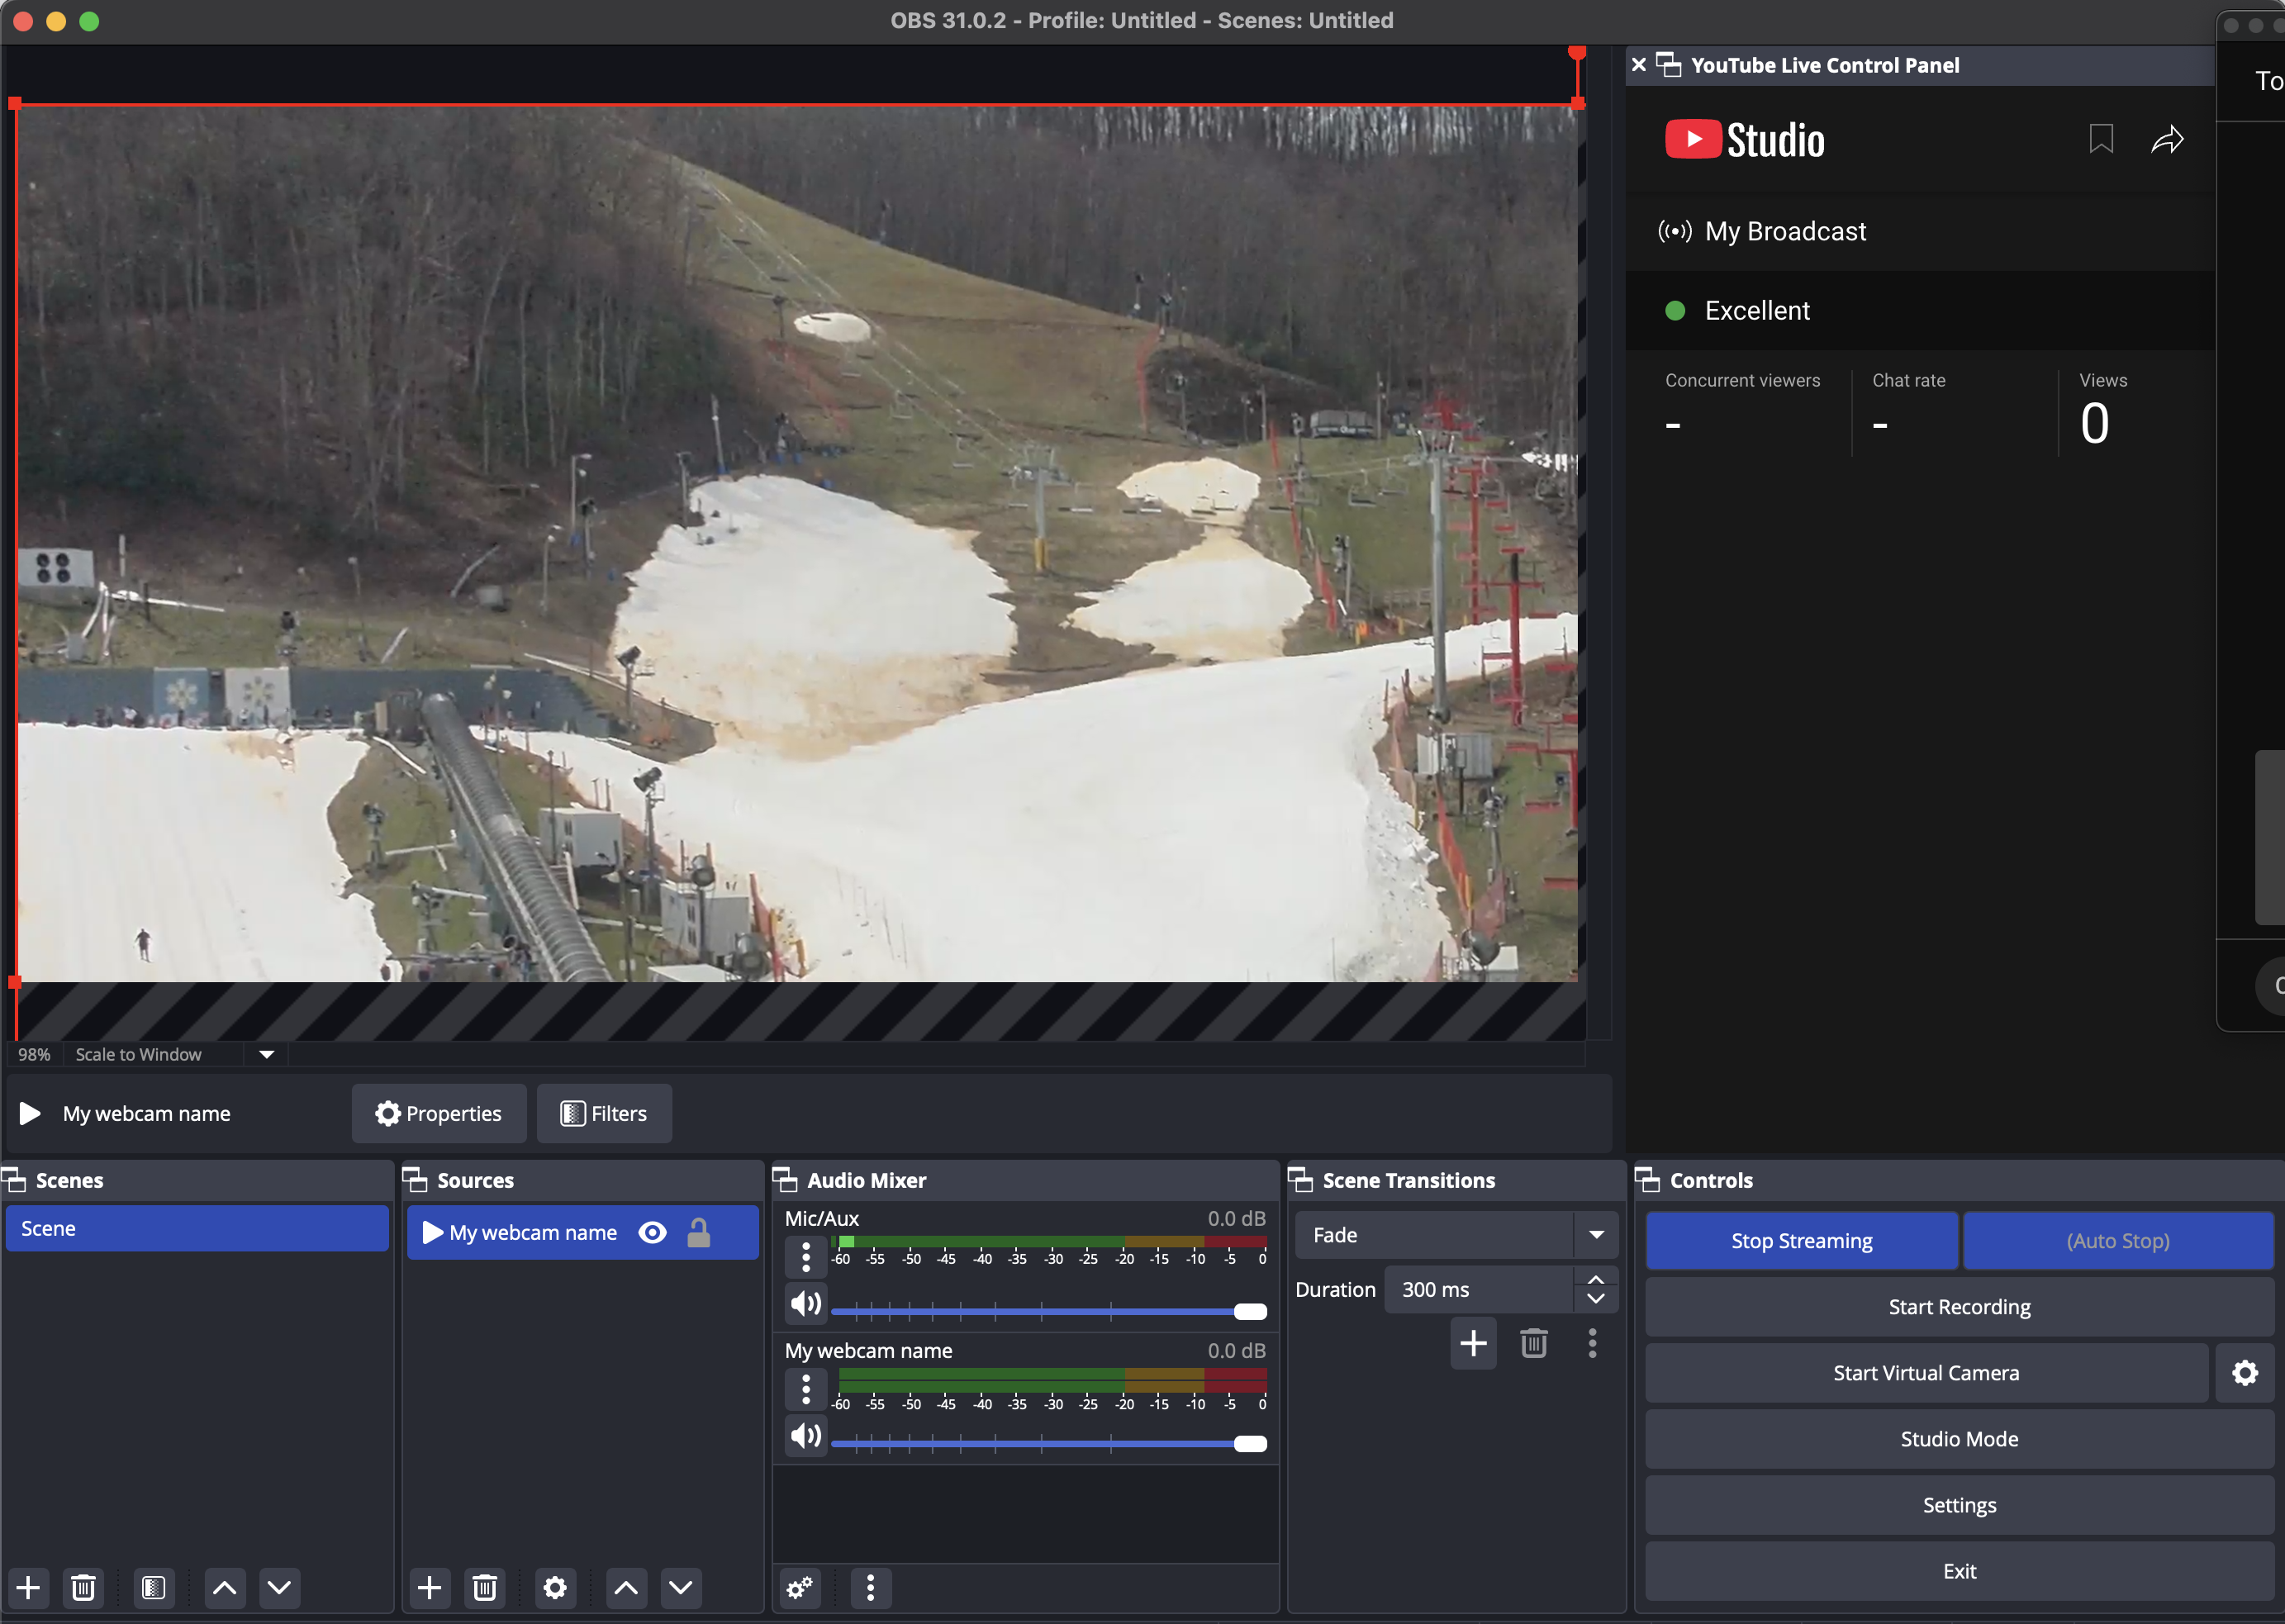
What is Live Rewind?
Our Live Rewind service allows your webcam viewers to rewind your video in real-time, up to 60 minutes, so that they don't miss a thing.
Enable Live Rewind in our Dashboard
- Log in to your Dashboard
- Navigate to WEBCAMS
- Select your WEBCAM STREAMNAME: yourwecamstreamname
-> Click Manage (green button) - Go to Player Settings
- Toggle Live Rewind ON. Live Rewind is a free service for all cameras on our 2TB plan or higher. 1TB customers can trial the service for free for up to a month.

Note: It takes a minute or two for Live Rewind to start working and will of course need to run a full 60 minutes before your users will be able to rewind the full 60 minutes.
My big webcam season is over, how do I downgrade my webcam plan?
Ski Areas, Bird Cams, and Surf cameras can often go over their bandwidth quota during their peak season and have their service levels automatically upgraded. However, our customers often want to downgrade their cameras back to lower bandwidth service levels during off season, which is easily done via our Dashboard.
Note: You can only downgrade to a lower service level after 30 days have passed since your webcam service last used a higher tiered level of service. I.e. If you want to downgrade to our 1TB plan then 30 days must have passed since your camera used more than 1TB of data.
To downgrade:
- Log in to your Dashboard
- Navigate to WEBCAMS
- Select your WEBCAM STREAMNAME: yourwecamstreamname
-> Click Manage (green button) - Click -> Upgrade This Streaming Service (green button)

- You'll then be presented with our service level slider and you'll then downgrade to the level that you want.
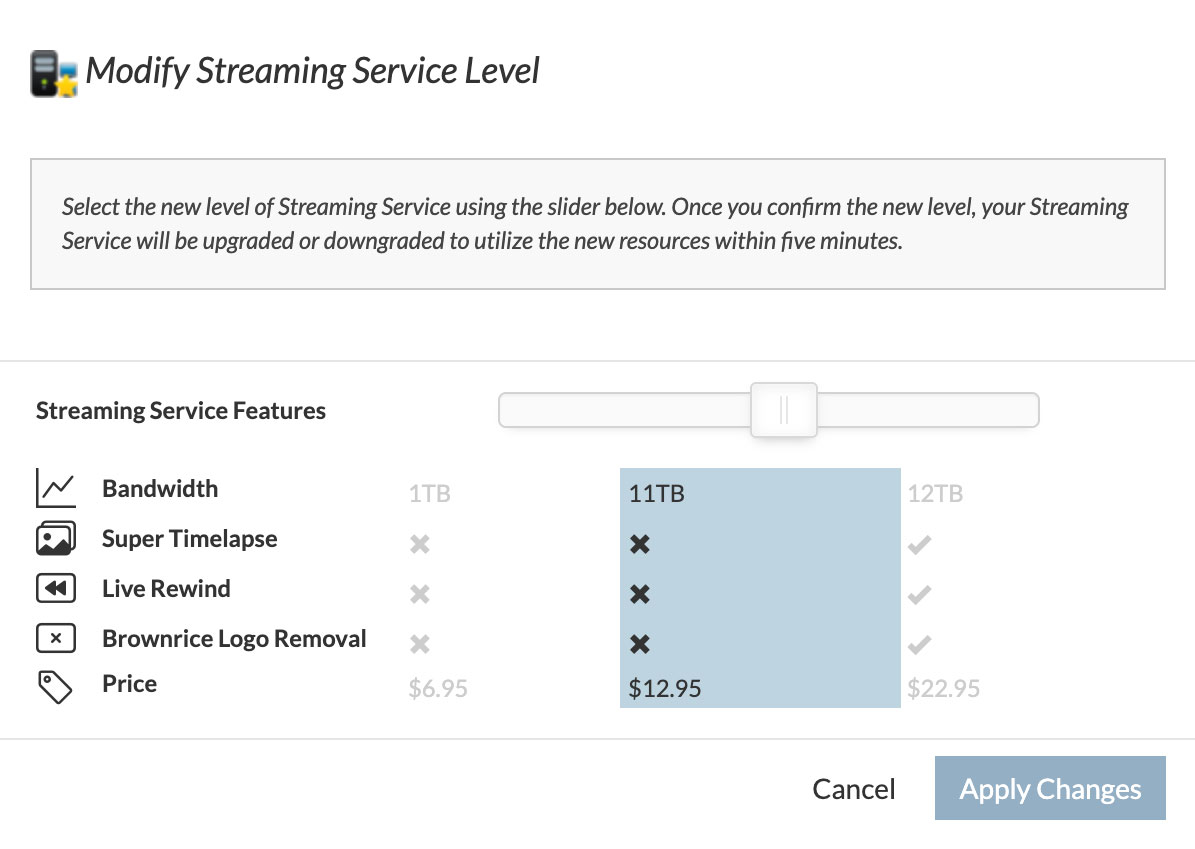
What is a webcam RTSP URL and how do I find it?
An RTSP URL is a specific type of URL used to access live video streams from IP cameras. It's a crucial part of connecting and viewing video feeds from these devices and is what the Brownrice streaming servers use to pull one video stream from your cameras.
The general format for an RTSP URL is: rtsp://username:password@ip_address:port/server_URL.
How do you find your camera's RTSP URL? Here are a few options:
- Use our ChatGPT transcript to get started: https://chatgpt.com/share/6838d458-5970-8012-a77f-fb3f390c8102 and then enter your camera make and model and IP address at the bottom of the chat and ChatGPT will likely be able to give you its RTSP URL.
- Consult your device's manual:
The user manual for your camera or NVR should provide information on how to find the RTSP URL, often including specific examples.
- ChatGTP "I have an Axis 504 camera and it lives at this public IP address. Please tell me what my RTSP URL is." And ChatGPT should give you the answer.
- Google "Camera make and model RTSP URL" (replace Camera make and model with your camera's make and model) will often lead you to the RTSP URL.
Test it! Once you feel like you've found your ip camera's RTSP URL, you can then test that it actually works with our RTSP URL tester at: https://brownrice.com/webcam_rtsp_test
Example RTSP URL:
rtsp://admin:password@208.188.111.111:554/axis-media/media.amp
(This example uses an Axis camera's default RTSP URL and a fake, public IP address).
Important notes:
- Usually you'll need to forward port 554 from the internet to your camera's LAN IP address in order for the RTSP URL to work. Port forwarding instructions are here..
- Some devices might have different stream types (e.g., main stream, sub-stream), which can affect the URL.
- It's always a good idea to secure your RTSP streams with strong authentication credentials.
- Feel free to contact us and we'll help you figure this out!
How do I customize the Poster image or Offline image for my webcam player?
What are the Poster and Offline Images?
The Poster image serves as a placeholder that appears while the video player is initializing or buffering before the live stream begins. The Offline image is displayed when the live stream is unavailable or offline.
Both images can be customized in the player settings to control what viewers see during player loading or stream downtime.
Here's how:
- Log in to your Dashboard
- Navigate to WEBCAMS
- Select your Webcam Stream: yourwebcamstreamname
-> Click Manage (green button) - Go to the Player Images & Overlays
Add a Poster image to be displayed while your webcam player is loading
- To upload a poster image, if you haven't already, click the small pencil icon next to Poster.

- Click Upload Poster.
- Browse to your poster image, and click Upload to upload your poster image.
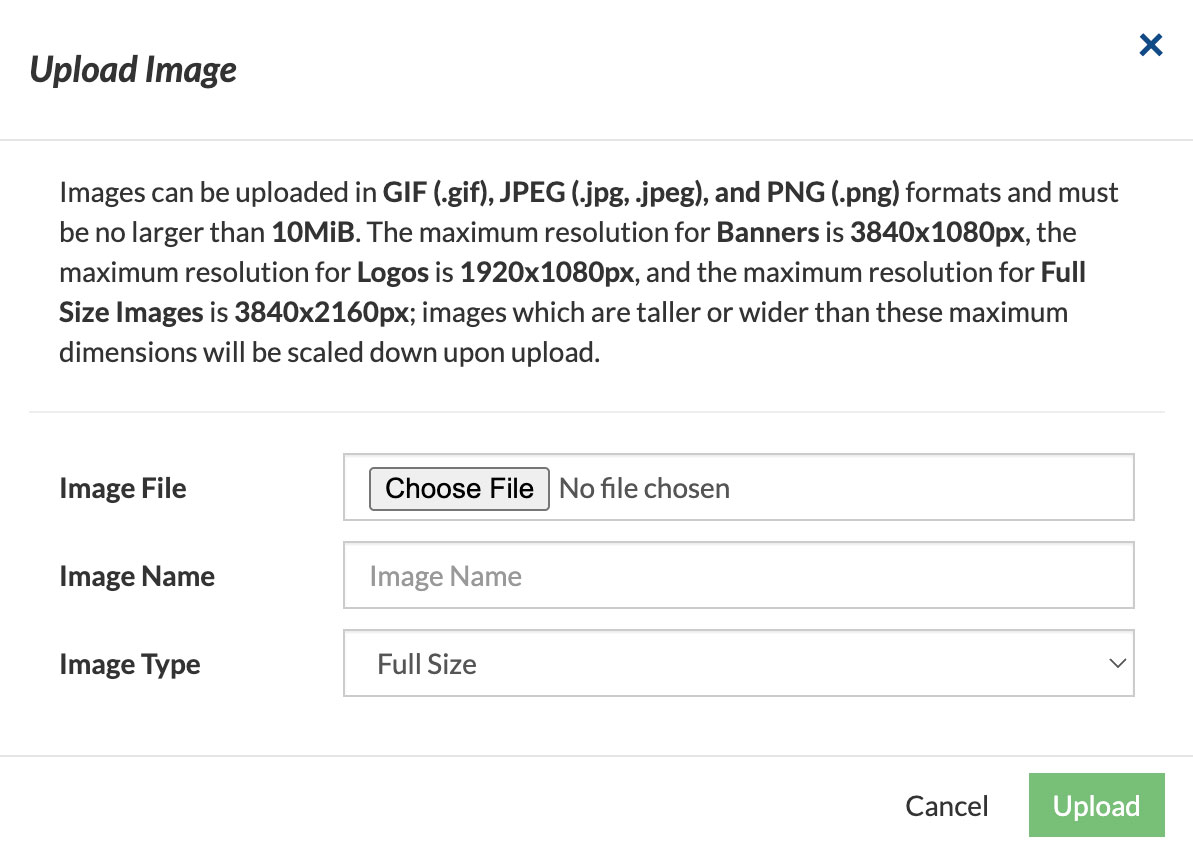
- All poster/offline images that have been uploaded will be displayed here. If you don't see the uploaded poster you are looking for, you have the option to Show Other Images in the upper right. When you see your desired banner image, click the Select Poster button below the image thumbnail.
- Once selected you will see this confirmation:
- Done! Your customized poster image has been successfully set for your webcam player.
Add an Offline image to be displayed when you live feed for your webcam is offline
- To upload an Offline image, if you haven't already, click the small pencil icon next to Offline Image.
- Click Upload Offline Image.
- Browse to your offline image, and click Upload to upload your offline image.
- All poster/offline images that have been uploaded will be displayed here. If you don't see the uploaded poster you are looking for, you have the option to Show Other Images in the upper right. When you see your desired banner image, click the Select Offline Image button below the image thumbnail.
- Once selected you will see this confirmation:
- Done! Your customized offline image has been successfully set for your webcam player.
Have a look at your webcam to ensure that your poster/offline images look and behave the way you want them to!
Note: Any poster images or offline images that are uploaded will be available to be used on any of your webcams, so you only need to upload a poster image or offline image once.
Note: When an image is deleted from the Manage Images section, automatically remove it from any cameras where it is used as a logo, banner, poster, or similar.
See also:
- How do I place ads and logos on top of my webcam video player?
- Where Can I Upload and Manage Player Images (Banners, Logos, Poster, and Offline)?
If you need help with this just contact us and we'll be happy to give a hand.
Where Can I Upload and Manage Player Images (Banners, Logos, Poster, and Offline)?
Image Management Overview
The Image Management area serves as a centralized media library for uploading and organizing all player-related visuals, including overlay banners, overlay logos, poster images, and offline images. Uploaded assets can be edited to change their assigned category (e.g., banner, logo, poster, or offline), or deleted if no longer needed. Once stored in the media library, these images can be applied to individual players via the Player Images & Overlays settings.
Here's how:
- Log in to your Dashboard
- Navigate to WEBCAMS
- -> Click Manage Images (green button)

- -> Click Upload New Image (green button) upload a new image to the Media Library.
Note: Images can also be uploaded in the Player Images & Overlays settings. Images can be uploaded in GIF (.gif), JPEG (.jpg, .jpeg), and PNG (.png) formats and must be no larger than 10MiB. The maximum resolution for Banners is 3840x1080px, the maximum resolution for Logos is 1920x1080px, and the maximum resolution for Full Size Images is 3840x2160px; images which are taller or wider than these maximum dimensions will be scaled down upon upload.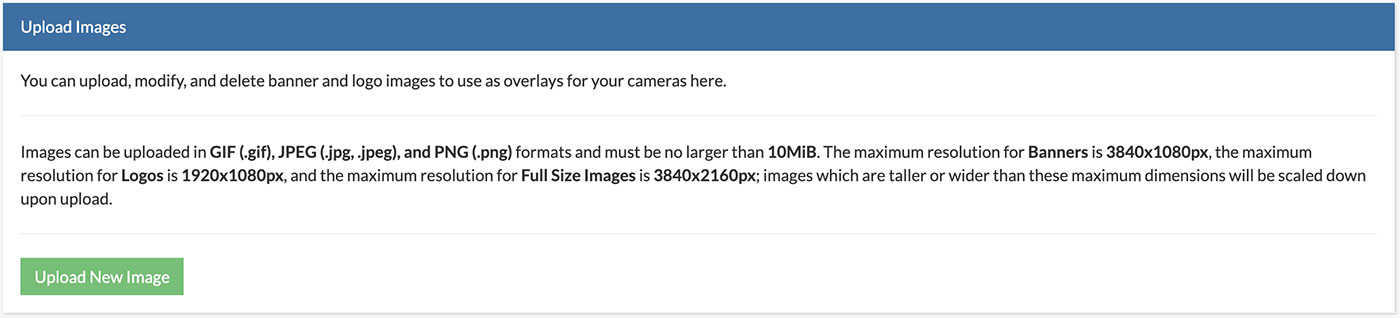
- Browse to the new image, select an Image Type Category, and click Upload (green button).
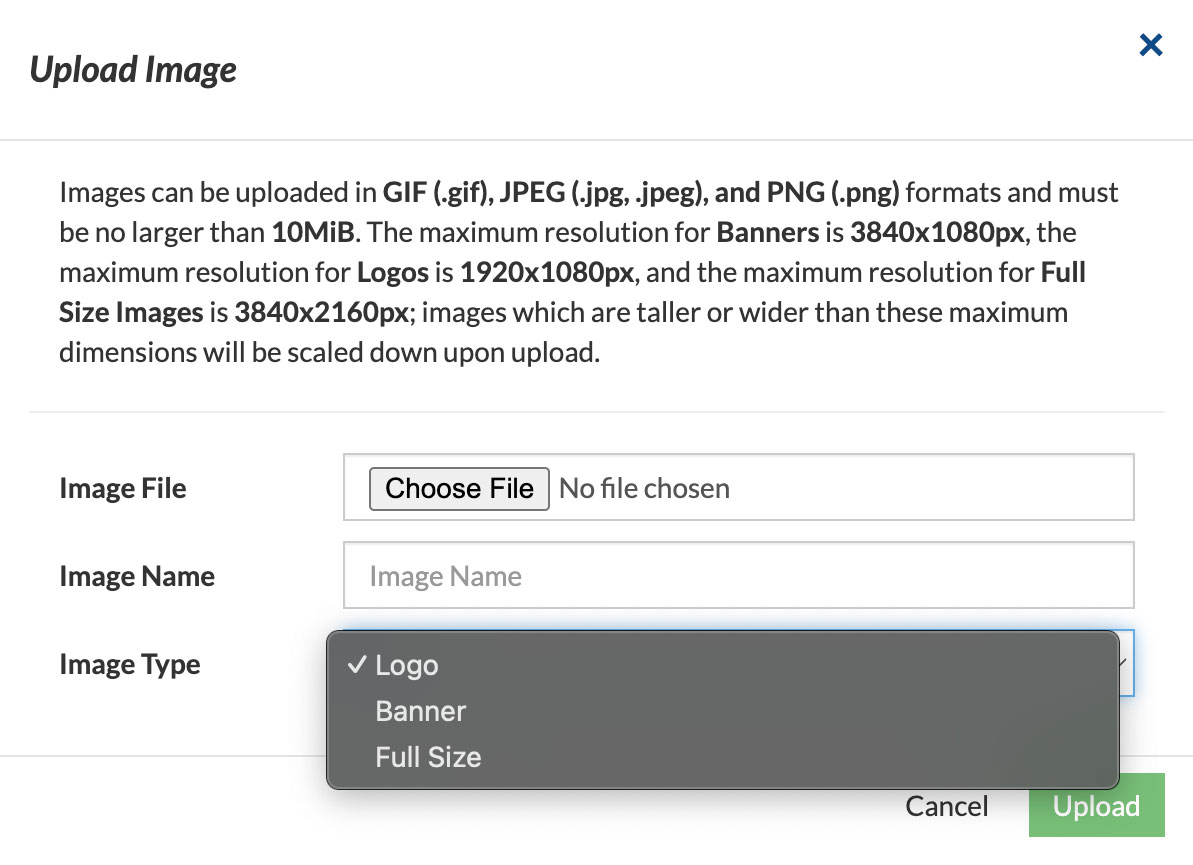
- Once images are uploaded and assigned to an Image Type category, they will appear within the corresponding category section, displaying a thumbnail preview along with key file details: dimensions (in pixels), file format (JPEG, GIF, or PNG), and file size.
Banners are overlaid on the video player and are primarily used for advertising. Each banner must include a targeted link, directing viewers to a specified URL when clicked.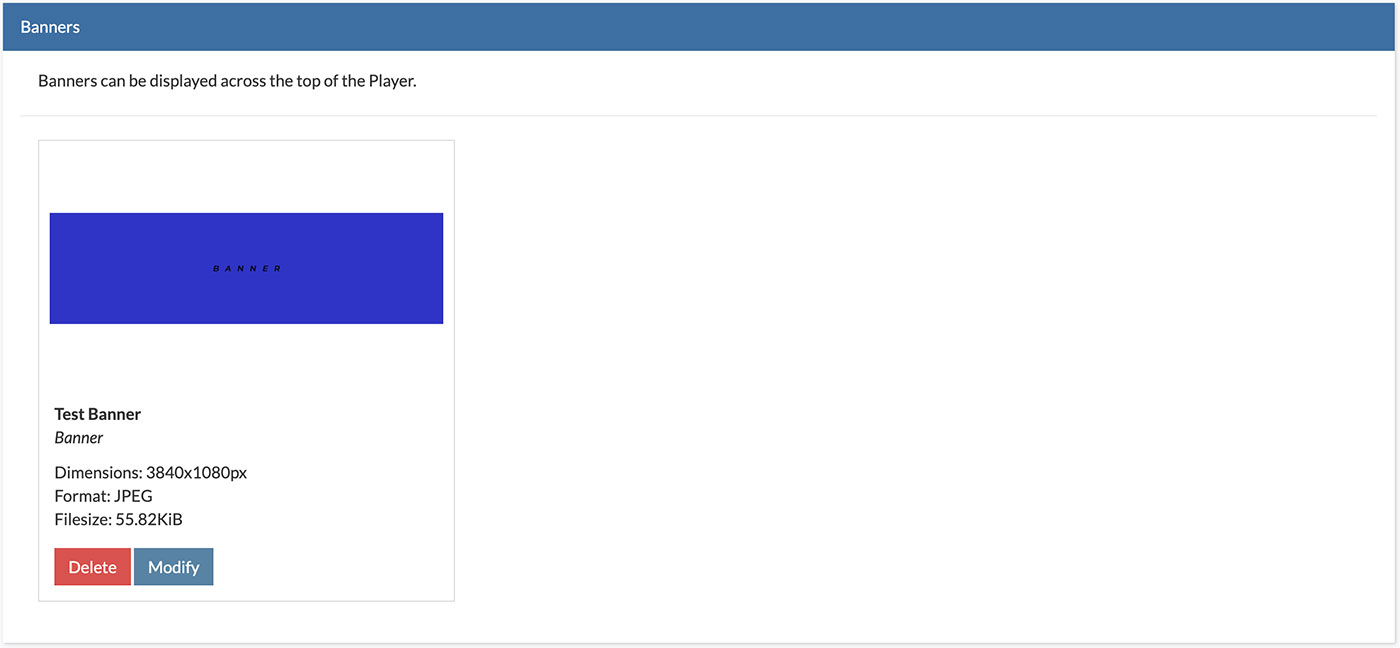
Logos are overlaid on the video player in the upper-left, upper-right, or both positions. Each logo can optionally include a clickable link or be displayed without one.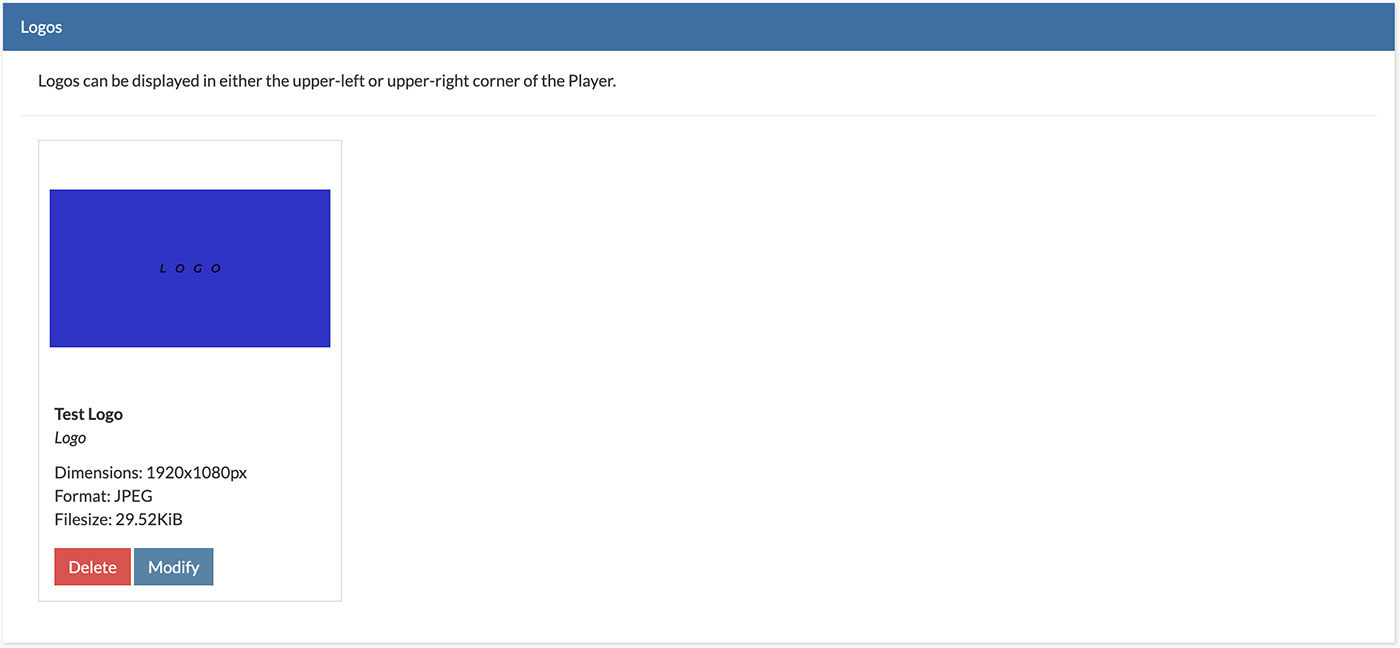
Full Size Images are used to assign visuals for either the Poster image (displayed while the player is loading) or the Offline image (displayed when the stream is unavailable).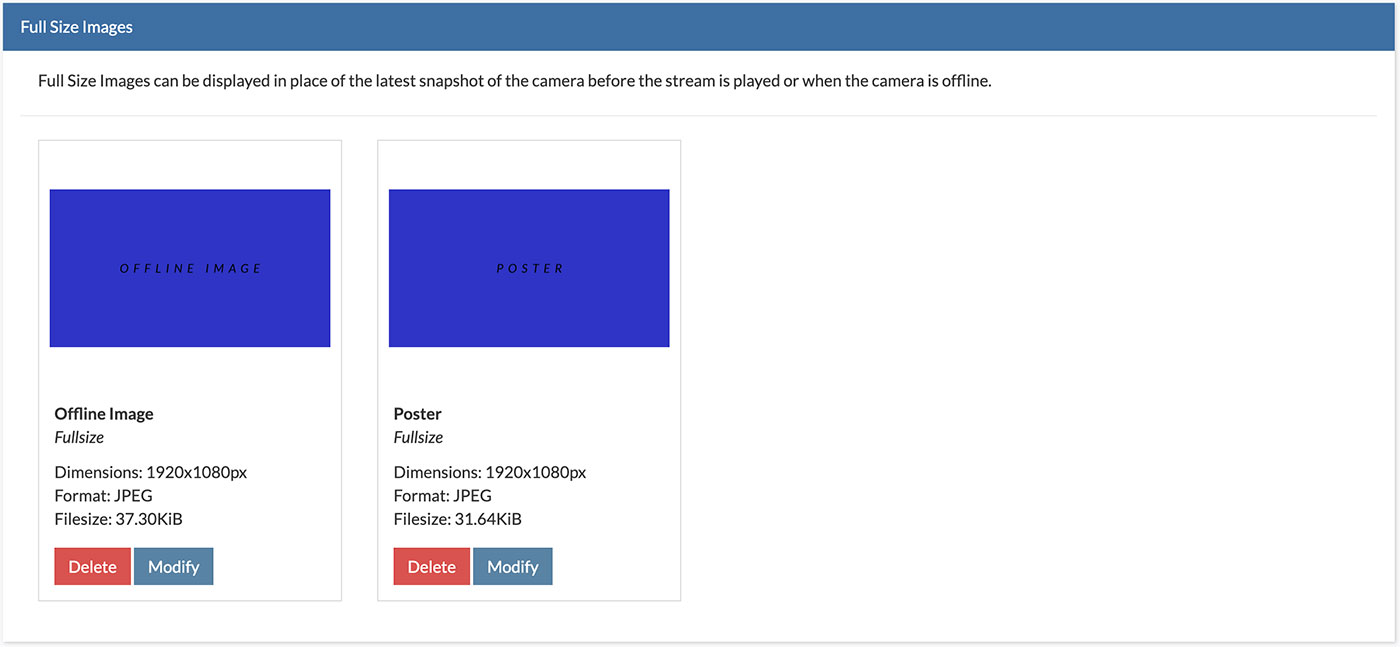
- To Modify an Image Type Category, click Modify (blue button below image thumbnail), then select a new Image Type Category and click Modify (yellow button).
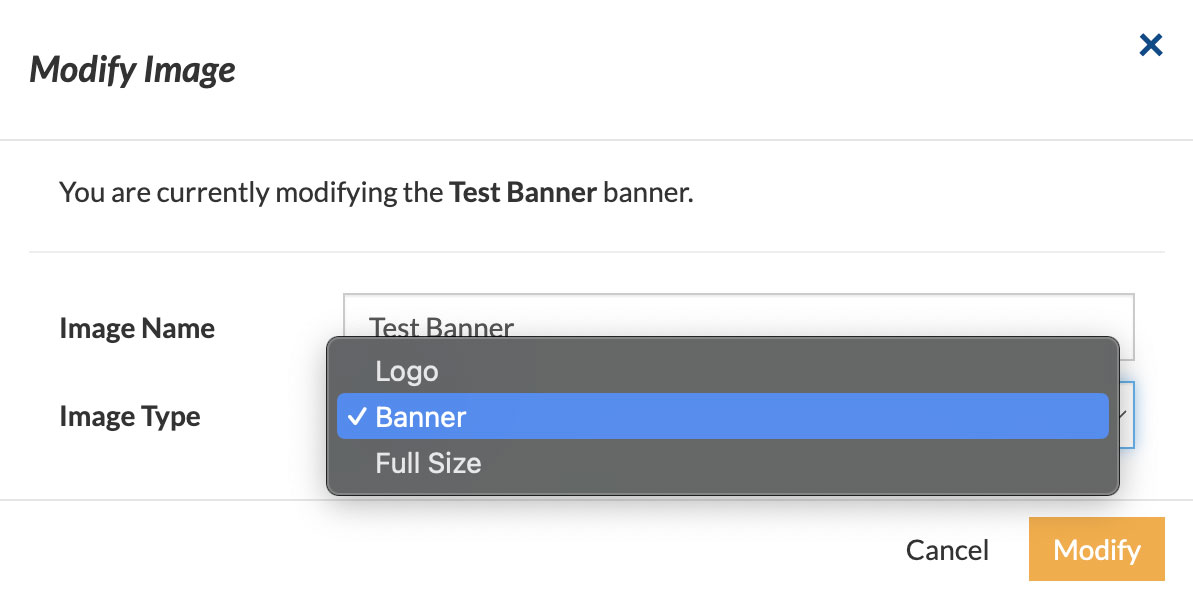
- To Delete an Image, click Delete (red button below image thumbnail), then Confirm by clicking Delete (red button). This is a permanent action and cannot be undone.
Note: When an image is deleted from the Manage Images section, automatically remove it from any cameras where it is used as a logo, banner, poster, or similar.
- Images can be applied to a player via the Player Images & Overlays settings.
See also:
- How do I place ads and logos on top of my webcam video player?
- How do I customize the Poster image or Offline image for my webcam player?
Done! The Image Management module provides a centralized way to upload and organize banner ads—perfect for scheduling seasonal promotions, saving campaign assets for future use, and managing a wide range of visual content with ease.
If you need help with this just contact us and we'll be happy to give a hand.
What is SmartPull Streaming?
SmartPull Streaming is a feature that helps save internet bandwidth by only starting your webcam stream when someone is actually watching. It’s included with all Brownrice webcam hosting plans.
Normally, your camera streams video 24/7, even if no one is viewing it—which can slow down your network, especially if you have multiple cameras. SmartPull Streaming changes that by waiting to pull video until a viewer presses play.
Once someone starts watching, the stream stays active for 10 more minutes after they leave, just in case others join. If no one returns, the stream stops automatically—saving bandwidth without affecting the viewing experience.
How to Enable:
- Log in to your Dashboard
- Navigate to WEBCAMS

- Select your WEBCAM STREAMNAME: yourwecamstreamname ? Click Manage (green button)

- Go to Camera Settings

- Toggle SmartPull Streaming ON

- You will be prompted by a warning that enabling SmartPull will deactivate Timelapse and Recording functionality*. Click Activate to confirm and enable SmartPull.
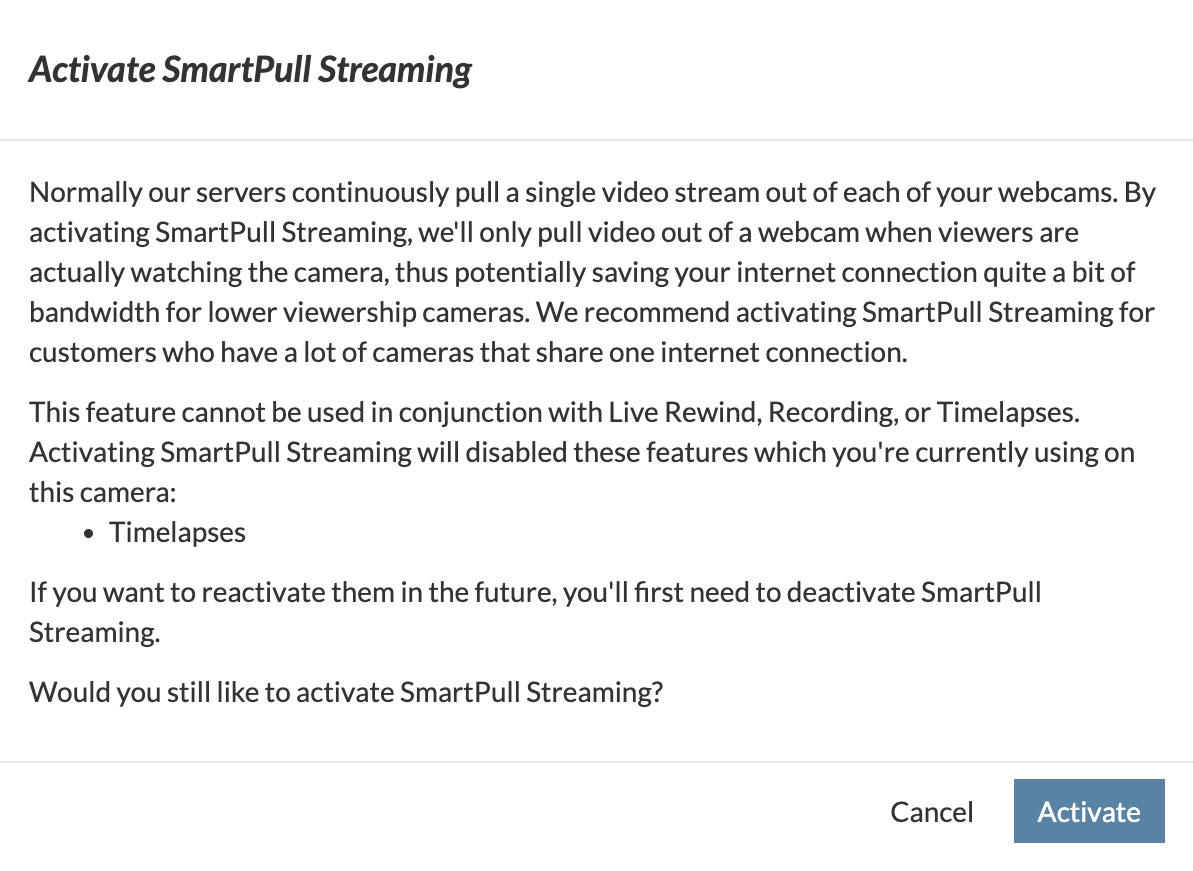

*Trade-offs:
SmartPull Streaming may introduce a brief startup delay (2–5 seconds) if no recent viewers are present. It also disables Recordings and Timelapse features, which cannot run concurrently. The dashboard will prompt you if a conflict arises. Attempts to enable these features while SmartPull Streaming is active will trigger a warning in the dashboard. Enabling them will disable SmartPull Streaming and vice versa.
Can I switch back?
Yes. You can easily disable SmartPull Streaming by toggling the feature OFF within the Dashboard at any time and re-enable Recordings or Timelapses if needed.
What Powers Brownrice's 100% Green Hosting?
Our Annual Energy Report
How much electricity does Brownrice use each year?
We use approximately 246 megawatt-hours (MWh) of electricity per year to run our datacenter and operations.
Download our latest Annual Energy Report (PDF) ›
Where does that power come from?
On-site solar: Our own rooftop solar array generates 81.1 MWh/year, supplying about 33% of our annual demand.
Renewable grid power: We purchase electricity through Kit Carson Electric Cooperative (KCEC) and its wholesale supplier Guzman Energy. Roughly 60% of KCEC’s retail load is served by renewable resources under a 15-year contract extension. This gives Brownrice 98.9 MWh/year of renewable grid energy (?40% of our load).
Renewable Energy Certificates (RECs): To cover the remaining non-renewable grid energy, we purchase and retire certified RECs from Terrapass. In 2025, we retired 66 MWh of RECs (certificate no. XZSTXLD3-tpus-1182583, dated 08/22/2025), slightly exceeding the gap and pushing us to 100% renewable on a net annual basis.
Why buy RECs if you already have solar and renewable grid power?
Because grid power is still partially fossil-fueled. RECs ensure that every kilowatt-hour we consume is matched with clean generation. We actually overshoot by about 0.05 MWh each year to be safe.
Do you publish this data?
Yes — we release an Annual Energy Report showing all sources, totals, and supporting links to Guzman Energy, KCEC, and Terrapass certificates. This transparency lets you verify that your hosting is genuinely powered by renewables.
View the full Annual Energy Report ›
Our Green Datacenter
What makes Brownrice’s datacenter “green”?
Our facility in Taos, New Mexico was built to minimize energy use and maximize on-site renewables. Key elements include:
On-site solar array directly feeding our servers and cooling systems.
Efficient hardware & cooling: We use energy-efficient servers and cooling methods designed for the high desert climate, reducing power draw compared to typical datacenters.
Local renewable grid: Thanks to Kit Carson Electric and Guzman Energy’s large solar and battery projects (like the 41 MW Taos Mesa Solar Array plus 15 MW battery), the electricity we import is majority renewable during peak hours.
Verified offsets: Any residual non-renewable usage is offset through RECs retired in our name.
How does this benefit my website?
When you host with Brownrice, your website runs at full speed on verified 100% renewable power — on-site solar, renewable grid electricity, and certified RECs — not just marketing buzzwords.
Explore our Green Datacenter ›
Where can I learn more?
How to setup your new Ready-Set-Stream Cam!
Ready. Set. Go live. Quick-Start Guide
Our Ready-Set-Stream (RSS) cameras are the easiest way to get your live stream up and running quickly and reliably. They eliminate the need for a fixed IP address and any modem port-forwarding setup. Follow our quick-start guide below to start streaming in just minutes!
What's in the box? Everything you need.
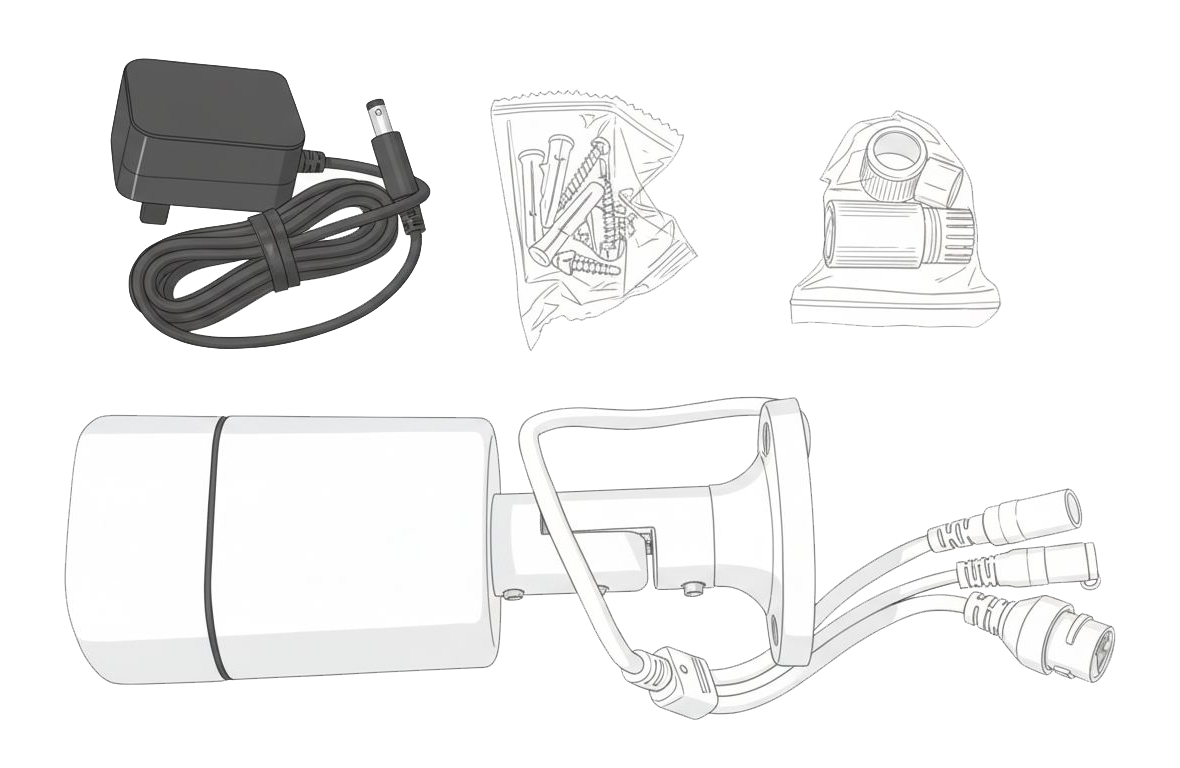
Inside your camera box, you’ll find everything required to get streaming fast. Make sure to note the camera name on the side of the box—this is your key to viewing, testing, and managing your stream.
- Camera Name Label (The VERY important sticker on the side of the box.)
- Ready-Set-Stream Camera
- Power Cable & Plug
- Mounting Hardware
- Optional: Weather-proofing kit
Plug it in and connect your webcam to the internet.
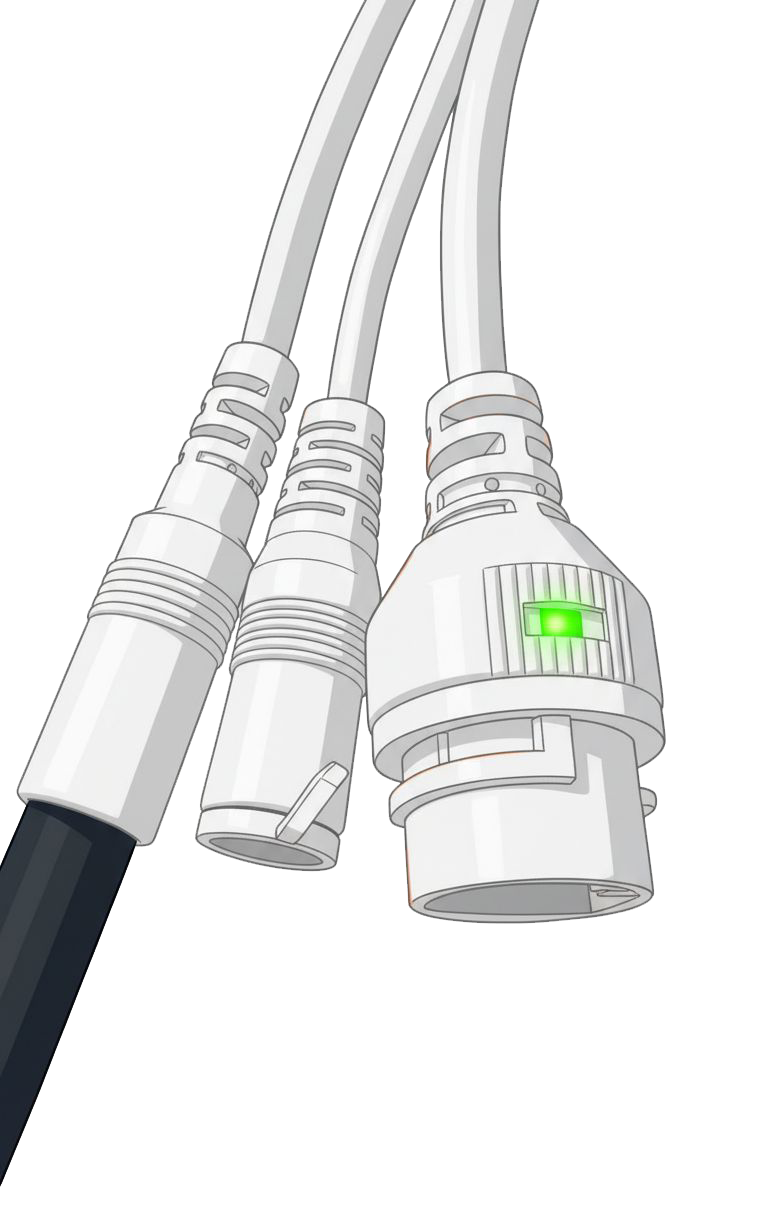
You'll be using the included power cable to plugin the camera and will also need a Cat5/6 Ethernet cable long enough to reach your camera from your router. This camera does not support WIFI.
- Determine clearest route from camera to power and internet connection.
- Plug in power cable to wall outlet or extension cord and the other end into the respective camera port. Confirm the camera is getting power by checking for a green light on the ethernet port lead off the camera.
Anternative Power Setup: These cameras also accept Power Over Ethernet (POE) and you can make use of this by connecting your own POE switch. If you go this route, disregard the power cable instructions above. - Connect one end of your Ethernet cable to your router and the other end to the respective cable lead coming off the camera. This will be the port that has the green light on if the camera is connected to power correctly. (This will leave the optical port covered and unused. That is expected.)
- That’s it—your camera is streaming!
- Optional: If setting up your camera outdoors, use the cable weather proofing hardware included in the box.
You're live! Preview your stream.
Find the camera name printed on the sticker on the side of your box, then preview your live stream at:
https://player.brownrice.com/embed/[your-camera-name]
(e.g. https://player.brownrice.com/embed/hookerupper2)
Manage your hosting account, fine-tune your player and explore our smart streaming features: https://dashboard.brownrice.com
- Set up a new account password at dashboard.brownrice.com by selecting the password reset link there. Be sure to use the email that you've been using to commmunicate with us as that will be your login username/email.
- Once logged into the dashboard, navigate to "WEBCAMS" and click the "Manage" button next to your camera's "name". You'll find plenty of camera options and toggles to experiment with there.
- You can add your camera stream to your website by grabbing your camera's embed code info by following our FAQ here: https://support.brownrice.com/content/6/225/en/what-is-the-embed-code-for-my-webcam.html
Done! If you have any issues let us know.
Site Building
Go to categoryIs Telnet or SSH enabled for my site?
We don't allow SSH access for our shared hosting clients. However, we do allow it for our virtual server clients. Our virtual servers are incredibly easy to manage, are optimized for hosting, and we'll even manage the machine for you. Virtual servers are a fanatastic and affordable upgrade to a shared hosting account. We'll upgrade your account from shared hosting to a virtual server for you for free. Contact us here: http://hosting.brownrice.com/contact
How do I take credit card payments via my web site?
There are numerous ways to do real-time credit card processing, but none that are inexpensive to get set up. You'll need:
1) An Internet merchant account. Most large banks offer these and they are usually about $10 per month. A normal merchant account won't work for this. This is a temporary holding account for the credit card payments that you receive.
2) An Online Payment processor. We use Cybersource for our business but we've also worked with Verisign as well. I'd imagine there are other companies that do this but these two are the big players. These businesses provide the mechanisms for your web site to do the actual real-time authorization and and money capture. The prices range between $15 and $50 per month (plus set up fees) depending on the level of sophistication of the authorization requests. i.e. The less expensive plans offer a pre-built form that lives on *their* servers and don't allow much customization while the more expensive plans let your programmer totally customize the web pages that process the cards, and these pages live on your web site. Once the card transaction has been approved these guys transfer the money into your Internet merchant account.
3) An Ecommerce System on your site. Your ecommerce system generally lives on your web site and handles the actual purchase process. It will do the talking to your Online Payment processor when it's time to charge the card. There are many, many ways to do this; from custom programmed code, to commercial packages, to free open source packages. None are easily implemented and all will have a set up cost associated with it. We've seen this range from $500 to $50,000. Your site designer will need to talk to you about all of the options, costs, and set up involved.
Bottom line: Real-time processing is great, but make sure that you are doing a fare amount of business via your web site before you go this route. Taking PayPal payments and manually approving card charges via your existing merchant terminal is much less expensive and a good way to get your feet wet.
How do I create a custom "Not Found" page?
Create a new text file on your computer and save it as ".htaccess".
If you are creating the file from scratch, simply type the following line into the file, changing the url to the location of your custom page:
ErrorDocument 404 http://www.YourWebSite.com/custom_page.html
Keep it all on one line, with a space on each side of the number 404. Also, this is case sensitive, so be sure to check the case of the E and D in ErrorDocument before you proceed.
When you are done, upload your new .htaccess file into the docs directory on the server. Make sure it's uploaded in ASCII format (not binary). Then, be sure to use the CHMOD command (this sets permissions) through your FTP or telnet program to set the permissions to 644.
Also be sure that you have uploaded your custom error page to the server, otherwise you'll get a 500 server error or something similar. Once that is done, you can test your new error page by typing in a url that you know does not exist on your site. You should get your custom page, ready to bring in the lost visitors that may be out there.
How do I password protect one of my web site directories?
We can password protect a directory for you quickly and easily. Just email us at support@brownrice.com OR you can do it yourself if you are a web site developer by following these instructions:
- On your computer create an special file exactly called ".htaccess" (without the quotes).
- This file's contents should look like this (below). Change the values in red to your web site address and the exact directory name that you are protecting. This file is case sensitive:
AuthName "Restricted Access"
AuthType Basic
AuthUserFile /home/domains/yourwebsite.com/docs/protecteddirectory/.htpasswd

require valid-user
Now create a second file on your computer called ".htpasswd" (again without the quotes). Go to this site and generate a username and password. You'll end up with something like this:
myusername:YXWM35gonN/VU
- Paste your version of the above encrypted username and password into your new .htpasswd file.
- FTP both of your new files into the password protected directory on your web site. Make sure your FTP program sends this file to the server as an ASCII or "plain text" file. It will not work if this is sent as a binary type file.
- Using a Browser surf to your new password protected web directory and ensure that it works correctly.
What is IDX?
IDX stands for Internet Data eXchange, and is used specifically for real estate.
Brownrice Internet updates all MLS real estate listing data and photos each morning at 5:30am. Subscribers to IDX have this new listing data displayed on their websites every day. We take the work out of getting new real estate listings to your clients! IDX subscribers get new listing data delivered to their clients every day without having to contact a web developer or office manager to do it for them!
Active, confirmed members of your MLS who would like to display this data on thier websites have two IDX options:
IDX Link —
$3.95 per month
We've built a generic IDX search for real estate sites to link to and/or "frame" into their web sites at this address: http://search.taosmls.net
You can only view the link above by typing it into your browser. Linking to this site from an outside site is blocked, unless you are a paying IDX Link customer.
The advantages of the IDX Link is that it is inexpensive and very easy to get running on your site.
The disadvantages of the IDX Link, in contrast to the IDX Enchanced Connection (see below), is that it is not customizable (e.g. you can't tweak or make it look or work the way you'd like) and that the true listing agent's contact information is displayed prominently in the middle of each listing. These issues, combined with the fact that the customer will be leaving your site to view listings often results in lost customers.
Example IDX Link site: http://www.tsvproperties.com/explore-local-properties-for-sale/
IDX Enhanced Connection —
$9.95 per month for Brownrice Internet hosted sites. $19.95 per month for offsite hosted sites.
With an IDX Enhanced Connection we provide your site with direct access to the IDX MLS database. This allows you and your web programmer to fully customize the way your IDX search looks, acts, and performs.
Example scenarios:
* You can display your contact information into each MLS listing whether the listing is yours - or someone else's - while minimizing the true listing agent's data (e.g. In the middle of a listing you might display "Contact me at xxx to show you this wonderful property.")
* You can dictate how your MLS search works. (i.e. Maybe your listings should be displayed before anyone elses? Or in bold?)
* You can fully integrate your site's colors, logos, and contact information throughout each step of the MLS search.
Approximately 60% of the MLS sites using IDX use this IDX Enchanced Connection, while 40% use the IDX Link.
Keep in mind that the IDX Enhanced Connection will require a programmer to customize your site. This is generally a one-time cost but it can be significant depending on the level of customization that you require. If you'd like us to provide you with a list of programmers who can do this work for you, or provide you with a quote, please feel free to ask.
Example IDX Enhanced Connection site: http://search.taosnewmexico.com/
Contact support@brownrice.com, or 575-758-4175, for more information.
How do I show hidden files?
Configuring your FTP client to show hidden files is a process that differs significantly for each FTP client. Instructions for doing so using many popular FTP clients can be found below:
In Dreamweaver
Dreamweaver won't display hidden files in Site View. You can either use another FTP program or you can use your filemanager.
In Filemanager
- Go to www.yoursite.com/fileman/fileman.cgi?
- Select the web folder
- Select Preferences from the Tools menu.
- Check the File Display - Do you want to show hidden files? checkbox (NB: The directory will refresh showing the hidden files.)
- You can then delete / copy / move the file using the Commands menu.
In CuteFTP
- Go to Sitemanager.
- Choose the connection and click edit.
- Make sure filters is checked.
- Press the filter button towards the bottom.
- Check [Enable remote filters (Server applied filter)]
- In the box below, add -al
- Hit apply. Now log in with that connection.
In WSFTP
- Right click on the connection before logging on.
- Select properties, then select the startup tab. On this screen you will see a box that says Remote file mask. In this box place "-al", then log in.
In Fetch
- Open Preferences.
- Click on the Misc tab.
- Click on the Obscure Options popup menu.
- Check the Send LIST -al to UNIX servers
In BBEdit
Click the checkbox that says Show Files Starting with ".
In Transmit
- Open Preferences.
- Click on Files in the Toolbar.
- Check the box that says Show all Hidden Files.
In FTP Voyager
- Select a profile in the FTP Site Profile Manager.
- Click on the Advanced button.
- Select the category Connection.
- Enter "-la" in the Extra LIST Parameter.
In SecureFX
- Right click on the connection before logging on.
- Select properties.
- Select Category > Options > FTP.
- On this screen you will see a box that says Directory Listing Options. Select the option All entries, then log in.
In LeechFTP
- Run Leech FTP
- Select File > Options.
- Select the Transfers tab.
- In the List Command box enter "LIST-a" (no quotes).
- Click Accept.
- Log in and view directory; all is well.
Do you have phpMyAdmin installed?
You can access phpMyAdmin for any site that we host at this url:
http://www.DomainName.com/MySQL
(obviously replace DomainName.com with your web site's address).
Or you can login to our control panel (http://dashboard.brownrice.com) then click -> Hosting -> sitename.com Manage -> MySQL to set up databases, MySQL users, and phpMyAdmin.
How do I use an .htaccess file?
Create a new text file on your computer and save it as ".htaccess" (with the leading dot and without the quotes)
Whatever directives you are entering into the .htaccess files you'll want to add them now.
Some instructions for adding these directives are here:
- How do I create a custom Not Found page?
- How do I password protect one of my web site directories?
- How do I turn off PHP "magic quotes"?
Once you've completed the instructions for any of the above, continue on...
.htaccess files are case sensitive, so be sure to check the case before you upload.
When you are done creating your .htaccess file it into the docs directory on the server. Make sure it's uploaded in ASCII format (not binary).
If you upload your .htaccess are you get a 500 server error or something similar when you load your site most likely you've uploaded the file in Binary format as opposed to ASCII or the syntax of the contents of the .htaccess is not correct. Download your error log files and look at the end of them to see what went wrong (log files are located in the /logs directory when you FTP in to your site).
How do I set up a MySQL Database?
You can login to our control panel (http://dashboard.brownrice.com) then click -> Hosting -> sitename.com Manage -> MySQL to set up databases, MySQL users, and use phpMyAdmin.
See also:
Do you have phpMyAdmin pre-installed?
Do the brownrice servers support mod_gzip?
In Apache2 - which is the web server Brownrice uses - mod_deflate has replaced Apache 1.3's mod_gzip.
mod_deflate is loaded and enabled on all of our servers.
See http://www.howtoforge.com/apache2_mod_deflate for usage.
Add this line to your docs/.htaccess file to enable:
AddOutputFilterByType DEFLATE text/text text/html text/plain text/xml text/css application/x-javascript application/javascript
The directives and be set via .htaccess, but if you need anything changed in a vhost please email.
My SEO Consultant tells me to consolidate my domains using 301 Redirects. How can I achieve this?
It is common for websites to be accessed via a number of different urls. For example site owners sometimes take out variants of the primary domain name such as .com/.org/.net and various mis-spellings and alternate names.
Normally all these names are aliased to the same content at the webserver, the same content appears regardless of the url entered.
The reason this becomes a problem for SEO is that when a search engine spider encounters identical content on multiple urls, the scoring algorithm may decide to lower the score for that content (as it appears just to be copies) and so the site appears lower down in the results.
A 301 Redirect is a way of telling the search engine spider that the alternate urls are only aliases, and to direct them to the primary domain. 301 is the code for 'Moved Permanently'
To achieve this you should add the following instructions to a file called '.htaccess' which should be placed in the document root of your site.
RewriteEngine on
RewriteCond %{HTTP_HOST} !myprimarydomain\.com [nc]
RewriteRule (.*) http://myprimarydomain.com [r=301]
These instructions say "If the host requested is not myprimarydomain.com, then redirect to myprimarydomain.com with a permanently moved code"
I'm getting a "permission denied" or "forbidden" error when I try and edit a file. How can I change permissions?
Occasionally web site software or a user on your server will change your file permissions which can prevent your other users from being able to write to your web site files. Or, conversely your FTP or SSH user account might upload a file without the correct permissions for your software (Wordpress, etc) to run correctly. When this happens you'll likely see the "Permission Denied" or "Forbidden" error message.
How to fix a "Permission Denied" or "Forbidden" error
For SmartVPS accounts:
- Log in to your Dashboard
- Navigate to VPS HOSTING
- Select your VPS: yourvpsname.com
-> Click Manage (green button) - Go to Web Sites
- When viewing your list of web site details (document root, php version, etc) click the File Permissions Reset link.
- Select the user account that you'd like your file to be owned by. If your website is running a CMS like Wordpress then make sure that user is set to apache
- Select Reset button and you should be all set!
Done!
Note: This permission reset function makes all files in the document root group writeable, ensures that the web server and all users are in the same group, and changes all file ownership to the user that you selected.
IDX for developers
For an overview of what IDX is, and what options are available to end-users, read this.
IDX Information For Developers
Our IDX system is a comprised of a straight-forward (i.e. simple) MySQL database that is updated with the latest Taos MLS data each morning at approximately 4am Mountain Time.
You, the developer, have nearly free reign to customize your client's web site with the look and functionality that you see fit as long as you comply with the Taos MLS IDX rules (contact the Taos MLS office for these rules.)
If you'd like you can download the code that runs the IDX link site, by clicking here and extracting the .tar.gz file.
Also, you can download the mobile version of the IDX link site, by clicking here and extracting the .tar.gz file.
Enclosed in both of the tar archives is PHP and/or JavaScript code (the mobile version uses JQuery Mobile extensively) which may speed up your development process. You'll need to contact us and request a valid IDX Enhanced MySQL username and password (yes, you'll need a client who is ready to sign up for us to provide this info.) and the IP address of the site that you'll be connecting from.
The IDX MySQL database is very straightforward.
Example connnect info:
Hostname: search.taosmls.net
Database Name: taos_mls
Username: (The IDX Enhanced username that your client was given)
Password: (The IDX Enhanced password that your client was given)
This info will be entered into the /include/connect.inc.php file that you downloaded from the sample scripts above.
phpMyAdmin is here: http://search.taosmls.net/MySQL
Note: Your MySQL connection will NOT work unless we open up the IP address of the web site that you are connecting from!
A brief layout of the tables:
taos_mls Tables
addendums Linked by MLS id. Added information about a listing. Note: There may be more than one addendum per listing.
feature_keys Relational table which links special_features and feature_categories to listings. Indexed on id and MLS number.
feature_categories Relational table. See feature_keys and special_features tables.
images Listing images. Linked by MLS id. Includes links to full sized (link field), web resized (resized field), and a thumbnail (thumb).
listing_commercial Commercial listing data. Indexed on MLS id. Very straigh tforward table.
listing_land Land listing data. Indexed on MLS id. Very straightforward table.
listings_multi_family Multi-unit listings. Indexed on MLS id. Fields beds* and baths* related to units 1 through 5.
listings_residential Residential Home listings. Indexed on MLS id. Very straightforward table.
special_features Relational table that links MLS numbers to special features. See feature_keys and feature_category tables.
If you have quesitons regarding this database feel free to call or email us any time!
Please note: You MUST follow the rules of the Taos MLS IDX when displaying listing data on a client's web site. Please contact the Taos MLS office and they will provide you with the IDX rules.
Thank you and have fun!
How do I update Wordpress?
Wordpress usually updates itself, but if for some reason it doesn't then updating is not difficult and not technical. Here are the steps to update:
- Login to Wordpress: http://YOUWEBSITE.COM/wp-login.php (replace YOURWEBSITE.COM with your real web site address.)
- If you don't know your username and password click the "Lost your password?" link and then enter your email address.
- Check your email for your password.
- Then go back to http://YOUWEBSITE.COM/wp-login.php and login.
- Once logged in then click the "Updates" link near the upper-left side of the Wordpress dashboard.
- Finally, select all the checkboxes next to the items that Wordpress says need to be updated, and click the Update button. You might need to do that a few times, once for Wordpress, once for plugins, and once for themes.
How do I add a subdomain to my hosting account?
Add a subdomain to your hosting account
For SmartVPS accounts:
- Log in to your Dashboard
- Navigate to VPS HOSTING
- Select your VPS: yourvpsname.com
-> Click Manage (green button) - Go to Web Sites
- Click Add New Website or Subdomain to this VPS (green button)
-
Follow instructions.
Now add the DNS entry for your subdomain
- Log in to your Dashboard
- Navigate to DNS
- Select your VPS/Domain: yourvpsname.com
-> Click Manage DNS (green button) - Click -> Edit DNS Records -> Add DNS Record
- Add your subdomain in the Hostname Field. i.e. If you are setting up "dev.yourvpsname.com" you'd enter "dev" in the Hostname field
- Change the Type a CNAME
- Enter your domain name in the Address field. i.e. If you are setting up "dev.yourvpsname.com" you'd enter "yourvpsname.com" in the Address field
- Save
Done!
How do I change my FTP/SSH User password?
How to change an FTP/SSH User password
For SmartVPS accounts:
- Log in to your Dashboard
- Navigate to VPS HOSTING
- Select your VPS: yourvpsname.com
-> Click Manage (green button) - Go to FTP/SSH Users or SSH Users (depending on the Generation of your VPS)
or - When viewing your list of FTP/SSH accounts click the small pencil icon to change the password.
or - Update the password and Save
Done!
How do I create a cron job?
How to create a Cron Job
For Shared or Basic Hosting accounts:
- Log in to your Dashboard
- Navigate to EMAIL HOSTING
- Select your VPS: yourvpsname.com
-> Click Manage Web Site (green button) - Go to the Cron Jobs
- Follow instructions! And that's it.
If you have any issues, questions, or would like us to do this for you just contact us and we'll be happy to take care of you.
For SmartVPS Hosting accounts:
- Log in to your Dashboard
- Navigate to VPS HOSTING
- Select your VPS: yourvpsname.com
-> Click Manage (green button) - Go to Cron Jobs
- Follow instructions! And that's it.
If you have any issues, questions, or would like us to do this for you just contact us and we'll be happy to take care of you.
If your account is a VPS account and you prefer to work via the command line:
SSH to your VPS (Don't know how? Follow these instructions first.)
Once logged into your VPS via the command line (any user account can do this, not just root) type: crontab -e
This will open a blank file where you will enter your cron commands. Type the letter "A" on your keyboard to enter edit mode so that you can enter your command.
The example comand below would open a web page every minute of every day.
* * * * * curl http://mywebpage.com/script.php
Here's an explanation:
This example would run a php script from the command line at 5:15pm every day (17:15):
15 17 * * * php /home/domains/mywebpage.com/docs/script.php
This will run a script every fifteen minutes. You can place multiple commands in a cronjob, just separate them with a semicolon. Here, we cd (change directory) to the location of the php script THEN execute it. If you're having problems getting a cron job to work, try doing it this way.
0,15,30,45 * * * * cd /home/domains/mywebpage.com/docs/; php script.php
This will run a script every fifteen seconds! - It is actually 4 separate jobs that start running at the same time (once a minute, every minute), but each one sleeps progressively longer than the last before executing the next command in the job.
* * * * * cd /home/domains/mywebpage.com/docs/; php script.php
* * * * * sleep 15; cd /home/domains/mywebpage.com/docs/; php script.php
* * * * * sleep 30; cd /home/domains/mywebpage.com/docs/; php script.php
* * * * * sleep 45; cd /home/domains/mywebpage.com/docs/; php script.php
Need to periodically download a file from another site? Just use wget! No need to script it in PHP.
* * * * * cd /home/domains/mywebpage.com/docs/downloads; wget http://example.com/somefile.zip
And if you want to have an email sent to you each time your cron runs enter this command:
MAILTO=username@youremailaddress.com
Note: Here is a nice tutorial with the full syntax of cron commands: http://code.tutsplus.com/tutorials/scheduling-tasks-with-cron-jobs--net-8800 And here is another one: http://tecadmin.net/crontab-in-linux-with-20-examples-of-cron-schedule/
When you are done editing the file you'll need to leave "edit" mode by pressing your ESC key, then you'll type ":wq" to save the file and quit the cron editor.
That's it! Your cron command(s) will run as often as you asked them to from this point forward.
A few notes on Cron Jobs:
- You can enter as many cron commands as you like within one file. Just keep each command on a seperate line.
- If you ever need to modify your cron command just follow this tuturial again and you'll see the commands in place (as long as you login as the same user)
- We recommand that you test your cron commands from the command line before entering them into the cron file to make sure they work. i.e. SSH into the machine, then type the command at the command line like this example "php /home/domains/mywebpage.com/docs/script.php" then press enter. If no errors then enter into your cron job! If there are errors then fix'em and try it again.
Where is your control panel?
Our mobile-friendly control panel is located here:
https://dashboard.brownrice.com
You can login with any email address that is associated with a Brownrice billing account. Click the Password Reset link to get yourself a password.
How do I install Wordpress
How to install Wordpress
- Log in to your Dashboard
- Navigate to VPS HOSTING
- Select your VPS: yourvpsname.com
-> Click Manage (green button) - Go to Web Sites
- If you have not already, setup your new website by clicking Add New Website or Subdomain to this VPS (green button)
- Scroll down to your website and click Install Wordpress (click Wordpress icon)
Note: The website must not have any existing site in place or the site install will fail. - Select the site url you would like to install wordpress to, along with your preferred email address and username you'll use to login.
Note: If you see any errors below your site name as shown above, you should first setup your domain's DNS A record to point to your VPS's IP address, which can be found on the VPS management page. Otherwise you can use the brownrice subdomain option and your site will work there as well. - Then click Install! Once WordPress is installed, the login info displayed ought to be saved in your records for future use.
How do I export or backup a database?
Before you use either of the following methods:
- Log in to the Brownrice Dashboard
- Find your database credentials
- DB username
- DB password
- database name
To Backup/Export via phpMyAdmin
- From the Databases page, click the phpMyAdmin link and log in with your credentials.
- In the left sidebar select the databse to be exported.
- In the top menu-bar click 'Export'.
- Under 'Format', select the format you would like to export as.
- Choose 'SQL' for a databse backup that can be used to restore.
- Choose 'CVS' or 'CVS for MS Excel' for a spreadsheet.
- Choose 'PDF' or 'Microsoft Word 2000' for a readable-document format.
- Choose any of the other formats if you have other needs.
- Click 'Go'. It will download to your computer. That's it, you're done!
To Backup via SSH
If you have SSH access, you can use the following method to create a backup of your database.
- SSH into your server and navigate to the document root of your site: /home/domains/examplesite.com/docs/
- Replace username, databasename, and the path to where you'd like the dump (don't put a path if you just want it in docs/) with your info, in the following command:
mysqldump -u username -p databasename > path/to/desired/location/databasename.sql
hit enter and enter your database password. Hit enter again. - If no error message shows up, it very probably worked.
- Check to make sure:
- run
ls path/to/desired/location
and make sure the .sql file is there. - run
less path/to/desired/location/databasename.sql
to inspect the contents of the dump. Hit 'q' to exit.
- run
- Use SFTP to copy the file to your computer if you so desire.
- That's it, you're done!
How do I change the document root of my website?
What is the Document-Root?
This is the directory where your site lives, and where you should put your index.php or index.html file, or install your software. Its also where Wordpress is typically installed.
The default settings are as follows:
For the main site (mywebsite.com in this example) this is where your document root usually lives:
/home/domains/mywebsite.com/public
for any subdomians of that site (mysubdomain.mywebsite.com in this example):
/home/domains/mywebsite.com/public.mysubdomain
For older, Gen6 SmartVPS customers, the document root is typically here:
/home/domains/mywebsite.com/docs
How can I change my website's document-root?
- Log in to your Dashboard
- Navigate to VPS HOSTING
- Select your VPS/Domain: mywebsite.com
-> Click Manage (green button) - Go to Web Sites
- Scroll to your website, and click (edit) next to the Document Root.
- Type in a directory name and click Save. Note: If the directory doesn't exist, clicking 'Save' will also create the directory automatically.
- Important: You will also need to change the document-root for the two SSL versions of your site (www and without www.)
That's it, you're done!
How do I edit my .htaccess file (or other hidden file) via the Brownrice Filemanager?
When logged into the Brownrice Filemanager, if you open an .htaccess file by double-clicking the file it will open in a preview mode which doesn't allow you to edit it.
So how do I edit it?
Follow these steps to edit the .htaccess or other hidden file:
- Navigate to the file's directory, click on the file so it's selected.
- In the right-hand side-bar, click the 'Preview' drop-down, then click 'Choose other ...'.
- Choose 'Source Editor' from the list.
- Click 'Close' to close the file.
- Double click the file to re-open. It will now open in a new tab and you can edit it! All hidden files should now follow this behavior.
My Wordpress site has been hacked! How do I clean it up?
How to clean up a Wordpress hack
The only way to ensure that a hacked Wordpress site is fully rid of a hackers code is to follow these instructions:
- Using FTP or SSH download the wp-content/uploads directory to your computer, virus scan all files and ensure that its hack free.
- Using FTP or SSH download the wp-config.php file and write down the database name, username, and password.
- Login to Wordpress (if you are able) and write down the exact names of all of your active plugins.
- Using FTP or SSH delete all code from server (leave database in place).
- Re-install a fresh Wordpress install by FTP'ing NEW Wordpress install files back to server. (do not use *any* old Wordpress files and do not use our dashboard installer to reinstall Wordpress.)
- Configure new Wordpress wp-config.php file to connect to old database using the database info you collected in step 2.
- Reinstall all plugins that you noted in step 3 via the new Wordpress. (Do NOT re-upload existing plugins as they are a likely source of hack.)
- Change all Wordpress username and passwords and delete any Wordpress users that you are not familiar with. (may require reviewing Wordpress users database table directly.)
- Re-upload your *cleaned* wp-content/uploads directory to the server.
How do I cancel my Brownrice account?
Just send an email to support@brownrice.com from an email address listed on the account and we'll shut it down for you.
Keep in mind that all data will be removed when we do so be sure to have a back up of any site files, databases, and email that you want to keep before requesting that your account be closed.
Any unused, pre-paid hosting payments will be prorated the following day and credited to your account. Refunds will not be issued but credits can be applied to future Brownrice services.
My Wordpress site is now live on Brownrice. How do I change the temporary URL to my URL?
If you've been using a temporary brownrice.com URL to build your site on our servers prior to it going live (e.g. yourwebsite.brownrice.websites) you'll want to change that temporary address "yourwebsite.brownrice.websites" to just be "yourwebsite.com."
How to make your temporary url live and move to the live url
Via your Dashboard (easiest option):
- Log in to your Dashboard
- Navigate to VPS HOSTING
- Select your VPS: yourvpsname.com
-> Click Manage (green button) - Go to the Web Sites
- Click the small pencil icon to the right of Wordpress URL.
- Enter the live URL of the website (https://yourwebsite.com) and click the Set button
- Check your Wordpress site and ensure that its working correctly.
Done!
Via Wordpress Directly (harder but better if you don't have dashboard access):
- Login to Wordpress: http://yourwebsite.com/wp-login.php
- Click -> Settings -> General.
- Change both the Wordpress address and Site Address to read: https://yourwebsite.com.
- Click Save Changes.
- Click Permalinks.
- Click Save Changes (yes, you don't actually change anything on the Permalinks page, you only click Save Changes.)
Done!
How do I run Node.js and NPM on my SmartVPS?
Node.js is not intended to be used as server-wide software and should be installed on a per-user basis. This allows you to use whatever version of Node that you like and manage that on your own (which is what you want!)
To install Node.js on your server
- First install nvm, like so (FYI: Use these instructions for the latest version: https://github.com/creationix/nvm#installation)
- SSH into your server
- Run the nvm install script
This will set up nvm. (Note if you see an error like "curl invalid option: -c" email us and ask us to upgrade your version of git)curl -o- https://raw.githubusercontent.com/creationix/nvm/v0.33.11/install.sh | bash - Now log out of your SSH account and then log back in. Once logged back in you'll have access to nvm. Now run this command to install the latest version of node:
nvm install node
Done!
If you want to run Node as a web server contact us and let us know what port you'll be running it on and we'll open the the firewall to allow traffic through that port.
My Wordpress site just had its SSL certificate installed, how do I make my site use the SSL address?
How to implement your SSL and change your non-secure Wordpress address (http://yourwebsite.com) to a secure address (https://yourwebsite.com)
Via our Dashboard (easiest option):
- Log in to your Dashboard
- Navigate to VPS HOSTING
- Select your VPS: yourvpsname.com
-> Click Manage (green button) - Go to the Web Sites
- Click the small pencil icon to the right of Wordpress URL.
- Change the URL of the website from (http://yourwebsite.com) to (https://yourwebsite.com) and click the Set button
- Check your Wordpress site and ensure that its working correctly.
Done!
Via Wordpress Directly (harder but better if you don't have dashboard access):
- Login to Wordpess: http://yourwebsite.com/wp-login.php
- Click -> Settings -> General.
- Change both the Wordpress address and Site Address to read: https://yourwebsite.com.
- Click Save Changes.
- Click Permalinks.
- Click Save Changes (yes, you don't actually change anything on the Permalinks page, you only click Save Changes.)
Done!
How do I add someone else, like my web developer, to my account?
Add a web developer or access for another user to your Dashboard account
If you'd like someone else - like your web developer or another trusted employee - to be able to access our Dashboard so that they can administer your account and have all the control you have, do this:
- Log in to your Dashboard
- Navigate to USERS
- -> Click Add User (green button, either the one in the header or the one below all contacts)
- Add user's info and select permissions with the checkboxes at the bottom of the modal and click Save, which will email your new contact with a password reset link so that they can then login to https://dashboard.brownrice.com as well.
Done!
Can I have root access or sudo for my web site or server?
Yes! For Unmanaged VPSs and Unmanaged Dedicated servers we'll immediately provide you with root access and you can do as you please.
However, for SmartVPSs, which is our Managed hosting option and comprises the majority of our customer service types, the answer to that is yes, you can have root access with caveats.
The key thing to know is that our SmartVPSs are Managed Servers and as such are configured to work with our monitoring scripts, automated SSL certificate installation, security services, and our Dashboard. These scripts ensure your web services are up, are always tuned for high performance, that free SSL certificates are automatically installed, that the permissions allow you to get work done easily and securely, that our clients and our support staff are automatically notified if something is wrong, and that it all works seamlessly with our Dashboard.
On a SmartVPS we will provide you with root or sudo access with these caveats:
- Do not change httpd or virtual host configurations except through our dashboard. If you need to make changes that are not available via the dashboard please email those requests to support@brownrice.com and we can make those changes for you (if they won’t break our automated systems.)
- Do not setup up any services (i.e. Node and/or Dockers!) that use ports 80, 443, 3306, 22, or 25. i.e. Do not setup any services that conflict with any of the SmartVPSs existing service ports as that'll break things on our end and cause our monitoring script to alerts us and then we'll be upset because we'll have to deal with it, and you.
- Do not change MySQL configurations anywhere other than via phpMyAdmin through our dashboard.
- Do not add, modify, or remove user accounts anywhere but via our dashboard.
- Do not change permissions schemes or groups.
And finally, if we provide you with root or sudo access and you break things - your things or our things or anything - we'll switch your account over to be an Unmanaged server. And that's OK! But with an Unmanaged server you'll need to install your own SSL certificates, fix things if they break, secure the server, and you won't have our sweet dashboard intregration to configure things. But since you'll already have root access then you are clearly a command line ninja so you can do all of this from the command line yourself!
My web site isn't using the SSL certificate that has been installed. How do I force visitors to only be able to visit the SSL version of my site?
Force SSL version of your site
You can force all visitors to use the secure version of your site by uploading this to your docs/.htaccess or public/.htaccess file:
RewriteEngine On
RewriteCond %{HTTPS} off
RewriteRule ^(.*)$ https://%{HTTP_HOST}%{REQUEST_URI} [L,R=301]General Questions
Go to categoryWhere is your control panel?
Our mobile-friendly control panel is located here:
https://dashboard.brownrice.com
You can login with any email address that is associated with a Brownrice billing account. Click the Password Reset link to get yourself a password.
What are your Backups, Redundancies, SLA, Security, and Disaster Recovery Plans?
1. What is the uptime SLA of the environment?
The Brownrice SLA is 99.99%. View our full Terms of Service here:
https://brownrice.com/pop_tos
2. What backups does Brownrice provide?
There are three tiers of backups with our (Gen7) VPS platform:
Snapshots: You can take a snapshot backup of your entire VPS, these can be locked/saved, and restored all via the dashboard. This is useful for being able to quickly revert the VPS to a known-good snapshot if something breaks during an upgrade procedure, etc. Three snapshots are included with your Gen7 VPS for free, these snapshots are automatically generated for the 1st of the month, every friday (last friday), and nightly (last night). These snapshots are stored on the same host machine as the VPS, so they aren't to be relied upon in the case of a host machine failure.
On-site full backups: These are full backups of all website configs, files, and databases for all sites on a VPS. These are stored on-site, on a separate server from the VPS, and we can use them anytime to restore a singe missing file, a single site, a database, or the entire VPS. These are on-site and can be used to quickly restore a VPS in the case of a host machine failure. Nightly backups are stored for 8 nights and again on the 1st of the month. Monthly backups are stored for three months. This means that at any point we can restore your site (or entire VPS) back as far as 3 months.
Remote full backups: These are full backups of all website configs, files, and databases for all sites on a VPS. These are stored at our remote datacenter and can be used to restore a site (or full VPS) in the case of a disaster. This is part of our disaster recovery plan, in case of a natural disaster or fire in our datacenter, etc. the data is stored remotely and can still be restored even if our datacenter is offline.
3. What is the disaster recovery plan?
We utilize a second remote data center for remote backups and remote monitoring. In the case of catastrophic situation we would restore all data to this second data center and resume services ASAP.
4. If we decide to end or not renew the contract what happens to our data?
We wipe out the data on your drives and after three months your backup data is rotated out and removed from our backup servers. On top of that the drives themselves are phsyically destroyed, we don't re-use drives.
5. Who has access to our data?
Only Brownrice systems administrators can access your data, and the data will only be accessed upon your approval in order to fix service issues.
6. How is our data, including back up data segmented and protected?
Backup data is stored on segmented, private networks and are stored on physical servers both locally and in our remote data center.
7. What are your network redundancies in your datacenter?
Brownrice has triple network redundancy. We have 2 pysically redundant fiber routes (northern and southern routes) with automated failover. These leave the building and go separate directions, and do not share the same conduit. We also have a 3rd redundant wireless route in the unlikely case that something happens to both of those routes at the same time..
8. What are your power redundancies in your datacenter?
In addition to our APC batteries, which all hosting equipment is on, we have a massive 100,000 watt Diesel Generator that can run indefinitely to keep our systems online. The APC batteries assist in smoothing out the power and facilitating a seamless switch-over to generator.
9. What are your HVAC (cooling) redundancies in your datacenter?
We have triple redundant A/C systems to keep the datacenter cool at all times. By utilizing hot-aisle containment and ambient air cooling our data center is engineered to capitilize on the dry, predominantly cool outside air that we have at our 7,000' location. As a result we are able to cool our servers solely with filtered, outside air for nine months of the year.
10. What security is included with Brownrice hosting?
VPS security: Our latest VPS template is on the latest Alma9 OS release (EOL in 2032), including a firewall with only the ports open required by running services to operate. It also uses Fail2Ban WAF (web application firewall) that will auto-block IPs based off common attacks (brute force logins and other known attacks). All running services are configured properly with default configs removed. Only services required for web hosting are running on the VPS, with unnecesarry services purged from the template. All services running on the VPS have been hardened to industry standards with default configs and users removed, and the VPS is PCI compliant ready out of the box.
Data Center Security: Our data center is both PCI and HIPAA compliant utilizing biometric entry, IP and physical based security systems, logs for entry/exit, and our staff is a highly trained group of engineers who have been repeatedly battle tested. Security is what we do. Every day.
11. What failover is included with my Brownrice hosting?
Our default VPS plan doesn't include failover, but does include 99.9% uptime. The hardware that your VPS is hosted on consists of Enterprise level equipment that has redundant power supplies, RAID 10 SSD disk arrays, and are not prone to unexpected failure. And in the case of host machine failure we have on-site backups and we'll get things back up ASAP by restoring data over our LAN to ensure minimal downtime in such a case.
How do I pay my bill? Why can't I just email you my Credit Card?
We have multiple easy and secure ways for you to pay your bill. Never put your credit card info in an email! If you email us a credit card number, we'll delete that email from our server, and ask that you not do that in the future. We will not enter it into our system, and your bill will not get paid. We know, it's frustrating. But it's for your protection.
The reason is simple: Email is insecure. Doesn't matter who your email provider is. Think you're ok because your email client uses a secure connection? Think again. Your computer's connection to the server that sends the email may be secure, but the email is likely transmitted across the world wide web in plain text unless you use 3rd party encryption software such as OpenPGP.
Digging your CC info out of an email is easy for a bad guy with a beginner to intermediate skill set.
To pay your bill securely:
Use the secure payment link in your Brownrice invoice. Data is encrypted from the moment it leaves your computer. All stored data is locked down with modern AES-256 encryption.
Click the seure payment link in your invoice, and use PayPal.
Log in to https://dashboard.brownrice.com, and go to the Billing section!
Call us on the phone. We'll enter it for you directly from within our own secure network.
Mail us a good old fashioned check, cashier's check, or money order, or stop by our office and drop off some cash.
Mailing / physical address is:
Brownrice Internet Inc.
201 Camino de la Merced
Taos, NM
87571
It's the building covered in antennae, with a 20 kW solar array over the parking lot. You can't miss it!
How do I add someone else, like my web developer, to my account?
Add a web developer or access for another user to your Dashboard account
If you'd like someone else - like your web developer or another trusted employee - to be able to access our Dashboard so that they can administer your account and have all the control you have, do this:
- Log in to your Dashboard
- Navigate to USERS
- -> Click Add User (green button, either the one in the header or the one below all contacts)
- Add user's info and select permissions with the checkboxes at the bottom of the modal and click Save, which will email your new contact with a password reset link so that they can then login to https://dashboard.brownrice.com as well.
Done!
Can I have root access or sudo for my web site or server?
Yes! For Unmanaged VPSs and Unmanaged Dedicated servers we'll immediately provide you with root access and you can do as you please.
However, for SmartVPSs, which is our Managed hosting option and comprises the majority of our customer service types, the answer to that is yes, you can have root access with caveats.
The key thing to know is that our SmartVPSs are Managed Servers and as such are configured to work with our monitoring scripts, automated SSL certificate installation, security services, and our Dashboard. These scripts ensure your web services are up, are always tuned for high performance, that free SSL certificates are automatically installed, that the permissions allow you to get work done easily and securely, that our clients and our support staff are automatically notified if something is wrong, and that it all works seamlessly with our Dashboard.
On a SmartVPS we will provide you with root or sudo access with these caveats:
- Do not change httpd or virtual host configurations except through our dashboard. If you need to make changes that are not available via the dashboard please email those requests to support@brownrice.com and we can make those changes for you (if they won’t break our automated systems.)
- Do not setup up any services (i.e. Node and/or Dockers!) that use ports 80, 443, 3306, 22, or 25. i.e. Do not setup any services that conflict with any of the SmartVPSs existing service ports as that'll break things on our end and cause our monitoring script to alerts us and then we'll be upset because we'll have to deal with it, and you.
- Do not change MySQL configurations anywhere other than via phpMyAdmin through our dashboard.
- Do not add, modify, or remove user accounts anywhere but via our dashboard.
- Do not change permissions schemes or groups.
And finally, if we provide you with root or sudo access and you break things - your things or our things or anything - we'll switch your account over to be an Unmanaged server. And that's OK! But with an Unmanaged server you'll need to install your own SSL certificates, fix things if they break, secure the server, and you won't have our sweet dashboard intregration to configure things. But since you'll already have root access then you are clearly a command line ninja so you can do all of this from the command line yourself!
What is MFA, why should I use it, and how do I enable it?
What is MFA?
Multi-factor authentication (MFA) is a security feature which requires the user to provide two or more verification factors in order to gain access to an application (in this case our Dashboard). For example: In addition to their username and password, a user with MFA enabled will also have to authenticate through an authentication app or SMS text message in order to login to the dashboard. Simply put, this means that someone attempting to break into your Brownrice account will be unable to do so even if they possess your username and password!
Why should I use MFA?
MFA is highly recommended for anyone concerned about the security of their account, particularly developers or other individuals who have access to multiple accounts via the Brownrice Dashboard. It's also a requirement in some cases, such as if you need to meet PCI, HIPAA, or other requirements that require MFA to be in place for administrative logins. Anyone can use MFA and it's easy to enable and use!
This sounds great! What if I get locked out?
Once MFA is enabled you will be unable to access your account without your user's MFA code (or recovery code). However, if you get locked out, you can contact BRI support to unlock your account and/or reset your user's MFA.
Account vs user level MFA
There are two levels on which MFA can be enabled:
Account level MFA:
MFA can be enabled on the account level, and once enabled, it's forced on the user level. This means that if you enable MFA for your account, any users (contacts) on the account will be forced to enable MFA in order to access your account upon their next log-in. Account level MFA was designed this way on purpose so that companies can lock down their entire Brownrice account with MFA in order to easily meet compliance and security requirements. If you want to enable account level MFA, please skip to the "How do I enable MFA for my account?" section below.
User level MFA:
MFA can also be enabled on the user level without forcing account level MFA. With user level MFA enabled MFA is only forced for your user alone. This means that if you enable user level MFA for your dashboard user, no other users on the account will be forced to enable MFA. If you want to enable user level MFA, please skip to the "How do I setup MFA for my user?" section below.
How do I enable MFA for my account?
First, login to the Brownrice Dashboard.
Next, navigate to the "Contacts" page:
Then, on the "Contacts" page, under the "Contacts" list, select "Enable MFA":
After you've clicked the "Enable MFA" button you'll see a pop-up Modal with a warning about MFA. Once you have read and understood the warning, click the red "Enable MFA" button to proceed:
Once enabled, click OK when prompted to proceed to the MFA tab to complete your MFA setup:
How do I setup MFA for my user?
Once MFA has been enabled on the account level, procced to the MFA tab to complete the MFA setup for your user (you should be automatically redirected to this page after enabling MFA on the account level in the previous step):
On the MFA tab you should be prompted with 2 options for MFA setup:
Either option works fine.
If you choose to go with the authenticator app option, please follow this FAQ to proceed.
If you choose to go with the SMS (text message) option, please follow this FAQ to proceed.
Enroll in MFA using authenticator app
If you aren't yet familiar with MFA, please see this FAQ: What is MFA, why should I use it, and how do I enable it?
If you are here we are going to assume that you've enabled MFA as outlined in the FAQ linked above, and that you have selected the "Enroll in MFA using authenticator app" option. Our MFA works with any authentication app that is compatible with the Google OAuth 2.0 protocol. This includes (but is not limited to) the following:
Google Authenticator
Duo Mobile
Microsoft Authenticator
iCloud Keychain 2FA
We recommend going with Google Authenticator, unless you have another preference for some reason. If you already have an authentication app setup, you should be able to use that as long as it supports the Google OAuth 2.0 protocol.
First, on the MFA tab in the dashboard, you should be prompted with a MFA setup page like this:
Next, open your Authenticator app of choice. See the list above for known-compatible authentication apps.
Within your Authenticator app, if there's an option to scan a QR code, select that, and scan the QR code on the page.
If there's no QR code option, you can manually setup the app using the MFA Secret option (Click the eyeball icon to show the MFA Secret in plaintext).
Once the account is setup you should get a 6-digit MFA code generated by your app. Typically this code refreshes every 60 seconds. Go ahead and enter this code into the "MFA Code" box and click "Complete MFA enrollment" to complete the setup.
Be sure to save your recovery code when prompted. This allows you to access the account if you lose access to the authenticator app that you used to set it up.
That's it! Once MFA is setup you will simply need to enter the MFA code when prompted upon login in order to access your account going forward.
Enroll in MFA using SMS (text message) option
If you aren't yet familiar with MFA, please see this FAQ: What is MFA, why should I use it, and how do I enable it?
If you are here we are going to assume that you've enabled MFA as outlined in the FAQ linked above, and that you have selected the "Enroll in MFA using SMS" option. Our MFA works with any SMS (cell phone) provider.
First, on the MFA page, click the option to "Enroll in MFA using SMS":
Next, you should see the following prompt:
You should enter your cell phone number (as long as it supports SMS text messaging), then click "Send Code".
You should receive an SMS (text) message within ~10 seconds. Within that SMS message there will be a 6-digit MFA code. This code expires 5 minutes after it was generated.
Enter the code into the "MFA Code" field, and click "Complete MFA enrollment":
If successful you will see a page like this:
Be sure to save your recovery code when prompted. This allows you to access the account if you lose access to the phone number that you used to set it up.
The Brownrice MFA SMS will always come from our SMS number: 575-741-2011
If you are having any issues receiving our texts, please be sure that this number is not blocked in your phone, and feel free to save this nuber as a contact for easy reference!
That's it! Once MFA is setup you will simply need to enter the MFA code when prompted upon login in order to access your account going forward.
What Powers Brownrice's 100% Green Hosting?
Our Annual Energy Report
How much electricity does Brownrice use each year?
We use approximately 246 megawatt-hours (MWh) of electricity per year to run our datacenter and operations.
Download our latest Annual Energy Report (PDF) ›
Where does that power come from?
On-site solar: Our own rooftop solar array generates 81.1 MWh/year, supplying about 33% of our annual demand.
Renewable grid power: We purchase electricity through Kit Carson Electric Cooperative (KCEC) and its wholesale supplier Guzman Energy. Roughly 60% of KCEC’s retail load is served by renewable resources under a 15-year contract extension. This gives Brownrice 98.9 MWh/year of renewable grid energy (?40% of our load).
Renewable Energy Certificates (RECs): To cover the remaining non-renewable grid energy, we purchase and retire certified RECs from Terrapass. In 2025, we retired 66 MWh of RECs (certificate no. XZSTXLD3-tpus-1182583, dated 08/22/2025), slightly exceeding the gap and pushing us to 100% renewable on a net annual basis.
Why buy RECs if you already have solar and renewable grid power?
Because grid power is still partially fossil-fueled. RECs ensure that every kilowatt-hour we consume is matched with clean generation. We actually overshoot by about 0.05 MWh each year to be safe.
Do you publish this data?
Yes — we release an Annual Energy Report showing all sources, totals, and supporting links to Guzman Energy, KCEC, and Terrapass certificates. This transparency lets you verify that your hosting is genuinely powered by renewables.
View the full Annual Energy Report ›
Our Green Datacenter
What makes Brownrice’s datacenter “green”?
Our facility in Taos, New Mexico was built to minimize energy use and maximize on-site renewables. Key elements include:
On-site solar array directly feeding our servers and cooling systems.
Efficient hardware & cooling: We use energy-efficient servers and cooling methods designed for the high desert climate, reducing power draw compared to typical datacenters.
Local renewable grid: Thanks to Kit Carson Electric and Guzman Energy’s large solar and battery projects (like the 41 MW Taos Mesa Solar Array plus 15 MW battery), the electricity we import is majority renewable during peak hours.
Verified offsets: Any residual non-renewable usage is offset through RECs retired in our name.
How does this benefit my website?
When you host with Brownrice, your website runs at full speed on verified 100% renewable power — on-site solar, renewable grid electricity, and certified RECs — not just marketing buzzwords.
Explore our Green Datacenter ›