Step 1 - Start the connection in Squarespace
The following steps must be done within your SquareSpace account.
To connect your domain, start in the Domains panel:
- Open the Domains panel. Or, if there's a ? in the top-left corner, open that menu and click Domains.
- Click Use a Domain I Own.
- Enter the full domain name you're connecting in the Enter Domain field, then click the arrow.
- Click Connect Domain.
- Select your domain provider. For a Brownrice registered domain, select Other.
- Click Connect Domain.
- In the message that appears, click Continue.
Step 2 - View your DNS settings in Squarespace
The following steps must be done within your SquareSpace account.
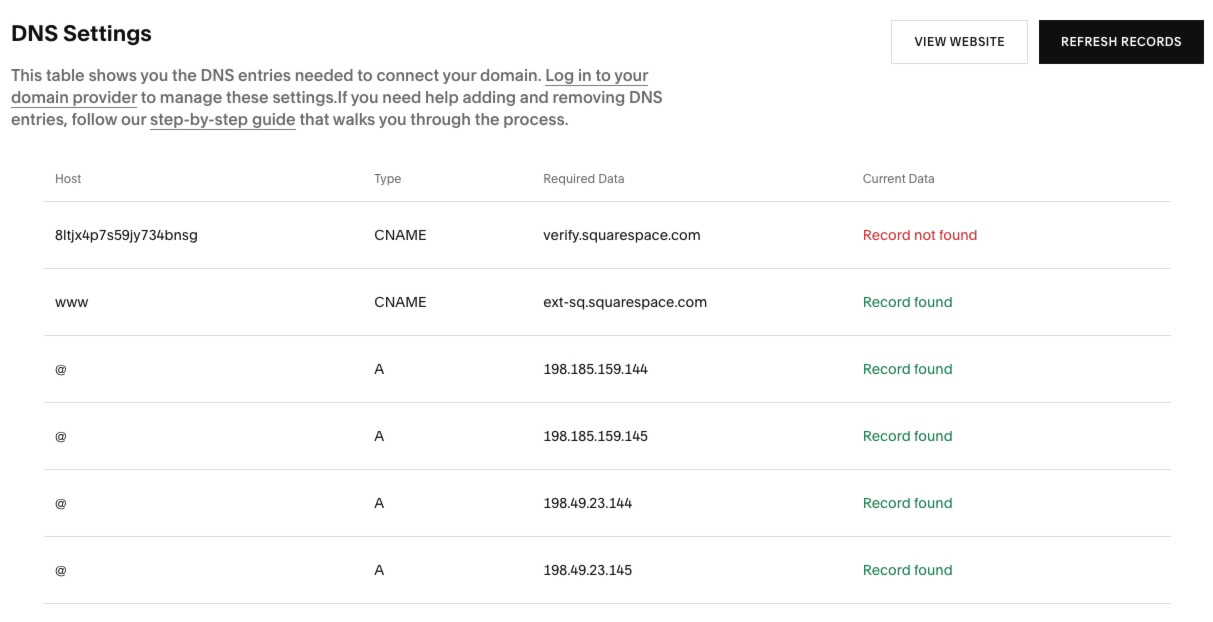
After you click connect, the DNS Settings panel will appear. This panel shows the records you need to enter in your Brownrice account.
Your domain records may be green or red, depending on the DNS information that Squarespace receives from Brownrice.
Use your unique Squarespace DNS settings and not those shown in the screenshot below:
Step 3 - Log into your Brownrice Dashboard and setup the required DNS records
The following steps must be done within your Brownrice account.
- Log in to your Dashboard
- Navigate to DNS

- Select your Domain: yourvpsname.com
-> Click Manage DNS (green button)
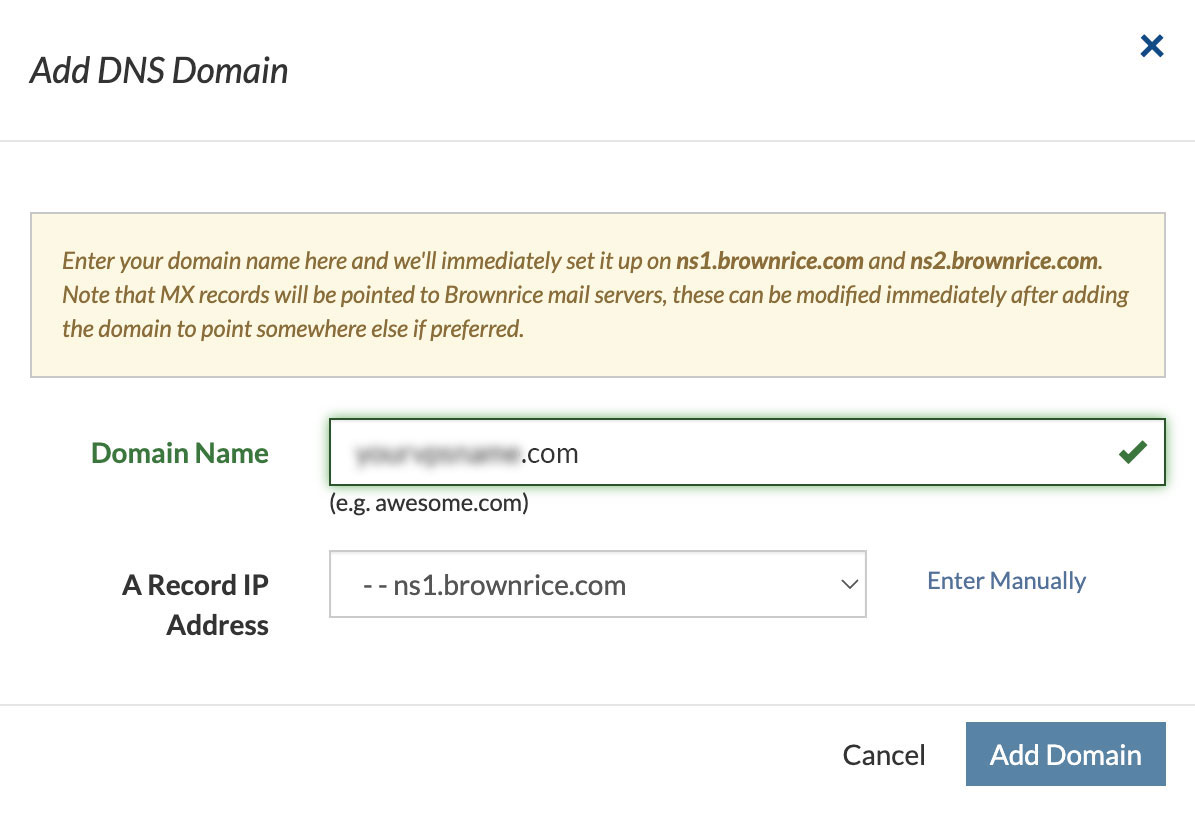
- If no DNS is configured, Click here to get this setup and add your domain to the DNS.

- You’ll be taken to a DNS zone editor page like this (this example is for domain: bridashboard.com):
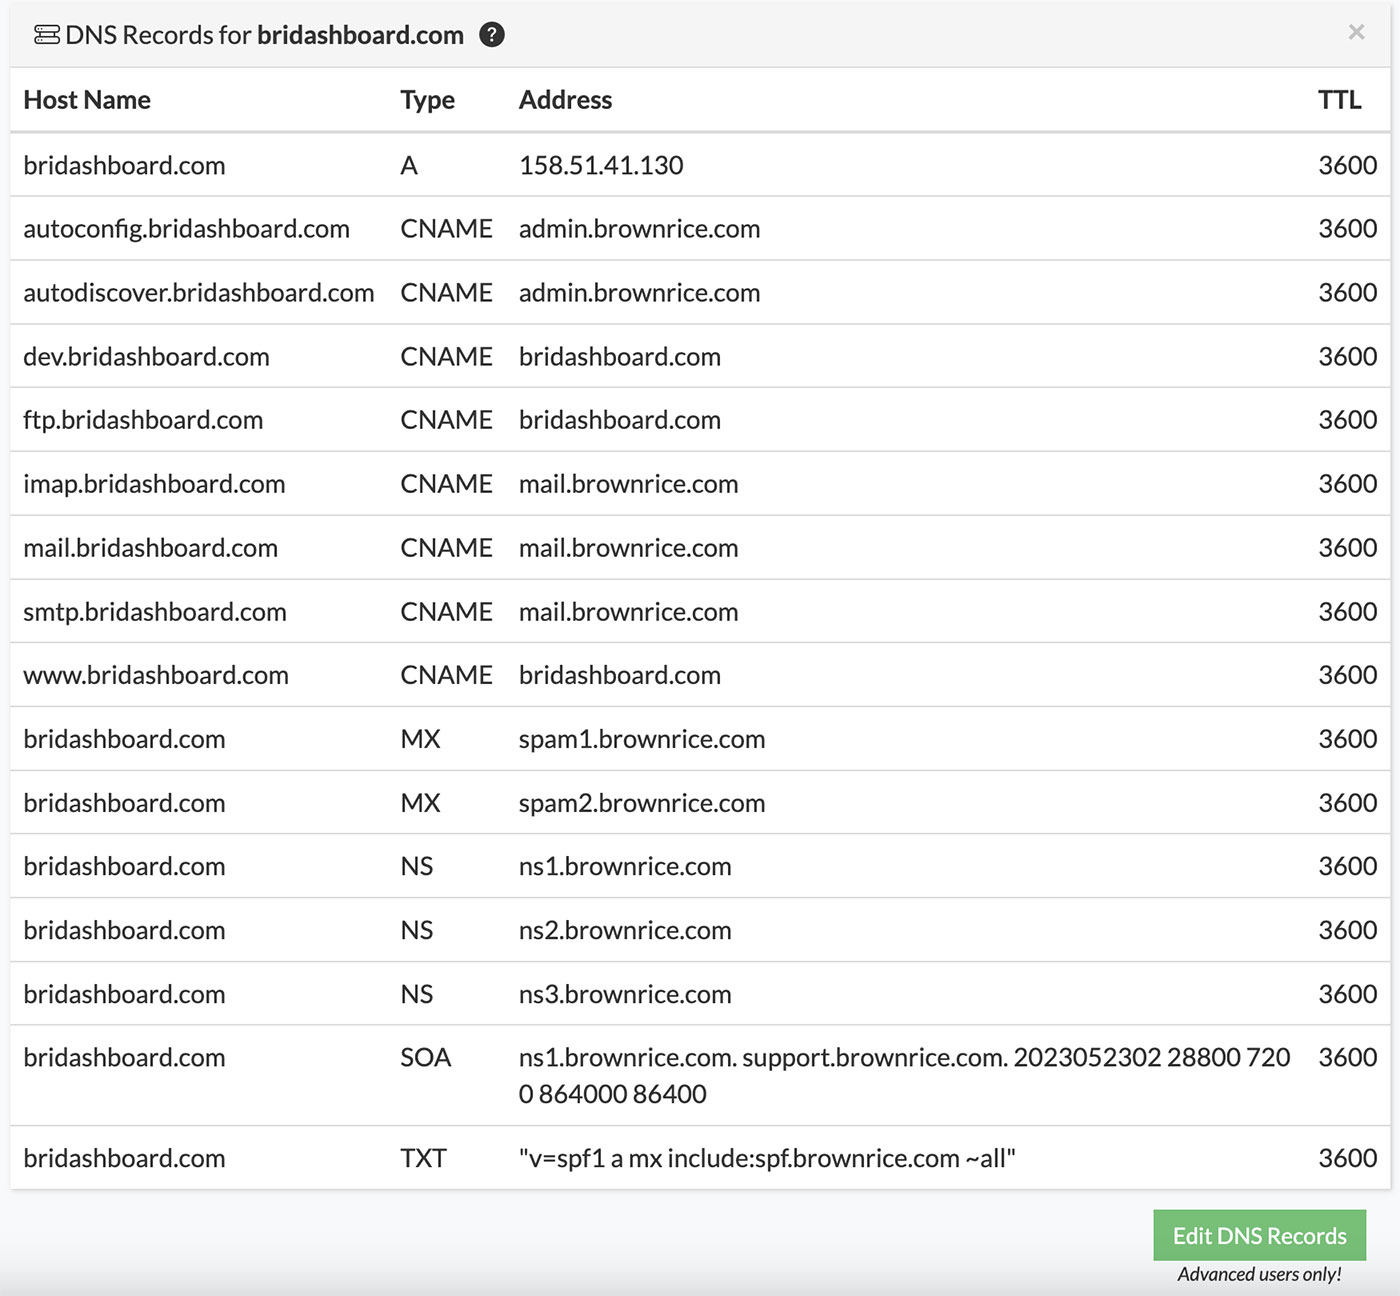
- -> Click Edit DNS Records to add or modify records based on your Squarespace values.
Step 4 - Add the first CNAME Record
Use the DNS settings from SquareSpace in Step 2.
Copy the unique code under "Host" on the first line and point it to verify.squarespace.com.
In Brownrice, create a CNAME with these values:
| Host Name | Type | Address |
| Copy and paste the unique code under Host | CNAME | verify.squarespace.com |
Note: If this CNAME is missing or incorrect, your domain will unlink after 15 days. If that happens, you can start over.
Step 5 - Add the second CNAME Record
Use the DNS settings from SquareSpace in Step 2.
Use "www" as the Host and point it to ext-cust.squarespace.com.
Edit any existing www CNAME if needed.
| Host Name | Type | Address |
| www | CNAME or CNAME Alias | ext-cust.squarespace.com |
Step 6 - Add the A records
Use the DNS settings from SquareSpace in Step 2.
Use @ as the Host for each A record and input the four IPs:
| Host Name | Type | Address |
| @ | A | 198.185.159.144 |
| @ | A | 198.185.159.145 |
| @ | A | 198.49.23.144 |
| @ | A | 198.49.23.145 |
This is how it should look in Brownrice:
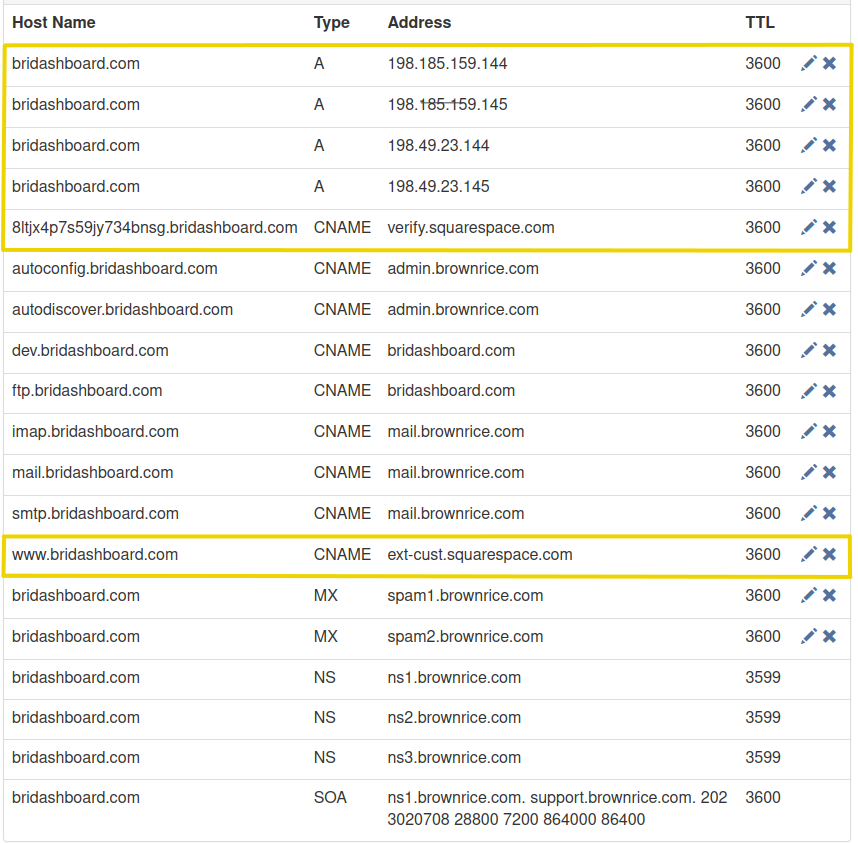
Other default records for email can remain as-is.
Step 7 - Wait for the connection to complete
You're done! It can take 24 to 72 hours for everything to propagate. You can monitor the connection in the Squarespace Domain overview panel.
If any of this is overwhelming, we can do it for you for a 1-time $59 fee. Submit a support request with your Squarespace login and the domain to connect.