Configuring Android Mail
- First, open your mail application. Go to your "apps" and tap on the icon that looks something like this:

You'll be shown several options for what type of account you want to create. Choose "other".
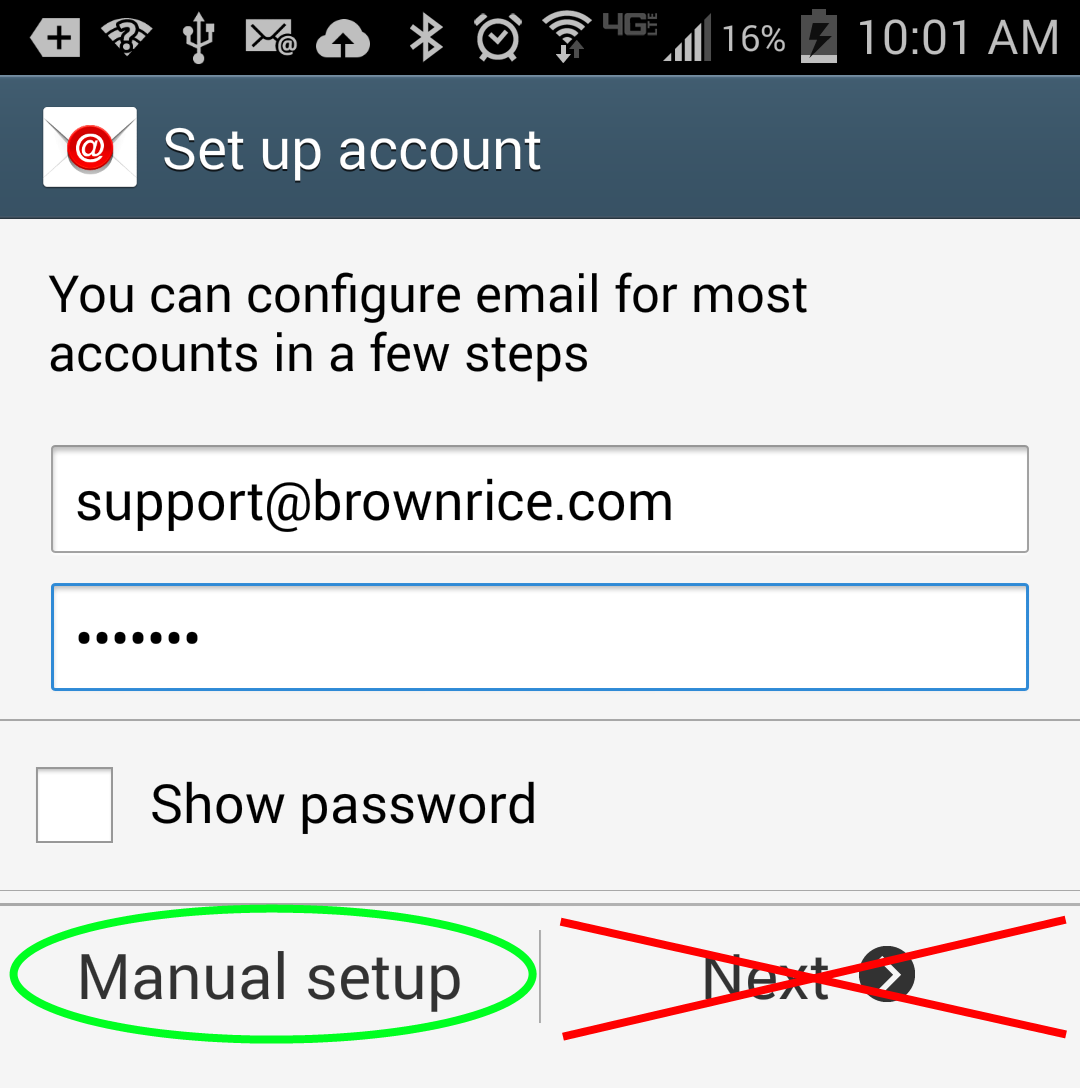
- Enter your email address and password, and tap "Manual Setup".
- Choose "IMAP Account".
IMAP is intended to work with multiple devices, and will synchronize your email between them. It also keeps a backup copy on our servers. POP, on the other hand, unless specifically configured not to, will download all emails to the device, store them only on the device, and not synchronize between devices. That means if your device is lost, damaged, or stolen, all your email goes with it; so use IMAP.
- Replace "support@brownrice.com" with your email address, and enter your own password. Other than that, all settings should exactly match the ones shown here:

- Aside from username (your full email address again) and password, your outgoing settings should exactly match the ones shown here:

Optional Settings
You can research and adjust these settings to fit your needs. The ones shown here are optimal for an account that receives a lot of email. If you choose a longer period to sync email, it may slow down features of your mail app such as the ability to search your inbox.

Done!
